Adjustment Procedure
Tools Required
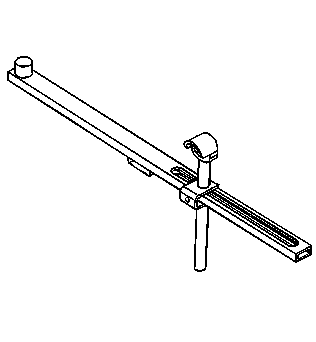
J 42854 Trim Measurement Gauge
Important: When adjusting either the right or left hand rear trim height the opposite side trim height will be effected.
- Place vehicle on an alignment rack.
- Set the tire air pressure to the proper pressure.
- Manually lift the rear of the vehicle up approximately 38 mm (1½ in) gently remove hands and let the vehicle settle.
- Repeat the above step two more times for a total of three times.
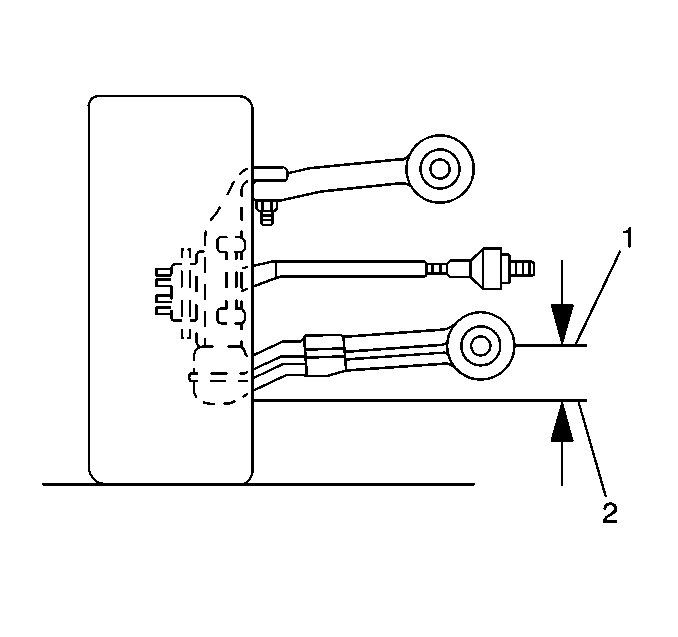
- Use tool J 42854 to measure the distance between the lowest point of the left rear ball joint (2) and the center of the front of the forward rear lower control arm bushing mounting bolt (1).
- Manually push the rear of the vehicle down approximately 38 mm (1½ in). Gently remove hands and let the vehicle rise on it's own.
- Repeat the above step two more times for a total of three times.
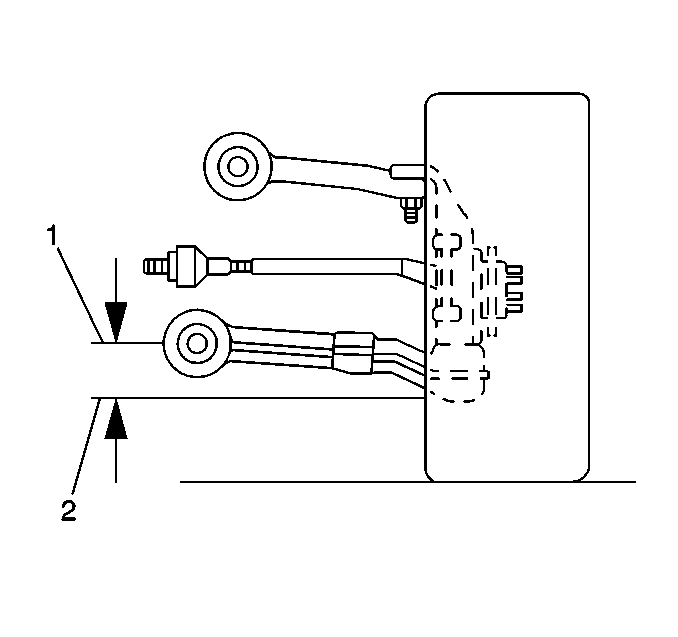
- Use tool J 42854 to measure the distance between the lowest point of the right rear ball joint (2) and the center of the front of the forward rear lower control arm bushing mounting bolt (1).
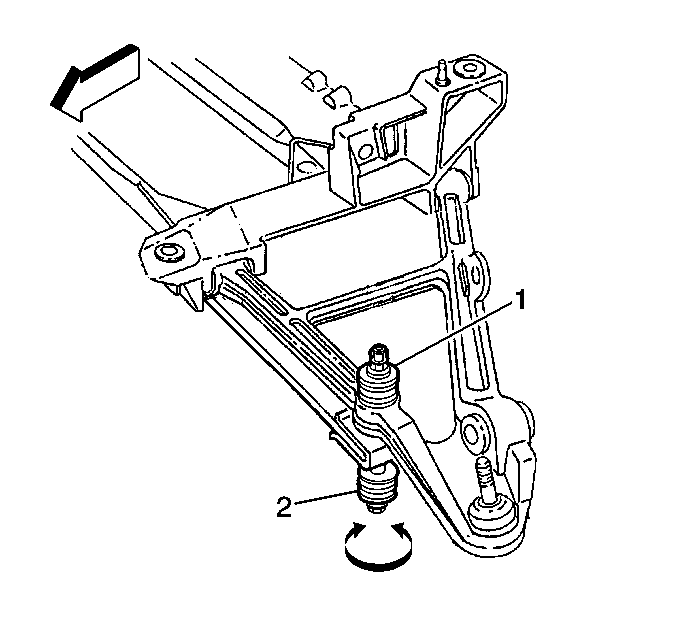
- Loosen the nut (1) at the top of the spring bolt (2).
- Adjust the D trim height by turning the spring bolt.
- Perform the jounce procedures again and remeasure the D trim height.
- Measure the rear spring stud heights (2). Refer to General Specifications
| • | Measure both the right and left sides of the vehicle. |
| • | The true D trim height is the average of the high and low measurements. |
| • | Refer to Trim Height Specifications in Suspension General Diagnosis. |
Important: One complete turn of the adjustment bolt is equal to 2 mm ( 5/64 in).
Notice: Use the correct fastener in the correct location. Replacement fasteners must be the correct part number for that application. Fasteners requiring replacement or fasteners requiring the use of thread locking compound or sealant are identified in the service procedure. Do not use paints, lubricants, or corrosion inhibitors on fasteners or fastener joint surfaces unless specified. These coatings affect fastener torque and joint clamping force and may damage the fastener. Use the correct tightening sequence and specifications when installing fasteners in order to avoid damage to parts and systems.
Tighten
Tighten the spring bolt to 50 mm (37 ft lb).

Important: Do not exceed the maximum difference between the right and left rear spring stud heights.
