Removal Procedure
- Disconnect the negative battery cable. Refer to
Caution: Unless directed otherwise, the ignition and start switch must be in the OFF or LOCK position, and all electrical loads must be OFF before servicing any electrical component. Disconnect the negative battery cable to prevent an electrical spark should a tool or equipment come in contact with an exposed electrical terminal. Failure to follow these precautions may result in personal injury and/or damage to the vehicle or its components.
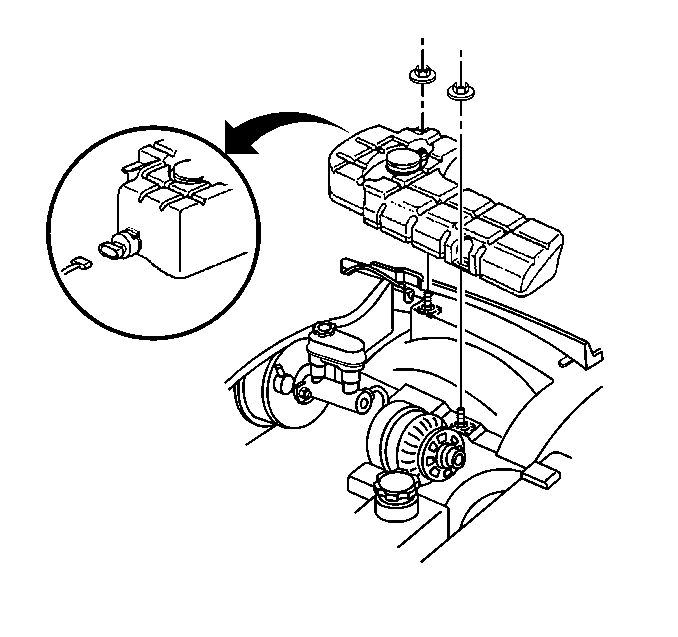
. - Remove the washer solvent container retaining nuts.
- Lift the washer solvent container from the LH wheelhose.
- Disconnect the electrical connections and the washer hose from the container.
- Plug the washer pump outlet.
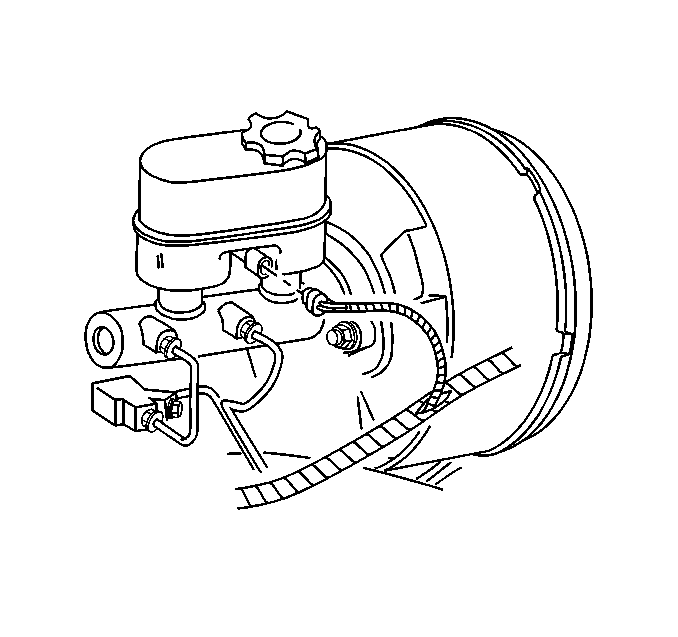
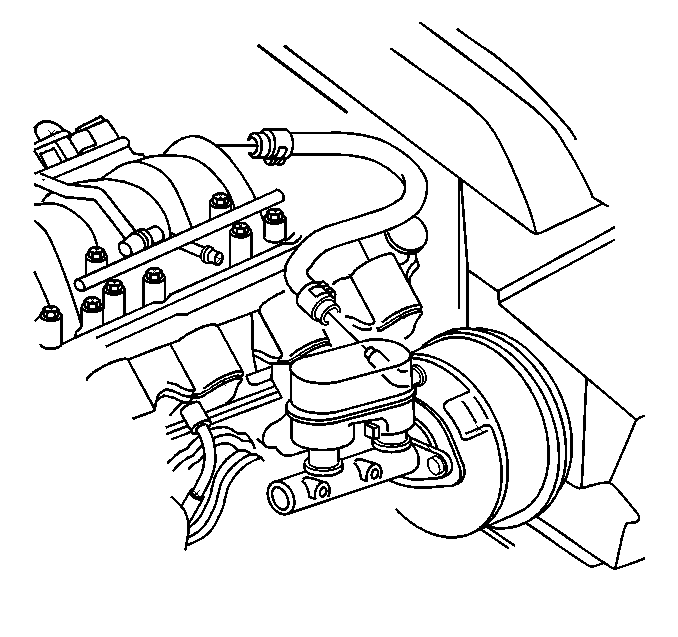
- Disconnect the electrical connector from the brake fluid level switch.
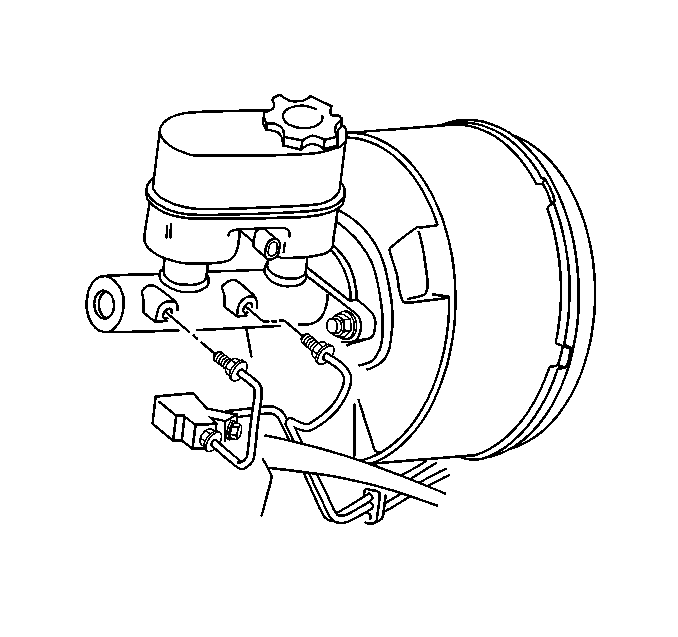
- Remove the brake lines from the master cylinder.
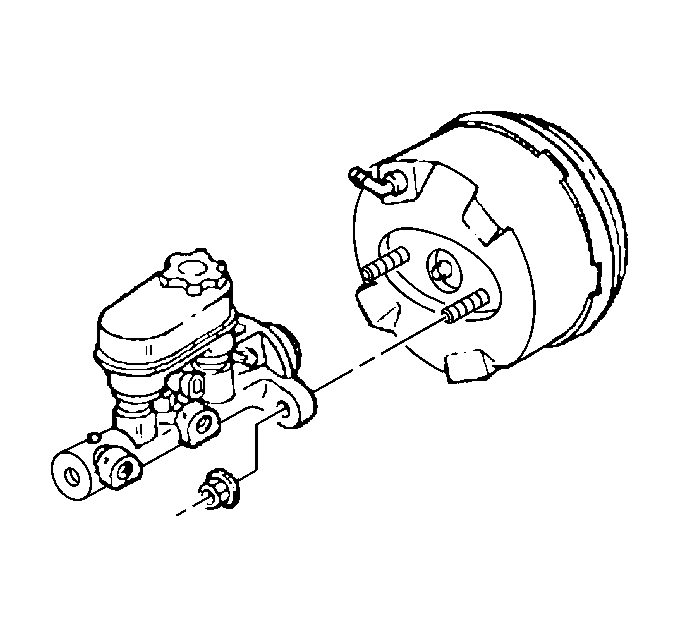
- Remove the nuts securing the master cylinder to the brake booster.
- Remove the master cylinder from the brake booster.
- Disconnect the brake booster vacuum check valve hose from the booster.
- Remove the drivers lower I/P closeout panel.
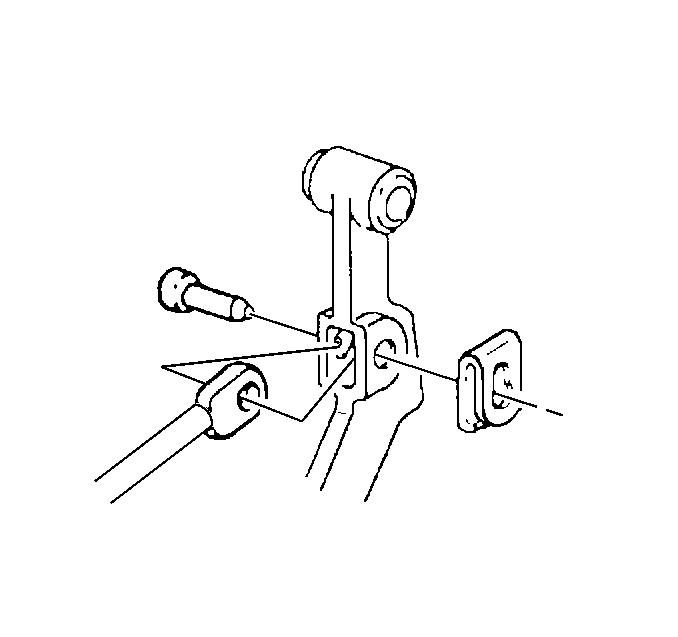
- Remove the input push rod retaining clip and pin from the brake pedal.
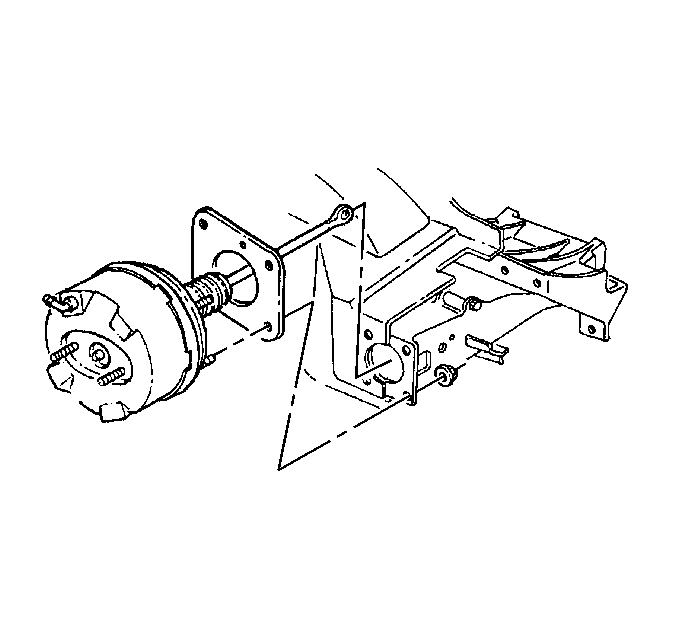
- Remove the brake booster mounting nuts and washers from the studs.
- Remove the brake booster and seal from the front of dash.
- Inspect the booster seal and sealing surfaces for damage. Replace if necessary.
Installation Procedure
- Install the seal and brake booster to the front of dash.
- Install brake booster mounting nuts and washers on to the studs.
- Install the input push rod pin and retaining clip to the brake pedal.
- Install the drivers lower I/P closeout panel.
- Connect the brake booster vacuum check valve hose to the brake booster.
- Install the master cylinder to the brake booster.
- Install the master cylinder retaining nuts.
- Install the brake lines to the master cylinder.
- Connect the electrical to the brake fluid level switch.
- Connect the electrical and the washer hose to the washer solvent container.
- Install washer solvent container to LH wheelhouse.
- Install the washer solvent container retaining nuts.
- Connect the negative battery cable.
- Bleed brake system as necessary. Refer to Manual Brake System Bleeding .
Tighten
Tighten the brake booster mounting nuts to 21 N·m (15 lb ft).
Tighten
Tighten the master cylinder retaining nuts to 29 N·m (21 lb ft).
Tighten
Tighten the brake pipe to master cylinder tube nuts to 16 N·m
(12 lb ft).
Tighten
Tighten the washer solvent container nuts to 7.5 N·m (66 lb in).
Tighten
Tighten the negative battery cable bolt to 15 N·m (11 lb ft).
