Removal Procedure

- Raise and suitably support the vehicle. Refer to
Lifting and Jacking the Vehicle
in General Information.
- Shift the transmission into NEUTRAL.
If replacing a damaged cable, be sure that BOTH the floor shift control
and the transmission are in NEUTRAL.
- Remove the intermediate exhaust pipes. Refer to
Intermediate Pipe
in Engine Exhaust.
- Remove the driveline tunnel closeout panel. Refer to
Driveline Tunnel Closeout Panel
in Propeller Shaft.
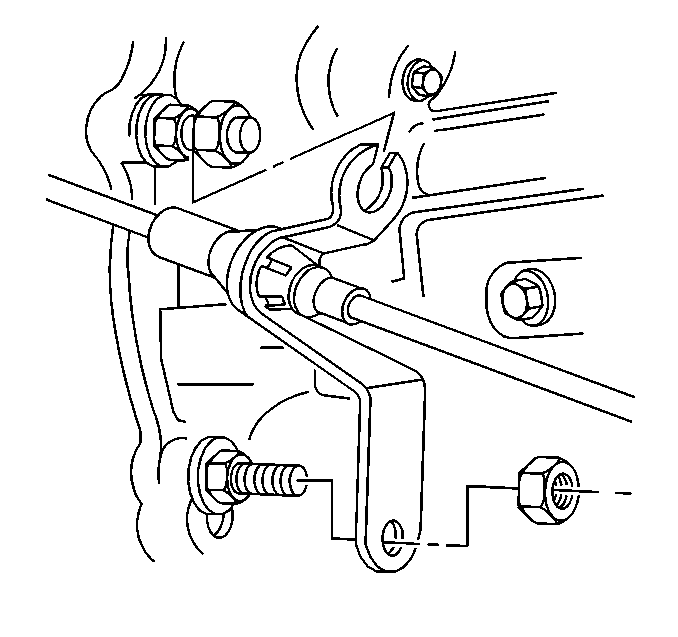
- Unsnap the shift control cable end clip from the floor shift control
arm stud.
Use care to not suddenly jerk the shift control cable, the cable is
extremely rigid.
- Remove the shift control cable from the driveline tunnel bracket.
| 6.1. | Using a flat bladed screwdriver, pry the cable retaining staple
clip from the cable. |
| 6.2. | Depress the cable retaining tabs. |
| 6.3. | While depressing the tabs, push the tabs through the hole in the
driveline tunnel bracket. |
| 6.4. | Slide the cable out of the bracket slot. |
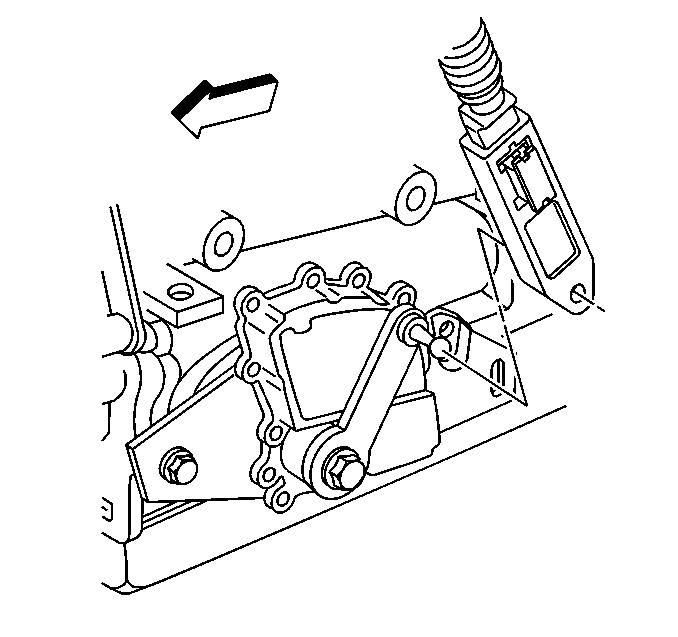
- Remove the nuts retaining the shift control cable bracket to the transmission.
- Reposition the cable and cable bracket away from the studs.
- Unsnap the shift control cable end clip
from the transmission shift lever stud.
Use care to not suddenly jerk the shift control cable, the cable is
extremely rigid.
- Remove the shift control cable and bracket.

- Remove the shift control cable bracket
from the shift control cable, if necessary.
| 11.1. | Using a flat bladed screwdriver, pry the shift cable retaining
staple clip from the cable. |
| 11.2. | Depress the shift cable retaining tabs. |
| 11.3. | While depressing the tabs, push the tabs through the hole in the
shift cable bracket. |
| 11.4. | Slide the cable out of the bracket slot. |
Installation Procedure
- Install the shift control cable bracket
to the shift control cable, if removed.
| 1.1. | Slide the smaller diameter portion of the cable into the slot
in the shift cable bracket. |
| 1.2. | Push the tabs through the hole in the bracket to lock the cable
in place. |
| 1.3. | Insert the shift cable retaining staple clip between the shift
cable retaining tabs. |
Press the staple clip firmly to secure.
- Position and install the shift control cable to the driveline tunnel bracket.
| 2.1. | Slide the smaller diameter portion of the shift cable into the
slot in the driveline tunnel bracket. |
| 2.2. | Push the shift cable retaining tabs through the hole in the bracket
to lock the cable in place. |
| 2.3. | Insert the shift cable retaining staple clip between the shift
cable retaining tabs. |
Press the staple clip firmly to secure.
- Press to snap and secure the shift control cable end clip to the
floor shift control arm stud.
- Install the shift control cable bracket
to the transmission studs.
- Install the nuts retaining the shift control cable bracket to
the transmission.
Tighten
Tighten the transmission shift control cable bracket retaining nuts
to 20 N·m (15 lb ft).
Notice: Use the correct fastener in the correct location. Replacement fasteners
must be the correct part number for that application. Fasteners requiring
replacement or fasteners requiring the use of thread locking compound or sealant
are identified in the service procedure. Do not use paints, lubricants, or
corrosion inhibitors on fasteners or fastener joint surfaces unless specified.
These coatings affect fastener torque and joint clamping force and may damage
the fastener. Use the correct tightening sequence and specifications when
installing fasteners in order to avoid damage to parts and systems.
- Check to be sure that BOTH
the floor shift control and the transmission are in NEUTRAL.
- Press to snap and secure the shift control cable end clip onto
the transmission shift lever stud.

- If installing a NEW transmission shift
control cable, remove the shipping guard from the adjuster lock.
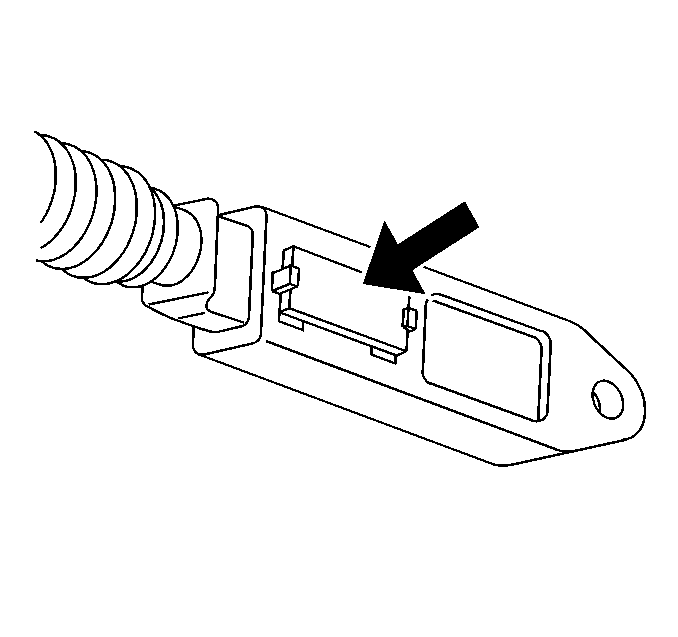
- If installing a NEW transmission shift
control cable, depress the shift control cable adjuster lock.
- Install the driveline tunnel closeout panel. Refer to
Driveline Tunnel Closeout Panel
in Propeller Shaft.
- Install the intermediate exhaust pipe. Refer to
Intermediate Pipe
in Engine Exhaust.
- Lower the vehicle.
