End Plate and Rotating Group Replacement Rotating Group and Sleeve Asm
Removal Procedure
- Remove the drive shaft assembly.
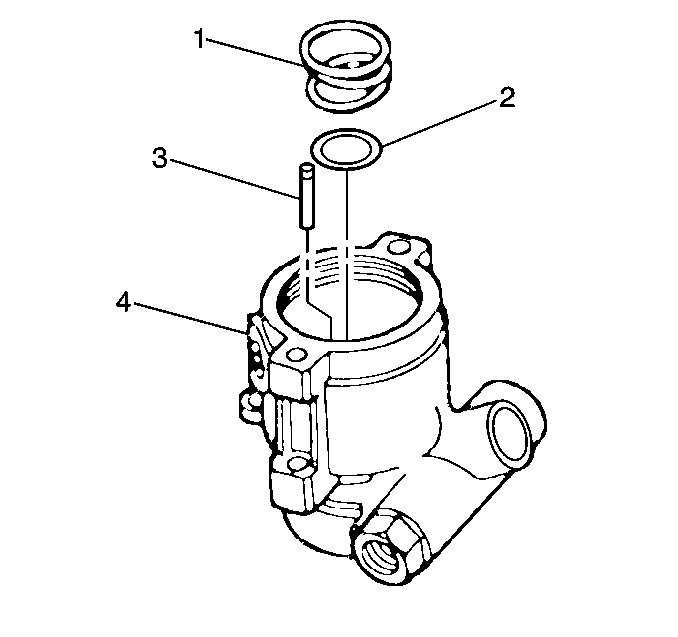
- Remove the thrust plate
retaining ring (4) from the housing (3).
- Use a 5/8 piece of bar
stock or suitable brass drift to remove the thrust plate. Press on the pressure
plate hub from the drive shaft side of the housing (3).
- Remove the O-ring seal.
- Discard the O-ring seal.
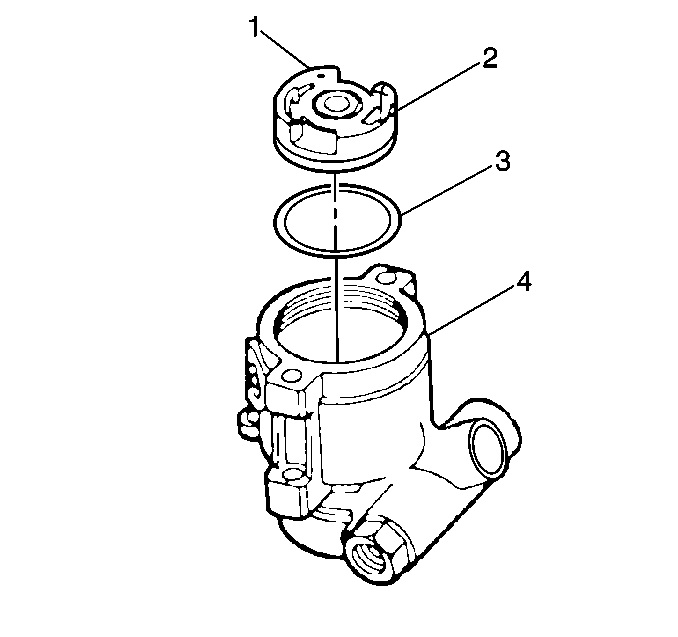
- Remove the pump ring (4).
- Remove the pump rotor.
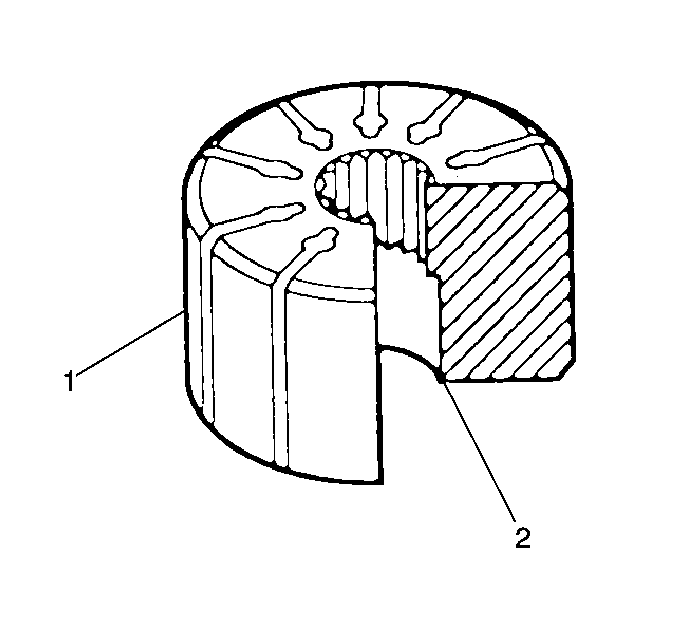
- Remove the ten vanes (6).
- Remove the two pump ring dowel pins.
- Remove the pressure plate. Apply pressure if necessary to remove
pressure plate.
- Remove the O-ring seal from the pressure plate.
- Discard the O-ring seal.
- Remove the pressure plate spring.
- Remove the dowel pin.
- Remove the O-ring seal from the sleeve assembly.
- Discard the O-ring seal.
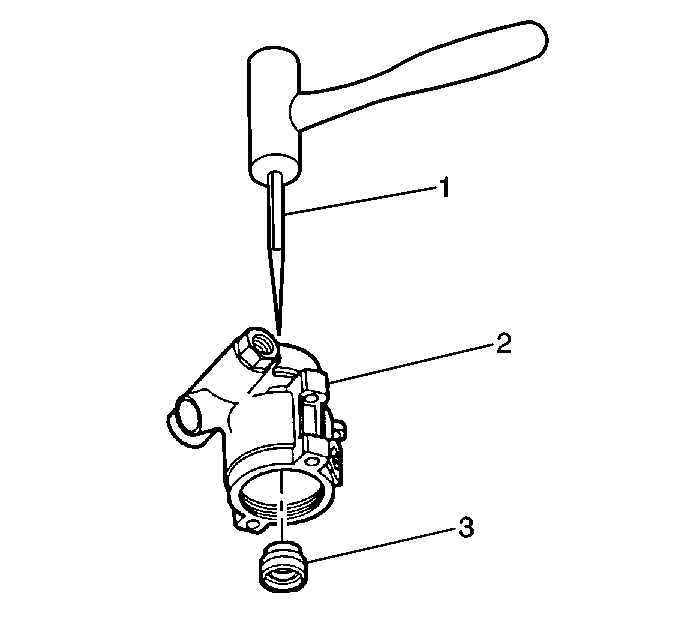
- Use a punch (1) on the
drive shaft side of the housing (2) to remove the sleeve (3).
- Clean all the parts in the power steering fluid.
- Clean the dry parts.
- Inspect the following parts:
| • | Inspect the pressure plate. |
| • | Inspect the drive shaft and the splines. |
| • | Inspect the ball bearing. |
- Replace any parts that contain scoring, pitting, or chatter marks.
Installation Procedure
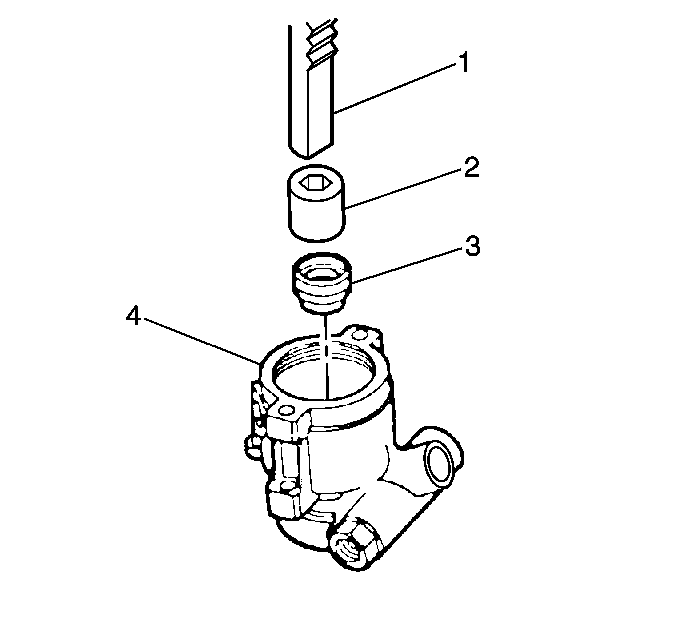
- Use a suitable socket
(2) to install the new sleeve assembly (3). Press to seat the sleeve assembly
into the housing from the pressure plate side.
- Lubricate the new O-ring seal with power steering fluid.
- Install the O-ring seal
into the groove in the sleeve assembly.
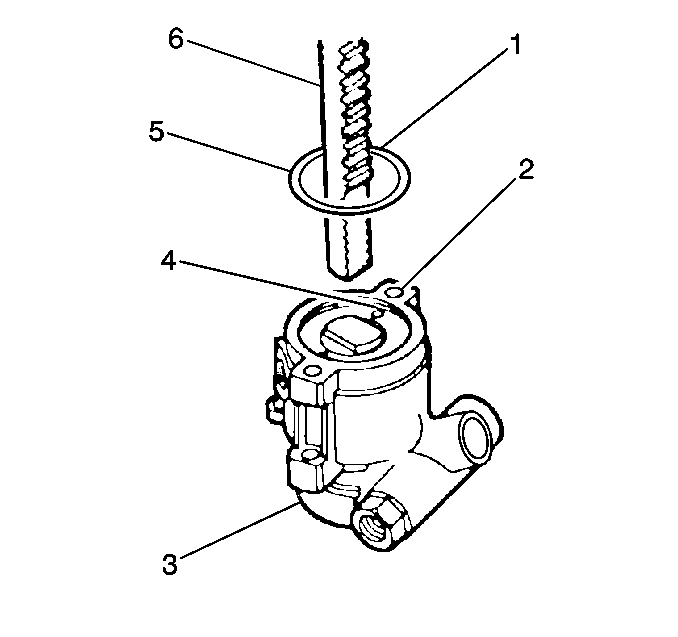
- Install the dowel pin (3) into the housing.
- Install the pressure plate spring.
- Lubricate the new O-ring seal with power steering fluid.
- Install the O-ring seal into the groove in the pressure plate.
- Mark the top of the pressure
plate (1) directly over the dowel pin hole in the plate. This will line up
the hole with the dowel pin (2) and this will ensure the dowel pin and the
hole in the pressure plate engage properly.
- Install the pressure plate (1).
- Install the two pump ring dowel pins.
- Install the pump rotor.
- Check that the counterbore is facing the drive shaft end of the
housing.
- Install the ten vanes (1) into the slots in the pump rotor (2).
- Install the pump ring over the dowel pins.
- Lubricate the new O-ring seal with power steering fluid.

- Install the O-ring seal
(3) into the groove in the pump housing.
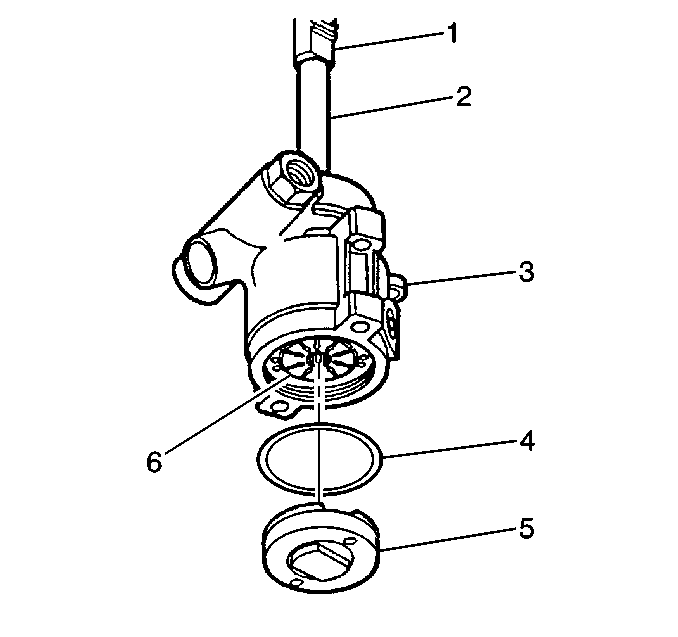
- Lubricate the outer edge of the thrust plate (2).
- Install the thrust plate assembly (2). Line up the dimples (1)
in the thrust plate with the bolt holes in the housing.
- Check that the thrust plate engages with the pump ring dowel pins
(4).
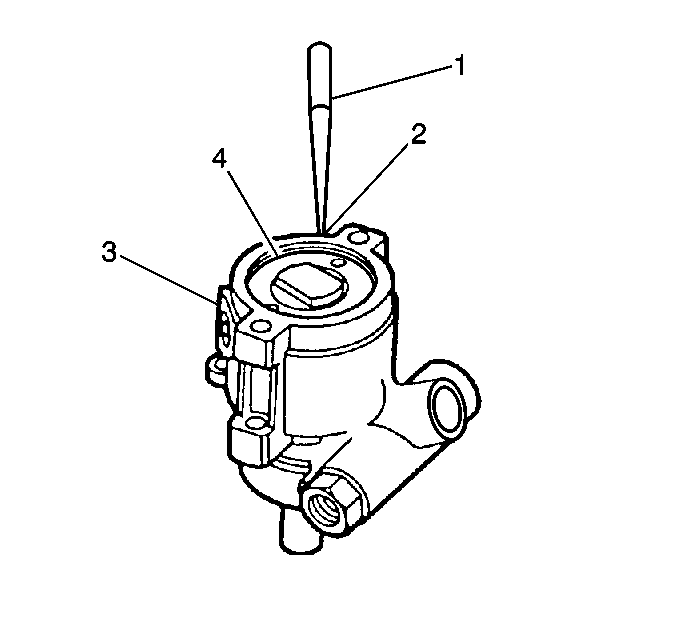
- Press on the thrust plate
(4) far enough to install the retaining ring (5).
- Center the ring opening with the bolt hole (2) in the housing
(3) nearest to the access hole.
- Install the retaining ring (5) into the groove in the pump housing
(3).
- Install drive shaft.
