For 1990-2009 cars only
Instrument Panel Insulator Panel Replacement LH
Removal Procedure
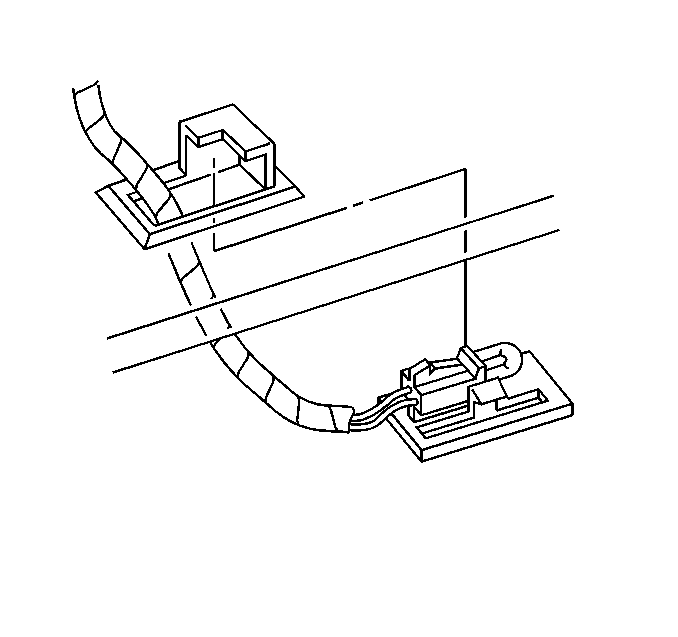
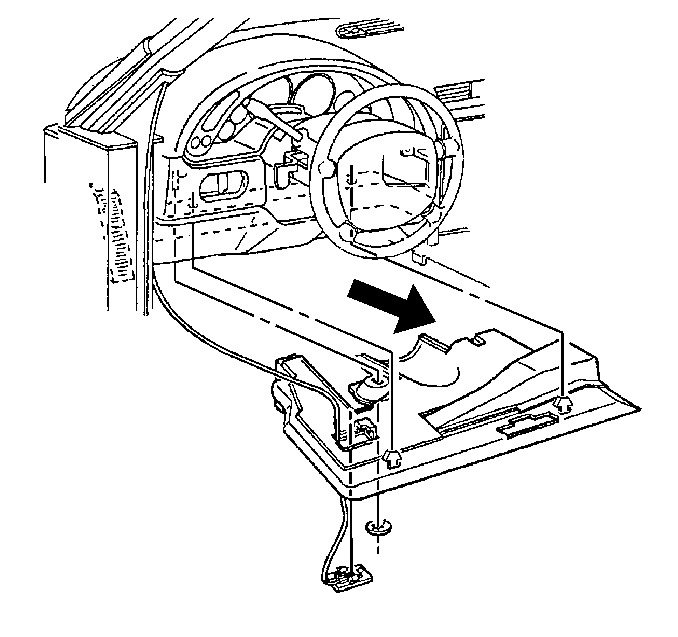
- Using a flat bladed tool, carefully pry the I/P courtesy lamp assembly from the LH lower closeout panel.
- Remove the push-on retaining nut from the steering column bracket stud.
- Release the LH lower closeout panel push-in retainers from the I/P lower support beam.
- Insert the I/P courtesy lamp assembly up through the opening in the closeout panel.
- Lower and remove the closeout panel.


Release the notch in the RH forward edge of the closeout panel from the tab on the accelerator pedal bracket.
Installation Procedure
- Insert the I/P courtesy lamp down through the opening in the closeout panel.
- Install the closeout panel into position.
- Secure the closeout panel push-in retainers to the I/P lower support beam.
- Secure the notch in the RH forward edge of the closeout panel to the tab on the accelerator pedal bracket.
- Install the push-on retaining nut to the steering column bracket stud.
- Align the I/P courtesy lamp to the closeout panel opening, then push to secure.

Align, then push up to secure.

Instrument Panel Insulator Panel Replacement RH
Removal Procedure
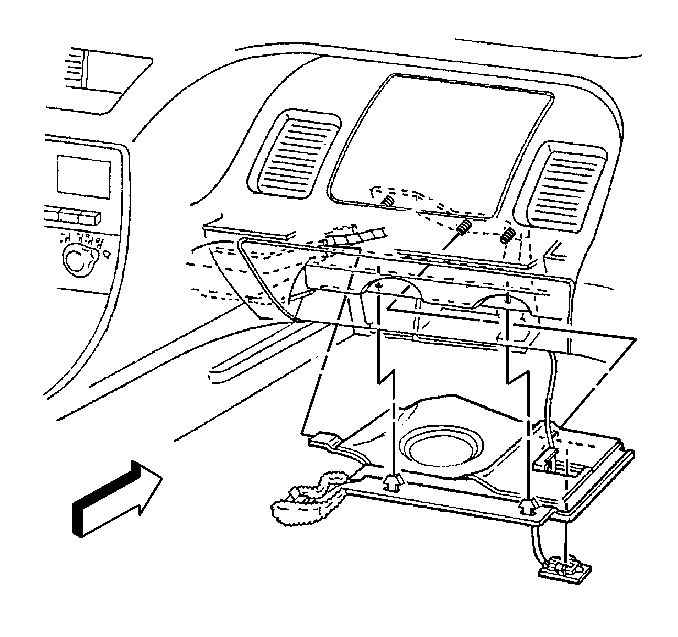
- Using a flat bladed tool, carefully pry the I/P courtesy lamp assembly from the RH lower closeout panel.
- Remove the RH lower closeout panel push-in retainers from the I/P lower support beam.
- Lower the closeout panel slightly, and finesse the left side of the closeout panel from above the driveline tunnel.
- Insert the I/P courtesy lamp assembly up through the opening in the closeout panel.
- Continue to lower the closeout panel, then pull to remove from the dash panel studs.
- Remove the closeout panel.


Installation Procedure
- Install the RH closeout panel onto the dash panel studs.
- Insert the I/P courtesy lamp down through the opening in the closeout panel.
- Raise the closeout panel slightly, and finesse the left side of the closeout panel into position above the driveline tunnel.
- Install the closeout panel push-in retainers to the I/P lower support beam.
- Align the I/P courtesy lamp to the closeout panel opening, then push to secure.


