Removal Procedure
- Place the vehicle on a level surface.
- Block the wheels to keep the vehicle from moving.
- Apply the parking brake.
- Shift the floor shift control into PARK.
- Turn the ignition to LOCK.
- Disconnect the negative battery cable. Refer to
Caution: Unless directed otherwise, the ignition and start switch must be in the OFF or LOCK position, and all electrical loads must be OFF before servicing any electrical component. Disconnect the negative battery cable to prevent an electrical spark should a tool or equipment come in contact with an exposed electrical terminal. Failure to follow these precautions may result in personal injury and/or damage to the vehicle or its components.
in General Information. - Remove the console. Refer to Console Replacement in Instrument Panel, Gauges and Console.
- Remove the I/P accessory trim plate. Refer to Instrument Panel Accessory Trim Plate Replacement in Instrument Panel, Gagues and Console.
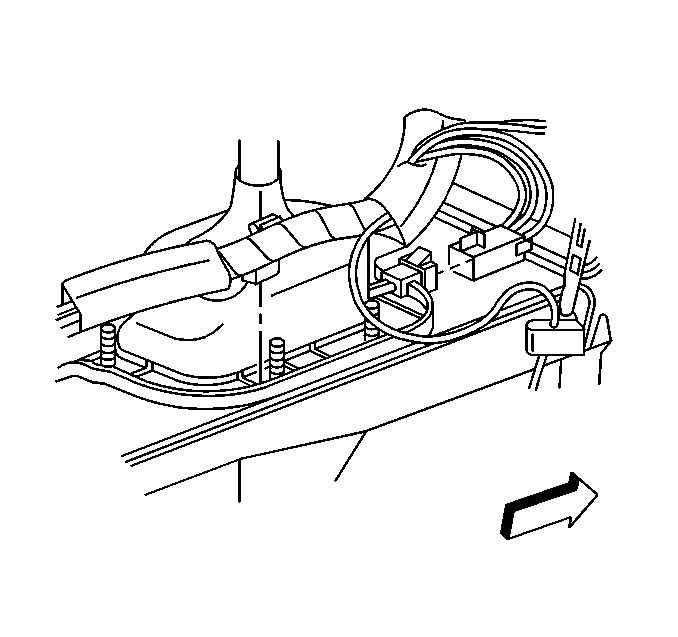
- Disconnect the floor shift control electrical connector.
- Disconnect the I/P wiring harness retaining clip from the shift control and reposition the harness.
- Using a small flat bladed screwdriver or other suitable tool, release the tab retaining the park/lock cable to the slot on the shift control.
- Lift the park/lock cable out of the shift control slot and reposition the cable.
- Grasp the cable end and pull rearward in order to unlock the cable from the shifter pivot arm stud, then reposition the cable.
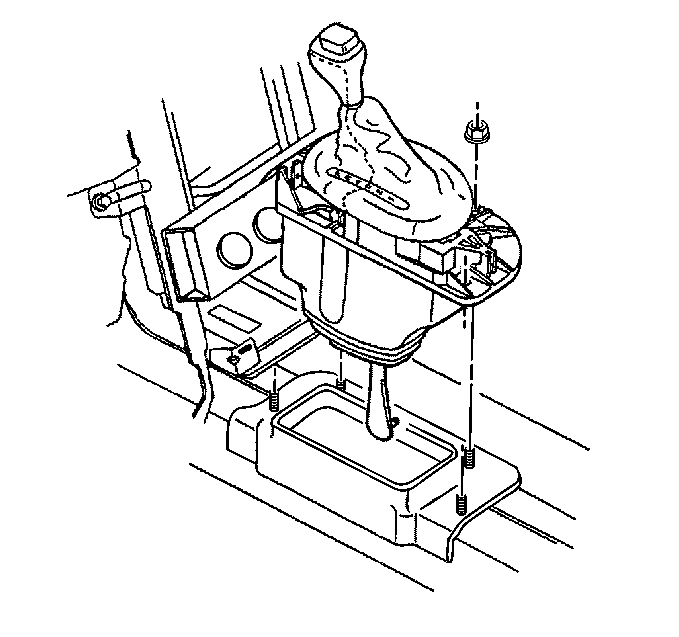
- Remove the nuts retaining the shift control to the driveline tunnel.
- Shift the floor shift control into FIRST.
- Slowly lift the floor shift control just enough to access the shift control cable end.
- Unsnap the shift control cable end clip from the floor shift control arm stud.
- Remove the floor shift control.
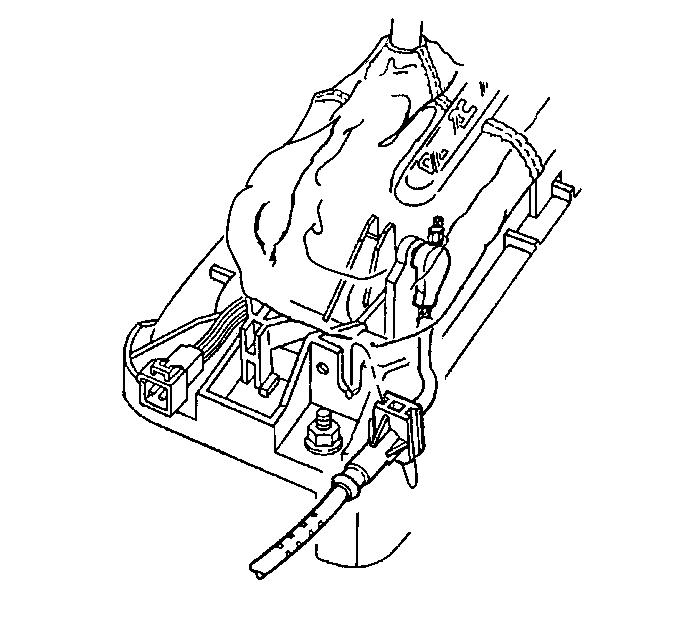
This will lengthen the shift control cable and provide slightly more movement.
Important: DO NOT lift the floor shift control any more than necessary, the shift control cable is extremely rigid.
BE SURE the floor shift control remains in FIRST.
Use care to not suddenly jerk either the cable or the floor shift control.
Installation Procedure
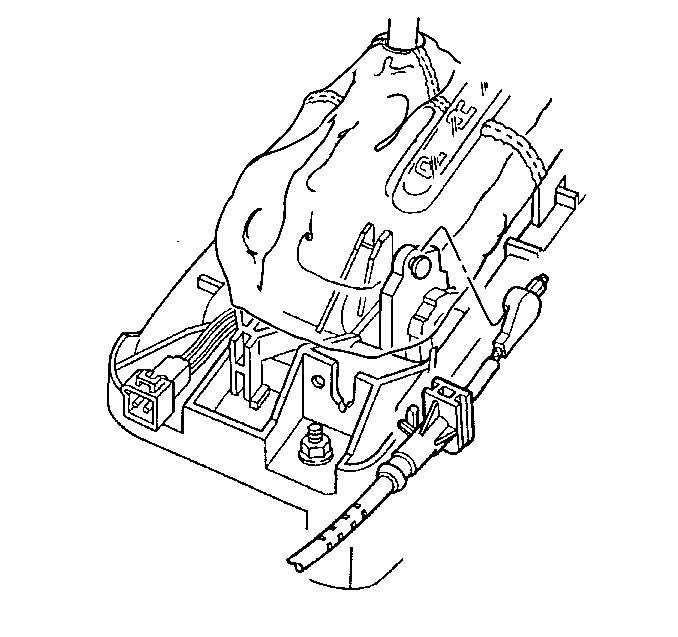
- Shift the floor shift control into FIRST.
- Lower the floor shift control into position.
- Align the shift control cable end to the floor shift control arm stud.
- Press to snap and secure the shift control cable end clip to the floor shift control arm stud.
- Seat the floor shift contol to the driveline tunnel.
- Install the nuts retaining the floor shift control to the driveline tunnel.
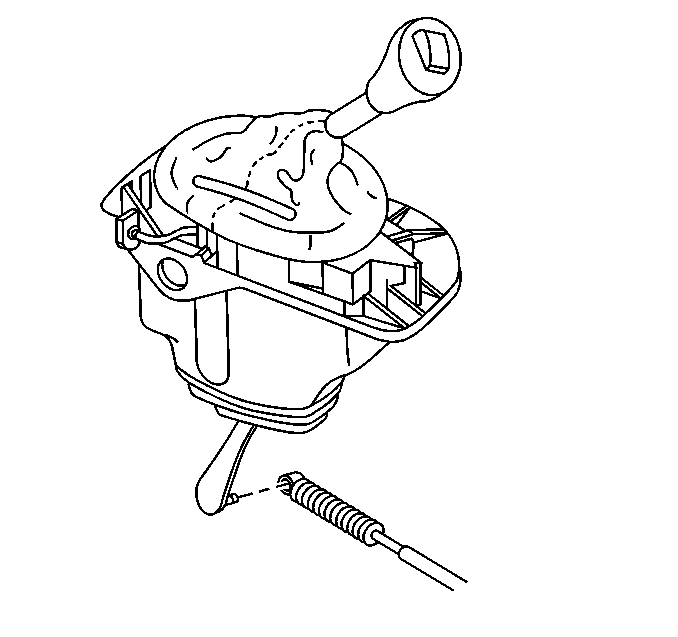
- Shift the floor shift control into PARK.
- Install the park/lock cable to the floor shift control pivot arm stud.
- Insert the park/lock cable into the slot on the floor shift control.
- Connect the I/P wiring harness retaining clip to the shift control.
- Connect the shift control electrical connector.
- Install the I/P accessory trim plate. Refer to Instrument Panel Accessory Trim Plate Replacement in Instrument Panel, Gauges and Console.
- Install the console. Refer to Console Replacement in Instrument Panel, Gauges and Console.
- Connect the negative battery cable.
- Unblock the wheels.
- Release the parking brake.
Important: Be sure to position the floor shift contol as low as possible, the shift control cable is extremely rigid.
BE SURE the floor shift control remains in FIRST.
Tighten
Tighten the floor shift control retaining nuts to 10 N·m
(89 lb in).
Notice: Use the correct fastener in the correct location. Replacement fasteners must be the correct part number for that application. Fasteners requiring replacement or fasteners requiring the use of thread locking compound or sealant are identified in the service procedure. Do not use paints, lubricants, or corrosion inhibitors on fasteners or fastener joint surfaces unless specified. These coatings affect fastener torque and joint clamping force and may damage the fastener. Use the correct tightening sequence and specifications when installing fasteners in order to avoid damage to parts and systems.
Align the cable onto the arm stud then pull forward to lock.
Be sure the cable retaining tab locks into place.
Tighten
Tighten the negative battery cable bolt to 15 N·m (11 lb ft).
