For 1990-2009 cars only
Clutch Rotor and/or Bearing Install V7 - Direct Mount
Tools Required
| • | J 33013-B Hub and Drive Plate Remover/Installer |
| • | J 33017 Pulley and Bearing Assembly Installer |
- Position the clutch rotor and bearing assembly (2) onto the A/C compressor.
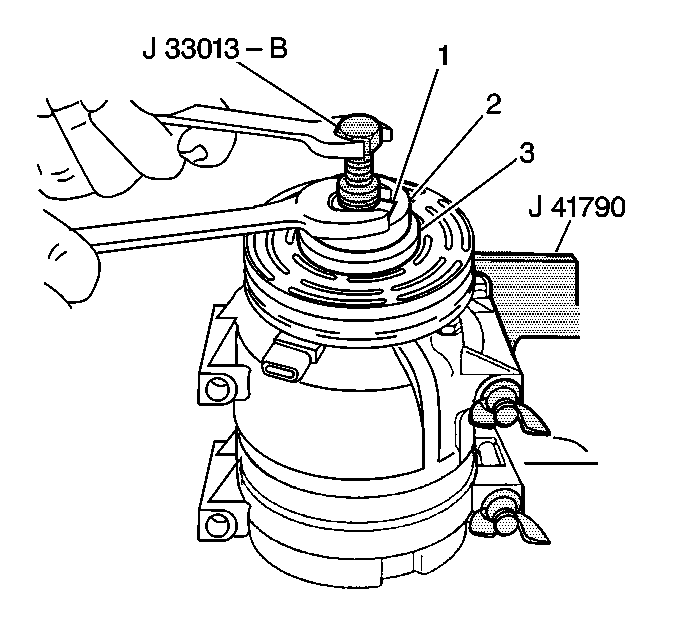
- Position the J 33017 and bearing (1) from the J 33013-B directly over the inner race of the bearing.
- Place the washer (3) from the J 42126 tool kit onto the body of the J 33013-B .
- Remove the center screw from the body of the J 33013-B .
- Install the center screw into the opposite end of the J 33013-B .
- Back the body of the J 33013-B off enough to allow the center screw to be threaded onto the end of the A/C compressor shaft.
- Thread the center screw several turns onto the end of the A/C compressor shaft.
- Hold the center screw with a wrench.
- Tighten the hex portion of the J 33013-B body several turns.
- Remove the J 33013-B from the clutch rotor and bearing assembly.
- Make sure that the clutch rotor and bearing (2) is pressed onto the nose of the A/C compressor far enough to clear the groove for the retaining ring.
- Install the clutch rotor and bearing retaining ring (3) using external snap ring pliers (1).
- Install the clutch plate and hub assembly. Refer to A/C compressor Clutch Plate/Hub Assembly Install (V7 - Direct Mount) .
- Remove the A/C compressor from the J 41790-A .
- Install the A/C compressor into the vehicle.
Do not tighten the center screw on the A/C compressor shaft.
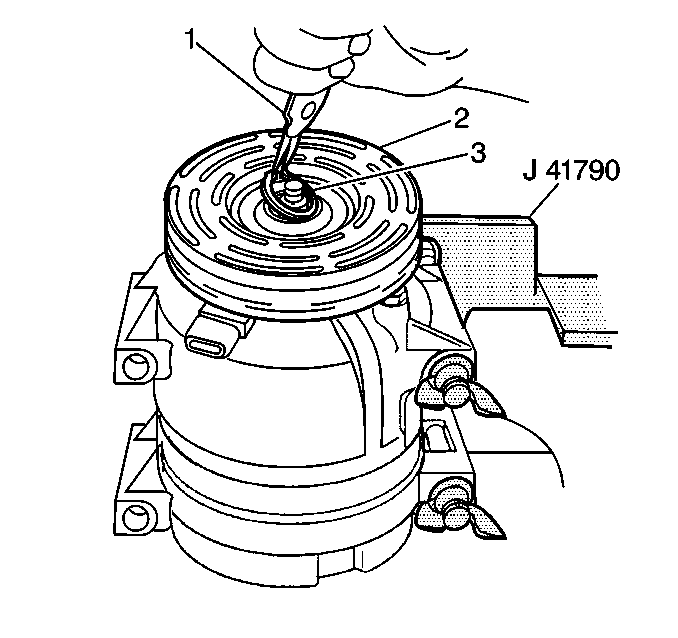
If the clutch rotor and bearing does not clear the groove, repeat steps 7, 8 and 9.
Make sure that the camphor side of the retaining ring is facing up when the retaining ring is being installed.
