Removal Procedure
Notice: When removing body panels, apply tape to corners of panel and adjacent surfaces to help prevent paint damage.
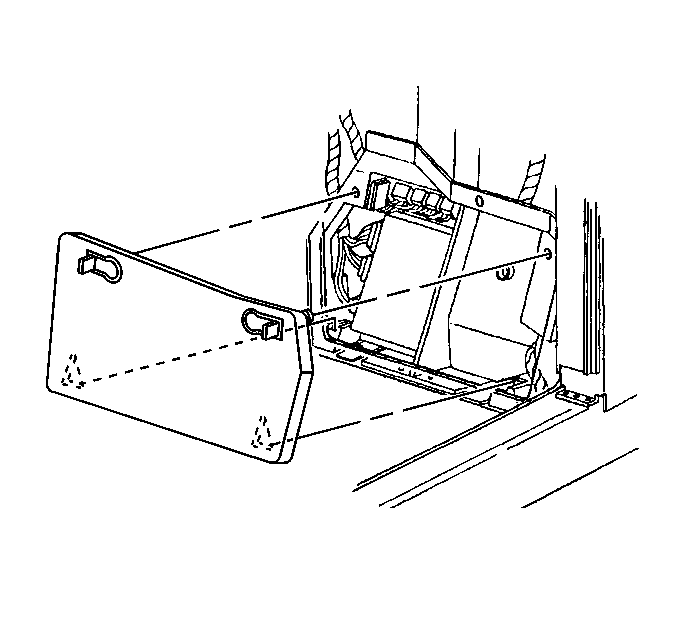
- Remove the passenger side floor kick up panel for access to the I/P electrical center.
- Remove the HDLP Maxi circuit breaker #54, from the instrument panel (I/P) electrical center.
- Raise the hood.
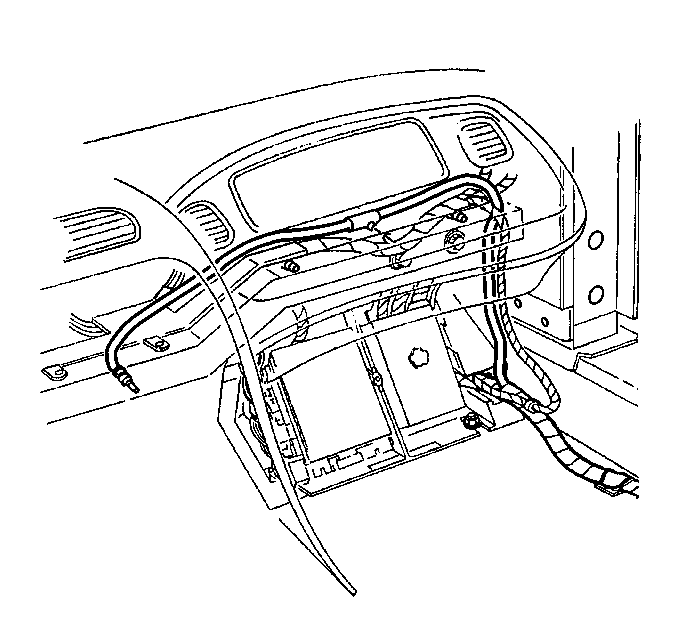
- Disconnect the headlamp wiring harness electrical connector from the forward lamp wiring harness.
- Raise the headlamp by turning the headlamp motor/actuator manual control knob counterclockwise.
- Remove the headlamp bezel. Refer to Headlamp Bezel Replacement .
- Remove the front fascia lower closeout panel. Refer to Front Bumper Fascia Lower Close Out Panel Replacement in Bumpers.
- Remove the brake caliper cooling duct. Refer to Front Brake Caliper Cooling Duct Replacement in Bumpers.
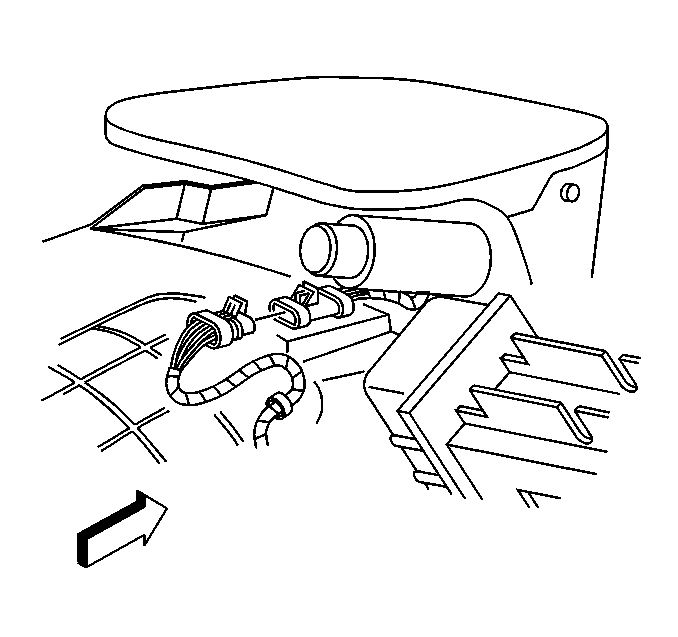
- Disconnect the electrical connectors from the headlamp automatic control module (RH side only).
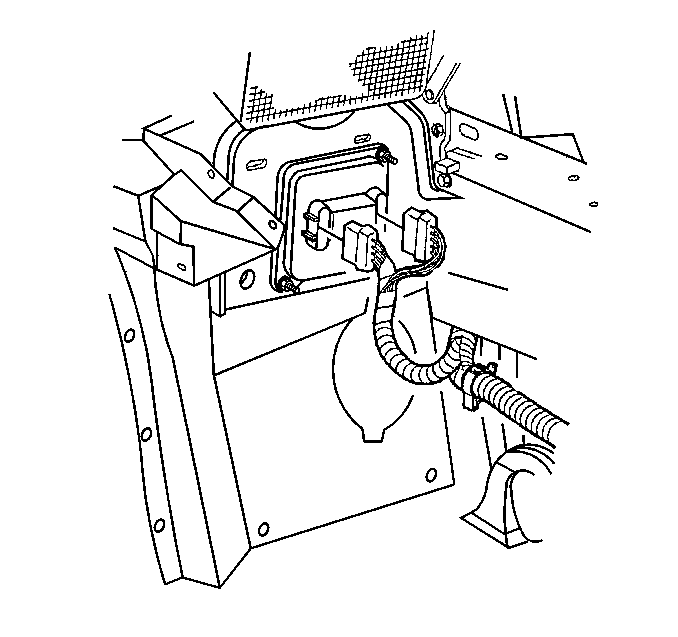
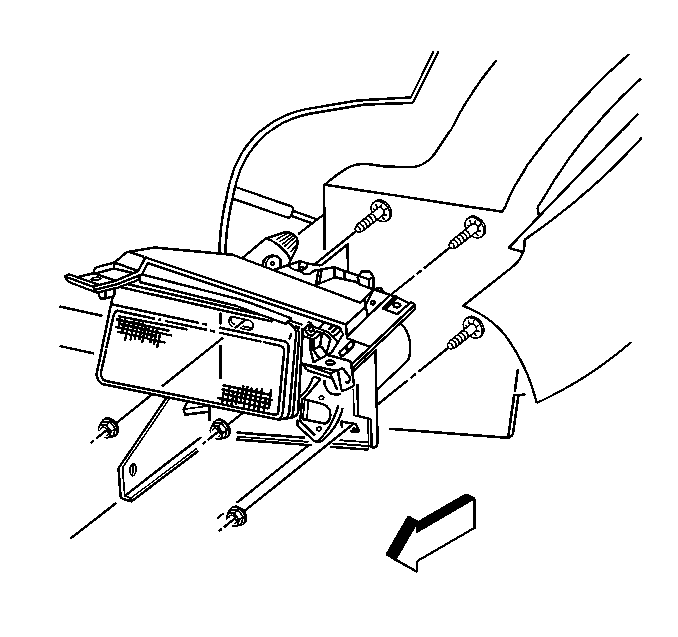
- Remove the two bolts mounting the headlamp bracket to the frame rail.
- Remove the three nuts mounting the headlamp bracket to the headlamp stud plate.
- Carefully lift the headlamp assembly out of the vehicle.
- Transfer parts as necessary.
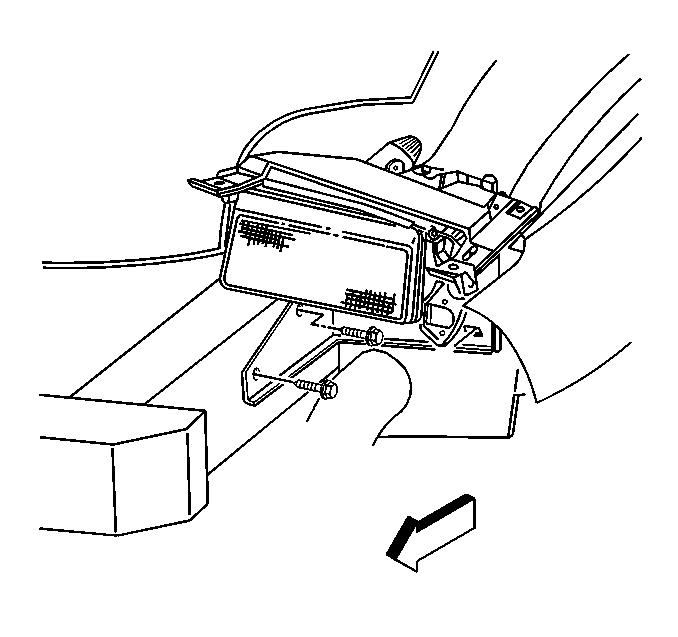
Important: Before removing the fasteners, be sure to support the headlamp assembly.
The headlamp assembly will have to clear the studs extending from headlamp stud plate.
Installation Procedure
- Use care in positioning the headlamp assembly into the vehicle.
- Loosely install the three nuts mounting the headlamp bracket to the headlamp stud plate.
- Loosely install the two bolts mounting the headlamp bracket to the frame rail.
- Beginning with the upper location, tighten the two bolts mounting the headlamp bracket to the frame rail.
- Beginning with the upper inner location, tighten the nuts mounting the headlamp to the headlamp stud plate.
- Connect the electrical connectors to the headlamp automatic control module (RH side).
- Install the brake caliper cooling duct. Refer to Front Brake Caliper Cooling Duct Replacement in Bumpers.
- Install the front fascia lower closeout panel. Refer to Front Bumper Fascia Lower Close Out Panel Replacement in Bumpers.
- Install the headlamp bezel. Refer to Headlamp Bezel Replacement .
- Connect the headlamp wiring harness electrical connector to the forward lamp wiring harness.
- Lower the headlamps manually to ensure no binding exists.
- Close the hood.
- Install the HDLP Maxi circuit breaker #54 into the I/P electrical center.
- Install the floor kick up panel.
- Check the alignment of the headlamp opening door. For adjustment procedures, refer to Headlamp Opening Door Adjustment .
- Check headlamp aim.
- Remove any protective tape installed during removal of the headlamp.
Mount the headlamp assembly onto the studs extending from the headlamp stud plate.
Notice: Use the correct fastener in the correct location. Replacement fasteners must be the correct part number for that application. Fasteners requiring replacement or fasteners requiring the use of thread locking compound or sealant are identified in the service procedure. Do not use paints, lubricants, or corrosion inhibitors on fasteners or fastener joint surfaces unless specified. These coatings affect fastener torque and joint clamping force and may damage the fastener. Use the correct tightening sequence and specifications when installing fasteners in order to avoid damage to parts and systems.
Tighten
Tighten the headlamp mounting bolts to 20 N·m (15 lb ft).
Tighten
Tighten the headlamp mounting nuts to 10 N·m (89 lb in).
Rotate the headlamp motor/actuator manual control knob clockwise to lower the headlamp.
| • | To check the aim of the headlamps using the screen method, refer to Headlamp Aiming . |
| • | To check the aim of the headlamps using the mechanical method, refer to Headlamp Aiming . |
