For 1990-2009 cars only
Radio Antenna Cable Extension Cable Replacement Rear Lift Window, Coupe
Removal Procedure
- Remove the roof bow interior trim panel. Refer to Rear Roof Bow Trim Panel Replacement in Interior Trim.
- Remove the left rear compartment side trim panel. Refer to Rear Compartment Side Trim Panel Replacement in Interior Trim.
- Remove the left lock pillar trim panel. Refer to Body Lock Pillar Trim Panel Replacement in Interior Trim.
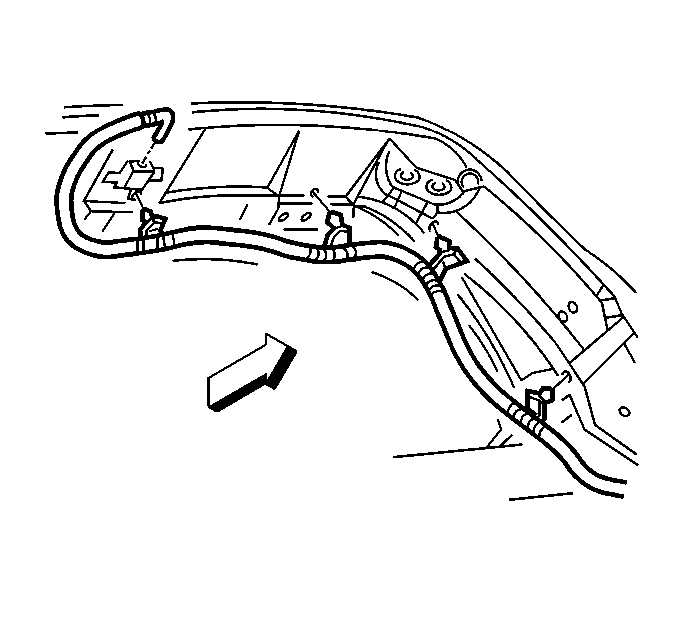
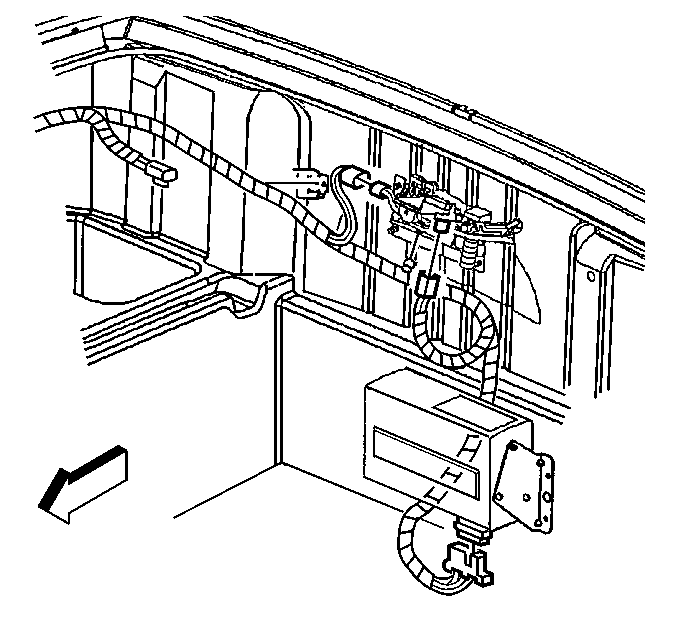
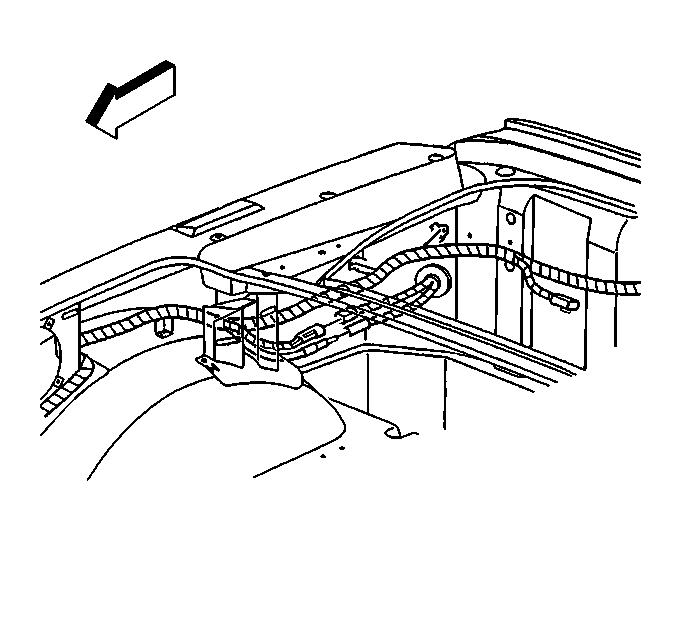
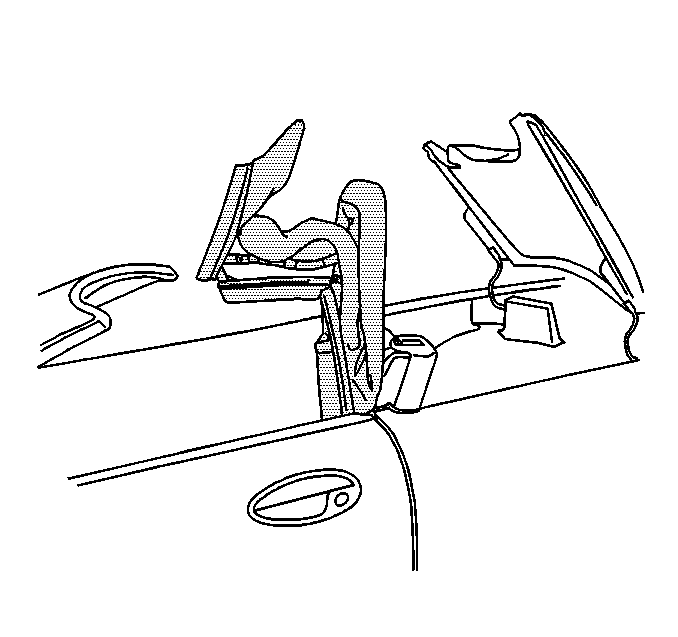
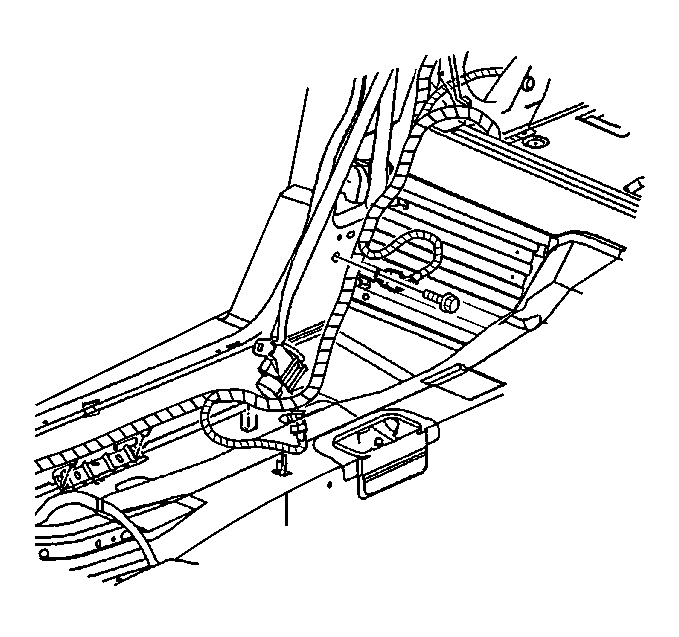
- Disconnect the rear lift window antenna coaxial extension cable from the antenna buffer.
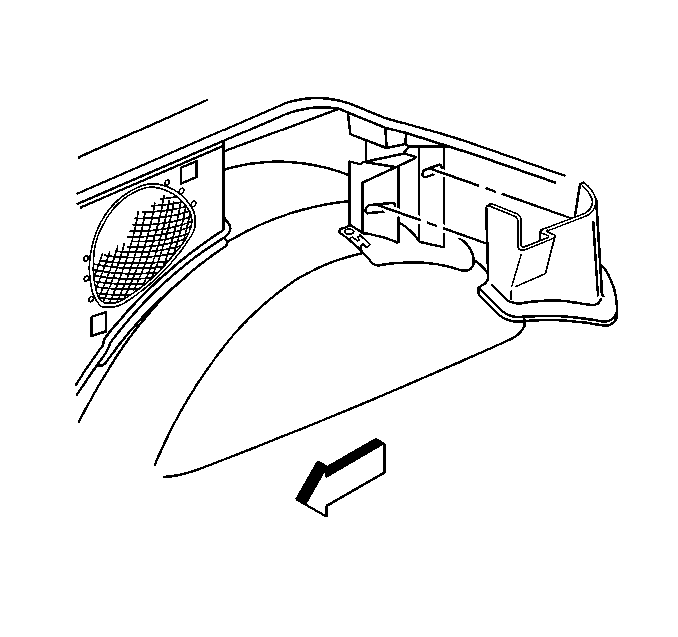
- Beginning at the antenna buffer end, carefully remove the push-in fastener retainers securing the coaxial extension cable along the roof bow.
- Remove the push-in fastener retainers securing the coaxial extension cable to the lock pillar and the front seat back reinforcement panel.
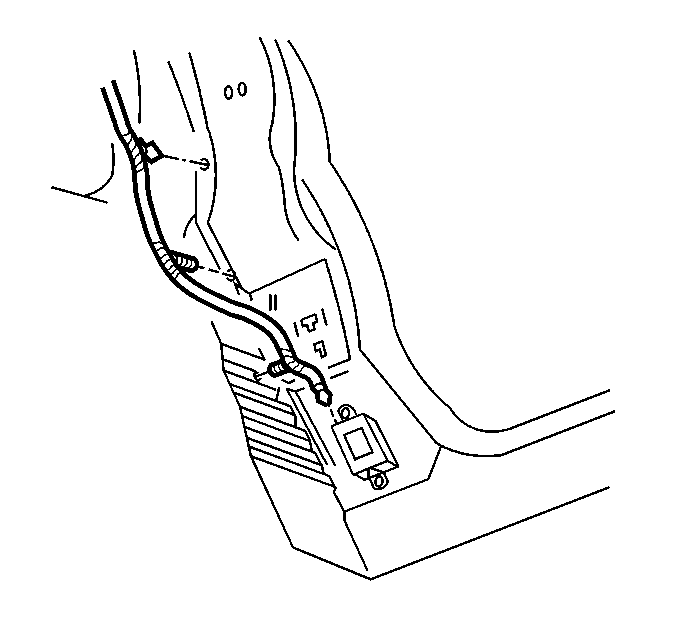
- Disconnect the coaxial extension cable from the antenna module.
- Remove the coaxial extension cable.
Installation Procedure
- Install the rear lift window antenna coaxial extension cable push-in fastener retainers to the front seat back reinforcement panel and along the lock pillar.
- Connect the coaxial extension cable to the antenna module.
- Working upward along the roof bow, install the remaining coaxial extension cable push-in fastener retainers.
- Connect the coaxial extension cable to the antenna buffer.
- Install the lock pillar trim panel. Refer to Body Lock Pillar Trim Panel Replacement in Interior Trim.
- Install the rear compartment side trim panel. Refer to Rear Compartment Side Trim Panel Replacement in Interior Trim.
- Install the roof bow interior trim panel. Refer to Rear Roof Bow Trim Panel Replacement in Interior Trim.
Radio Antenna Cable Extension Cable Replacement Convertible
Removal Procedure
- Open the rear compartment lid.
- Remove the RR end/corner carpet trim panel. Refer to Rear Corner Trim Panel Carpet Replacement in Interior Trim.
- Remove the decklid latch carpet trim panel.
- Reposition the center carpet section to expose the front body wiring harness connectors.
- Disconnect the front body wiring harness connectors from the decklid latch and the remote CD changer, if equipped.
- Remove the decklid support trim panel.
- Pull back the edge of the center carpet section from behind the decklid support.
- Disconnect the power antenna coaxial cable from the power antenna coaxial extension cable.
- Disconnect the antenna electrical connector from the front body wiring harness connector.
- Release the front body wiring harness from the retaining clip on the rear compartment side wall.
- Close the rear compartment lid.
- Raise and position the convertible top with the 1 and 5 bows upright.
- Raise or leave raised, the folding top stowage compartment lid.
- Remove the push-in fastener from the rear compartment side trim panel.
- Remove the rear compartment side trim panel.
- Remove the RH lock pillar upper trim panel. Refer to Body Lock Pillar Trim Panel Replacement in Interior Trim.
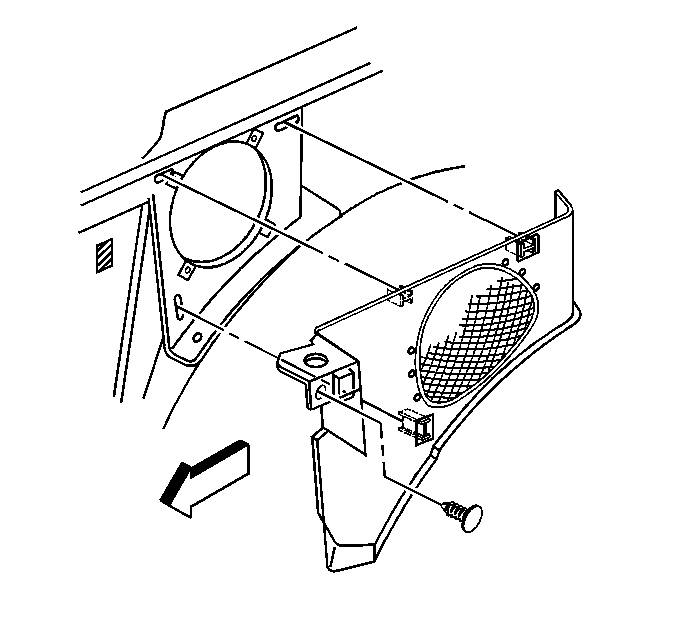
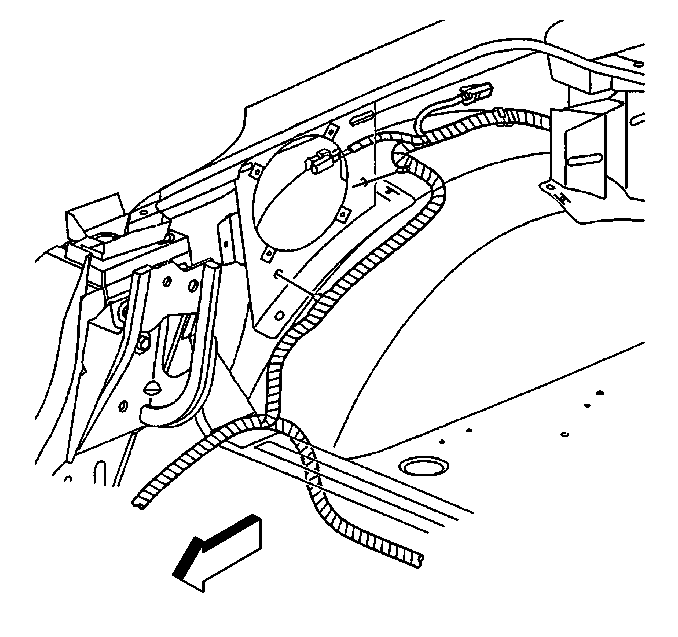
- Release the front body wiring harness retainers from the rear speaker housing.
- Pull the front body wiring harness from the rear of the vehicle.
- Remove the RH door sill plate. Refer to Door Sill Plate Replacement in Interior Trim.
- Remove the RH lock pillar lower trim panel. Refer to Body Lock Pillar Trim Panel Replacement in Interior Trim.
- Release the front body wiring harness retainers from the lock pillar and the floor panel support.
- Release the front body wiring harness from the body retainers.
- Carefully remove the tape securing the power antenna coaxial extension cable to the front body wiring harness.
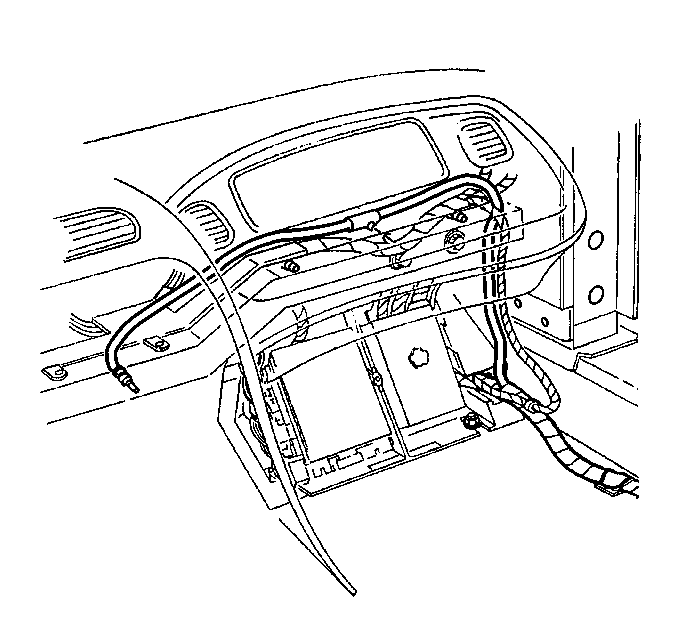
- Remove the I/P RH lower insulator panel. Refer to Instrument Panel Insulator Panel Replacement in Instrument Panel, Gauges and Console.
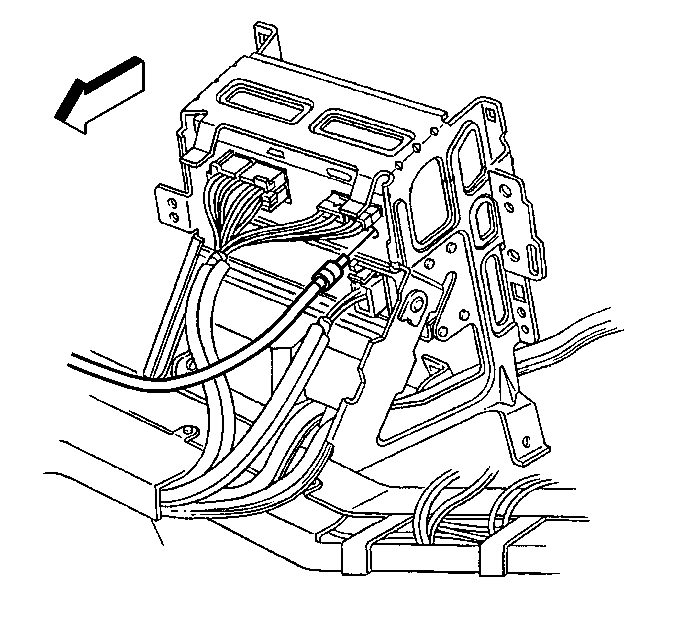
- Release the power antenna coaxial extension cable retainer from the I/P lower support beam.
- Remove the radio control. Refer to Radio Replacement .
- Remove the power antenna coaxial extension cable.
Pull to release the retaining clips.
Installation Procedure
- Position the power antenna coaxial extension cable to the vehicle.
- Install the radio control. Refer to Radio Replacement .
- Secure the power antenna coaxial extension cable retainer to the I/P lower support beam.
- Install the I/P RH lower insulator panel. Refer to Instrument Panel Insulator Panel Replacement in Instrument Panel, Gauges and Console.
- Using tape, secure the power antenna coaxial extension cable to the front body wiring harness.
- Secure the front body wiring harness to the body retainers.
- Secure the front body wiring harness retainers to the lock pillar and the floor panel support.
- Install the RH lock pillar lower trim panel. Refer to Body Lock Pillar Trim Panel Replacement in Interior Trim.
- Install the RH door sill plate. Refer to Door Sill Plate Replacement in Interior Trim.
- Position the front body wiring harness to the rear of the vehicle.
- Secure the front body wiring harness retainers to the rear speaker housing.
- Install the RH lock pillar upper trim panel. Refer to Body Lock Pillar Trim Panel Replacement in Interior Trim.
- Install the rear compartment side trim panel.
- Install the push-in fastener to the rear compartment side trim panel.
- Lower the folding top stowage compartment lid.
- Raise the convertible top.
- Open the rear compartment lid.
- Secure the front body wiring harness to the retaining clip on the rear compartment side wall.
- Connect the antenna electrical connector to the front body wiring harness connector.
- Connect the power antenna coaxial cable to the power antenna coaxial extension cable.
- Install the edge of the center carpet section behind the decklid support.
- Install the decklid support trim panel.
- Connect the front body wiring harness connectors to the decklid latch and the remote CD changer, if equipped.
- Install the center carpet section into position.
- Install the decklid latch carpet trim panel.
- Install the RR end/corner carpet trim panel. Refer to Rear Corner Trim Panel Carpet Replacement in Interior Trim.
- Close the rear compartment lid.
Align the panel, then push to secure the retaining clips.
