Folding Top Weatherstrip Replacement Front and Center Side Rails
Removal Procedure
The front side rail and the center side rail weatherstrips can be replaced separately.
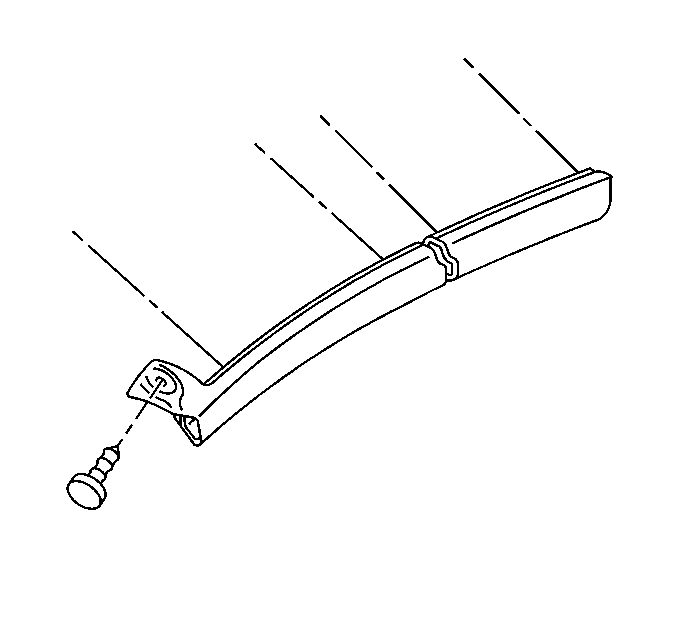
- Remove the fastener from the front of the weatherstrip (front side rail weatherstrip only).
- Remove the side rail weatherstrip.
- Clean the mounting surface.
Installation Procedure
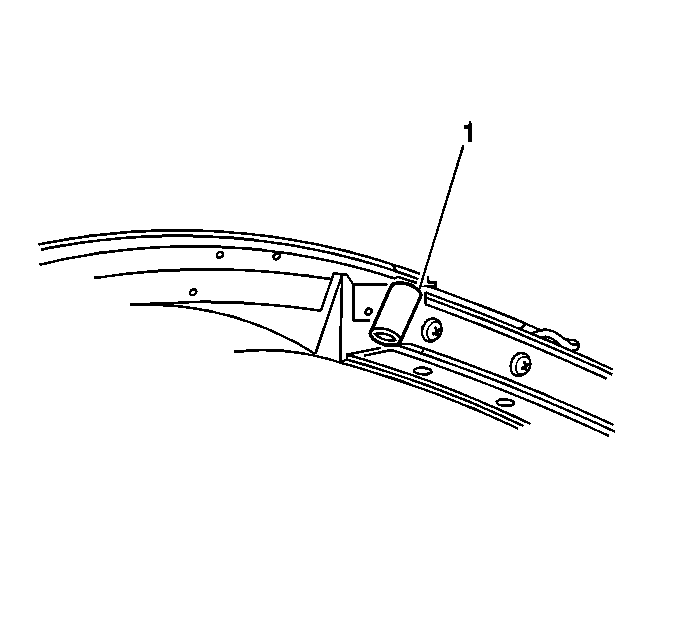
- install a foam sealer (1) to the forward end of the front side weatherstrip retainer.
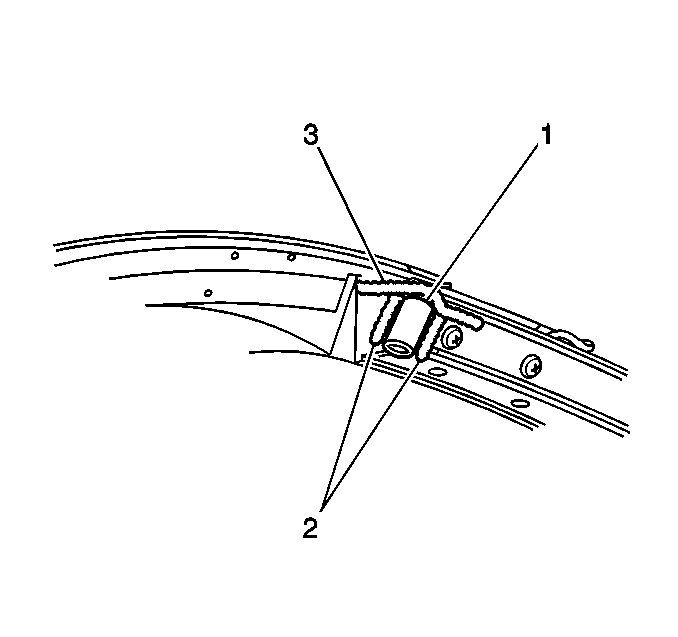
- Apply a 6 mm (2.4 in) high bead of sealer (3) to the front upper corner of the front side retainer and on both sides (2) of the foam sealer (1) and onto the folding top as shown.
- Apply a 12 mm (0.5 in) diameter drop of sealer (3) to the center side retainer screw heads as shown.
- Remove the protective film from the butyl adhesive on the weatherstrip.
- Install the side rail weatherstrip.
- Install the fastener to the front of the weatherstrip (front side rail weatherstrip only).


Notice: Use the correct fastener in the correct location. Replacement fasteners must be the correct part number for that application. Fasteners requiring replacement or fasteners requiring the use of thread locking compound or sealant are identified in the service procedure. Do not use paints, lubricants, or corrosion inhibitors on fasteners or fastener joint surfaces unless specified. These coatings affect fastener torque and joint clamping force and may damage the fastener. Use the correct tightening sequence and specifications when installing fasteners in order to avoid damage to parts and systems.
Tighten
Tighten the side weatherstrip screw to 3.4 N·m (30 lb in).
Folding Top Weatherstrip Replacement Rear Side Rail
Removal Procedure
- Remove the fastener from the bottom of the rear side rail weatherstrip.
- Remove rear side rail weatherstrip.

Installation Procedure
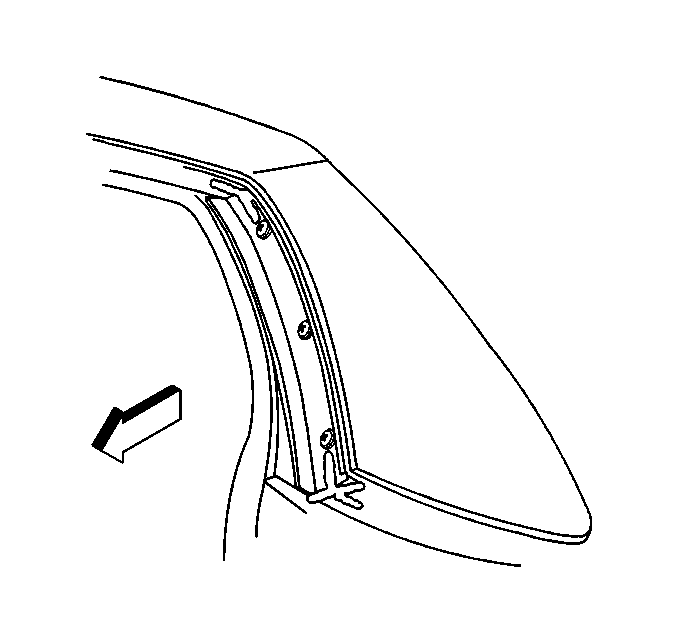
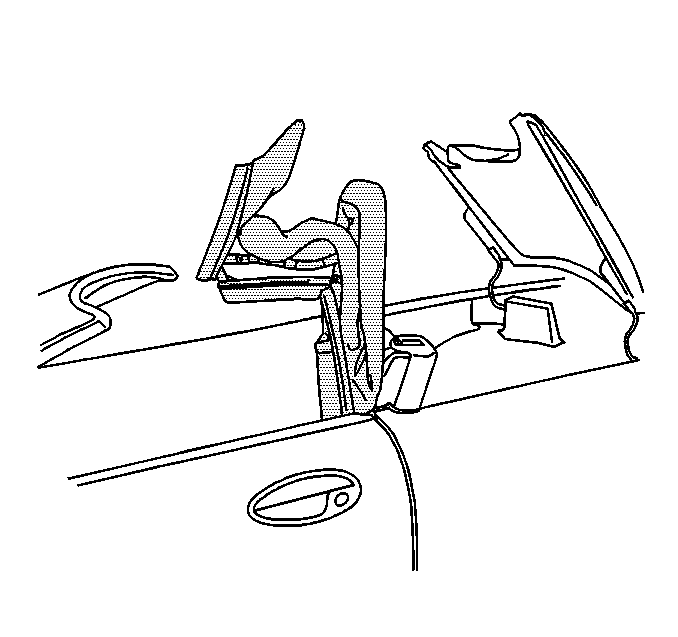
- Apply a bead of sealer to the upper and lower corners of the weatherstrip retainer as shown in the illustration.
- Peel the release paper from the back of the new weatherstrip.
- Install the weatherstrip to the rear side rail weatherstrip retainer and into the end of the center rail side weatherstrip.
- Install the fastener to the bottom of the rear side rail weatherstrip.

Folding Top Weatherstrip Replacement Number Five Bow
Removal Procedure
- Position the top with the number one and number five bows up.
- Remove the protective pads from the ends of the number five bow.
- Remove the protective pads from the nuts at the ends of the number five bow weatherstrip.
- Remove the nuts attaching the ends of the number five bow weatherstrip.
- Remove the number five bow weatherstrip.

Installation Procedure
- Install the number five bow weatherstrip.
- Install the nuts to the ends of the number five bow weatherstrip.
- Install the protective pads to the weatherstrip nuts.
- Install the protective pads to the ends of the number five bow.
- Secure the folding top.

Notice: Use the correct fastener in the correct location. Replacement fasteners must be the correct part number for that application. Fasteners requiring replacement or fasteners requiring the use of thread locking compound or sealant are identified in the service procedure. Do not use paints, lubricants, or corrosion inhibitors on fasteners or fastener joint surfaces unless specified. These coatings affect fastener torque and joint clamping force and may damage the fastener. Use the correct tightening sequence and specifications when installing fasteners in order to avoid damage to parts and systems.
Tighten
Tighten the number five bow weatherstrip nuts to 3.5 N·m
(31 lb in).
