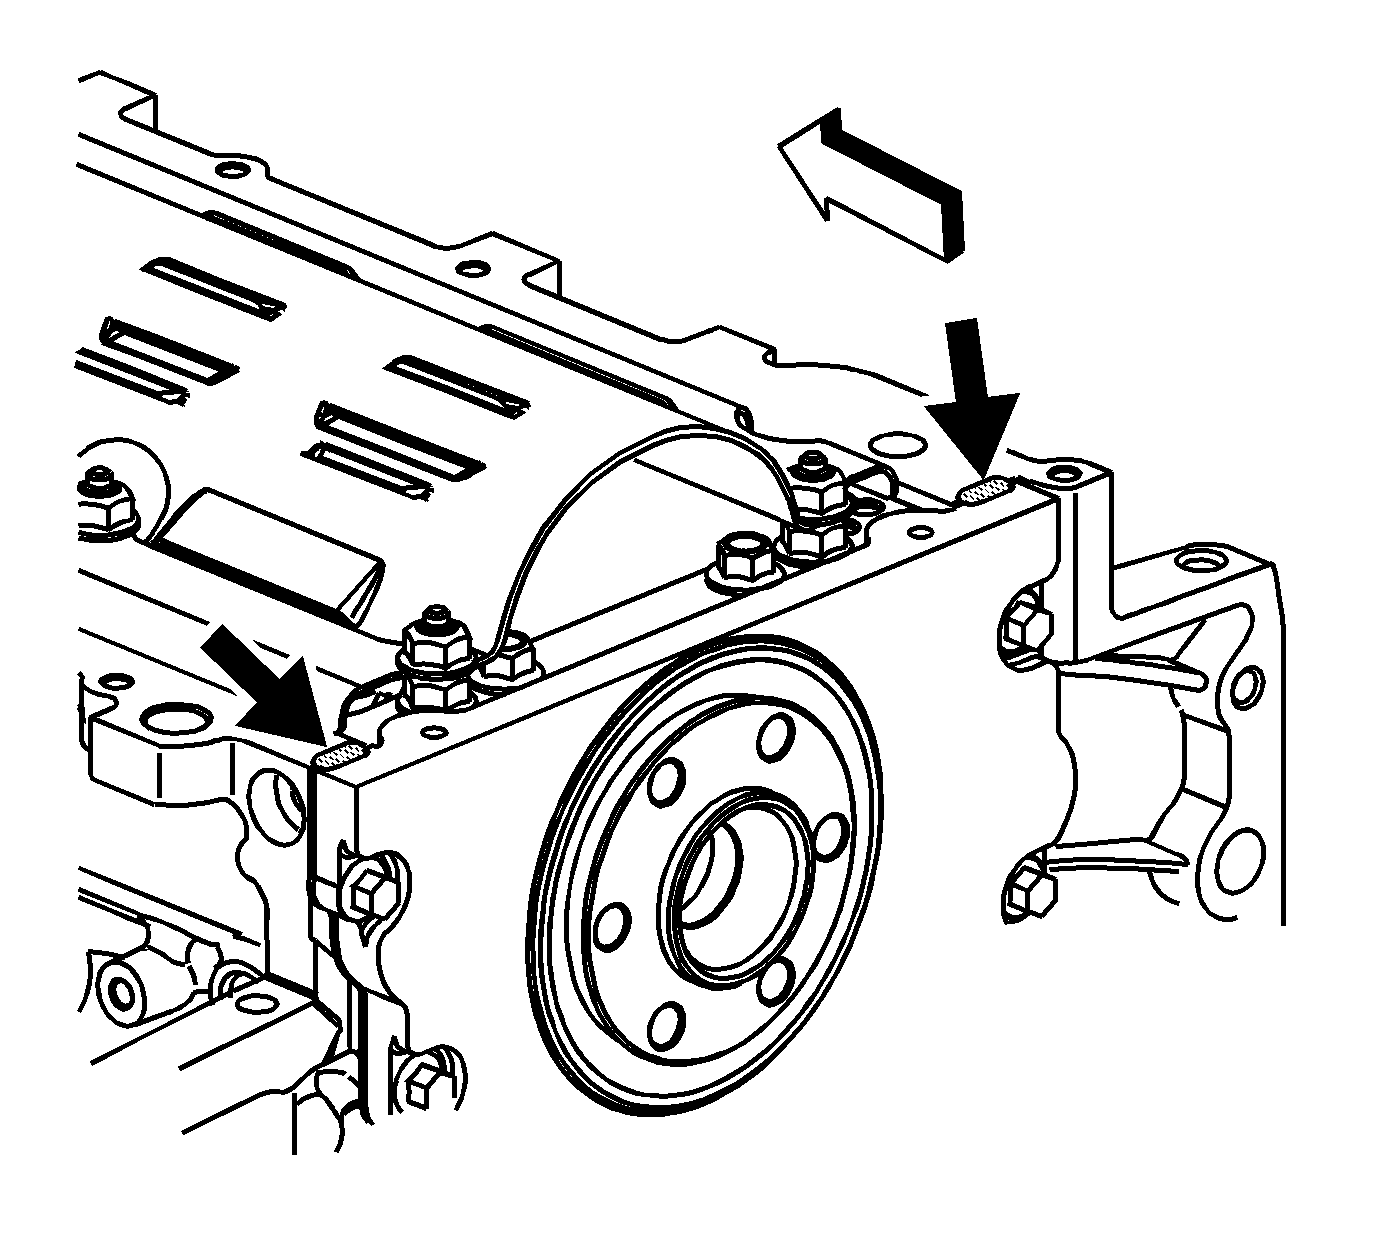
- Apply a 5 mm (0.2 in) bead of sealant GM P/N 12378190 or equivalent 20 mm (0.8 in) long to the engine block. Apply the sealant directly onto the tabs of the front cover gasket that protrude into the oil pan surface.
- Apply a 5 mm (0.2 in) bead of sealant GM P/N 12378190 or equivalent 20 mm (0.8 in) long to the engine block. Apply the sealant directly onto the tabs of the rear cover gasket that protrude into the oil pan surface.
- Pre-assemble the oil pan gasket to the pan, upper.
- Install the oil pan, upper, gasket and bolts to the engine block.
- Tighten bolts finger tight. Do not overtighten.
- Place a straight edge across the rear of the engine block and the rear of the oil pan at the transmission housing mounting surfaces.
- Align the oil pan - upper - until the rear of engine block and rear of oil pan are flush or even.
- Tighten the oil pan-to-block and oil pan-to-front cover bolts to 25 N·m (18 lb ft).
- Tighten the oil pan-to-rear cover bolts to 12 N·m (106 lb in).
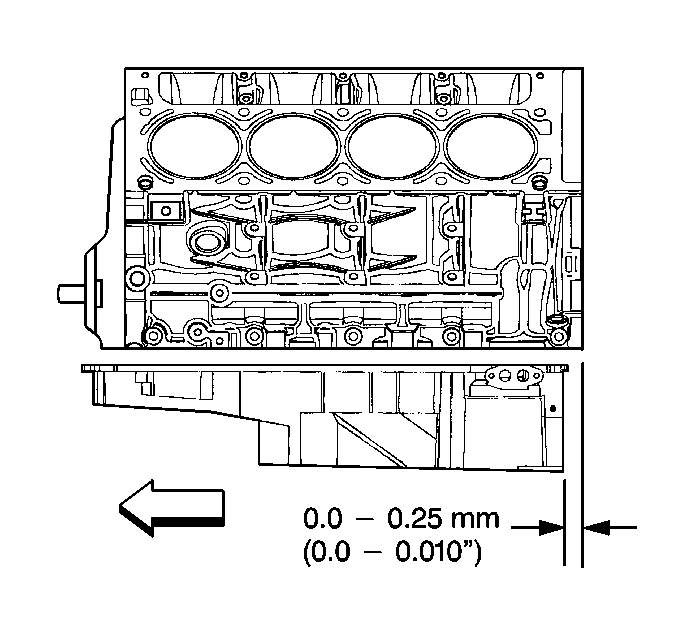
- Measure the oil pan-to-engine block alignment.
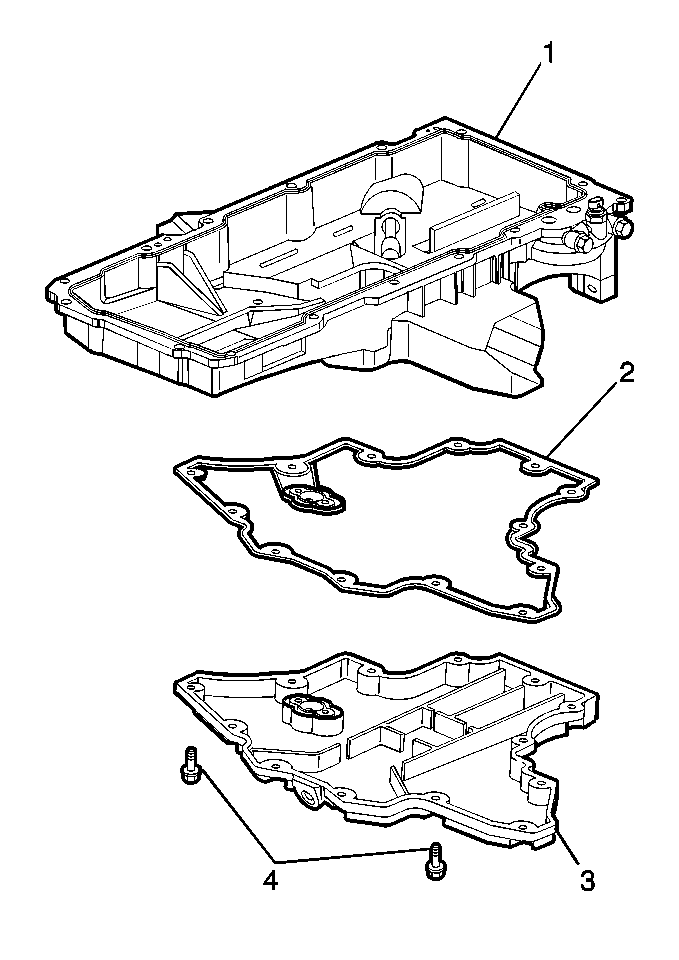
- Install the oil pan, lower (3), and gasket (2).
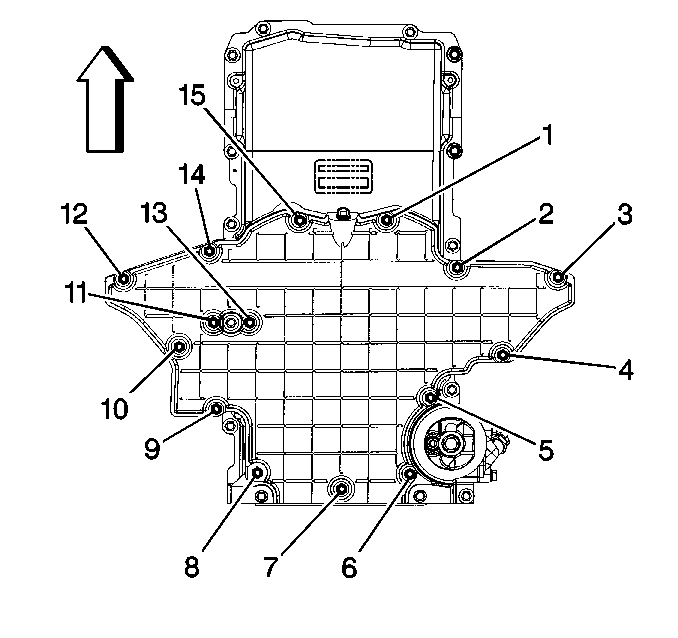
- Install the oil pan, lower bolts (1-15).
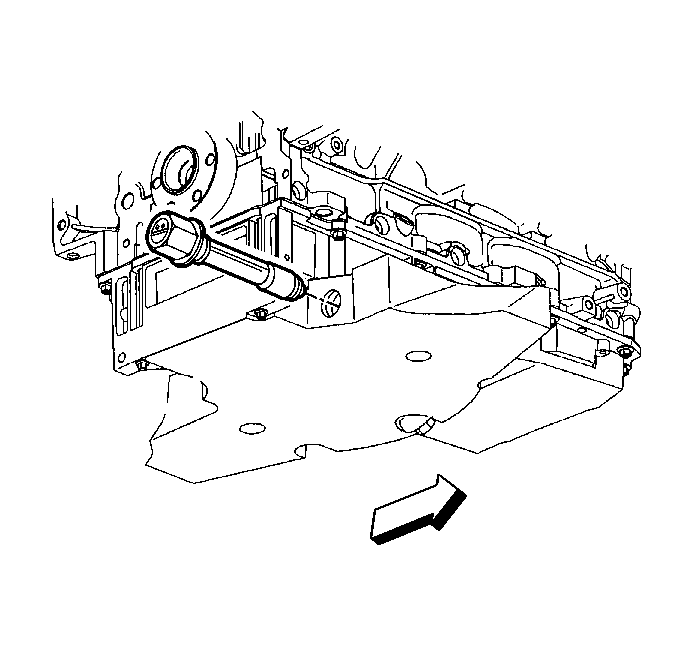
- Install the oil level sensor.
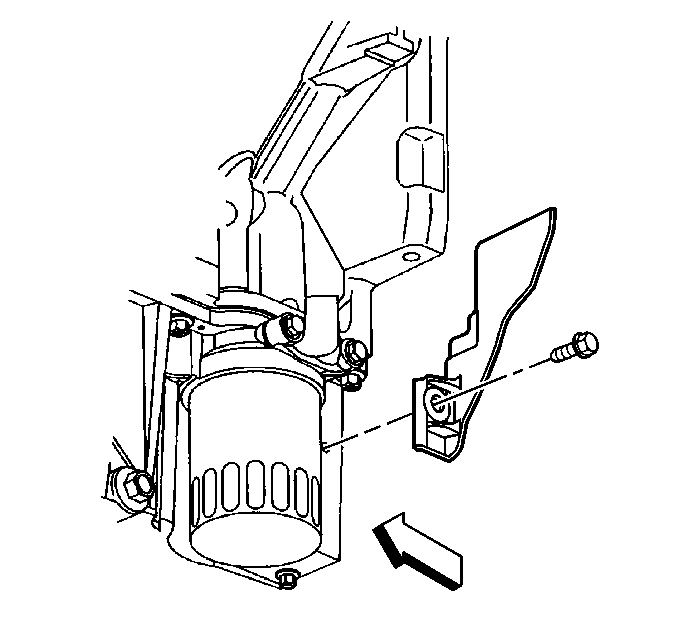
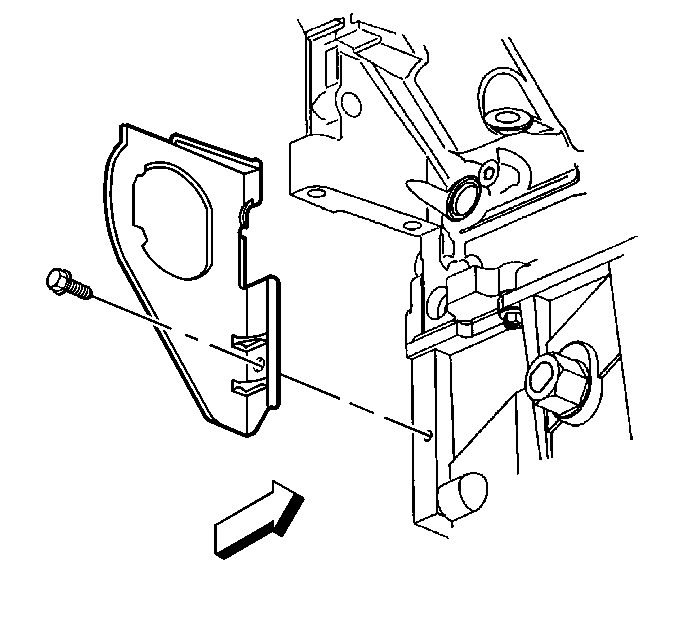
- Install the left closeout cover and bolt.
- Install the right closeout cover and bolt.
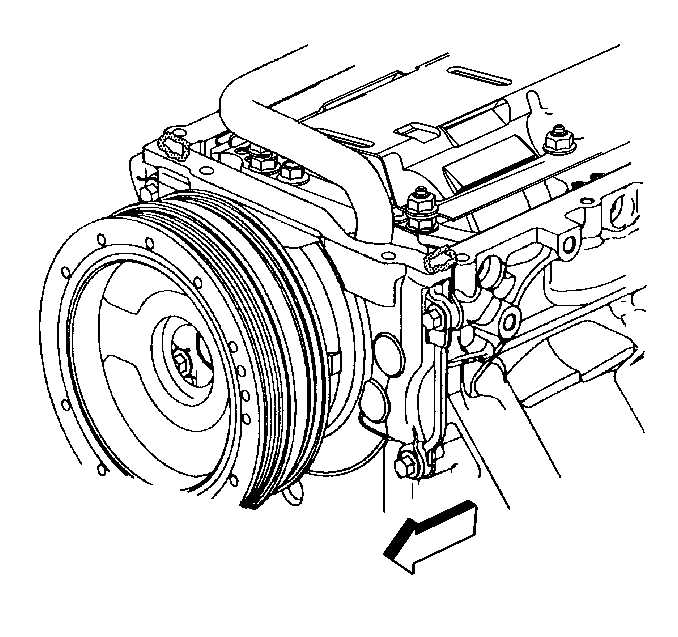
Important:
• All gasket surfaces should be free of oil or other foreign material
during assembly. • The alignment of the structural oil pan is critical. The rear bolt hole
locations of the oil pan provide mounting points for the transmission housing.
To ensure the rigidity of the powertrain and correct transmission alignment,
it is important that the rear of the block and the rear of the oil pan
are flush or even. The rear of the oil pan must NEVER protrude beyond
the engine block and transmission housing plane. • DO NOT use the oil pan gaskets again. • It is not necessary to rivet the NEW gasket to the oil pan. • It is not necessary to remove the oil level sensor prior to oil pan
installation.
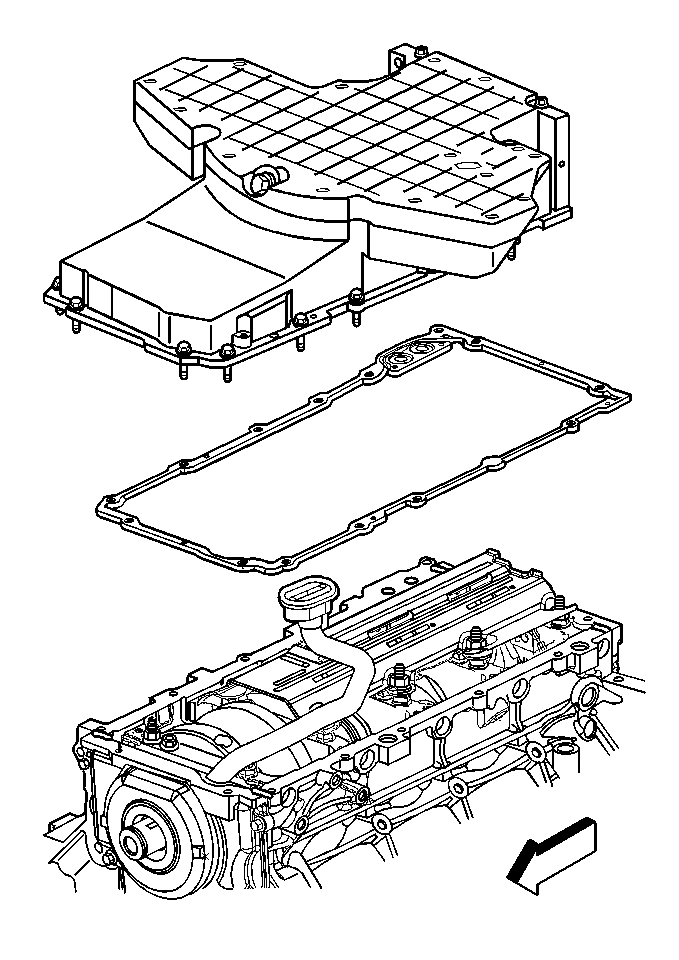
Important: Be sure to align the oil gallery passages in the oil pan and engine block properly with the oil pan gasket.
| 3.1. | Install the gasket onto the oil pan, upper. |
| 3.2. | Install the oil pan bolts to the pan and through the gasket. |
Notice: Refer to Fastener Notice in the Preface section.
Tighten
| 8.1. | Place a straight edge across the rear of the engine block and rear of oil pan at the transmission housing mounting surfaces. |
| Important: The rear of the oil pan must NEVER protrude beyond the engine block and transmission housing mounting surfaces. |
| 8.2. | Insert a feeler gage between the straight edge and the oil pan transmission housing mounting surface and check to make sure that there is no more than a 0.25 mm (0.01 in) gap between the pan and straight edge. |
| 8.3. | If the oil pan alignment is not within specifications, remove the oil pan and repeat the above procedure. |
Tighten
Tighten the oil pan, lower bolts to 12 N·m (106 lb in).
Tighten the bolts in a crossing pattern, alternating from side to side.
Tighten
Tighten the oil level sensor to 13 N·m (115 lb in).
Tighten
Tighten the closeout cover bolt to 12 N·m (106 lb in).
Tighten
Tighten the closeout cover bolt to 12 N·m (106 lb in).
