For 1990-2009 cars only
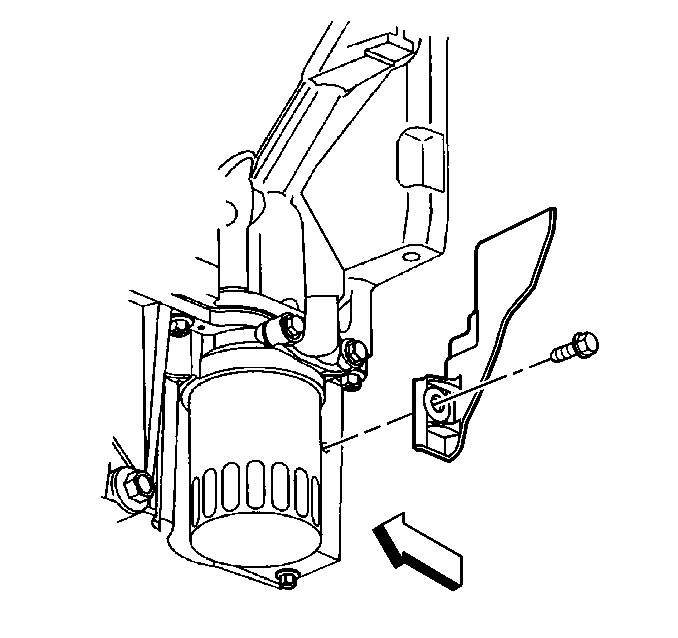
- Remove the left closeout cover and bolt.
- Remove the right closeout cover and bolt.
- Remove the oil level sensor from the oil pan, if required.
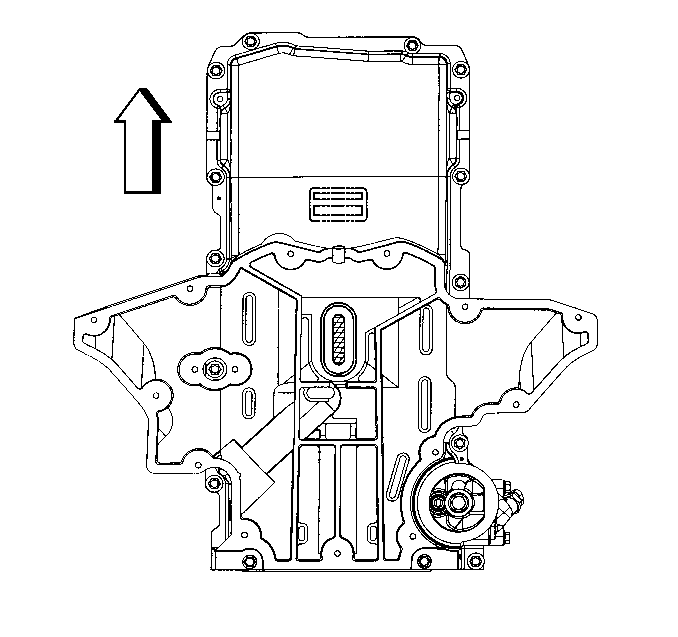
- Remove the oil pan - lower - bolts (1-15), if required.
- Removal of the oil pan - lower - will not provide access to the crankshaft oil deflector, crankshaft, or other internal engine components.
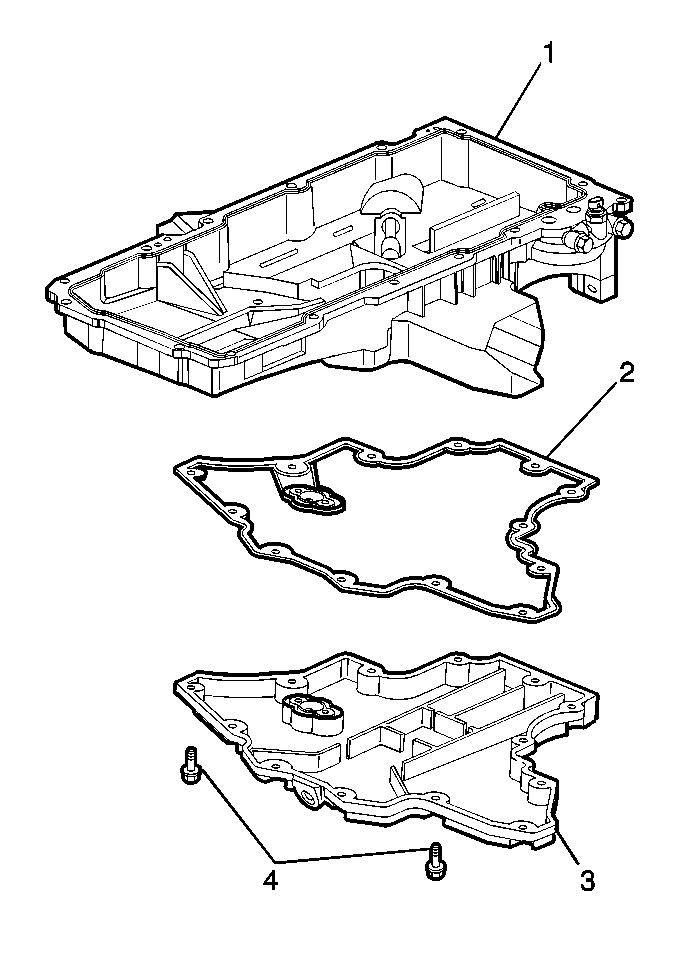
- Separate the oil pan (1) - upper, gasket (2), oil pan (3) - lower, and bolts (4), if required.
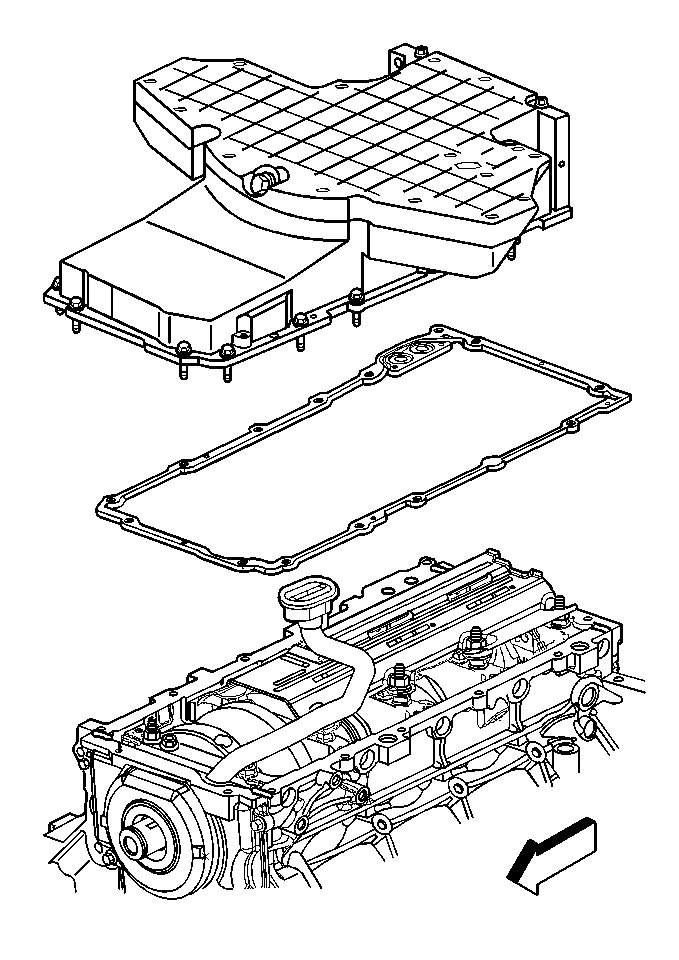
- Remove the oil pan - upper - bolts.
- Remove the oil pan.
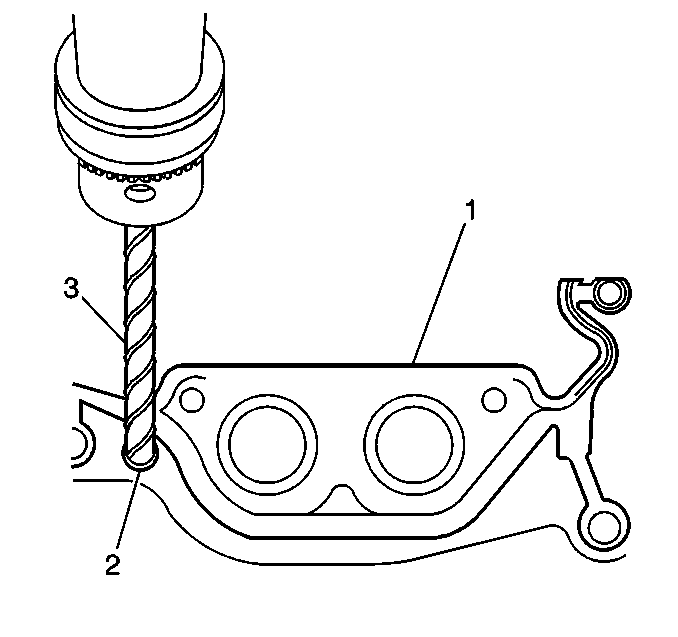
- Drill (3) out the oil pan gasket retaining rivets (2), if required.
- Remove the gasket (1) from the pan - upper.
- Discard the gasket and rivets.
Important: It is not necessary to remove the oil pan - lower - in order to remove the oil pan assembly.
The original oil pan gasket is retained and aligned to the oil pan by rivets. When installing a new gasket, it is not necessary to install new oil pan gasket rivets. DO NOT use the oil pan gaskets again. When installing the oil pan, install NEW oil pan gaskets.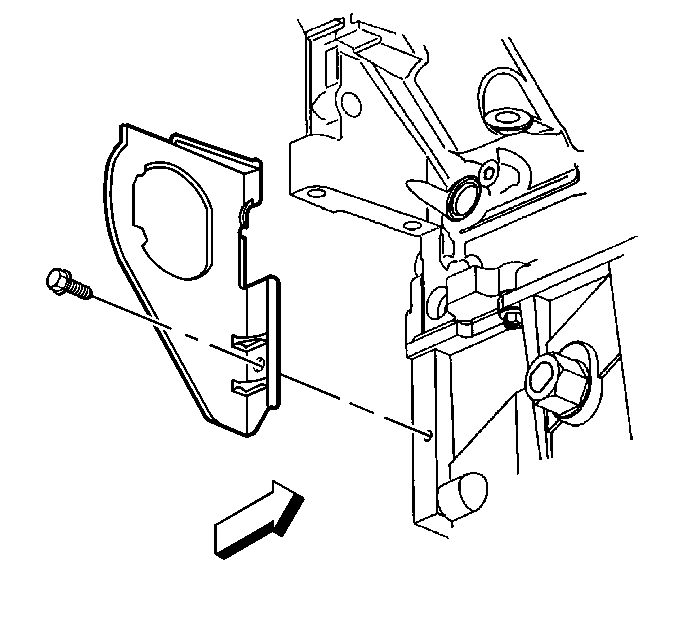
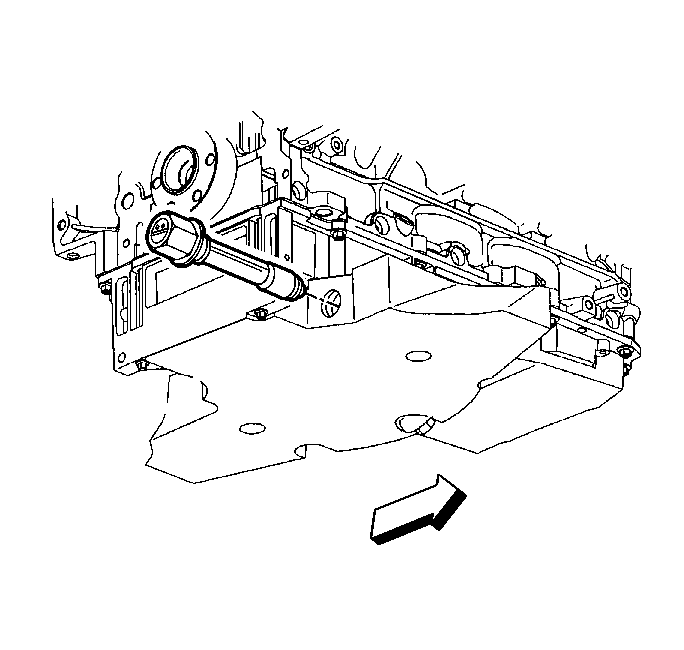
Important: It is not necessary to remove the oil level sensor prior to oil pan removal. Remove the oil level sensor if service is required.
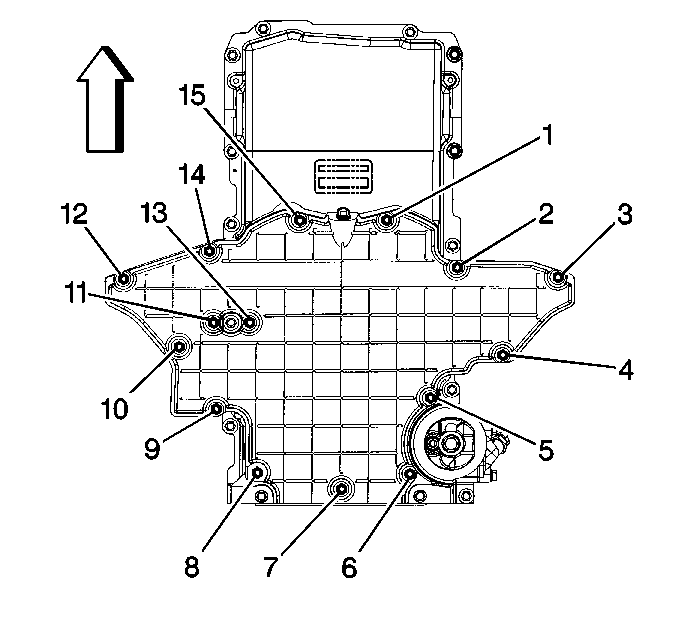
Important: It is not necessary to remove the oil pan - lower - to remove the oil pan assembly.
Important: DO NOT allow foreign material to enter the oil passages of the oil pan. Cap or cover the openings as required.
Use care not to gouge, score, or damage the oil pan sealing surface.