Tools Required
| • | J 34730-1A Fuel Pressure Gauge |
| • | J 37088-A Tool Set, Fuel Line Quick-Connect Separator |
Removal Procedure
- Disconnect the negative battery cable.
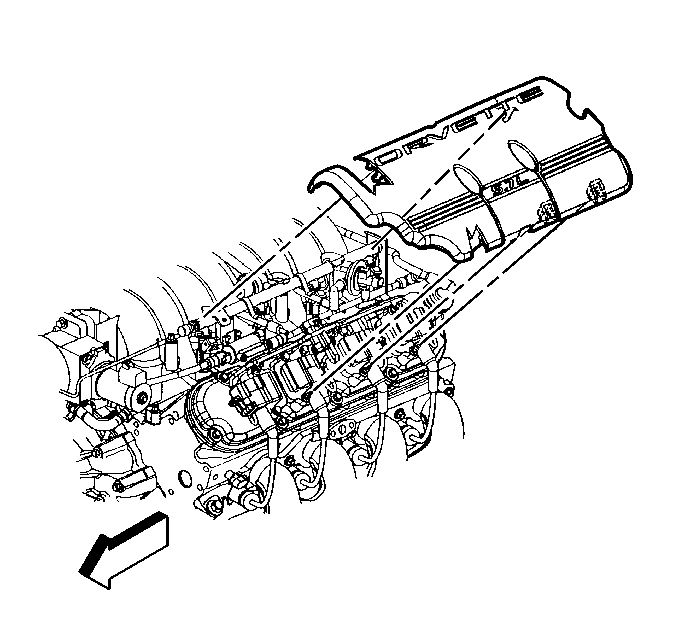
- Remove the left fuel rail cover.
- Relieve the fuel system pressure. Refer to the Fuel Pressure Relief .
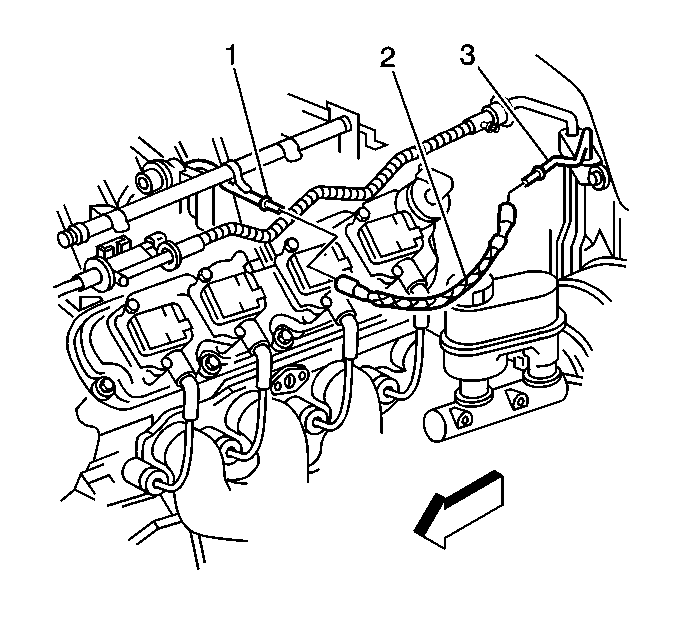
- Disconnect the fuel feed hose (2) from the chassis fuel feed pipe (3). Refer to Metal Collar Quick Connect Fitting Service .
- Cap the engine compartment fuel feed pipe.
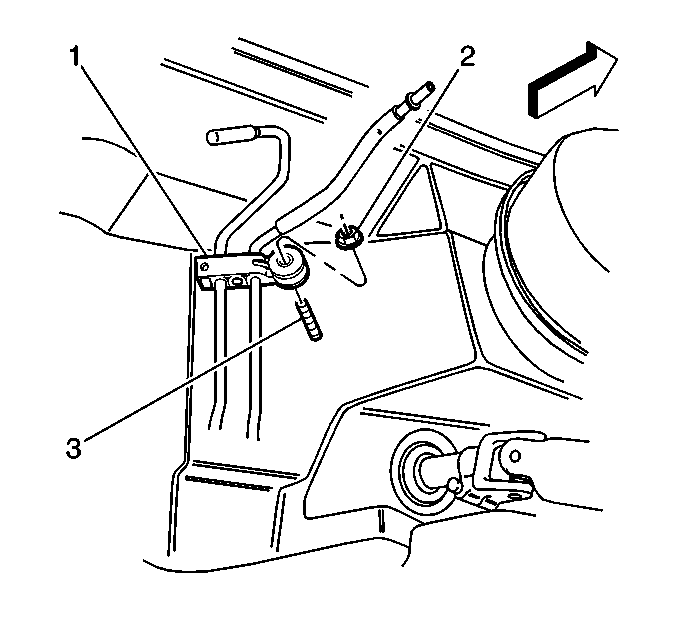
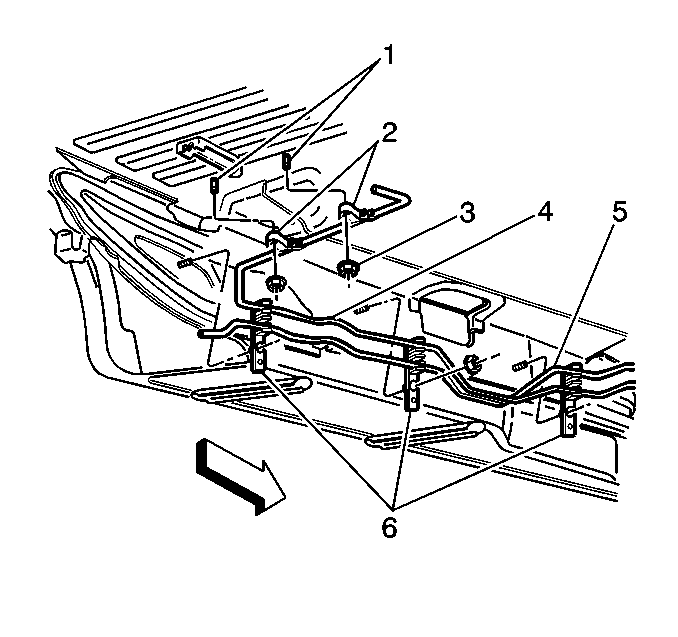
- Disconnect the chassis fuel and EVAP pipe retainer (1) from the upper front of dash mounting stud (3).
- Raise the vehicle. Refer to Lifting and Jacking the Vehicle in General Information.
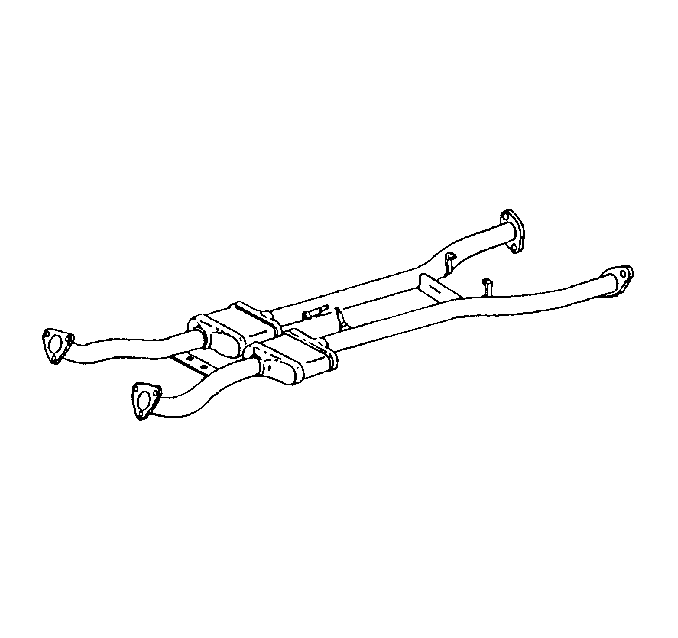
- Remove the exhaust intermediate pipe.
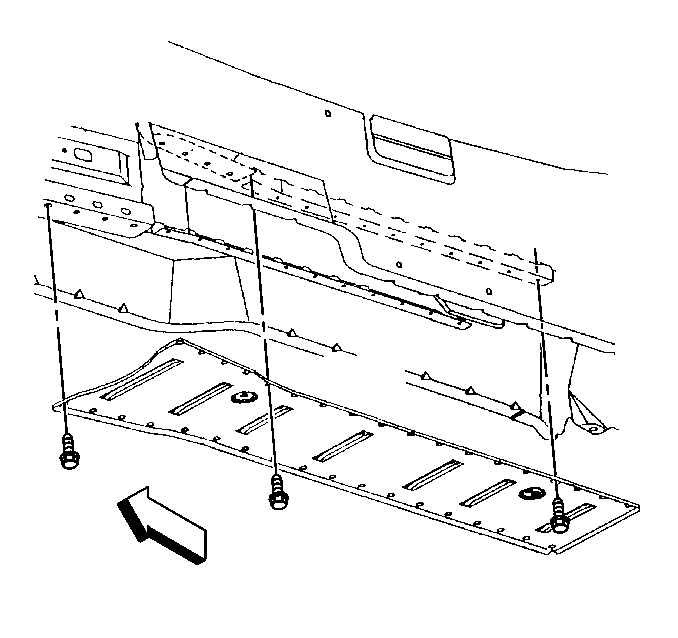
- Remove the driveline tunnel closeout panel. Refer to Floor Panel Tunnel Panel Reinforcement Replacement in Propeller Shaft.
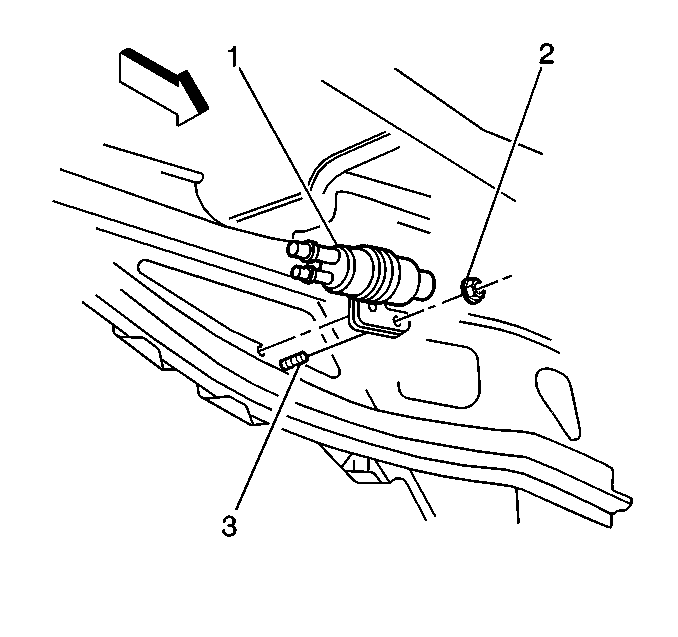
- Remove the fuel filter/pressure regulator bracket nut (2).
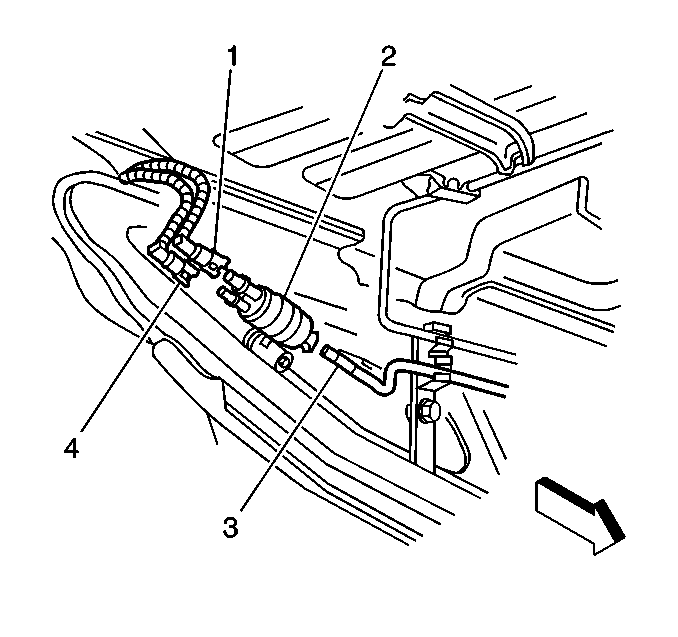
- Disconnect the chassis fuel feed pipe (3) from the fuel filter/pressure regulator. Refer to Metal Collar Quick Connect Fitting Service .
- Cap the open end of the fuel filter and the pressure regulator (2).
- Disconnect the chassis fuel pipe (5) from the underbody retainers (6).
- Remove the chassis fuel pipe.
Caution: Unless directed otherwise, the ignition and start switch must be in the OFF or LOCK position, and all electrical loads must be OFF before servicing any electrical component. Disconnect the negative battery cable to prevent an electrical spark should a tool or equipment come in contact with an exposed electrical terminal. Failure to follow these precautions may result in personal injury and/or damage to the vehicle or its components.
Notice:
• Do not repair the fuel feed or return pipes. • Replace the fuel feed and return pipes with original equipment
or with parts that meet the GM specifications for those parts. The replacement
pipe must have the same type of fittings as the original pipe in order to
ensure the integrity of the connection.
Caution: To avoid any vehicle damage, serious personal injury or death when major components are removed from the vehicle and the vehicle is supported by a hoist, support the vehicle with jack stands at the opposite end from which the components are being removed and strap the vehicle to the hoist.
Installation Procedure
Important:
• Follow the same routing as the original pipe. • Secure the pipe in order to prevent chafing. • Do not kink or bend the pipe.
- Install the chassis fuel pipe (5) into the underbody retainers (6).
- Uncap the fuel filter/pressure regulator outlet.
- Connect the chassis fuel feed pipe (3) to the fuel filter/pressure regulator (2). Refer to Metal Collar Quick Connect Fitting Service .
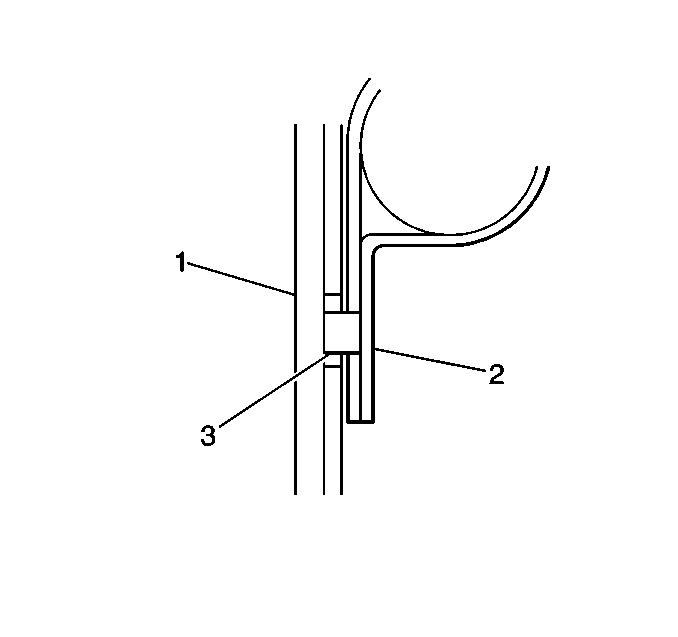
- Engage the anti-rotation tab (3) of the fuel filter/pressure regulator bracket (2) into the hole of the tunnel reinforcement (1).
- Install the fuel filter/pressure regulator bracket nut (2).
- Install the driveline tunnel closeout panel. Refer to Floor Panel Tunnel Panel Reinforcement Replacement in Propeller Shaft.
- Install the exhaust intermediate pipe.
- Lower the vehicle.
- Remove the cap from the engine compartment fuel feed pipe.
- Connect the chassis fuel and EVAP pipe retainer (1) at the upper front of dash mounting stud (3).
- Connect the fuel feed hose (2) to the chassis fuel feed pipe (3). Refer to Metal Collar Quick Connect Fitting Service .
- Tighten the fuel filler cap.
- Connect the negative battery cable.
- Perform the following procedure in order to inspect for leaks:
- Install the left fuel rail cover.
- Program the transmitters. Refer to Transmitter Programming in Keyless Entry.



Tighten
Tighten the fuel filter or the pressure regulator bracket nut to 5.0 N·m
(44 lb in).


Tighten
Tighten the fuel and EVAP pipe retainer nut to 6 N·m (53 lb in).

| 14.1. | Turn the ignition switch ON for 2 seconds. |
| 14.2. | Turn the ignition switch OFF for 10 seconds. |
| 14.3. | Turn the ignition switch ON. |
| 14.4. | Inspect for fuel leaks. |
