Tools Required
J 41364-A Park/Neutral Position Switch Aligner
Removal Procedure
- Raise and suitably support the vehicle. Refer to Lifting and Jacking the Vehicle in General Information.
- Remove the intermediate exhaust pipe and allow the LH muffler assembly to hang down out of the way. Refer to Catalytic Converter Replacement in Engine Exhaust.
- Shift the transmission into NEUTRAL.
- Remove the nuts retaining the transmission shift control cable bracket to the transmission.
- CAREFULLY release the shift control cable end clip from the transmission shift lever stud.
- Reposition the transmission shift cable and bracket.
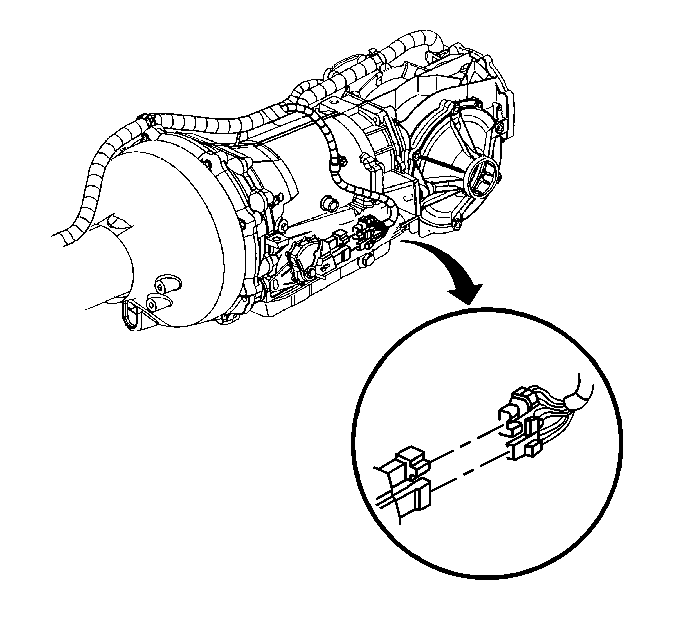
- Disconnect the park/neutral position switch electrical connectors.
- Using a wrench on the transmission manual shaft wrench flats (in order to keep the shaft from turning), remove the range selector (shift) lever retaining nut.
- Remove the range selector (shift) lever.
- Check that the transmission is still in NEUTRAL.
- Remove the park/neutral position switch mounting bolts.
- Slide the switch off of the manual shaft.
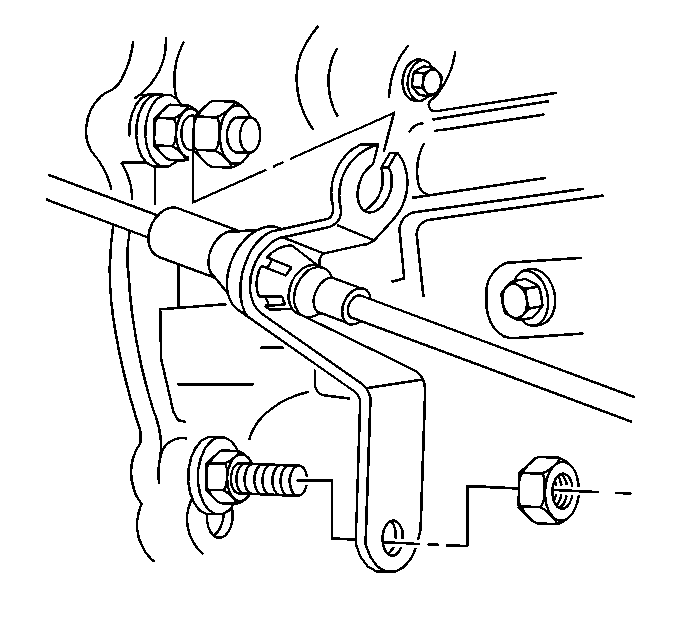
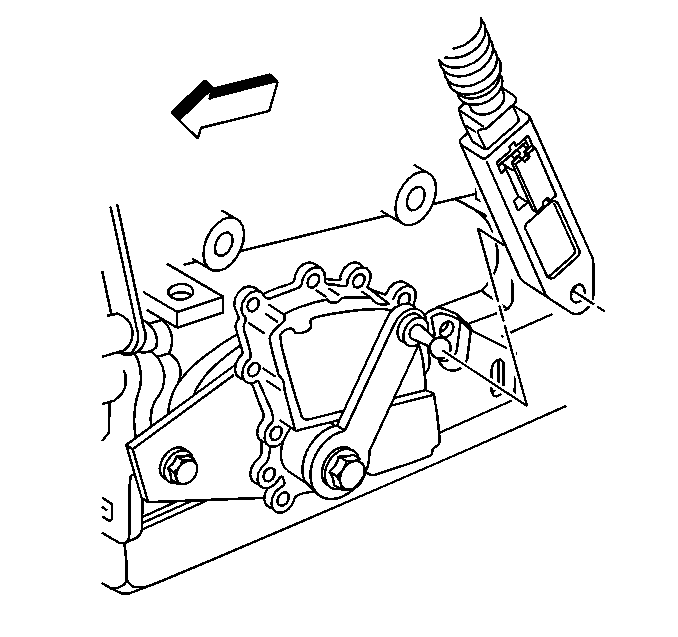
Important: Use care to not suddenly jerk the shift control cable during disassembly, the shift control cable rod end guide tubes are EXTREMELY INFLEXIBLE and capable of only a SLIGHT bend.
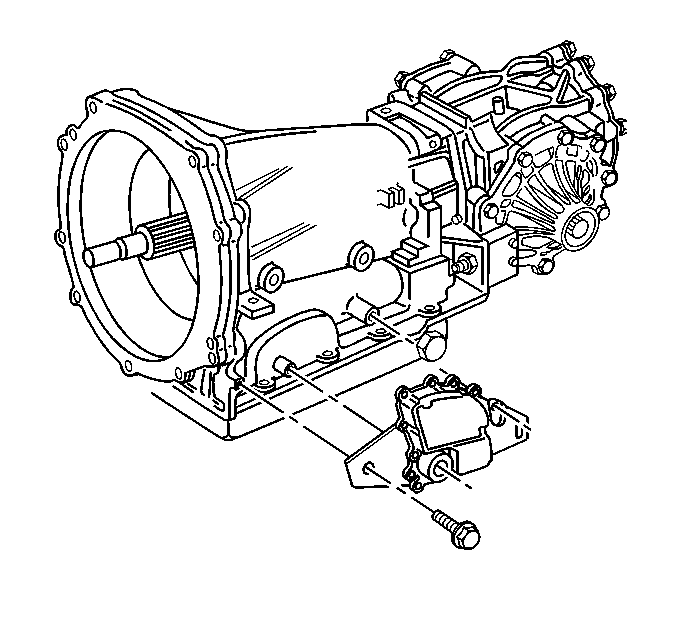
Installation Procedure
- Install the J 41364-A to the park/neutral position switch.
- Check that the transmission is still in NEUTRAL.
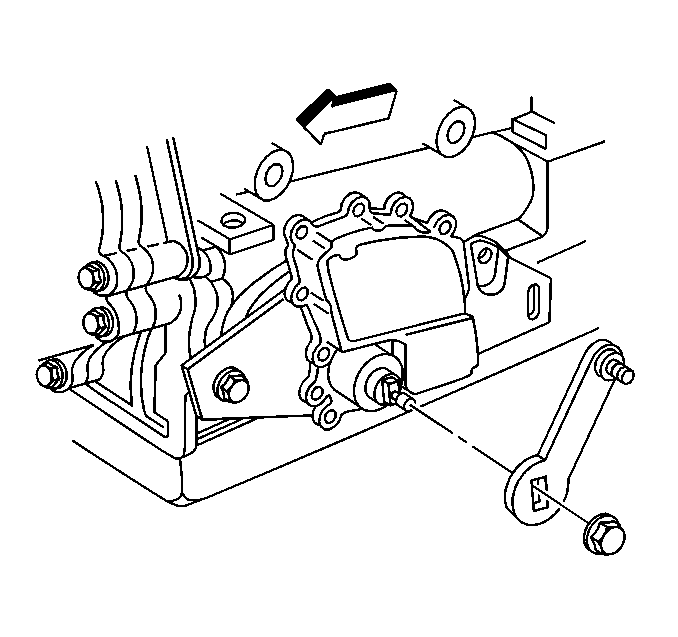
- Install the park/neutral position switch to the transmission manual shaft.
- Install the park/neutral position switch mounting bolts.
- Remove the J 41364-A from the switch.
- Install the transmission range selector (shift) lever onto the transmission manual shaft.
- Using a wrench on the transmission manual shaft wrench flats (in order to keep the shaft from turning), install the range selector (shift) lever retaining nut.
- Connect the park/neutral position switch electrical connectors.
- Install the transmission shift control cable and bracket into position.
- Align the shift control cable end to the transmission shift lever stud.
- CAREFULLY secure the shift control cable end clip to the transmission shift lever stud.
- Install the nuts retaining the transmission shift control cable bracket to the transmission.
- Install the intermediate exhaust pipe. Refer to Catalytic Converter Replacement in Engine Exhaust.
- Shift the transmission into PARK.
- Lower the vehicle.
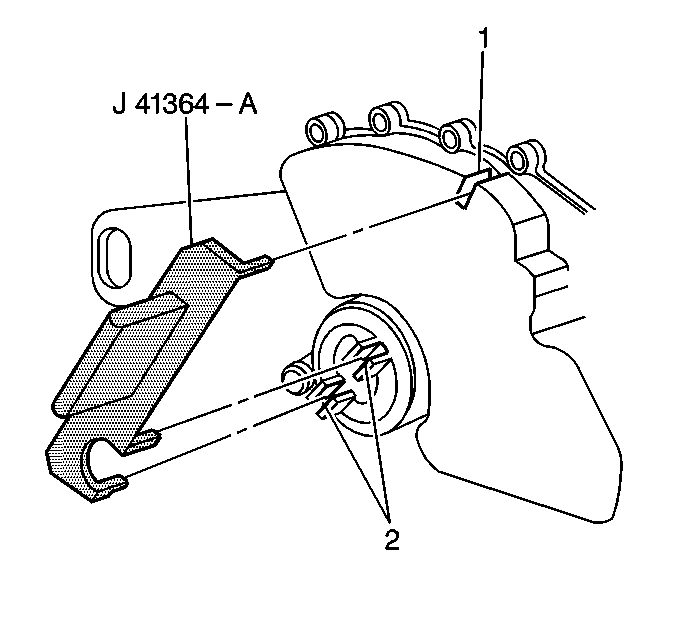
| 1.1. | Align the two lower slots on the switch (2) with the two lower tabs on the J 41364-A . |
| 1.2. | Rotate the tool until the upper pin on the tool is lined up with the slot on the top of the switch (1). |

Important: Do not remove the J 41364-A from the park/neutral position switch until instructed.
| 3.1. | Align the flats in the switch hub with the flats on the manual shaft. |
| 3.2. | Slide the switch onto the transmission manual shaft until the switch mounting bracket contacts the mounting bosses on the transmission case. |
Notice: Use the correct fastener in the correct location. Replacement fasteners must be the correct part number for that application. Fasteners requiring replacement or fasteners requiring the use of thread locking compound or sealant are identified in the service procedure. Do not use paints, lubricants, or corrosion inhibitors on fasteners or fastener joint surfaces unless specified. These coatings affect fastener torque and joint clamping force and may damage the fastener. Use the correct tightening sequence and specifications when installing fasteners in order to avoid damage to parts and systems.
Tighten
Tighten the park/neutral position switch mounting bolts to 27 N·m
(20 lb ft).

Be sure to install the shift lever in an upright orientation.
Tighten
Tighten the transmission range selector lever nut to 20 N·m
(15 lb ft).


Important: Use care to not suddenly jerk the shift control cable during assembly, the shift control cable rod end guide tubes are EXTREMELY INFLEXIBLE and capable of only a SLIGHT bend.

Tighten
Tighten the transmission shift control cable bracket retaining nuts
to 20 N·m (15 lb ft).
