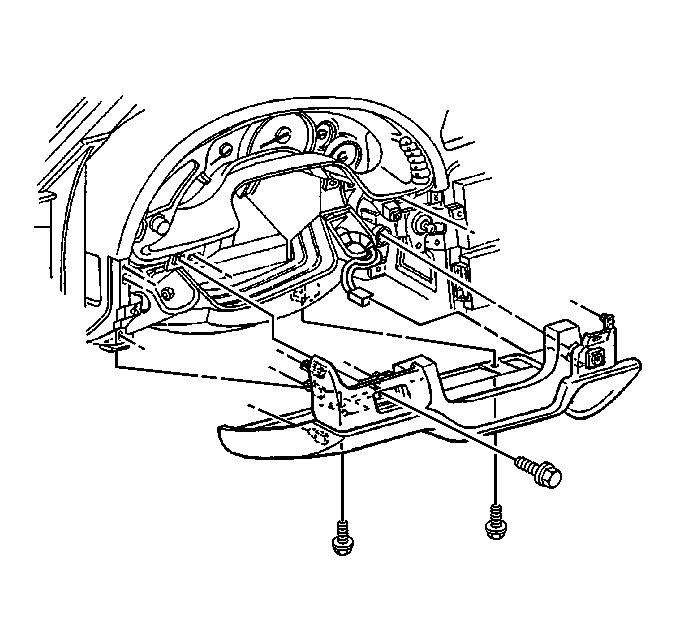
For 1990-2009 cars only
Steering Column Trim Cover Replacement Telescoping
Removal Procedure
- Disable the SIR system. Refer to SIR Disabling and Enabling in SIR.
- Remove the steering wheel from the steering column. Refer to Steering Wheel Replacement .
- Remove the tilt lever from the steering column. Refer to Tilt Lever Replacement .
- Remove the driver knee bolster trim panel. Refer to Driver Knee Bolster Panel Replacement in Instrument Panel, Gages and Console.
- Remove the 2 TORX® head screws from the lower trim cover.
- Separate the lower trim cover tabs from the slots in the steering column close out trim cover.
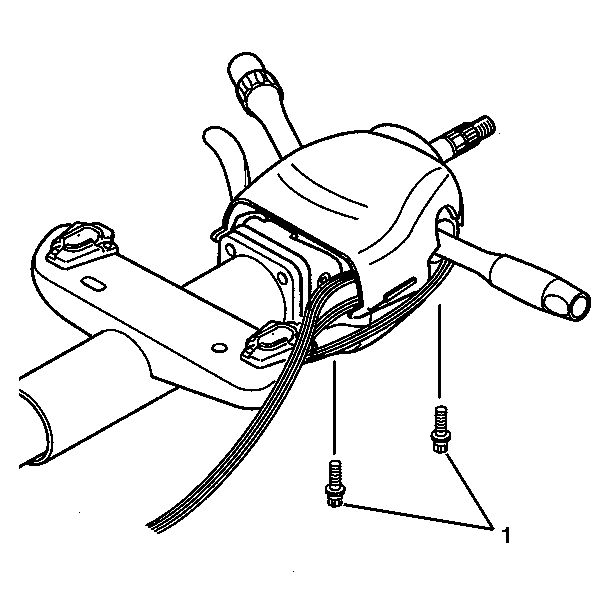
- Remove the switch wires from the telescope motor assembly, which are routed in clips along the bottom of the lower trim cover.
- From the inside of the lower trim cover, push out the telescope motor assembly switch.
- Disconnect the assembly switch connector from the instrument panel wiring harness.
- Remove the telescope motor assembly switch and wires from the trim cover.
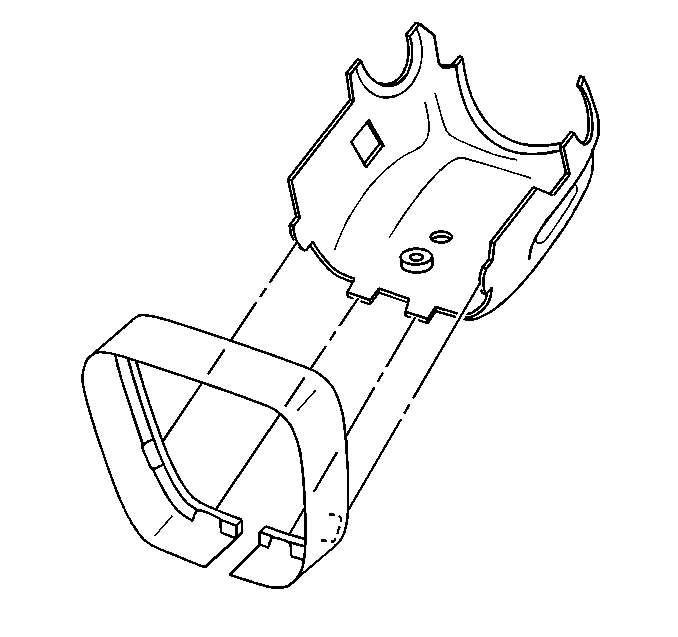
- Remove the lower trim cover.
- Remove the 2 TORX® head screws (2) from the upper trim cover (1).
- Separate the upper trim cover tabs from the slots in the steering column close out trim cover.
- Remove the upper trim cover (1).

Installation Procedure
- Install the upper trim cover to the steering column close out trim cover.
- Verify that the tabs on the upper trim cover are fully engaged with the slots in the steering column close out trim cover.
- Secure the upper trim cover (1) with 2 TORX® head screws (2).
- Install the telescope motor assembly switch and wires thorough the opening in the lower trim cover.
- Snap the wiring to the retaining clips in the lower trim cover.
- Route the switch wires to the telescope motor assembly along the column. Strap the wires.
- Connect the assembly switch connector to the instrument panel wiring harness.
- Install the lower trim cover tabs into the steering column close out trim cover.
- Verify that the tabs on the lower trim cover are fully engaged with the slots in the steering column close out trim cover.
- Install the 2 TORX® head screws (1) to the lower trim cover.
- Install the driver knee bolster trim panel. Refer to Driver Knee Bolster Panel Replacement in Instrument Panel, Gages and Console.
- Install the tilt lever. Refer to Tilt Lever Replacement .
- Install the steering wheel. Refer to Steering Wheel Replacement .
- Enable the SIR system. Refer to SIR Disabling and Enabling in SIR.
Notice: Refer to Fastener Notice in the Preface section.
Tighten
Tighten the screws to 1.5 N·m (13 lb in).
Tighten
Tighten the screws to 4 N·m (35 lb in).
Steering Column Trim Cover Replacement Manual
Removal Procedure
- Disable the SIR system. Refer to SIR Disabling and Enabling in SIR.
- Remove the steering wheel from the steering column. Refer to Steering Wheel Replacement .
- Remove the tilt lever from the steering column. Refer to Tilt Lever Replacement .
- Remove the driver knee bolster trim panel. Refer to Driver Knee Bolster Panel Replacement in Instrument Panel, Gages and Console.
- Remove the 2 TORX® head screws from the lower trim cover.
- Perform the following steps to remove the lower trim cover:
- Remove the 2 TORX® head screws (2) from the upper trim cover (1).
- Remove the upper trim cover (1).
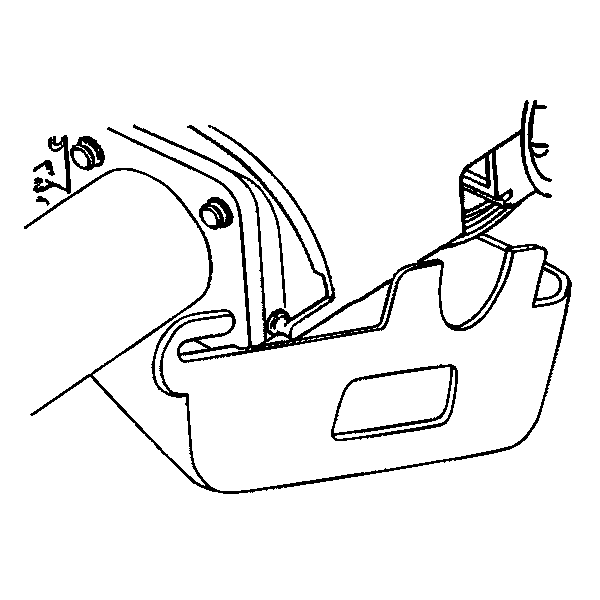
| 6.1. | Tilt the trim cover down. |
| 6.2. | Slide the lower trim cover back to disengage from the upper trim cover. |
Installation Procedure
- Install the upper trim cover.
- Secure the upper trim cover (1) with 2 TORX® head screws (2).
- Perform the following steps to install the lower trim cover:
- Install the 2 TORX® head screw (1) to the lower trim cover.
- Install the driver knee bolster trim panel. Refer to Driver Knee Bolster Panel Replacement in Instrument Panel, Gages and Console.
- Install the tilt lever. Refer to Tilt Lever Replacement .
- Install the steering wheel. Refer to Steering Wheel Replacement .
- Enable the SIR system. Refer to SIR Disabling and Enabling in SIR.
Notice: Refer to Fastener Notice in the Preface section.
Tighten
Tighten the screws to 1.4 N·m (12 lb in).
| 3.1. | Verify that the slots on the lower trim cover engage with the tabs on the upper trim cover. |
| 3.2. | Tilt the lower trim cover up and snap the trim covers together. |
Tighten
Tighten the screws to 4 N·m (35 lb in).
