For 1990-2009 cars only
Removal Procedure
- Remove the I/P upper trim pad. Refer to Instrument Panel Upper Trim Pad Replacement in Instrument Panel, Gages and Console.
- Disconnect the RH side window defogger lower outlet duct from the windshield defroster duct, then reposition the side window defogger duct forward.
- Disconnect the vacuum harness connectors from the defroster actuator.
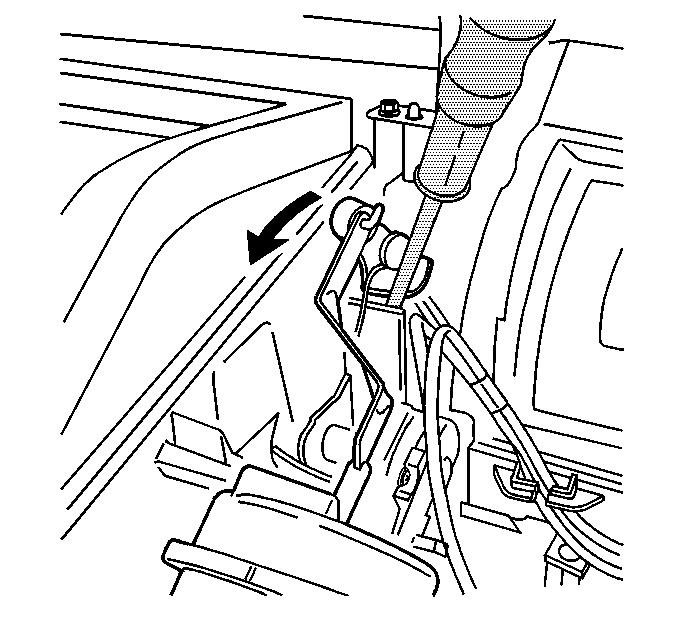
- Rotate the defrost door lever fully rearward/counterclockwise, then carefully insert a flat bladed tool between the bottom of the defrost door lever and the protruding wall of the HVAC module case below the door lever in order to keep the door lever in place.
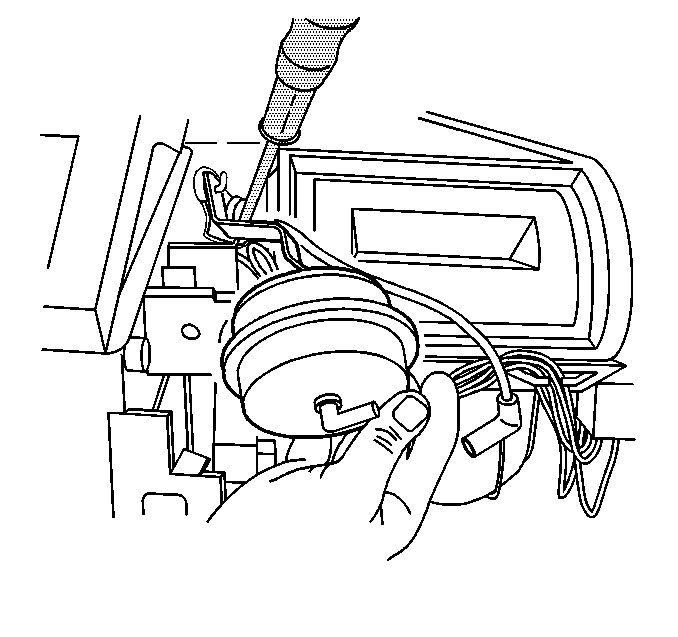
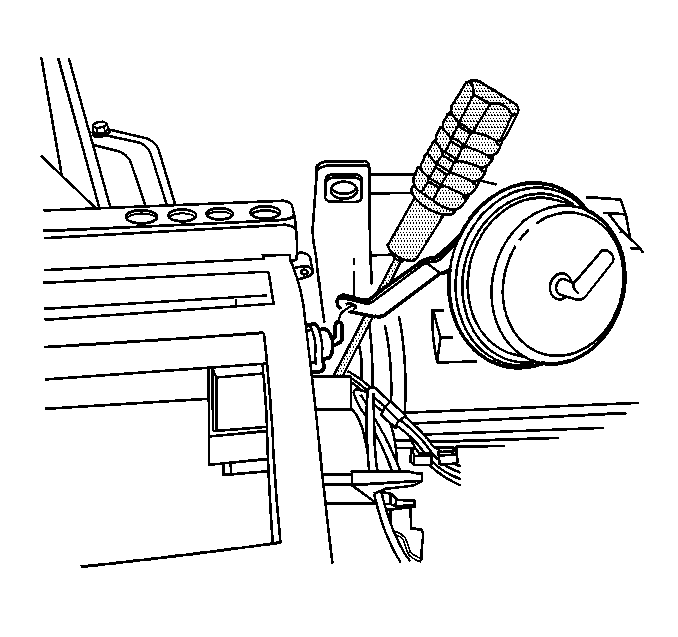
- Lift to release the defroster actuator retaining tab and begin to slide the actuator toward the passenger SIR bracket.
- Carefully rotate the actuator upward and forward until the actuator clears the passenger SIR bracket.
- Disconnect the actuator pushrod from the defrost door lever and remove the actuator.


Installation Procedure
- Connect the defroster actuator pushrod to the defrost door lever.
- Position the actuator along side of the passenger SIR bracket in line with the mounting pins on the HVAC module case.
- Carefully rotate the actuator past the passenger SIR bracket, rearward and downward, until the actuator slots align with the HVAC module mounting pins.
- Inspect that the actuator pushrod is not binding on the defrost door lever.
- Push the actuator toward the HVAC module case to secure the retaining tab.
- Remove the flat bladed tool maintaining the defrost door lever in position.
- Connect the vacuum harness connectors to the defroster actuator.
- Position and connect the RH side window defogger lower outlet duct to the windshield defroster duct.
- Install the I/P upper trim pad. Refer to Instrument Panel Upper Trim Pad Replacement in Instrument Panel, Gages and Console.
- Recalibrate the actuators. Refer to Actuator Recalibration .


