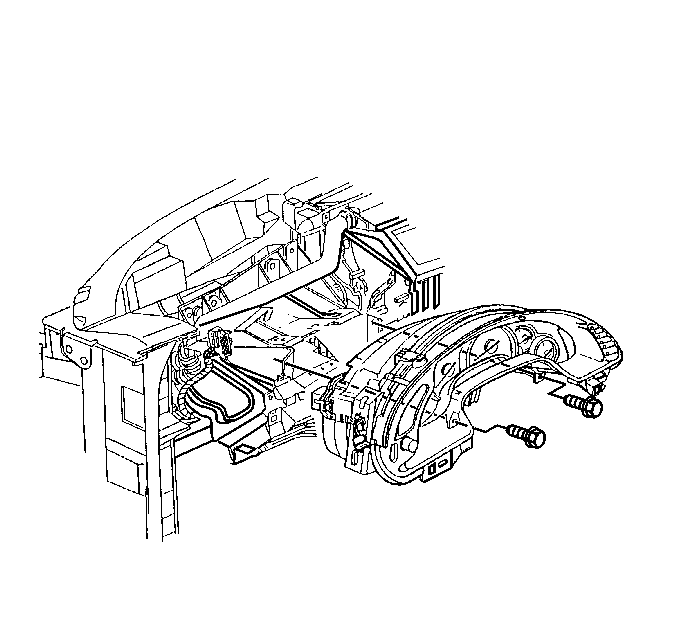
Removal Procedure
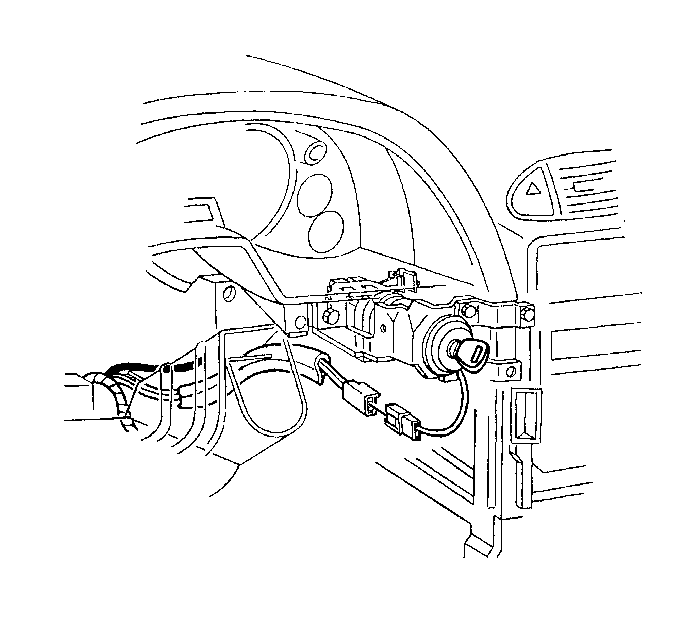
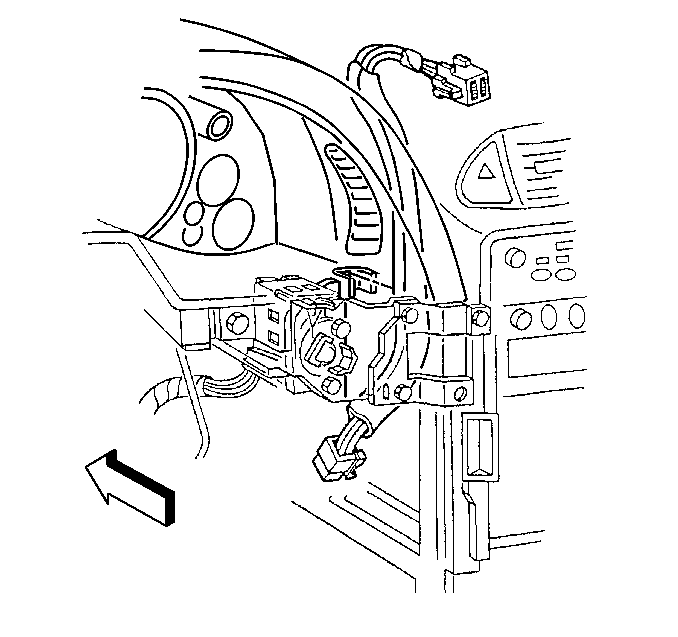
- Remove the I/P upper trim pad. Refer to Instrument Panel Upper Trim Pad Replacement in Instrument Panel, Gages and Console.
- Remove the instrument panel cluster (IPC) to steering column bracket retaining screws.
- Reposition the IPC to better access the inside air temperature sensor duct.
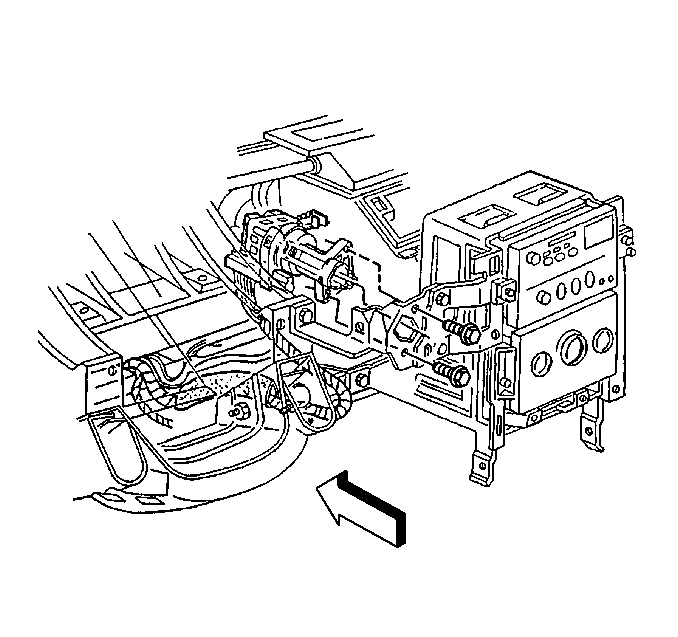
- Remove the inside air temperature sensor aspirator duct.
- Remove the driver knee bolster bracket. Refer to Driver Knee Bolster Panel Replacement in Instrument Panel, Gages and Console.
- Disconnect the ignition switch lock cylinder electrical connector from the retaining tab on the side of the ignition switch.
- Disconnect the lock cylinder electrical connector.
- Remove the ignition switch bezel.
- Remove the hazard warning switch wiring harness from the ignition switch retainer.
- Remove the ignition switch retaining bolts.
- Reposition the ignition switch downward.
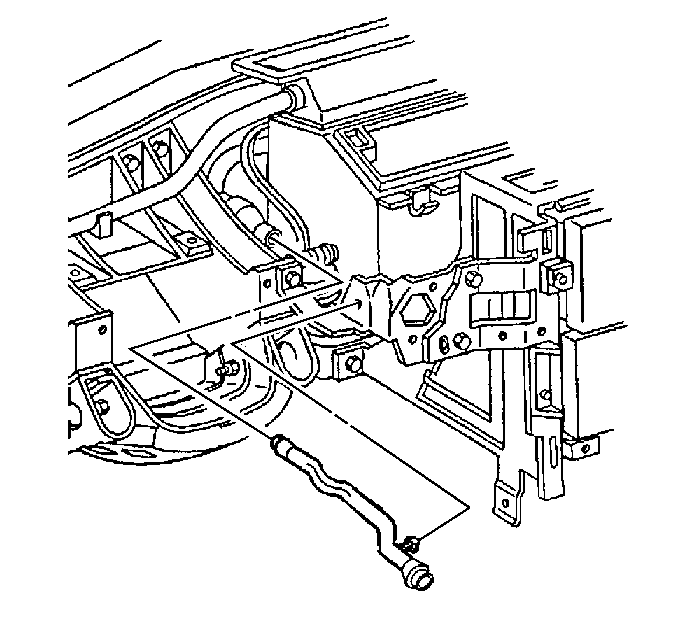
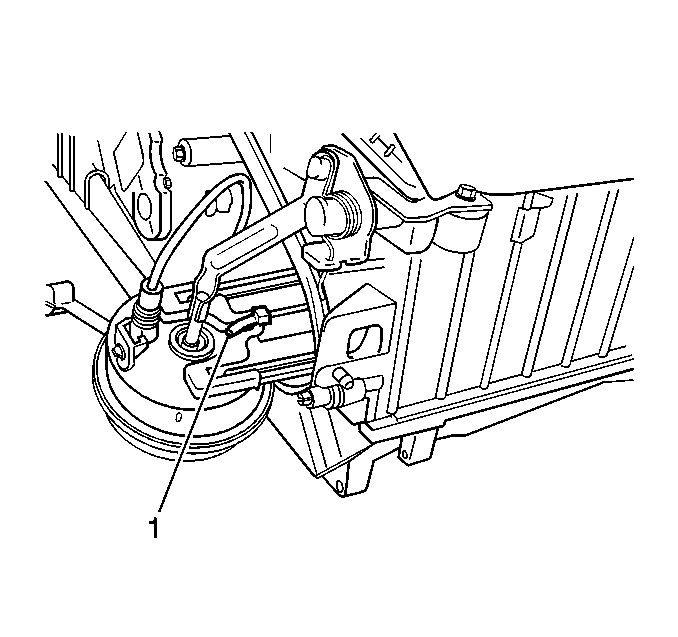
- Disconnect the vacuum harness connectors from the mode actuator.
- Cut and remove the adjustable plastic tie strap (1) from the base of the mode actuator.
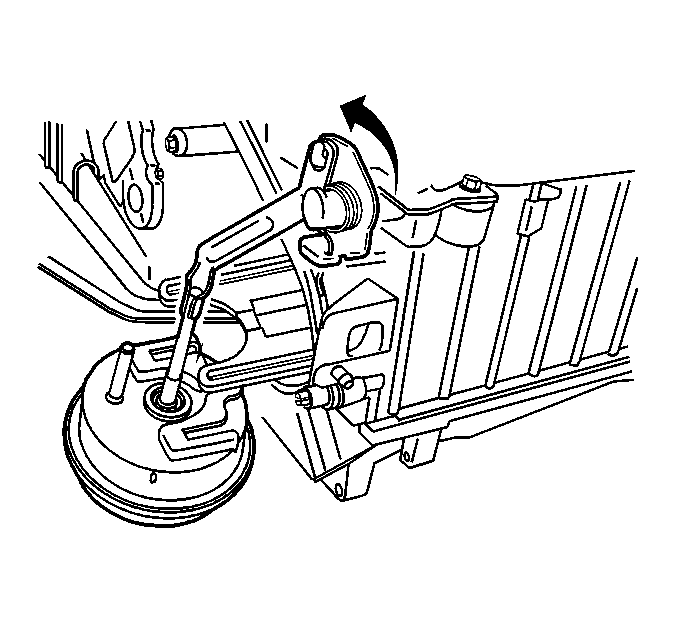
- Lift to release the mode actuator retaining tab and just begin to slide the actuator toward the steering column bracket.
- Remove the air distribution case cover screws.
- Remove the air distribution case cover with the mode actuator attached.
- Remove the mode actuator from the mode door lever.
| 4.1. | Depress the duct retaining tab and remove the duct from the ignition switch housing bracket. |
| 4.2. | Use a twisting motion to release the duct from the duct muffler. |
Important: Take note of how the ignition switch lock cylinder wire is wrapped around the base of the ignition switch bezel.
Carefully pull to unsnap.
Installation Procedure
- Connect the mode actuator pushrod to the mode door lever.
- Install the air distribution case cover with the mode actuator attached.
- Install the air distribution case cover screws.
- Position the pod of the mode actuator between the steering column bracket and the ignition switch housing bracket.
- Inspect that the actuator pushrod is not binding on the mode door lever.
- Push the actuator toward the HVAC module case to secure the retaining tab.
- Install a new adjustable plastic tie strap (1) to the base of the mode actuator.
- Connect the vacuum harness connectors to the mode actuator.
- Position the ignition switch to the ignition switch housing bracket.
- Install the ignition switch retaining bolts.
- Install the hazard warning switch wiring harness to the ignition switch retainer.
- Install the ignition switch bezel to the switch.
- Connect the lock cylinder electrical connector.
- Connect the lock cylinder electrical connector to the retaining tab on the side of the ignition switch.
- Install the driver knee bolster bracket. Refer to Driver Knee Bolster Panel Replacement in Instrument Panel, Gages and Console.
- Install the inside air temperature sensor aspirator duct.
- Install the IPC into position.
- Install the IPC to steering column bracket retaining screws.
- Install the I/P upper trim pad. Refer to Instrument Panel Upper Trim Pad Replacement in Instrument Panel, Gages and Console.
- Recalibrate the actuators. Refer to Actuator Recalibration .
Notice: Use the correct fastener in the correct location. Replacement fasteners must be the correct part number for that application. Fasteners requiring replacement or fasteners requiring the use of thread locking compound or sealant are identified in the service procedure. Do not use paints, lubricants, or corrosion inhibitors on fasteners or fastener joint surfaces unless specified. These coatings affect fastener torque and joint clamping force and may damage the fastener. Use the correct tightening sequence and specifications when installing fasteners in order to avoid damage to parts and systems.
Tighten
Tighten the screws to 1.6 N·m (14 lb in).
Tighten
Tighten the bolts to 5.5 N·m (49 lb in).
| 12.1. | Wrap the ignition switch lock cylinder wire around the base of the ignition switch bezel, as noted during removal. |
| 12.2. | Align the bezel slots to the lock cylinder pins, then push to secure. |
| 16.1. | Use a twisting motion to secure the duct to the duct muffler. |
| 16.2. | Install the duct retaining tab to the ignition switch housing bracket. |
Tighten
Tighten the screws to 3.5 N·m (31 lb in).
