Pressure Link- Five Bow Pressure on Stowage Lid
Adjust the lower pressure link to change the #5 bow pressure to the stowage compartment lid.
| • | Decrease the pressure if the top material is contacting and marring the lid. |
| • | Increase the pressure if water is leaking between the top and the lid. |
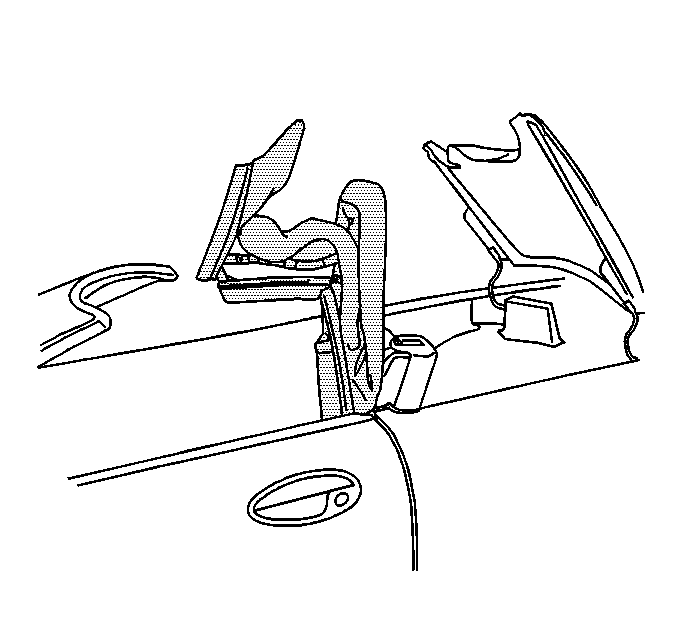
- Position the folding top with the #1 bow and the #5 bow up.
- Loosen the jam nut (1) on the pressure link where the adjuster attaches to the #5 bow.
- Mark the pressure link large adjustment nut (2) to aid in determining the amount of adjustment.
- Adjust the pressure link by rotating the large adjustment nut one turn at a time.
- Raise the top.
- Check the gap between the lid (2) and the #5 bow top cover material (1).
- Check the alignment of the front latch pins (2) with their receivers (3).
- Lower the top and re-adjust the pressure link as necessary.
- Position the folding top with the #1 bow and the #5 bow up.
- Tighten the jam nut.
- Raise and close the folding top.
- Water test the folding top. Refer to Waterleak Test Preparation in Waterleaks.
- Re-adjust the pressure link if necessary.
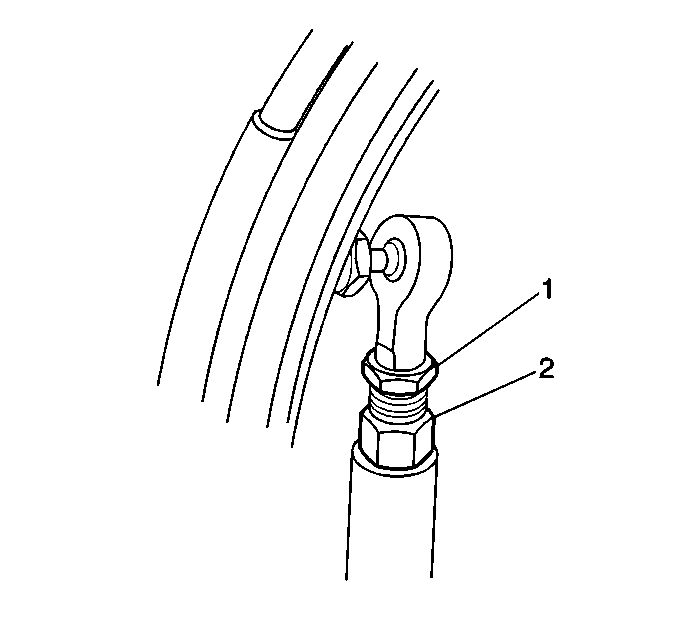
Important: The jam nuts are left handed thread.
Rotate the nut clockwise to increase the downward pressure of the #5 bow on the stowage lid. Turn the nut counter clockwise to decrease the downward pressure.
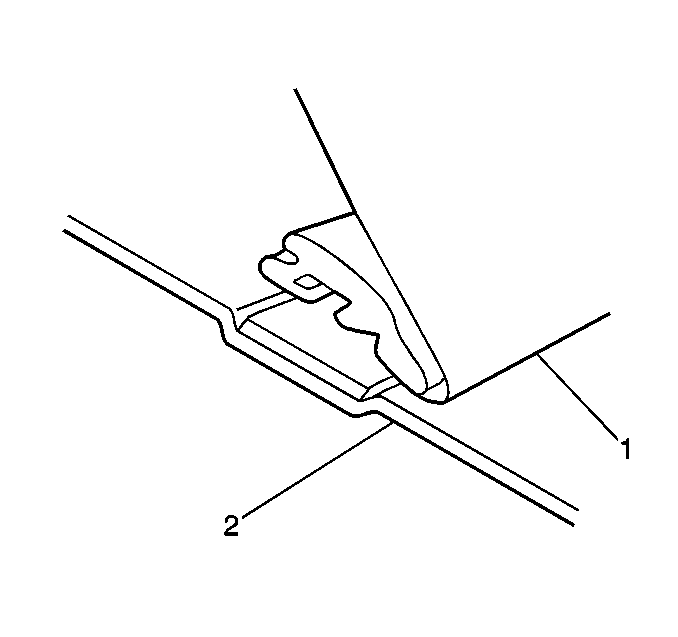
The gap between the lid and the top material should be 2-3 mm (0.08-0.12 in).
The gap between the five bow top material and the lid should be the same all the way across.
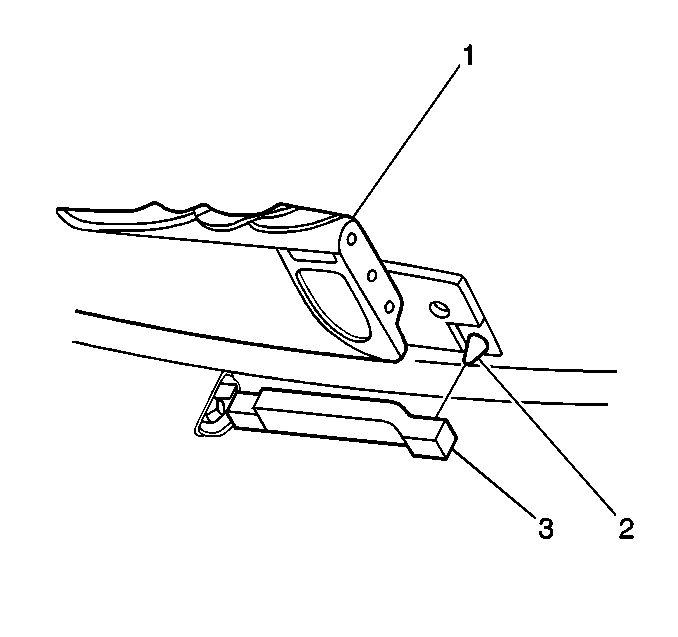
The front latch pins should be aligned so that when the top is raised the pins drop into the receivers.

Notice: Use the correct fastener in the correct location. Replacement fasteners must be the correct part number for that application. Fasteners requiring replacement or fasteners requiring the use of thread locking compound or sealant are identified in the service procedure. Do not use paints, lubricants, or corrosion inhibitors on fasteners or fastener joint surfaces unless specified. These coatings affect fastener torque and joint clamping force and may damage the fastener. Use the correct tightening sequence and specifications when installing fasteners in order to avoid damage to parts and systems.
Tighten
Tighten the nut to 50 N·m (37 lb ft).
Side Rail-Top of Door Window Contacting Top Fabric
To eliminate the top center of the window from hooking under the roof material adjust the knurled nut between the front and center side rails to increase the amount of bow in the side of the top.
- Position the top with the #1 and #5 bow up.
- Adjust the knurled nut outward to increase the bow in the roof.
- Raise the top and check the window clearance.
- Lower and re-adjust the top using the knurled nut as necessary.
- Raise and close the folding top.
- Water test the folding top. Refer to Waterleak Test Preparation in Waterleaks.
- Adjust the window if necessary. Refer To Door Window Tip-In Adjustment in Doors.

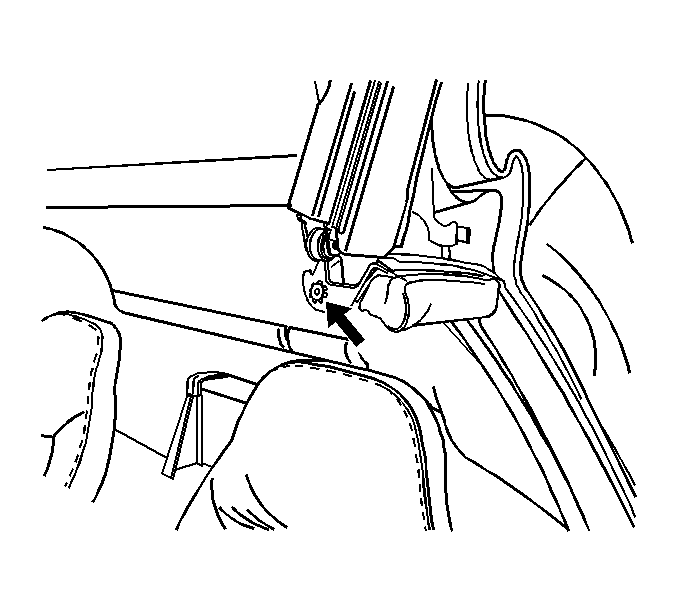
The window, in a full up position, should not contact the top material when opening and closing the door.
Rear Side Rail-Loose Fabric
To tighten the roof material, adjust the rear side rail rearward.
- Lower the folding top.
- Open the small cover/door on top of the lock pillar to access the adjuster.
- Loosen the adjuster jam nut.
- Mark the adjuster nut to aid in determining the amount of adjustment.
- Loosen the adjuster nut one turn at a time.
- Raise the top and check the top material for tightness.
- Check the alignment of the front latch pins (2) with their receivers. The front latch pins should be aligned so that when the top is raised the pins drop into the receivers.
- Lower and re-adjust the top using the adjuster as necessary.
- Tighten the jam nut.
- Water test the folding top. Refer to Waterleak Test Preparation in Waterleaks.
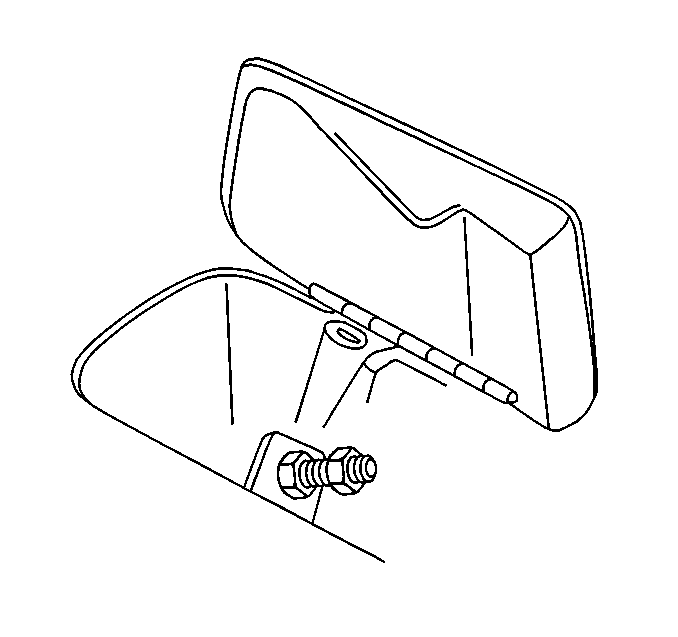


Notice: Use the correct fastener in the correct location. Replacement fasteners must be the correct part number for that application. Fasteners requiring replacement or fasteners requiring the use of thread locking compound or sealant are identified in the service procedure. Do not use paints, lubricants, or corrosion inhibitors on fasteners or fastener joint surfaces unless specified. These coatings affect fastener torque and joint clamping force and may damage the fastener. Use the correct tightening sequence and specifications when installing fasteners in order to avoid damage to parts and systems.
Tighten
Tighten the nut to 50 N·m (37 lb ft).
