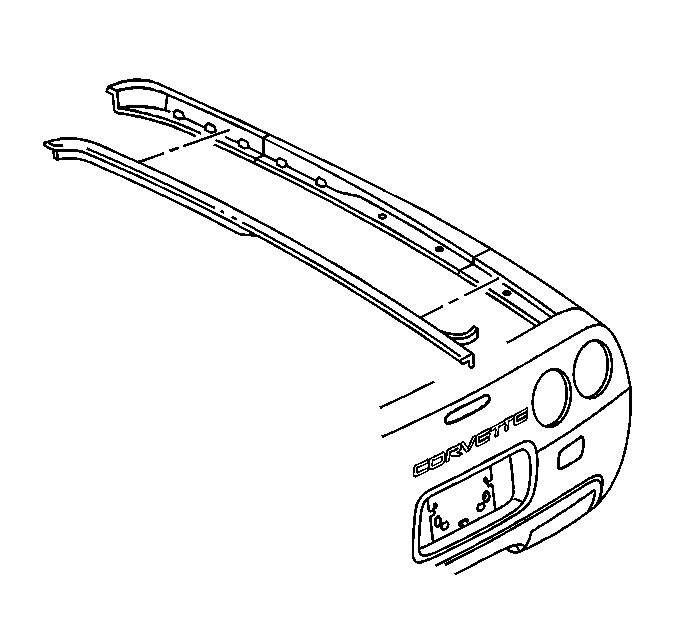
Rear Quarter Panel Replacement Coupe
Removal Procedure
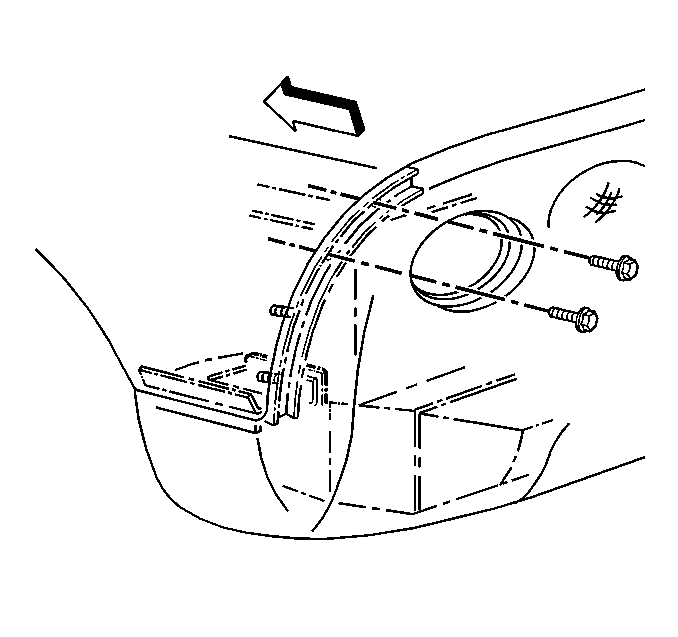
- Remove the outer taillamp (to gain access to the fascia mounting bolts).
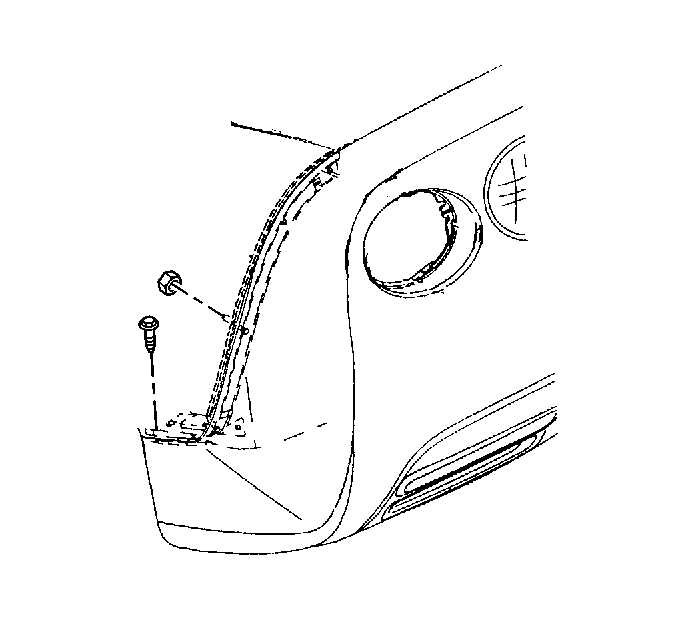
- Remove the bolts attaching the fascia to the quarter panel.
- Remove the tire and wheel. Refer to Tire and Wheel Removal and Installation in Tires and Wheels.
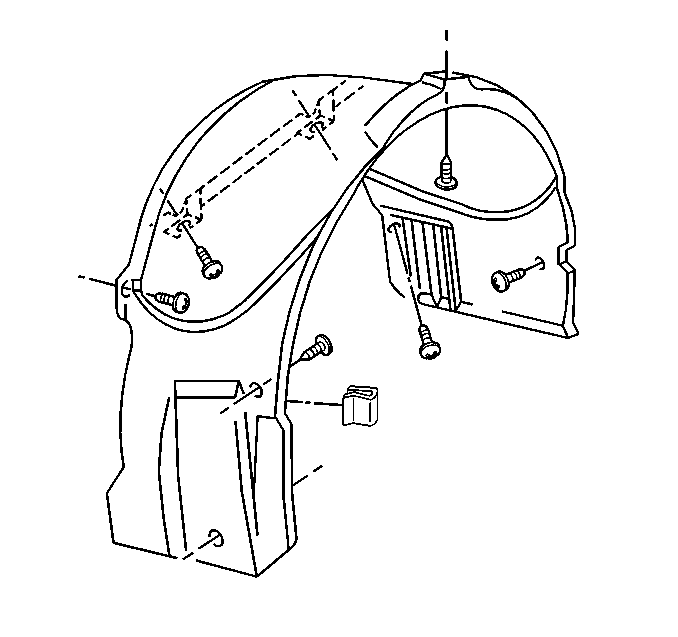
- Remove the bolts attaching the rear wheelhouse liner panel.
- Remove the wheelhouse liner panel.
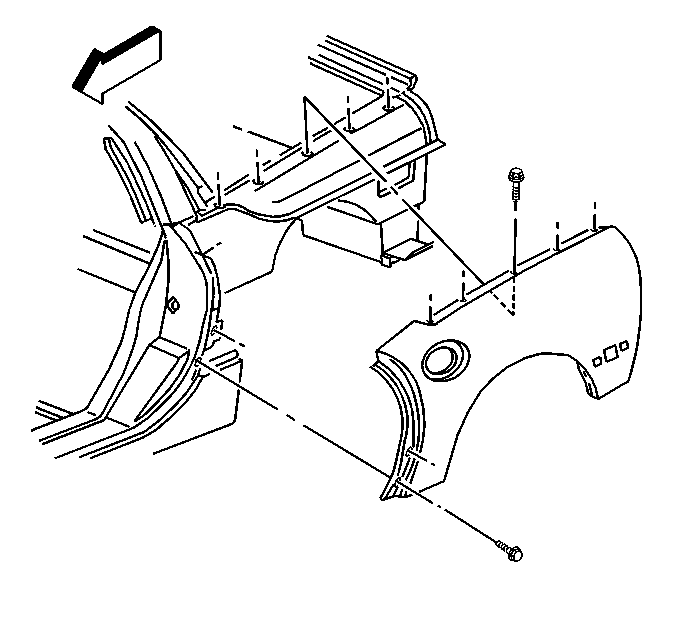
- Remove the bolts attaching the quarter panel to the rear compartment brace.
- Remove the side marker lamp socket from the lamp.
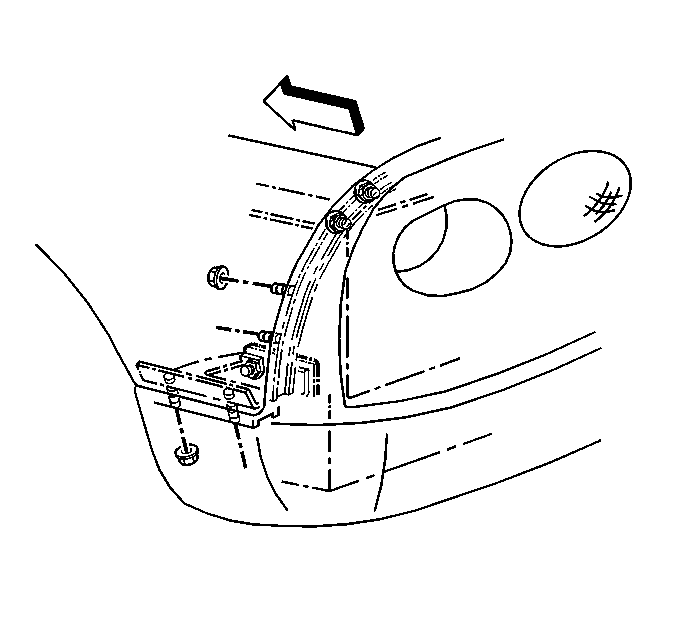
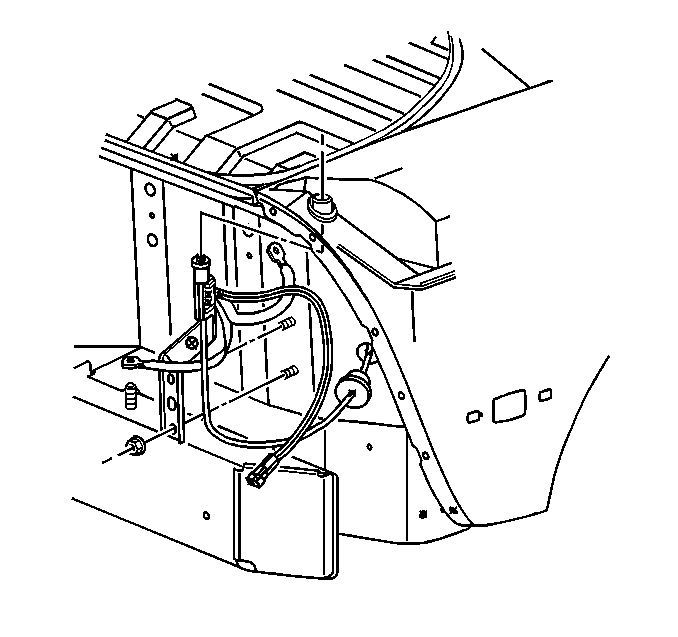
- Remove the nuts attaching the quarter panel to the fascia reinforcement studs.
- Remove the screws attaching the quarter panel to the door lock pillar.
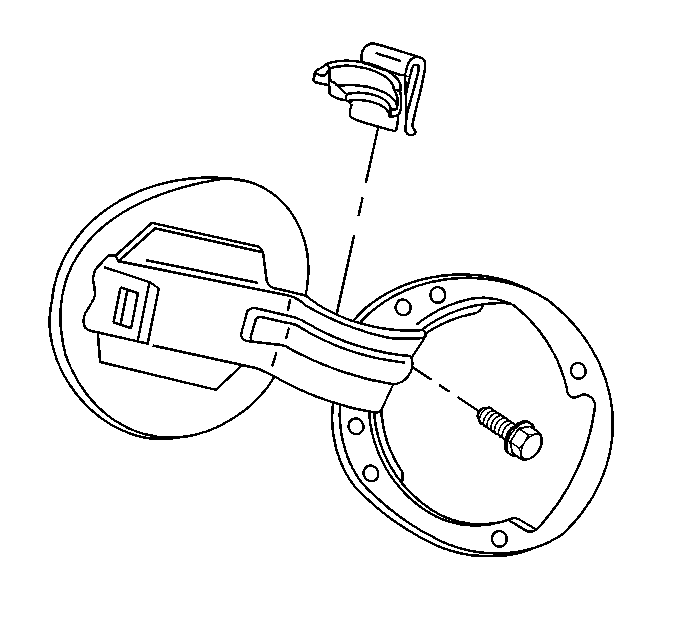
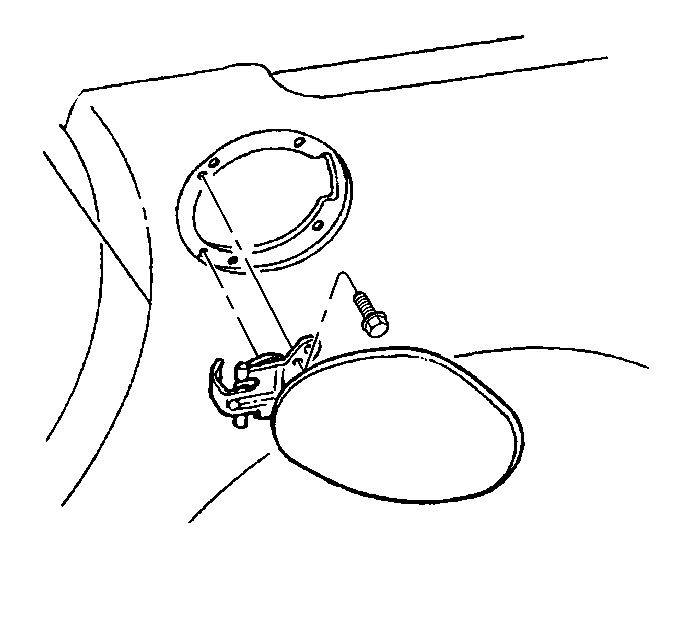
- Open the fuel door, remove the bolt mounting the fuel door to the inner body panel (driver's side only).
- Remove the gas cap tether strap from the fuel door (drivers side only).
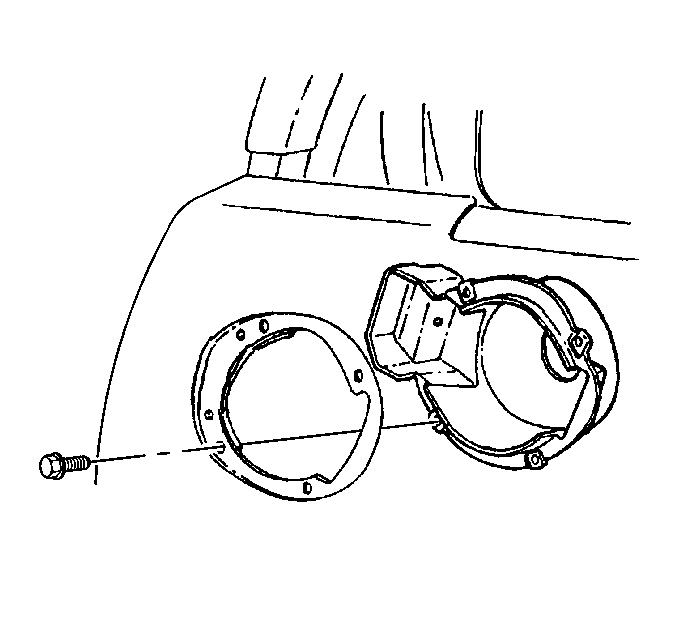
- Remove the screws attaching the quarter panel and the fuel door to the fuel pocket (drivers side only).
- Remove the fuel door (drivers side only).
- Remove the screws attaching the quarter panel to the rear compartment panel.
- Remove the quarter panel.
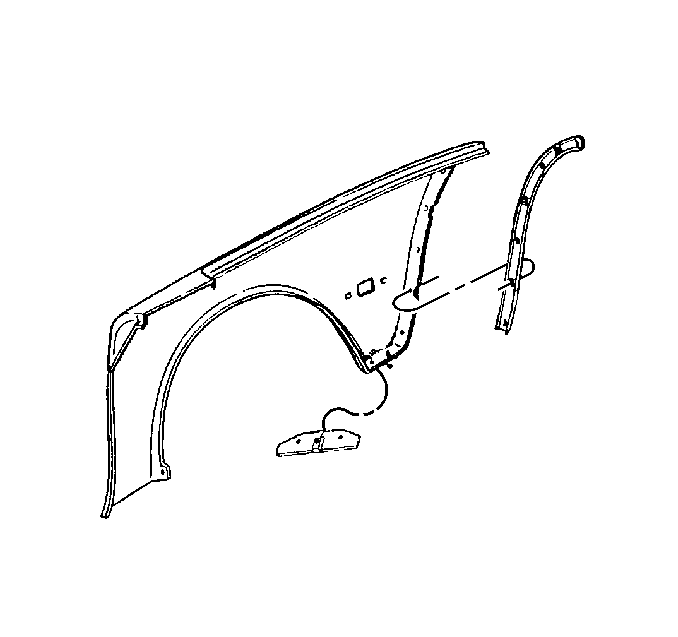
- Transfer parts as necessary (the retainer snaps to the inside of the rear flange of the quarter panel).

Installation Procedure
- Install the snap-in retainers to the rear of the quarter panel.
- Position the quarter panel to the vehicle aligning the forward hole in the quarter panel upper flange to the forward hole in the rear compartment panel.
- Loosely start a screw in the upper flange forward hole (the forward hole aligns the quarter panel fore and aft).
- Loosely start a screw in the upper flange rearward hole (the rearward hole aligns the quarter panel side to side).
- Install the screws in the remaining upper flange holes.
- Tighten the screws.
- Install the screws attaching the quarter panel to the door lock pillar.
- Install the bolts attaching the quarter panel to the rear compartment brace.
- Install the nuts attaching the quarter panel to the fascia.
- Position the fuel door in the fuel pocket (drivers side only).
- Install the bolt attaching the fuel filler door to inner body panel (drivers side only).
- Install the screws attaching the fuel door and quarter panel to the fuel pocket (drivers side only).
- Install the screws attaching the quarter panel to the fuel pocket (drivers side only).
- Install the bolts attaching the fascia to the quarter panel.
- Install the side marker lamp socket to the side marker lamp.
- Install the outer taillamp.
- Install the upper outer bolt attaching the wheelhouse liner panel.
- Install the remaining upper bolts.
- Position the lower front corner of the wheelhouse liner panel behind the door opening finish panel and install the attaching bolt.
- Install the remaining bolts attaching the wheelhouse liner panel.
- Install the tire and wheel. Refer to Tire and Wheel Removal and Installation in Tires and Wheels.

Notice: Use the correct fastener in the correct location. Replacement fasteners must be the correct part number for that application. Fasteners requiring replacement or fasteners requiring the use of thread locking compound or sealant are identified in the service procedure. Do not use paints, lubricants, or corrosion inhibitors on fasteners or fastener joint surfaces unless specified. These coatings affect fastener torque and joint clamping force and may damage the fastener. Use the correct tightening sequence and specifications when installing fasteners in order to avoid damage to parts and systems.
| 6.1. | Tighten the forward screw first. |
| 6.2. | Tighten the rearward screw second. |
| 6.3. | Tighten the remaining screws from the rear forward. |
Tighten
Tighten the quarter panel upper flange screws to 3 N·m
(27 lb in).
Tighten
Tighten the quarter panel to door lock pillar screws to 3 N·m
(27 lb in).

Tighten
Tighten the quarter panel to the rear compartment brace bolts to 5 N·m
(44 lb in).
Tighten
Tighten the quarter panel to fascia nuts to 10 N·m (89 lb in).

Tighten
Tighten the fuel filler door bolt to 2 N·m (18 lb in).

Tighten
Tighten the fuel door to quarter panel screws to 2 N·m
(18 lb in).
Tighten
Tighten the fuel filler pocket screws to 2 N·m (18 lb in).

Tighten
Tighten the fascia to quarter panel bolts to 5 N·m (44 lb in).
Tighten
Tighten the taillamp mounting screws to 2 N·m (18 lb in).

Tighten
Tighten the wheelhouse liner panel bolts to 2 N·m
(17 lb in).
Rear Quarter Panel Replacement Hardtop
Removal Procedure
The hardtop coupe quarter panel will be severely damaged during this removal procedure and should be replaced. There are hidden quarter panel attaching screws under the hardtop roof that are hard to accessed without cutting the quarter panel.
| • | The two hidden drivers side quarter panel screws are located approximately 76 mm, (3 in) and 444 mm (17.5 in) rearward of the front of the quarter panel. |
| • | The three hidden passenger side quarter panel screws are located approximately 76 mm (3 in), 203 mm (8 in) and 444 mm (17.5 in) rearward of the front of the quarter panel. |
- Remove the tire and wheel. Refer to Tire and Wheel Removal and Installation in Tires and Wheels.
- Remove the wheelhouse liner panel.
- Remove the outer taillamp (to gain access to the fascia mounting bolts).
- Remove the bolts attaching the fascia to the quarter panel.
- Remove the bolts attaching the quarter panel to the rear compartment brace.
- Remove the nuts attaching the quarter panel to the fascia reinforcement studs.
- Remove the side marker lamp socket from the lamp.
- Remove the screws attaching the quarter panel to the door lock pillar.
- Open the fuel door, remove the bolt mounting the fuel door to the inner body panel (driver's side only).
- Remove the gas cap tether strap from the fuel door (drivers side only).
- Remove the screws attaching the quarter panel and the fuel door to the fuel pocket (drivers side only).
- Remove the fuel door (drivers side only).
- Open the rear compartment lid.
- Remove the screws attaching the quarter panel to the rear compartment panel.
- Remove the four closest fascia to surround screws.
- Remove the antenna (right side only).
- Install protective covers to the passenger and stowage compartments areas.
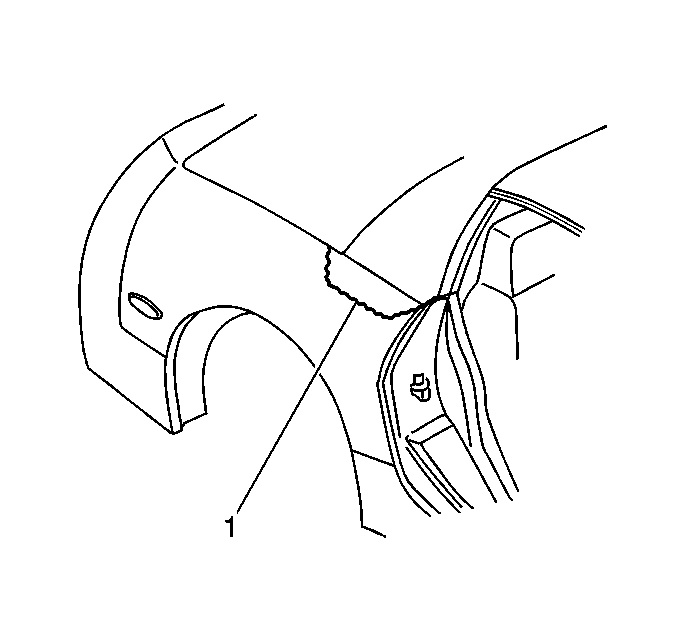
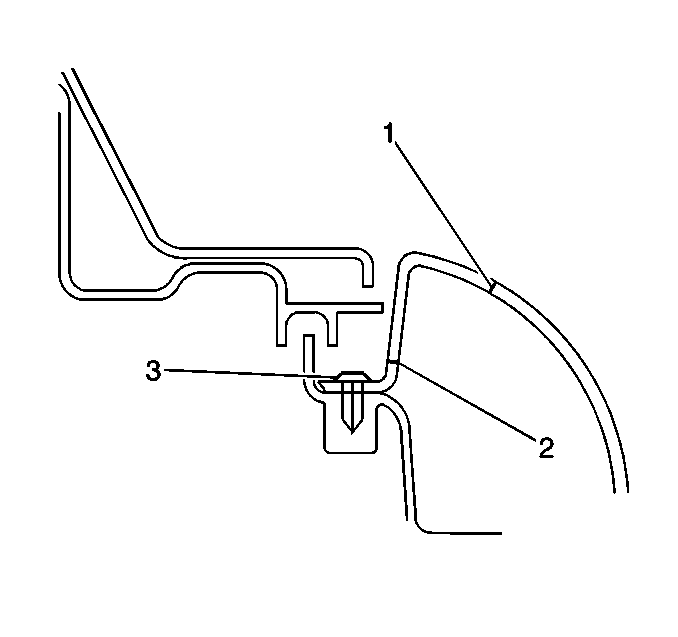
- Tape a cut line (1) on the quarter panel starting at the rear corner of the stowage compartment opening. Tape down about 75 mm (3 in) and then run the tape forward to a point about 50 mm (2 in) from the lock pillar, and then tape up to the lock pillar upper corner of the quarter panel.
- Protect the roof panel along the quarter panel with tape.
- Place a wedge between the quarter panel and the surround panel at the cut line.
- Place a wedge between the quarter panel and the lock pillar at the cut line.
- Cut the upper outer skin of the quarter panel along the marked cut line (1) being careful not to cut into the adjacent panels.
- Remove the quarter panel.
- Cut the quarter panel flange on a line (2) through the drain holes being care full to not cut into the surround panel.
- With a knife cut any butyl that is adhering to the quarter panel flange.
- Remove the flange. If it is necessary loosen the screws (3). Be sure and return the screws to their original position.
- Clean any butyl from the bonding surface.
- Transfer parts as necessary (the retainers snap to the inside of the quarter panel).



Installation Procedure
- Wash the bonding surface with soap and water.
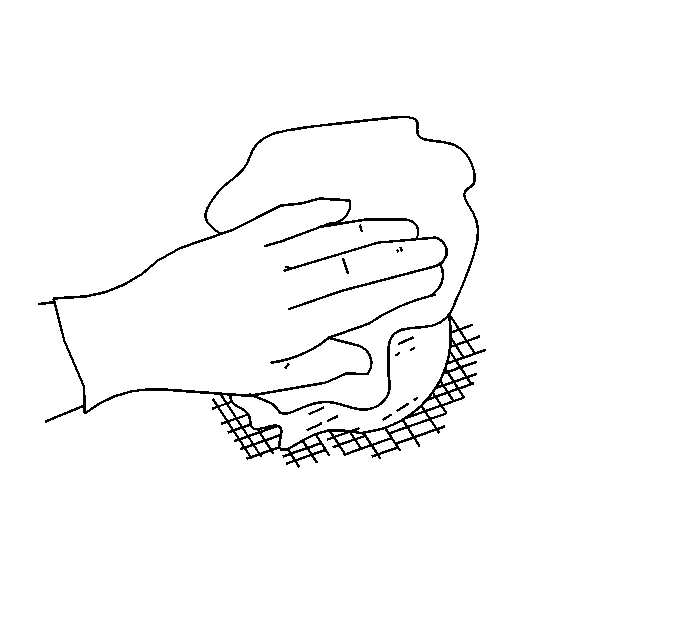
- Scuff sand the bonding surface with a 3M ™ Red Scotch Brite pad.
- Wipe with a clean cloth dampened with soap and water.
- Notch the new quarter panel at the screw holes so the quarter panel will slide snugly under the screws on the surround panel.
- Dry fit the quarter panel to the opening sliding the quarter panel under the screws.
- Remove the quarter panel.
- Follow the urethane manufactures instructions for preparing the surfaces before applying the urethane.
- Install a thin bead of windshield urethane, to the surround between the screws and two inches beyond the screws.
- Position the quarter panel to the vehicle aligning and setting the gap to the door.
- Install the screws attaching the quarter panel to the door lock pillar.
- Loosely start a screw in the upper flange rearward hole (the rearward hole aligns the quarter panel side to side).
- Set the gap to the stowage compartment lid.
- Install the screws in the remaining upper flange holes.
- Position the fuel door in the fuel pocket (drivers side only).
- Install the bolt attaching the fuel filler door to inner body panel (drivers side only).
- Install the screws attaching the fuel door and quarter panel to the fuel pocket (drivers side only).
- Install the antenna and antenna bezel. (right side only).
- Install the bolts attaching the quarter panel to the rear compartment brace.
- Install the nuts attaching the quarter panel to the fascia.
- Install the bolts attaching the fascia to the quarter panel.
- Install the outer taillamp.
- Install the side marker lamp socket to the side marker lamp.
- Install the wheelhouse liner panel with the upper outer attaching bolt.
- Install the remaining upper bolts.
- Position the lower front corner of the wheelhouse liner panel behind the door opening finish panel and install the attaching bolt.
- Install the remaining wheelhouse liner panel bolts.
- Install the tire and wheel. Refer to Tire and Wheel Removal and Installation in Tires and Wheels.
- Remove the covers protecting the interior.
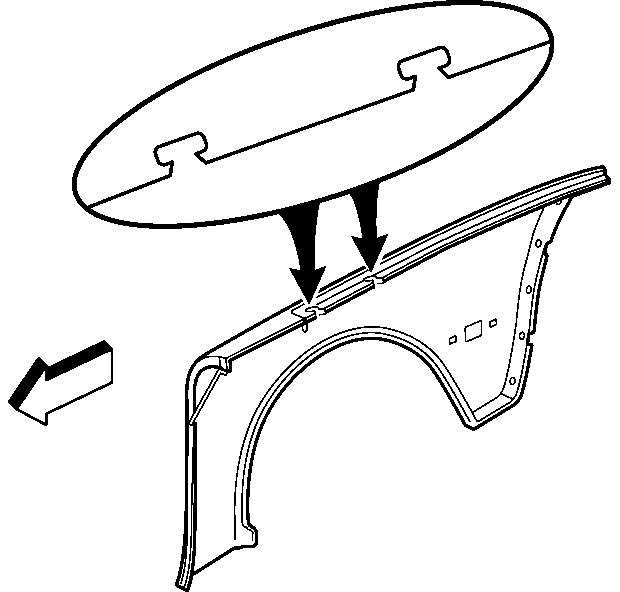
Loosen the screws slightly, if necessary.
Elongate the screw holes, if necessary, to achieve the proper gap.

Notice: Use the correct fastener in the correct location. Replacement fasteners must be the correct part number for that application. Fasteners requiring replacement or fasteners requiring the use of thread locking compound or sealant are identified in the service procedure. Do not use paints, lubricants, or corrosion inhibitors on fasteners or fastener joint surfaces unless specified. These coatings affect fastener torque and joint clamping force and may damage the fastener. Use the correct tightening sequence and specifications when installing fasteners in order to avoid damage to parts and systems.
Tighten
Tighten the quarter panel to door lock pillar screws to 3 N·m
(27 lb in).
Tighten
Tighten the quarter panel upper flange screws to 3 N·m
(27 lb in).

Tighten
Tighten the fuel filler door bolt to 2 N·m (18 lb in).

Tighten
Tighten the fuel door to quarter panel screws to 2.2 N·m
(19 lb in).


Tighten
Tighten the quarter panel to the rear compartment brace bolts to 5 N·m
(44 lb in).
Tighten
Tighten the quarter panel to fascia nuts to 10 N·m (89 lb in).

Tighten
Tighten the fascia to quarter panel bolts to 5 N·m (44 lb in).
Tighten
Tighten the taillamp attaching screws to 2 N·m (18 lb in).

Tighten
Tighten the wheelhouse liner panel bolts to 1.9 N·m (17 lb in).
Rear Quarter Panel Replacement Convertible
Removal Procedure
- Remove the taillamps (to gain access to the fascia to quarter panel mounting bolts).
- Remove the bolts attaching the fascia to the quarter panel.
- Remove the nut, the antenna cable strap, and the antenna braided ground strap from the antenna ground stud (passenger side only).
- Remove the antenna ground stud (passenger side only).
- Remove the tire and wheel. Refer to Tire and Wheel Removal and Installation in Tires and Wheels.
- Remove the bolts attaching the wheelhouse liner panel.
- Remove the wheelhouse liner panel.
- Remove the bolts attaching the quarter panel to the rear compartment brace.
- Remove the side marker lamp socket from the lamp.
- Remove the nuts attaching the quarter panel to the fascia reinforcement studs.
- Remove the screws attaching the quarter panel to the door lock pillar.
- Open the fuel door, remove the bolt mounting the fuel door to the inner body panel (driver side only).
- Remove the gas cap tether strap from the fuel door (driver side only).
- Remove the screws attaching the quarter panel and the fuel door to the fuel pocket (driver side only).
- Remove the fuel door (driver side only).
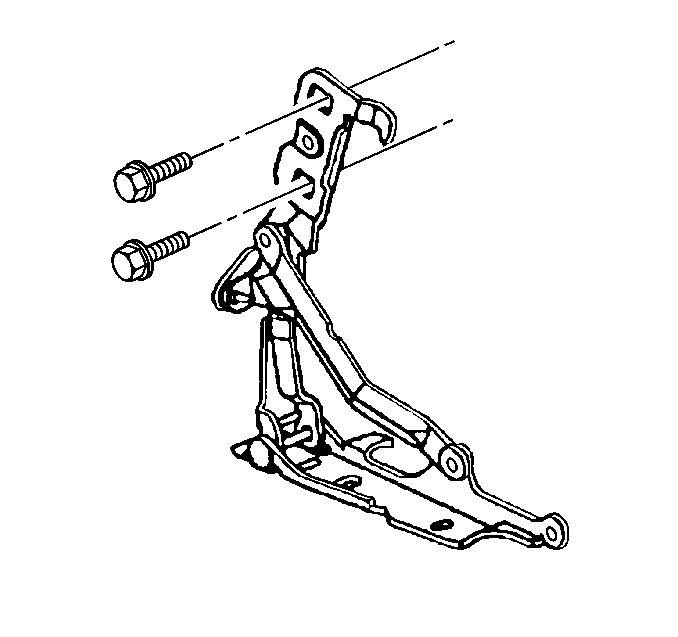
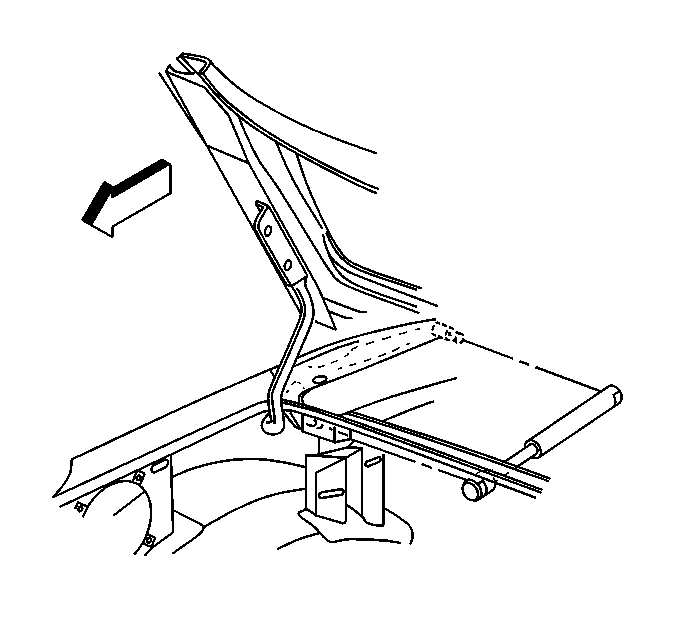
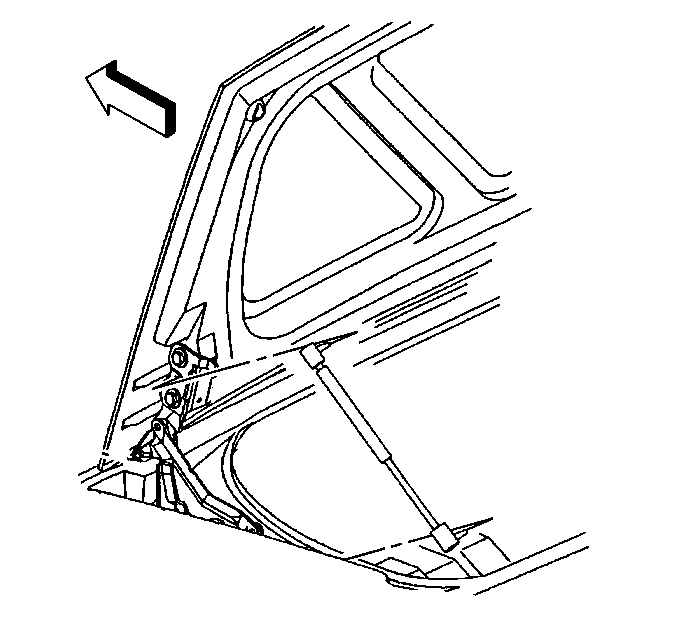
- Remove the rear compartment lid from the hinges.
- Remove the screws attaching the quarter panel upper flange to the rear compartment panel.
- Open the folding top stowage lid.
- Partly remove the weatherstrip to expose the screw heads.
- Remove the screws attaching the quarter panel upper flange to the folding top stowage compartment.
- Remove the quarter panel.
- Transfer parts as necessary (the retainer snaps to the inside of the rear flange of the quarter panel).

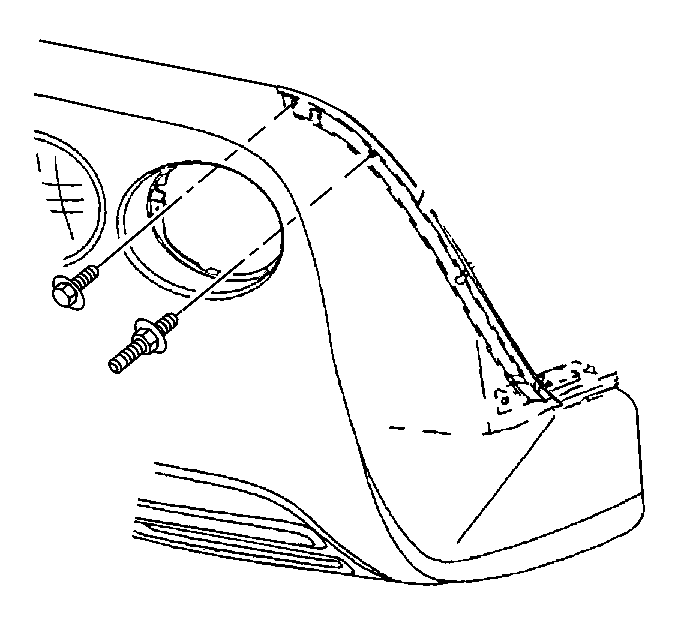
Important: Prevent the antenna ground stud from turning when removing the nut.



Installation Procedure
- Install the snap-in retainers to the rear of the quarter panel.
- Open the folding top stowage compartment lid.
- Position the quarter panel to the vehicle.
- Install the front screw (the front screw aligns the quarter panel front to rear).
- Loosely install all but the rear most two quarter panel upper flange attaching screws.
- Set the gap to the stowage lid.
- Tighten the quarter panel to the upper flange screws.
- Install the folding top stowage compartment weatherstrip.
- Close the folding top stowage compartment lid.
- Install the rear compartment lid.
- Loosely start a screw in the upper flange rearward hole (the rearward hole aligns the quarter panel side to side).
- Set the lid gap and snug the screw.
- Install the screw in the remaining upper flange hole.
- Install the screws attaching the quarter panel to the door lock pillar.
- Install the antenna (passenger side only).
- Install the antenna ground stud (passenger side only).
- Install the antenna braided ground strap, and the antenna cable strap to the antenna ground stud (passenger side only).
- Install the nut to the antenna ground stud.
- Install the bolts attaching the quarter panel to the rear compartment brace.
- Install the nuts attaching the quarter panel to the fascia.
- Position the fuel door in the fuel pocket (driver side only).
- Install the bolt attaching the fuel filler door to inner body panel (driver side only).
- Install the screws attaching the fuel door and quarter panel to the fuel pocket (driver side only).
- Install the screws attaching the quarter panel to the fuel pocket (driver side only).
- Install the bolts attaching the fascia to the quarter panel.
- Install the side marker lamp socket to the side marker lamp.
- Install the outer taillamp.
- Install the wheelhouse liner panel with the upper outer attaching bolt.
- Install the remaining upper bolts.
- Position the lower front corner of the wheelhouse liner panel behind the door opening finish panel and install the attaching bolt.
- Install the remaining wheelhouse liner panel bolts.
- Install the tire and wheel. Refer to Tire and Wheel Removal and Installation in Tires and Wheels.
- Install the quarter panel sealing strip.


Notice: Use the correct fastener in the correct location. Replacement fasteners must be the correct part number for that application. Fasteners requiring replacement or fasteners requiring the use of thread locking compound or sealant are identified in the service procedure. Do not use paints, lubricants, or corrosion inhibitors on fasteners or fastener joint surfaces unless specified. These coatings affect fastener torque and joint clamping force and may damage the fastener. Use the correct tightening sequence and specifications when installing fasteners in order to avoid damage to parts and systems.
Tighten
Tighten the quarter panel upper flange screw to 3 N·m (27 lb
in).
Tighten
Tighten the quarter panel upper flange screws to 3 N·m
(27 lb in).
Tighten
Tighten the rear compartment lid hinge bolts to 25 N·m
(18 lb ft).

Tighten
Tighten the quarter panel upper flange screws to 3 N·m
(27 lb in).
Tighten
Tighten the quarter panel to door lock pillar screws to 3 N·m
(27 lb in).

Tighten
Tighten the antenna ground stud to 5 N·m (44 lb in).
Important: Prevent the antenna ground stud from turning when tightening the stud nut.
Tighten
Tighten the antenna ground stud nut to 6 N·m (53 lb in).

Tighten
Tighten the quarter panel to the rear compartment brace bolts to 5 N·m
(44 lb in).
Tighten
Tighten the quarter panel to fascia nuts to 10 N·m (89 lb in).

Tighten
Tighten the fuel filler door bolt to 2 N·m (18 lb in).

Tighten
Tighten the fuel door to quarter panel screws to 2 N·m
(18 lb in).

Tighten
Tighten the fuel filler pocket screws to 1.2 N·m (18 lb in).

Tighten
Tighten the fascia to quarter panel bolts to 5 N·m (44 lb in).
Tighten
Tighten the taillamp mounting screws to 2 N·m (18 lb in).

Tighten
Tighten the wheelhouse liner bolts to 2 N·m (18 lb in).
