Windshield wiper blades should be inspected at least twice a year for wear or cracking. See "Wiper Blade Check" under Part B: Owner Checks and Services for more information.
Replacement blades come in different types and are removed in different ways. For the proper type and length, see Maintenance Replacement Parts .
It's a good idea to clean or replace the wiper blade assembly every six months.
Notice: Allowing the wiper blade arm to touch the windshield when no wiper blade is installed could damage the windshield. Any damage that occurs would not be covered by your warranty. Do not allow the wiper blade arm to touch the windshield.
To remove the wiper blade assembly, do the following:
- Open the hood to gain access to the windshield wipers.
- Lift the wiper arm until it locks into a vertical position.
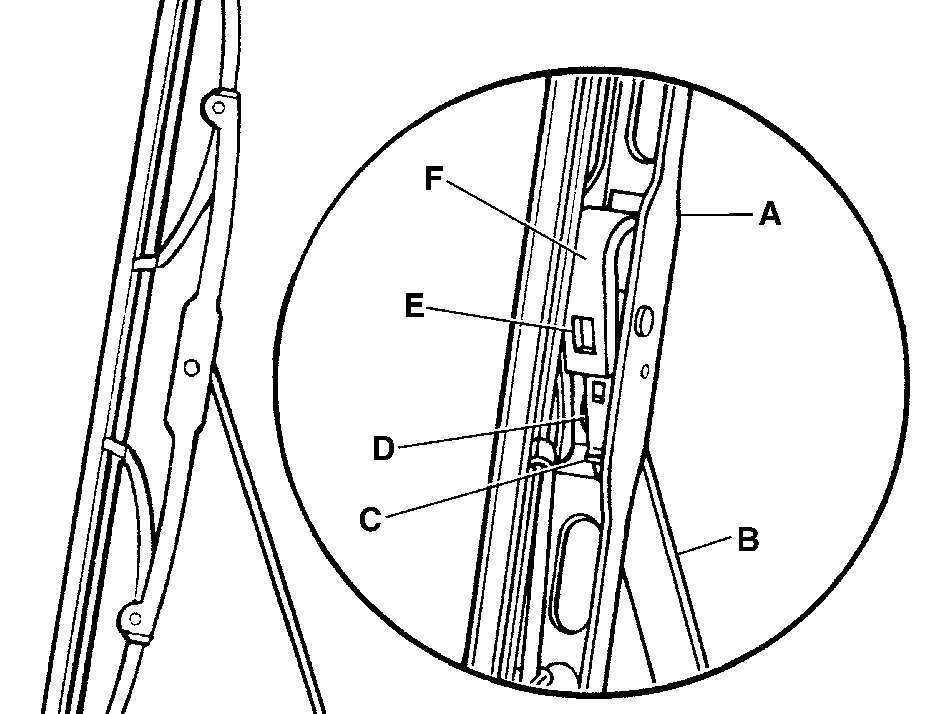
- Press down on the blade assembly pivot locking tab (C). Pull down on the blade assembly (A) to release it from the wiper arm hook (F).
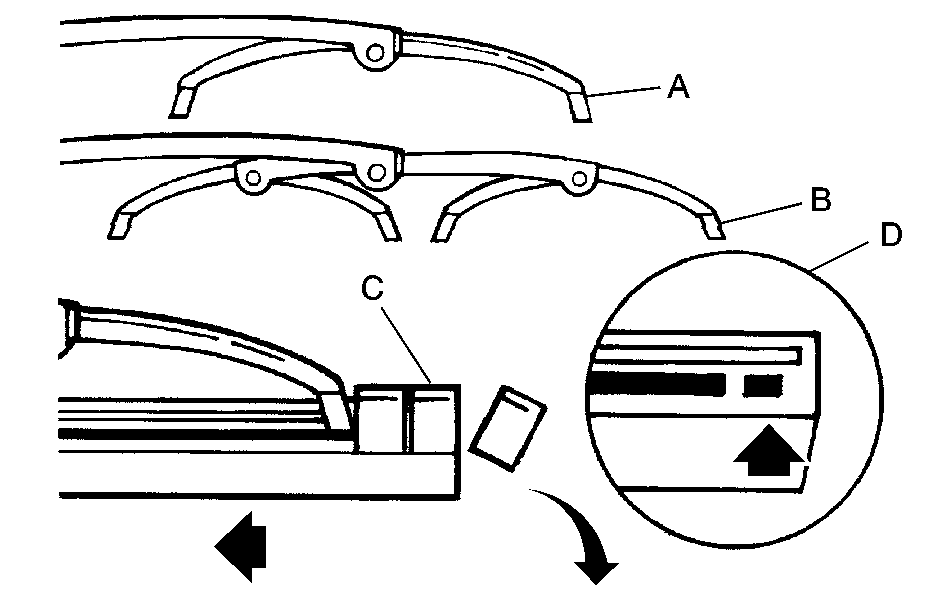
- Remove the insert from the blade assembly (A). The insert has two notches at one end that are locked by the bottom claws of the blade assembly. At the notch end, pull the insert from the blade assembly.

Blade Assembly
Arm Assembly
Locking Tab
Blade Pivot
Hook Slot
Arm Hook
To install the new wiper insert:

- Slide the insert (D), notched end last, into the end with the two blade claws (A). Slide the insert all the way through the blade claws at the opposite end (B). Plastic caps (C) will be forced off as the insert is fully installed.
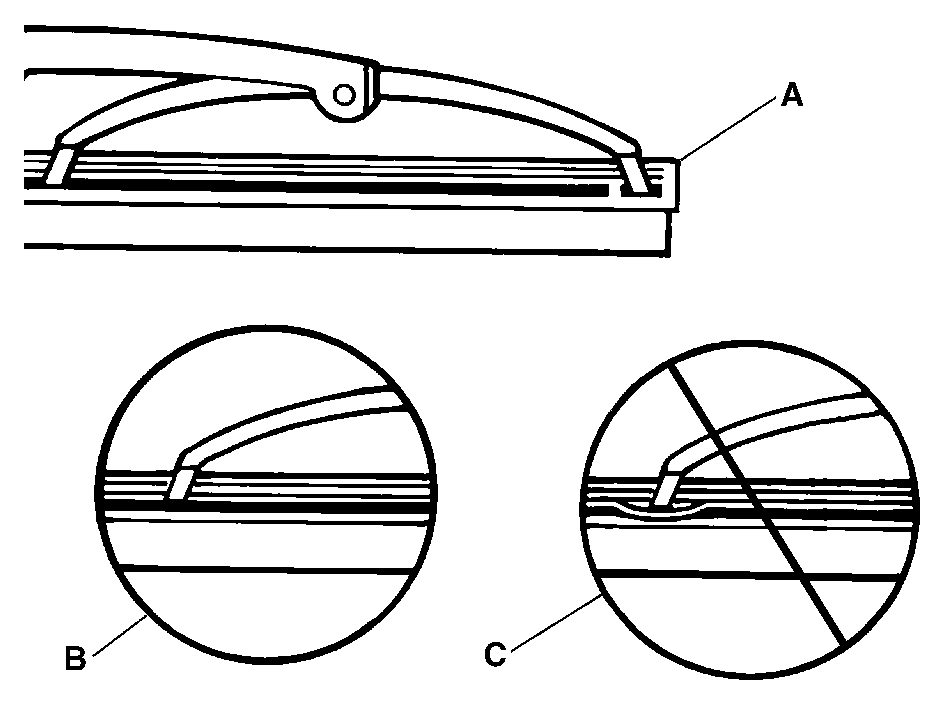
- Be sure the notches are locked by the bottom claws. Make sure that all other claws are properly locked on both sides of the insert slots.
- Put the blade assembly pivot in the wiper arm hook. Pull up until the pivot locking tab locks in the hook slot.
- Carefully lower the wiper arm and blade assembly onto the windshield.
Installation guide:

Claw in Notch
Correct Installation
Incorrect Installation
