Removal Procedure
- Remove the front suspension crossmember. Refer to Front Suspension Crossmember Replacement in Front Suspension.
- Remove the oil pan drain plug and allow the oil to drain.
- Re-install the engine oil drain plug until snug.
- If oil pan and/or gasket removal or replacement is NOT required proceed to step 10.
- If replacement of the oil pan (lower) gasket is needed, perform the following:
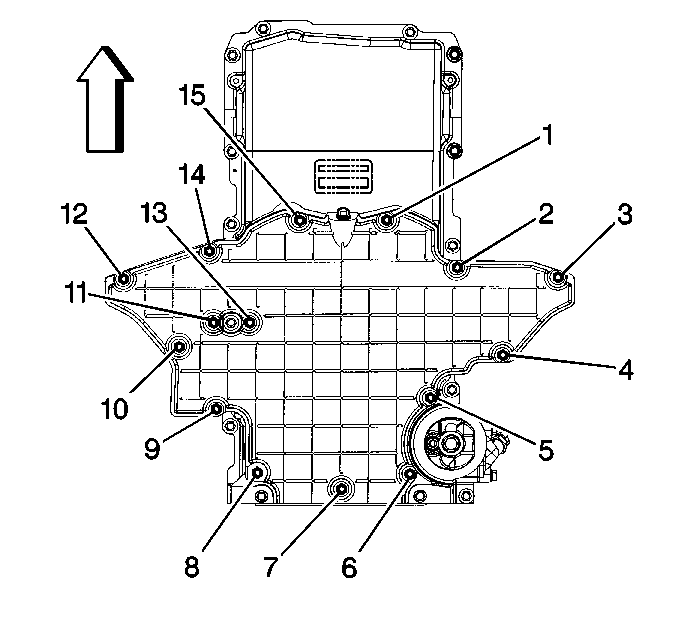
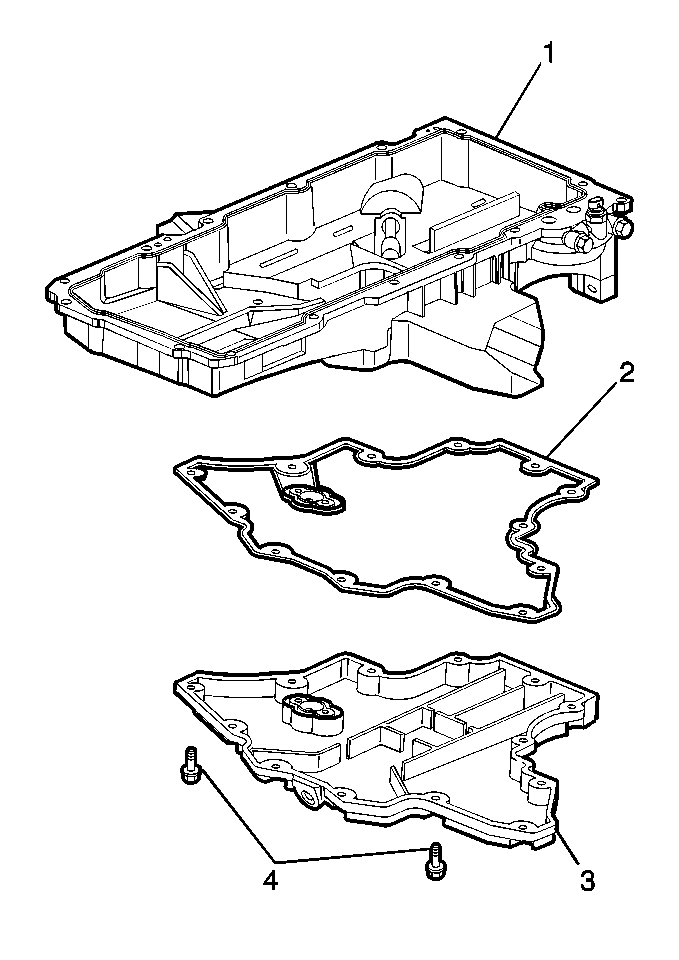
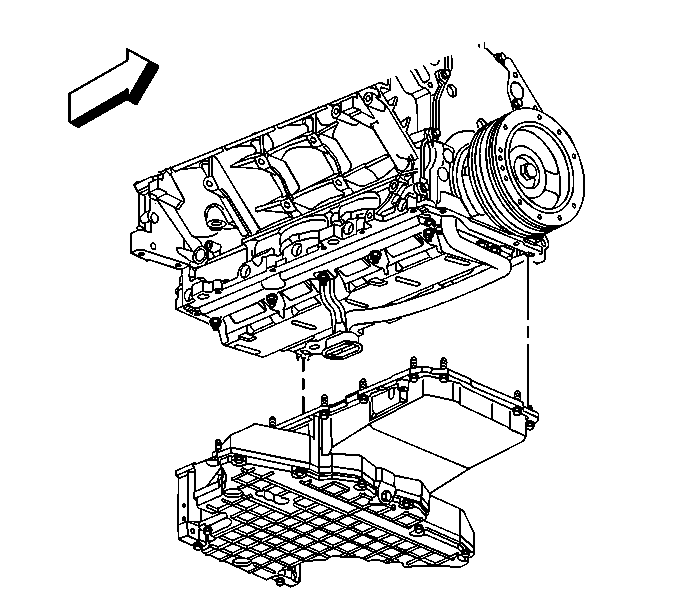
- Remove the oil pan (lower) bolt (1-15).
- Separate the oil pan (lower) (3) from the oil pan (1).
- Remove the oil pan (lower) gasket (2).
- Clean the oil pan (lower) gasket surface.
- Remove the starter motor. Refer to Starter Motor Replacement in Engine Electrical.
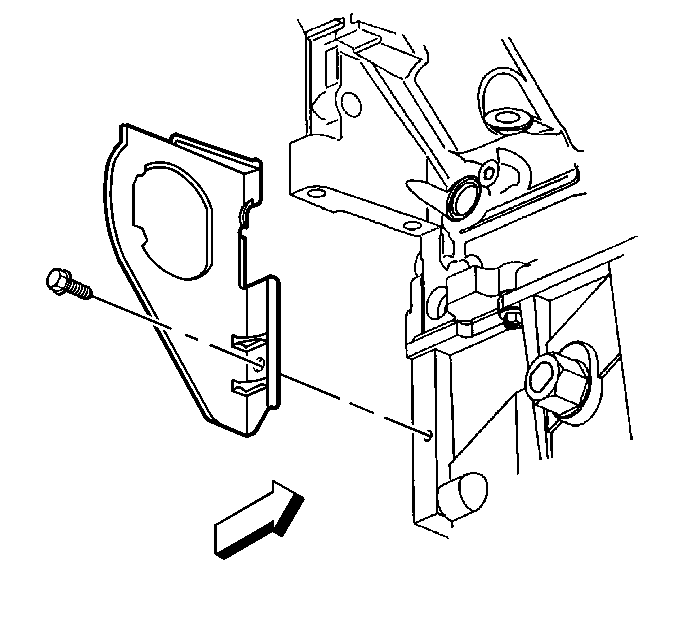
- Remove the left transmission cover bolt and cover.
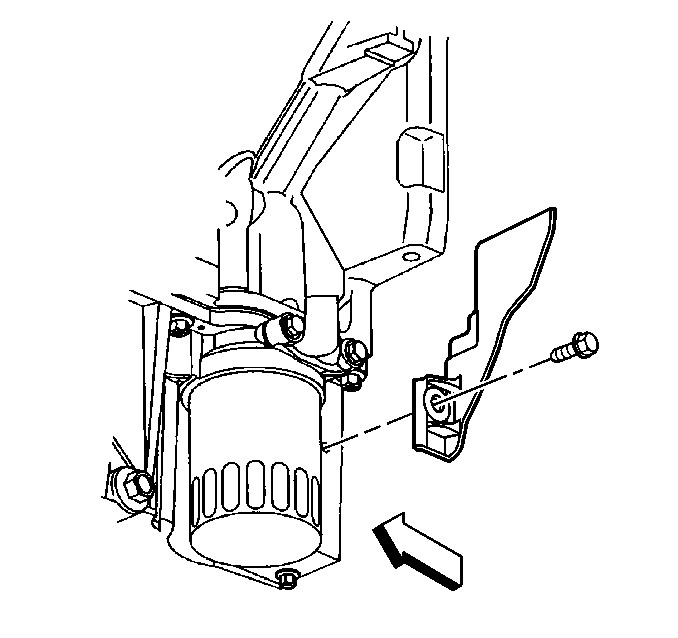
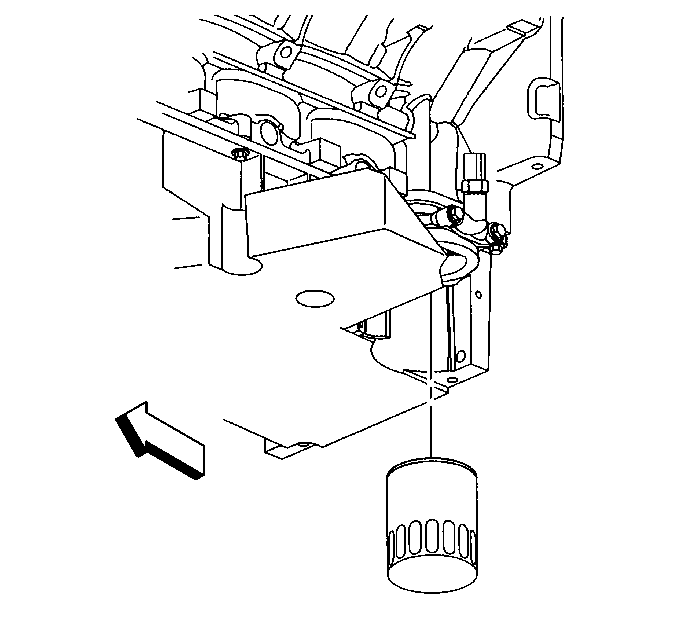
- Remove the engine oil filter and allow the oil to drain.
- Re-install the engine oil filter until snug.
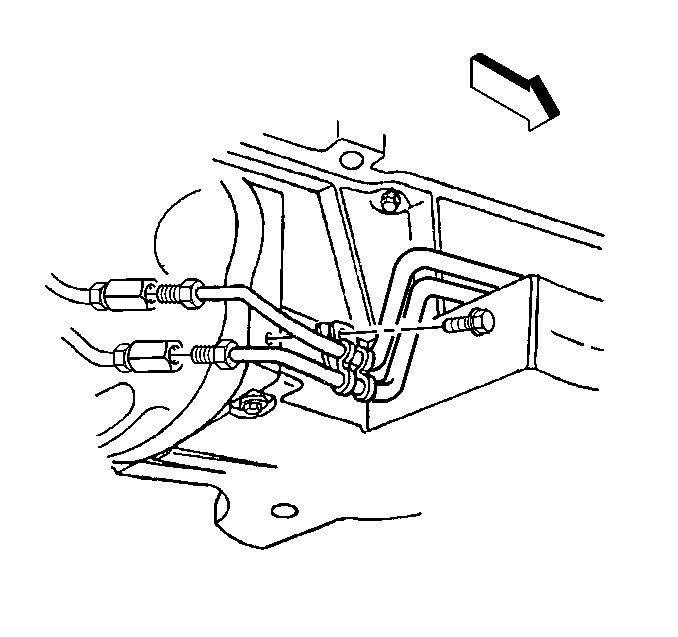
- Remove the automatic transmission fluid cooler line clamp bolt at the right transmission cover, if equipped.
- Remove the automatic transmission fluid cooler line clamp bolt at the oil pan, if equipped.
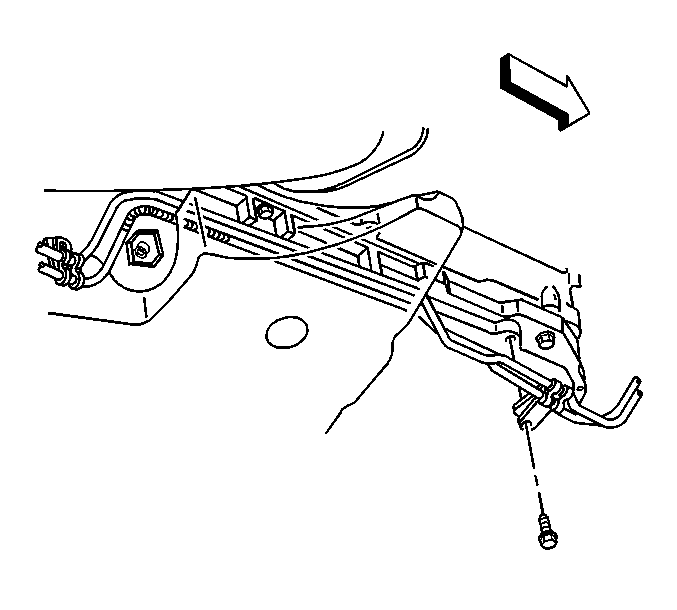
- Remove the right transmission cover bolt and cover.
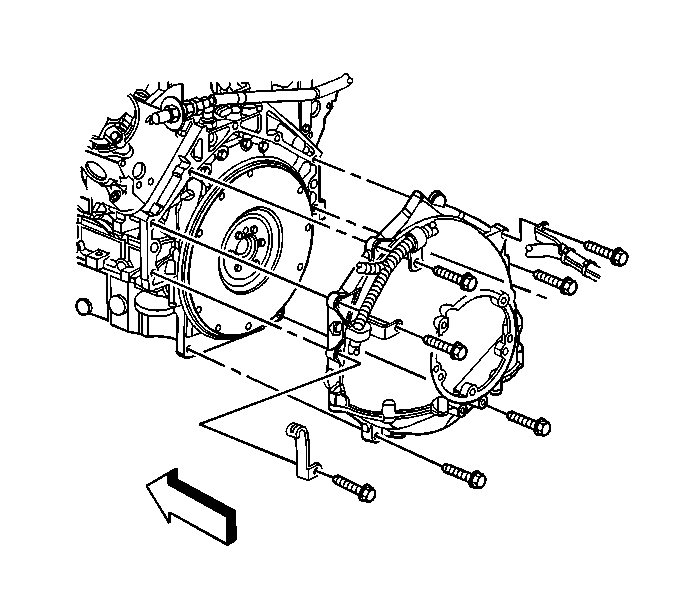
- Remove the bottom 2 flywheel housing-to-oil pan bolts.
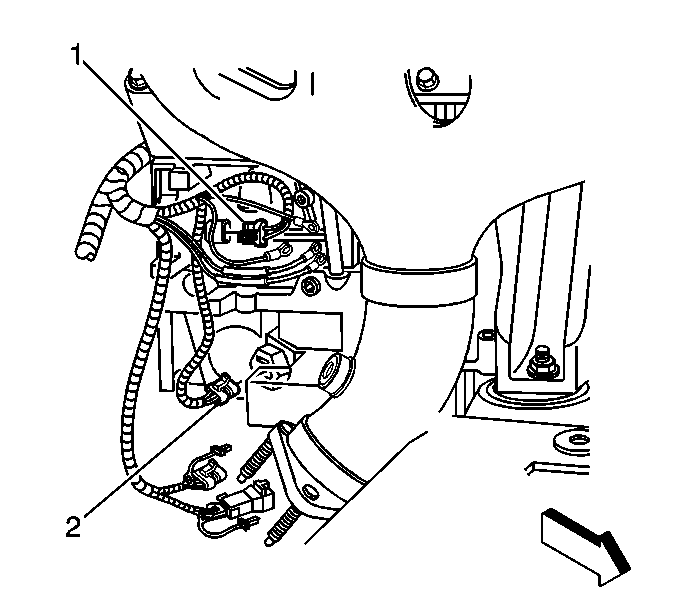
- Disconnect the engine oil level sensor electrical connector (2).
- Disconnect the engine oil temperature sensor (3) electrical connector.
- Remove the oil pan bolts.
- Lower the oil pan, rotate the pan until it can be removed from around the oil pump screen.
- Remove the engine oil filter.
- Clean and inspect the engine oil pan. Refer to Oil Pan Cleaning and Inspection .

Important: It is not necessary to remove the oil pan (lower) in order to remove the oil pan.
If the oil pan (lower) gasket replacement is required proceed to the next step.
For the oil pan (lower) installation, refer to step 13 in the installation procedure.

Important: The original oil pan gasket is retained and aligned to the oil pan by rivets. When installing a new gasket, it is not necessary to install new oil pan gasket rivets.
DO NOT reuse the oil pan gasket. When installing the oil pan, install a NEW oil pan gasket. Removal of the oil pan (lower) will not provide access to the crankshaft oil deflector, crankshaft, or other internal engine components.Installation Procedure
Important: All gasket surfaces should be free of oil or other foreign material during assembly.
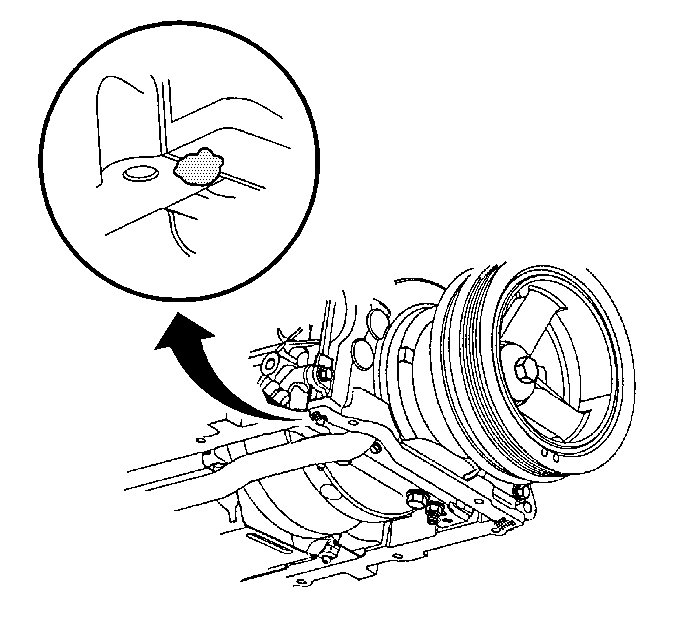
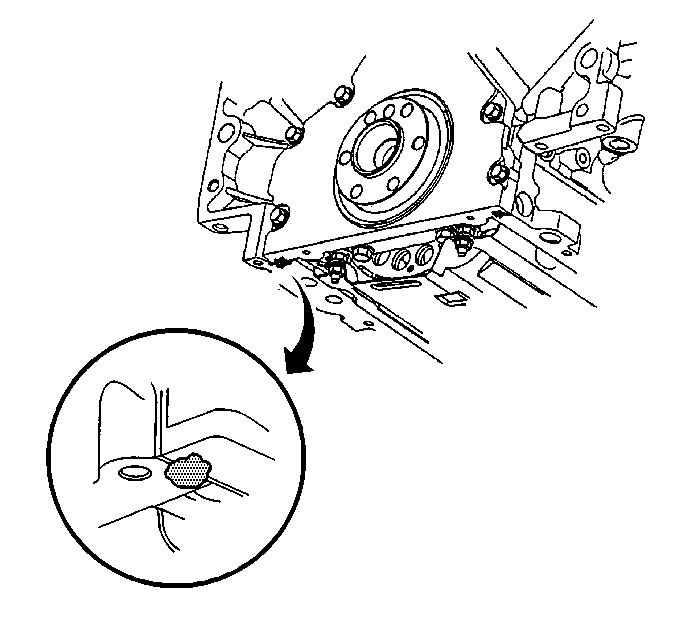
The alignment of the structural oil pan is critical. The rear bolt hole locations of the oil pan provide mounting points for the flywheel housing cover. To ensure the rigidity of the powertrain and correct transmission alignment, it is important that the rear of the block and the rear of the oil pan are flush or even. The rear of the oil pan must NEVER protrude beyond the engine block . Do NOT reuse the oil pan gasket. It is not necessary to rivet the NEW gasket to the oil pan.- Apply a 5 mm (0.20 in) bead of sealant GM P/N 12378190, or equivalent 20 mm (0.80 in) long to the engine block. Apply the sealant directly onto the tabs of the front cover gasket that protrude into the oil pan surface.
- Apply a 5 mm (0.20 in) bead of sealant GM P/N 12378190, or equivalent 20 mm (0.80 in) long to the engine block. Apply the sealant directly onto the tabs of the rear cover gasket that protrude into the oil pan surface.
- Pre-assemble the oil pan gasket to the pan.
- Install the 2 bottom flywheel housing bolts to position the oil pan correctly.
- Tighten the 2 bottom flywheel housing bolts until snug. Do not overtighten.
- Tighten the oil pan bolt and oil pan-to-front cover bolts to 25 N·m (18 lb ft).
- Tighten the oil pan-to-rear cover bolts to 12 N·m (106 lb in).
- Tighten the flywheel housing bolts to 50 N·m (37 lb ft).
- Connect the engine oil temperature sensor (3) electrical connector.
- Connect the engine oil level sensor electrical connector (2).
- Install the right transmission cover and bolt.
- Install the automatic transmission fluid cooler line clamp bolt-at-the oil pan, if equipped.
- Install the automatic transmission fluid cooler line clamp bolt-at-right transmission cover, if equipped.
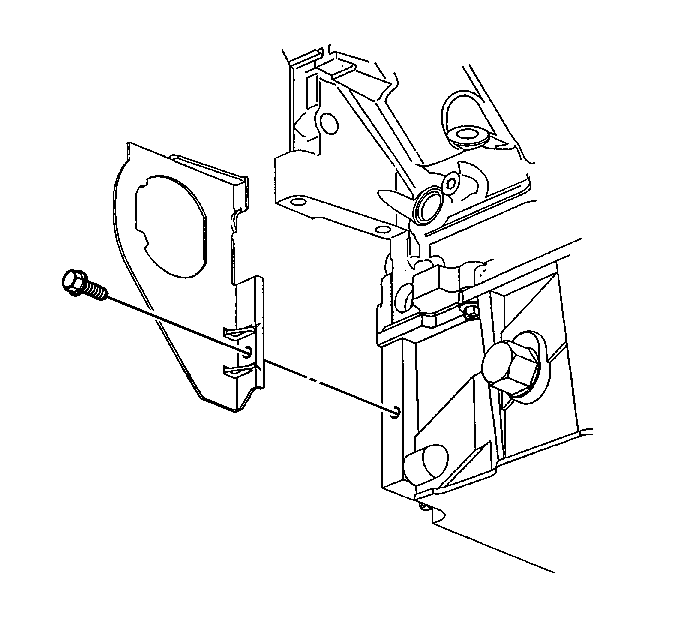
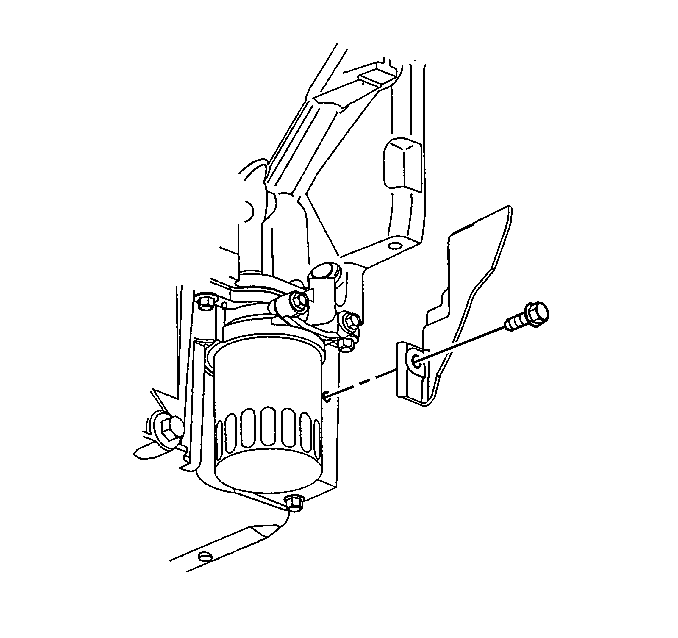
- Install the left transmission cover and bolt.
- Install the starter motor. Refer to Starter Motor Replacement in Engine Electrical.
- Install the oil pan (lower) (3) and gasket (2) to the oil pan (1).
- Install the oil pan bolts (4).
- Tighten the oil pan (lower) bolts (1-15) in a crossing pattern, alternating from side-to-side.
- Install a NEW engine oil filter.
- Install the oil pan drain plug.
- Install the front suspension crossmember to the vehicle. Refer to Front Suspension Crossmember Replacement in Front Suspension.
- Fill the crankcase with the proper quantity and grade of engine oil. Refer to Approximate Fluid Capacities and Fluid and Lubricant Recommendations in Maintenance and Lubrication.
- Check the transmission fluid, add if necessary.
- Run the engine and check for leaks.
Important: Be sure to align the oil gallery passages in the oil pan and engine block properly with the oil pan gasket.
| 3.1. | Install the gasket onto the oil pan. |
| 3.2. | Install the oil pan bolts to the pan and through the gasket. |
| 3.3. | Install the oil pan, gasket and bolts to the engine block. |
| 3.4. | Tighten the oil pan bolts until snug. Do not overtighten. |
Notice: Use the correct fastener in the correct location. Replacement fasteners must be the correct part number for that application. Fasteners requiring replacement or fasteners requiring the use of thread locking compound or sealant are identified in the service procedure. Do not use paints, lubricants, or corrosion inhibitors on fasteners or fastener joint surfaces unless specified. These coatings affect fastener torque and joint clamping force and may damage the fastener. Use the correct tightening sequence and specifications when installing fasteners in order to avoid damage to parts and systems.
Tighten
Tighten
Tighten the right transmission cover bolt to 12 N·m
(106 lb in).
Tighten
Tighten the automatic transmission fluid cooler
line clamp bolt-at-the oil pan to 12 N·m (106 lb in).
Tighten
Tighten the automatic transmission fluid cooler
line bolt-at-right transmission cover to 2.5 N·m (22 lb in).
Tighten
Tighten the left transmission cover bolt to 12 N·m
(106 lb in).
Tighten
Tighten the oil pan (lower) bolts to 12 N·m
(106 lb in).
Tighten
Tighten the engine oil filter to 30 N·m
(22 lb ft).
Tighten
Tighten the oil pan drain plug to 25 N·m
(18 lb ft).
