For 1990-2009 cars only
Removal Procedure
- Disconnect the negative battery cable from the battery. Refer to Battery Negative Cable Disconnection and Connection .
- Remove the battery tray. Refer to Battery Tray Replacement .
- Open the stud cover on the fuse/relay center.
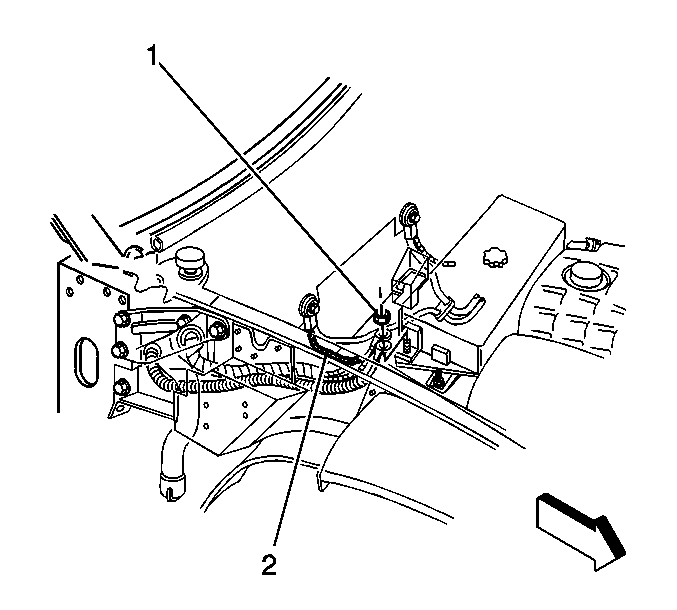
- Remove the positive battery cable nut from the fuse/relay center stud.
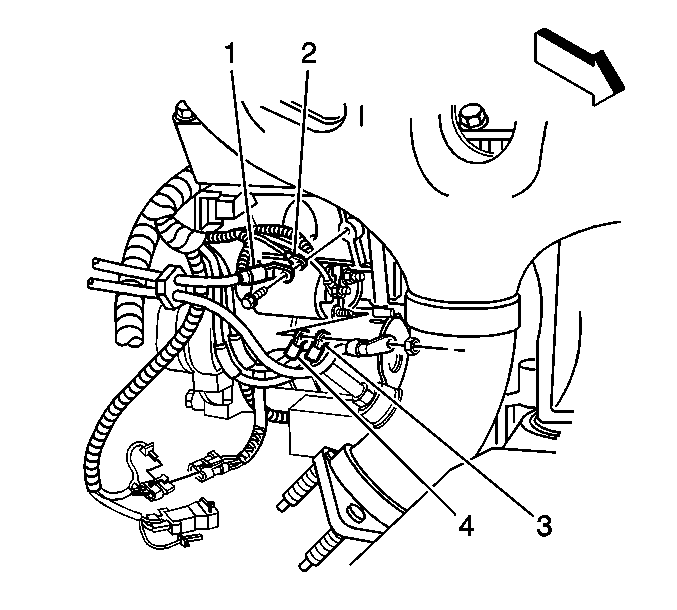
- Remove the positive battery cable lead (2) from the fuse/relay center stud.
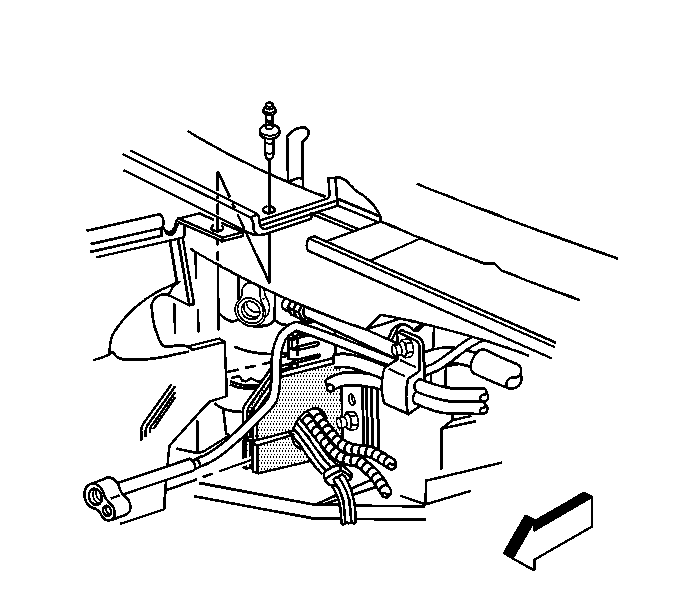
- Remove the heat shield retainer at the upper plenum.
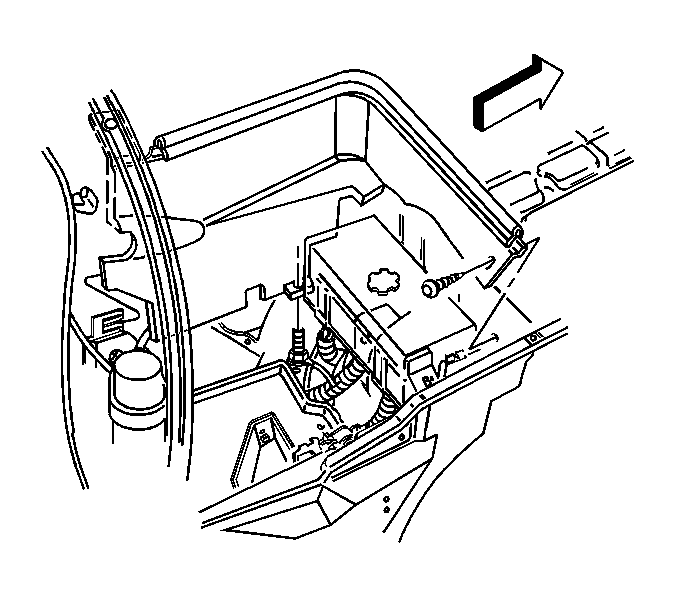
- Remove the battery heat shield retainer and the battery heat shield.
- Remove the right rear spark plug wire.
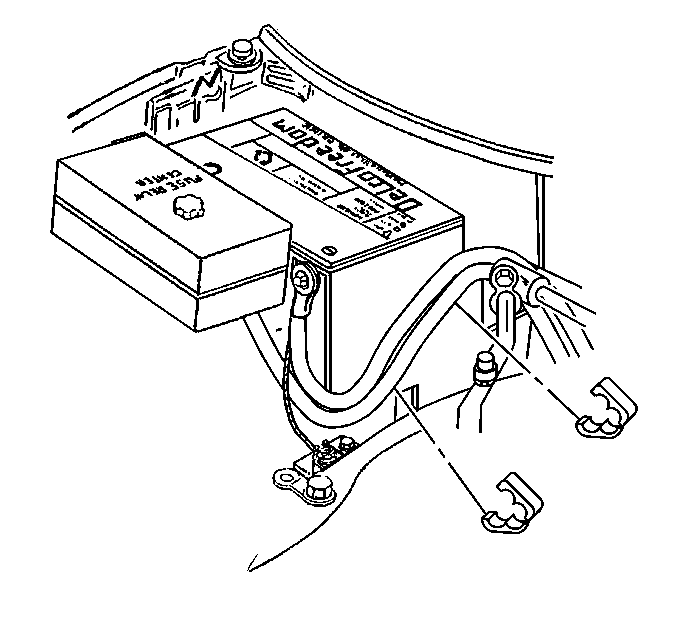
- Remove the battery cable clips.
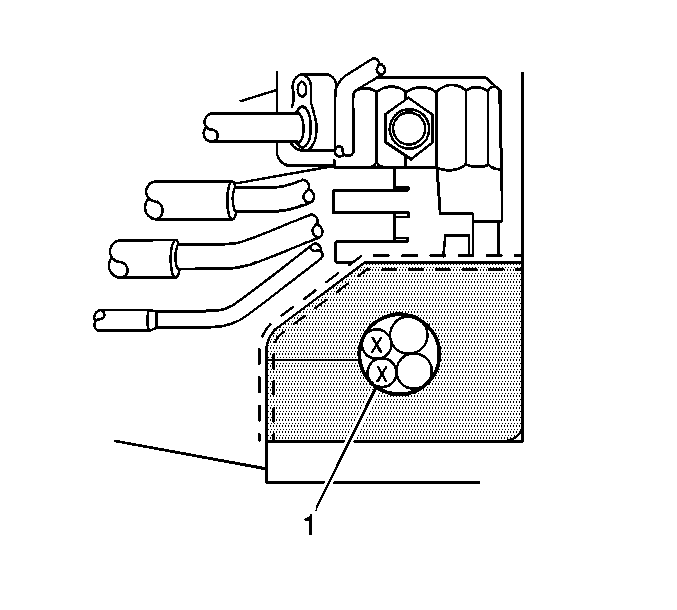
- Remove the battery cables (1) from the engine wiring harness insulator.
- Raise and suitably support the vehicle. Refer to Lifting and Jacking the Vehicle in General Information.
- Remove the positive battery cable terminal nut and terminals (3, 4) from the starter solenoid.
- Lower the vehicle.
- Remove the positive battery cable.
Installation Procedure
- Install the positive battery cable.
- Raise the vehicle.
- Install the positive battery cable terminals (3, 4) and nut to the starter solenoid.
- Install the battery cables (1) to the engine wiring harness insulator.
- Install the battery cable clips.
- Install the right rear spark plug wire.
- Install the battery heat shield.
- Install the heat shield retainer at the wheelhouse panel.
- Install the heat shield retainer at the upper plenum.
- Install the positive battery cable lead (2) to the fuse/relay center stud.
- Install the positive battery cable nut to the fuse/relay center stud.
- Close the stud cover on the fuse/relay center.
- Install the battery tray. Refer to Battery Tray Replacement .
- Connect the negative battery cable. Refer to Battery Negative Cable Disconnection and Connection .

Notice: Refer to Fastener Notice in the Preface section.
Important: Ensure that the engine harness leads (3, 4) are positioned on the solenoid prior to the positive cable terminal being installed.
Tighten
Tighten the positive battery cable nut to 8 N·m (71 lb in).


Important: Ensure that two fingers of the heat shield bracket are on either side of the heat shield, and the shield is inserted into the notch in the insulator.


Tighten
Tighten the positive battery cable nut to 10 N·m (89 lb in).
