Check Gages Light, Battery Voltage Low, Accessory Drive Belt Slipping or Missing (Install New Crankshaft Balancer with POA Friction Washer)

| Subject: | Check Gages Light, Battery Voltage Low, Accessory Drive Belt Slipping or Missing (Install New Crankshaft Balancer with POA Friction Washer) |
| Models: | 2005 Chevrolet Corvette |
| with 6.0L Engine (VIN U - RPO LS2) |
| Built Prior to VIN Breakpoint 55111039 |
This bulletin is being revised to update the Parts Information and include information on the new POA friction washer in the Service Procedure. Please discard Corporate Bulletin Number 05-06-01-001C(Section 6 -- Engine).
Condition
Some customers may comment on the Check Gages Light or the Battery Voltage Low indicator coming on. Additionally, some customers may comment on the accessory drive belt either slipping or being missing.
Cause
The crankshaft balancer bolt may have become loose.
Correction
Install the new crankshaft balancer with POA friction washer and a new crankshaft balancer bolt using the following procedure:
- Disconnect the negative battery cable at the battery.
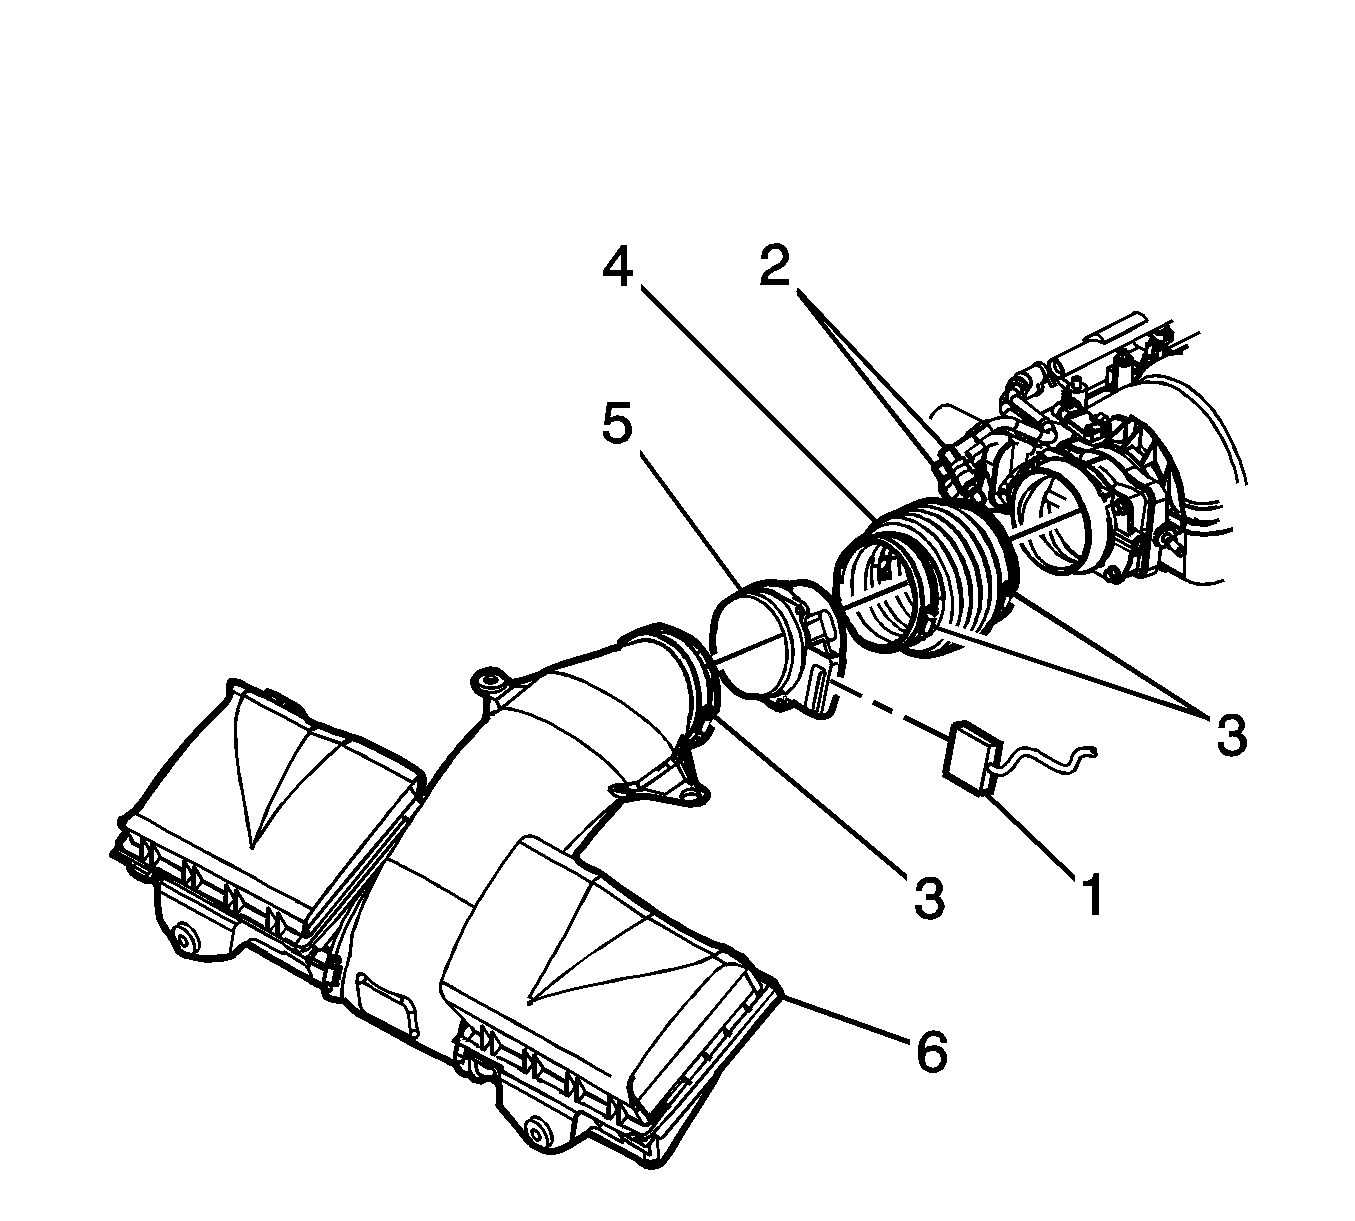
- Remove the air duct (6).
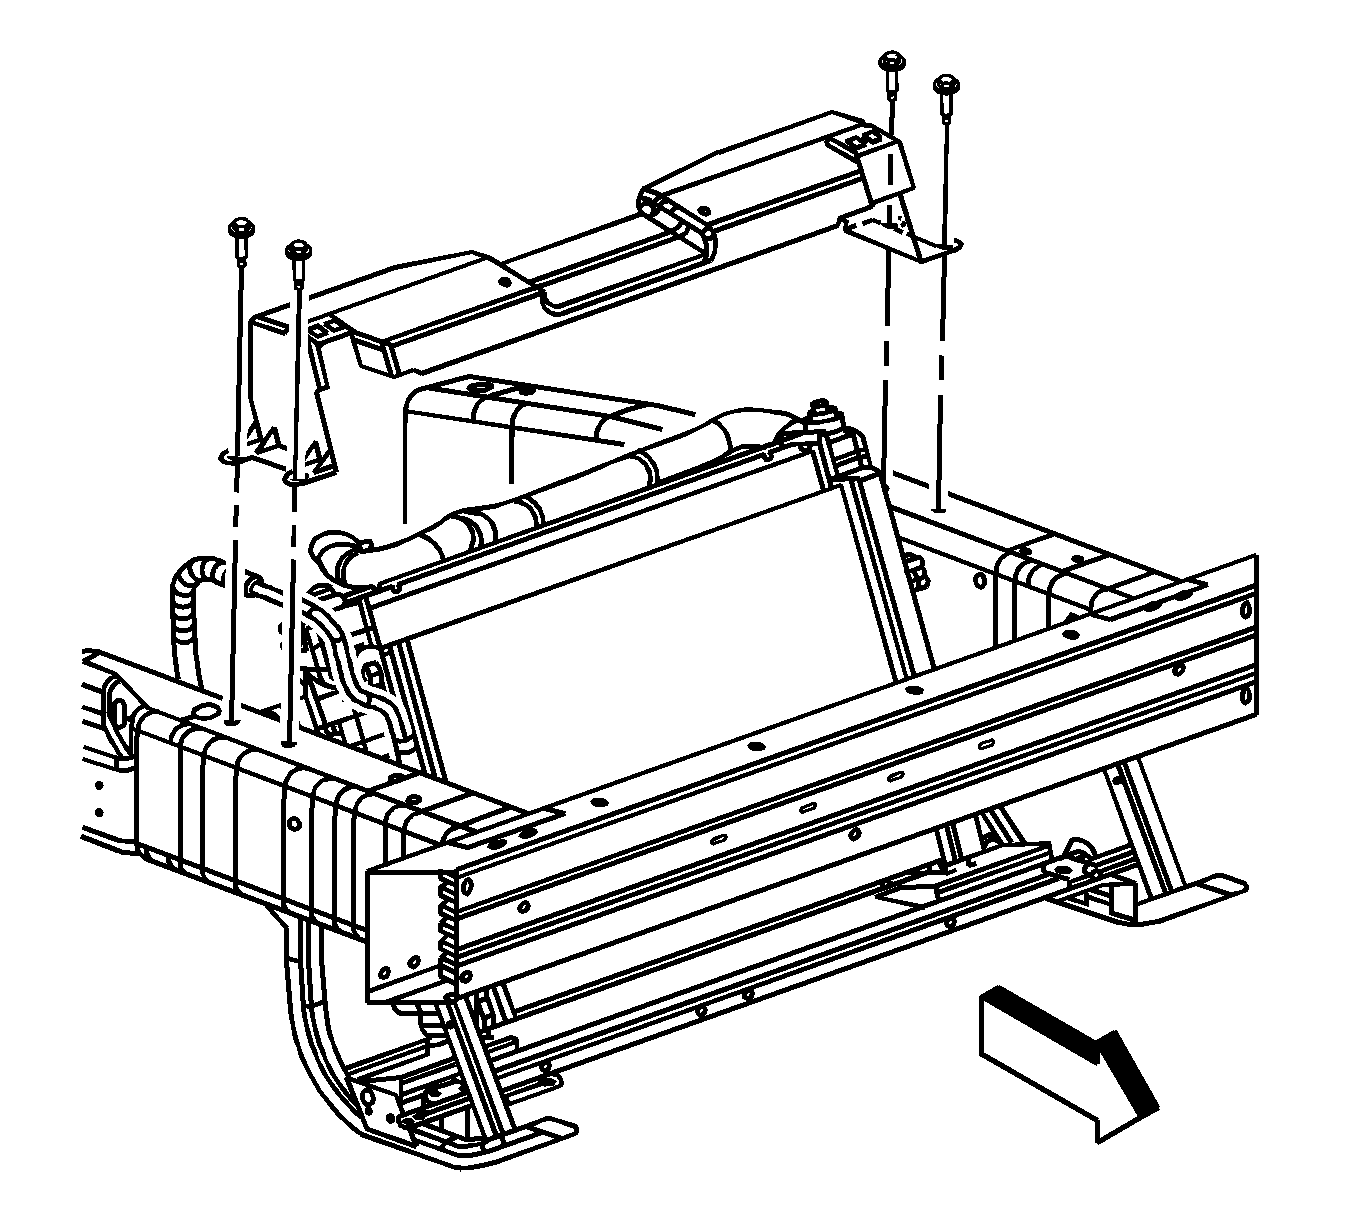
- Remove the radiator support.
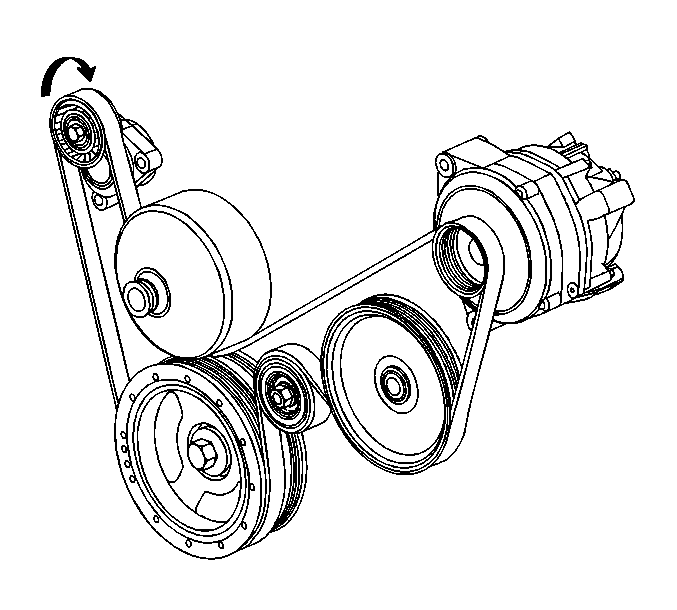
- Remove the accessory drive belt.
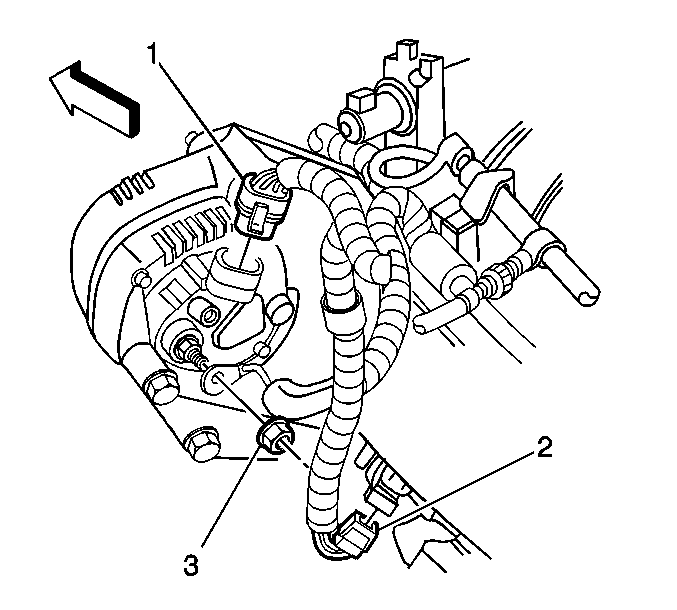
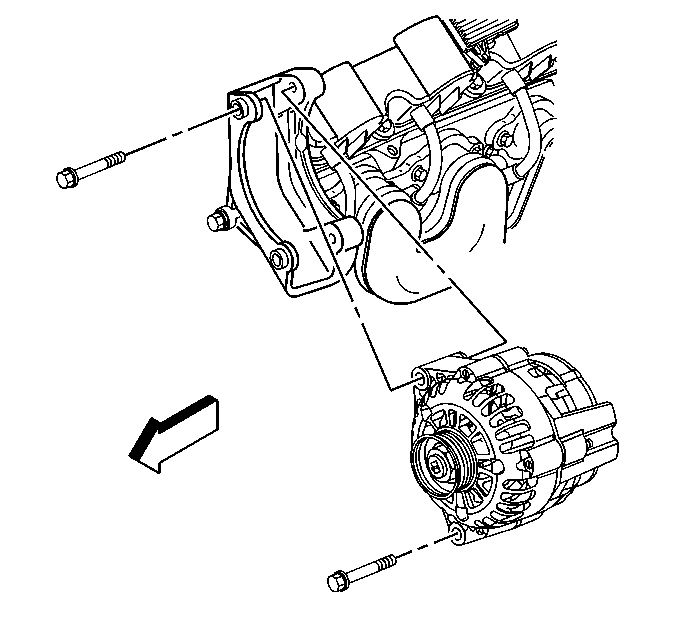
- Disconnect the generator.
- Remove the generator bolts and generator.
- Disconnect the steering intermediate shaft at the steering gear.
- Install the engine support swivel brackets( J 42451-1). Two swivel brackets are needed OR install engine support swivel brackets (SPX 7100) which come as a set.
- Hoist the vehicle.
- Remove the front wheels.
- Loosen the motor mounts.
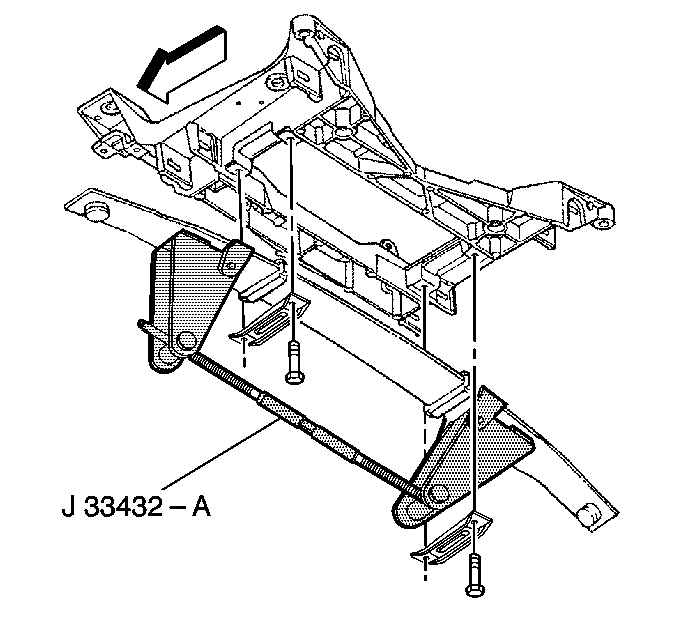
- Install the leaf spring fixture (J 33432-A).
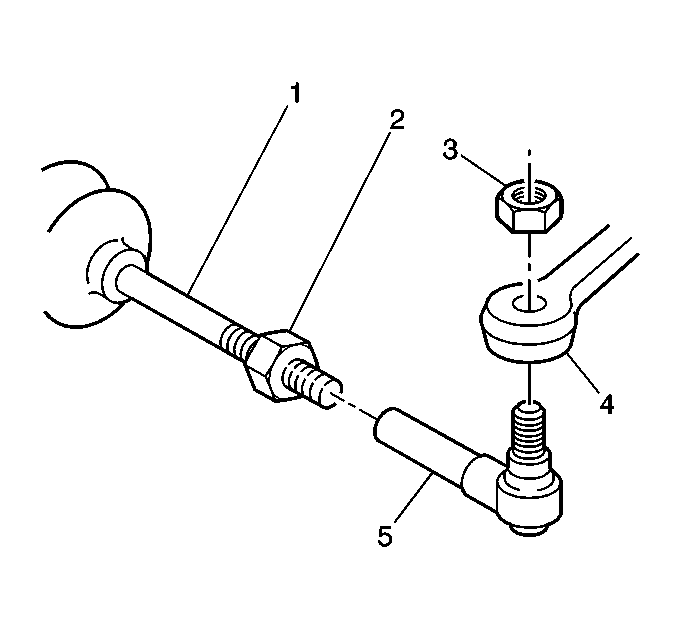
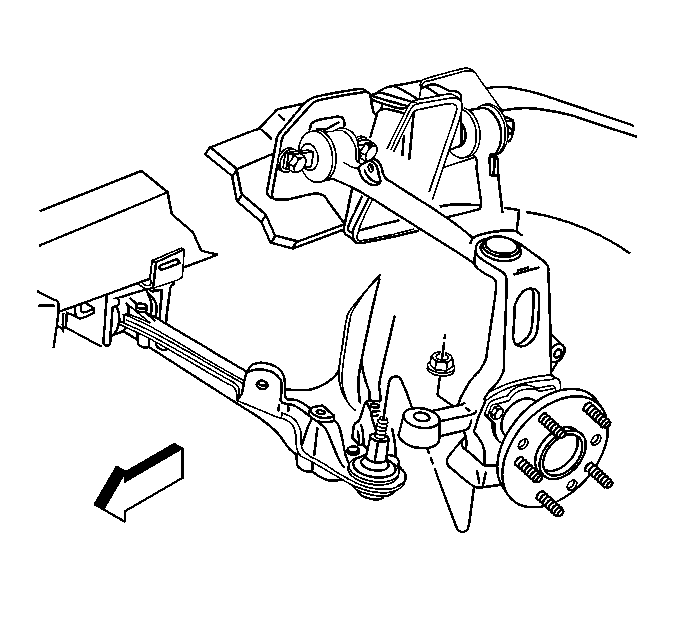
- Disconnect the tie rods (5) from the steering knuckle (4).
- Disconnect the speed sensor.
- Remove the lower ball joint nut and disconnect the lower control arm from the knuckle.
- Disconnect the bottom shock absorber bolts.
- Disconnect the ABS module bracket bolts.
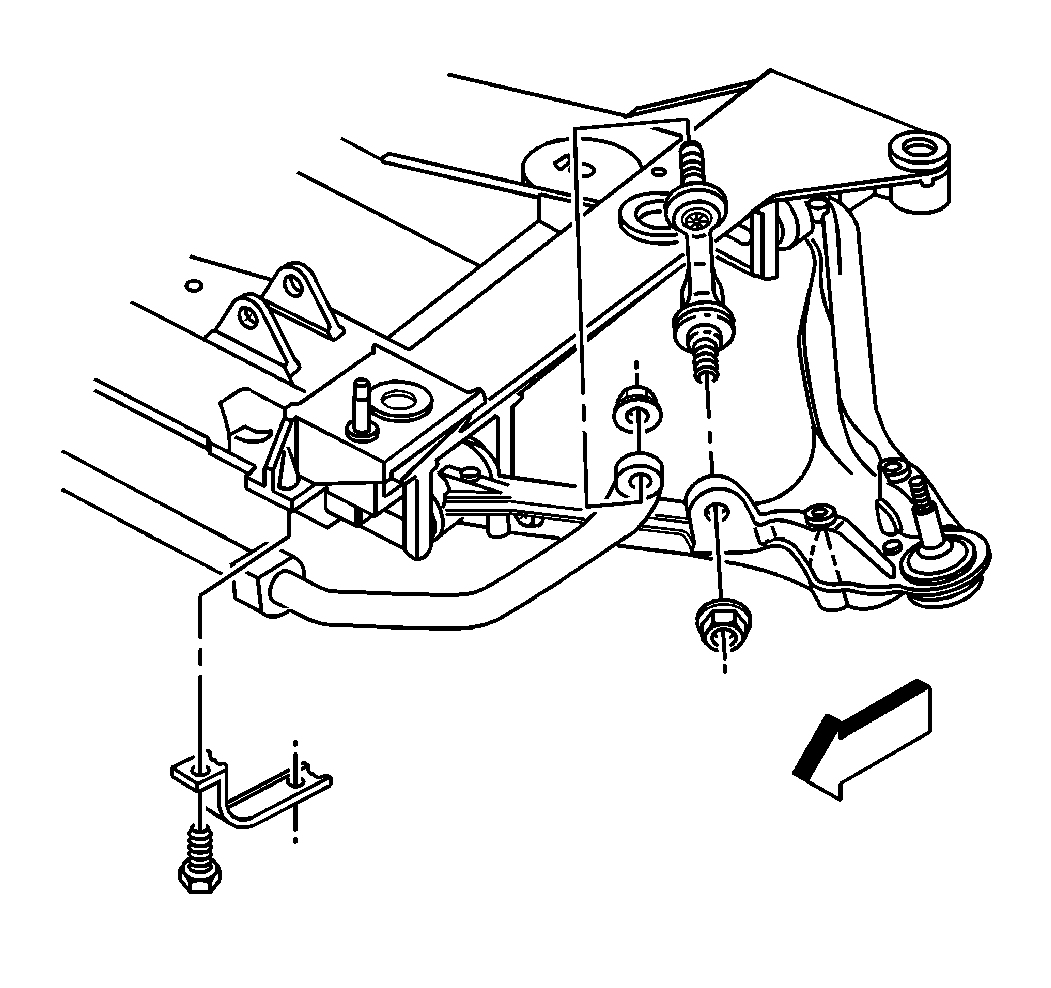
- Disconnect the stabilizer shaft insulator clamp bracket bolts and shaft.
- Disconnect the cooler line bolts to the engine cradle.
- Install a suitable jack under the cradle.
- Remove the cradle nuts.
- Lower the cradle.
- Remove the A/C belt.
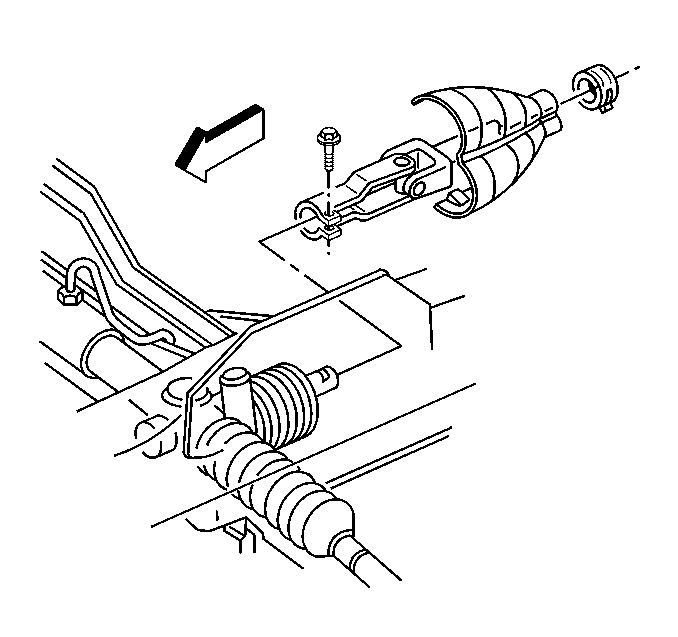
- Disconnect and remove the starter.
- Install the flywheel holding fixture J 42386-A.
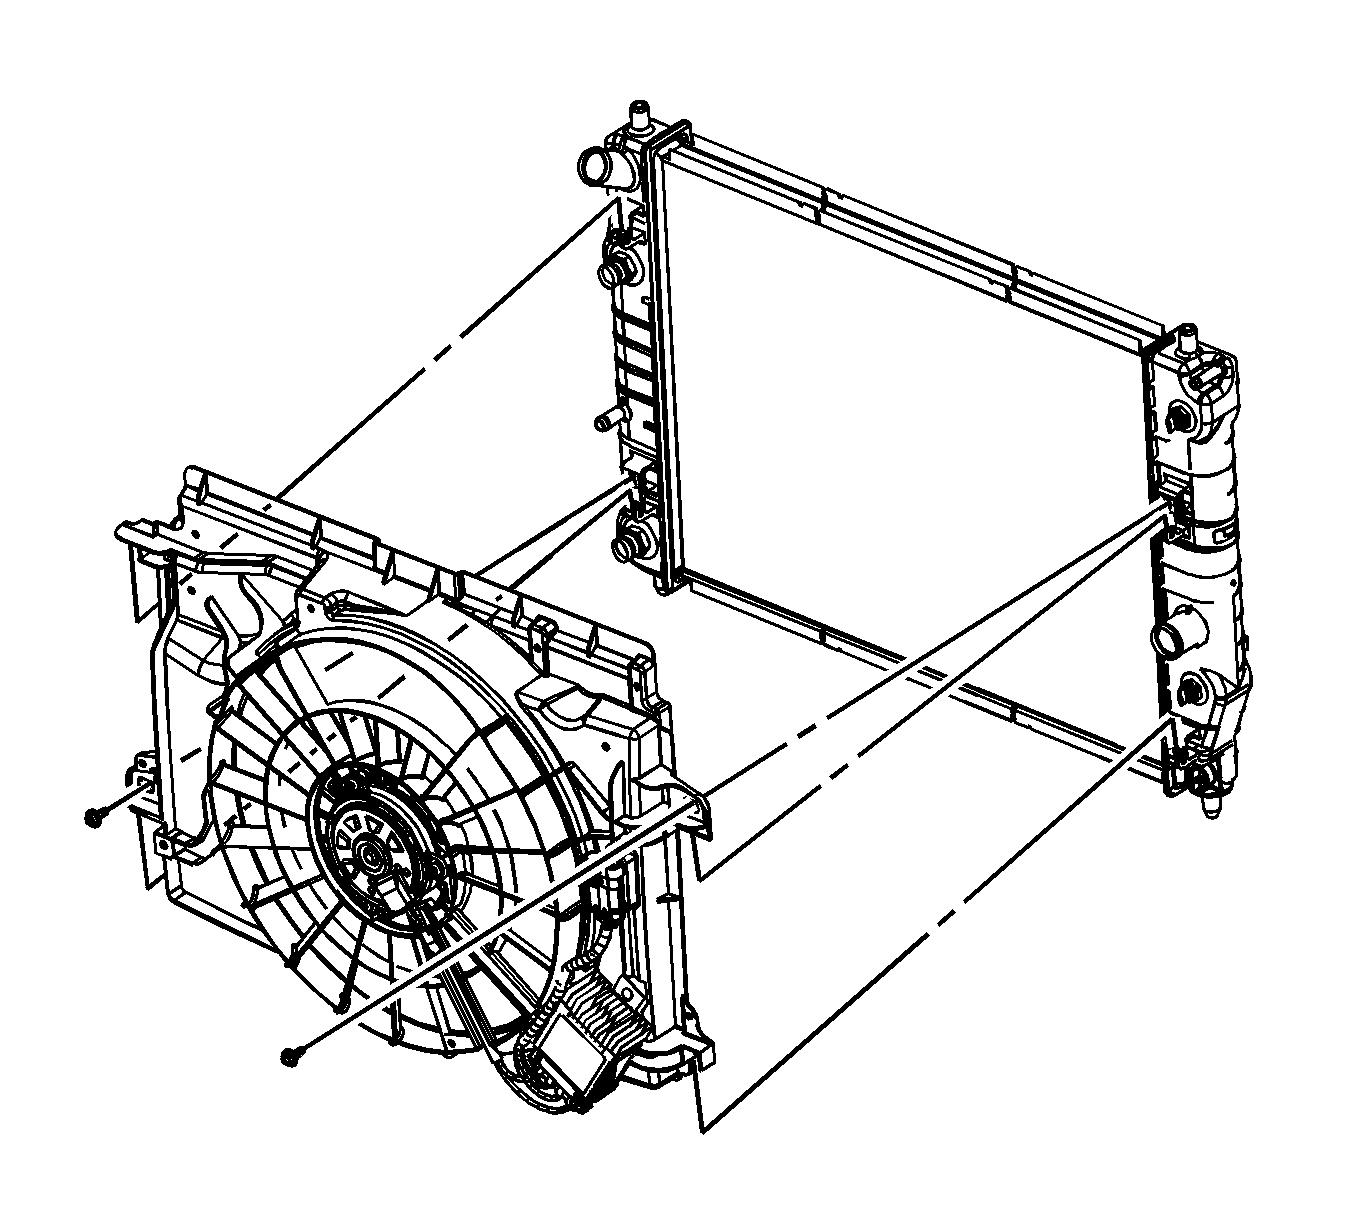
- Remove the cooling fan bolts and fan assembly.
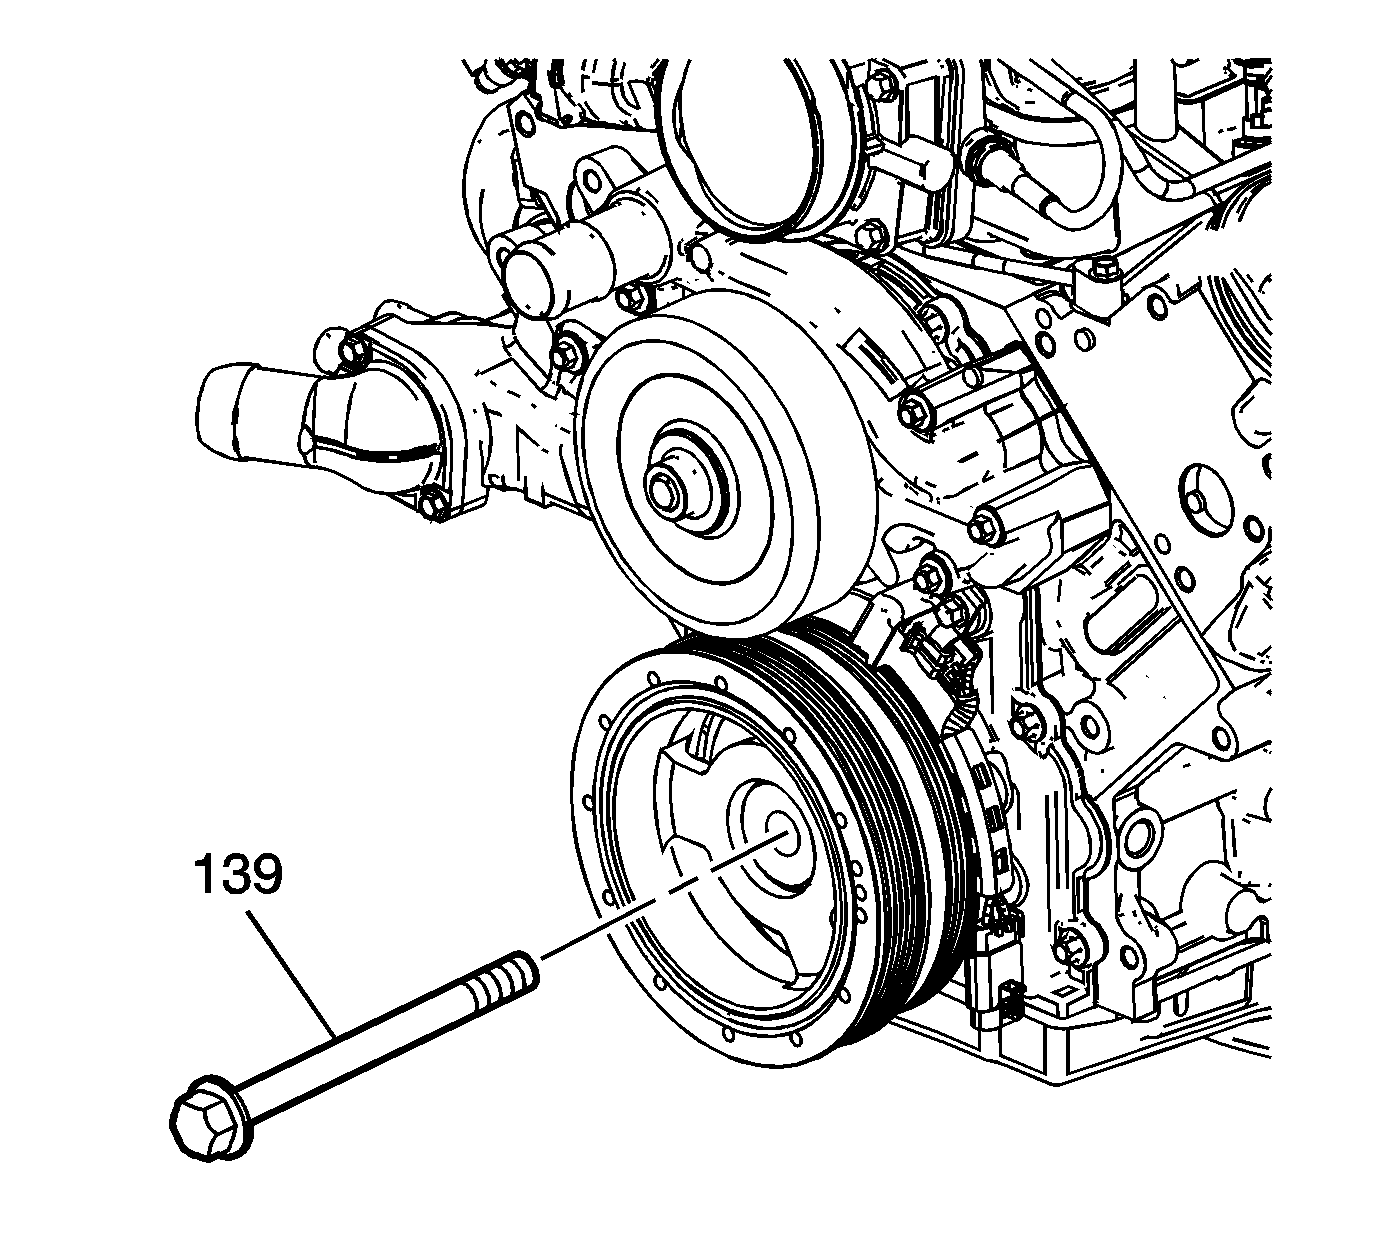
- Scribe or mark balancer orientation.
- Remove the crankshaft balancer bolt (139). Do not discard the crankshaft balancer bolt. The balancer bolt will be used during the balancer installation procedure.
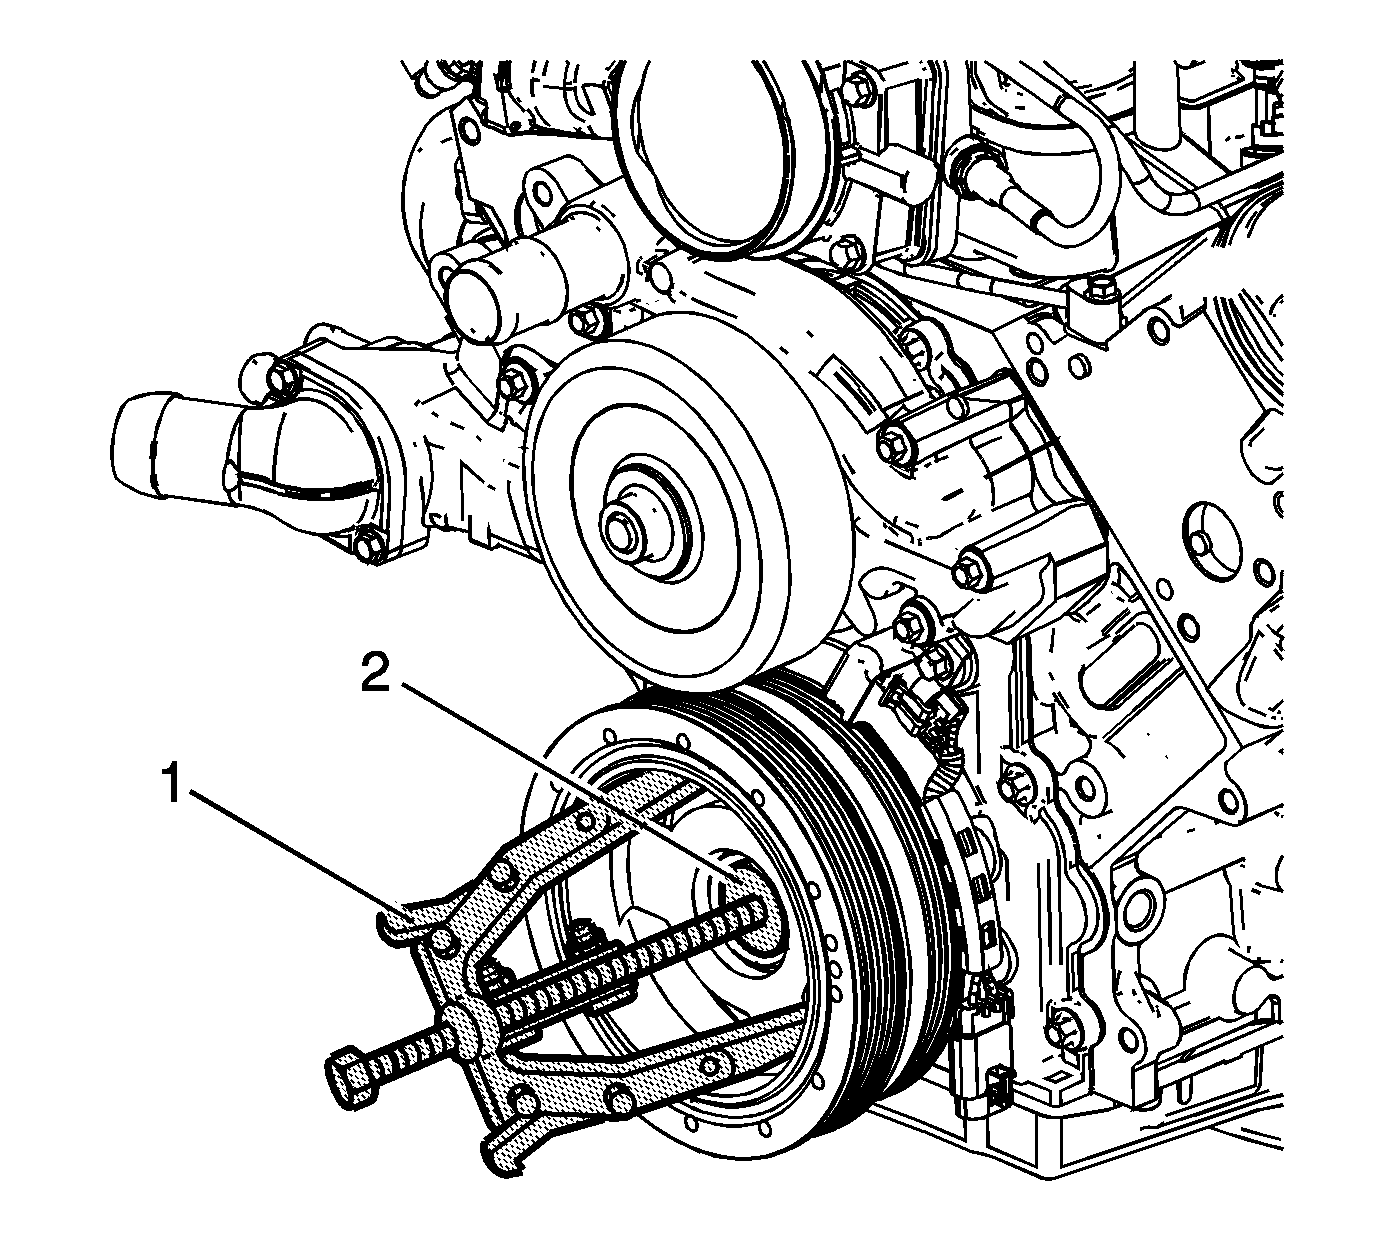
- Use the J 41816 (1) and the J 41816-2 (2) in order to remove the crankshaft balancer.
- Place the old and new balancers on the bench and orient them the same way (i.e. face up with a weight balance hole at 12 o'clock). Scribe/mark the new balancer in the same location as the old balancer. Do not transfer weight pins on manual transmission equipped vehicles. Most vehicles will be balanced without the use of any additional weight pins. Because some balancers may have spun on the crankshaft, transferring weight pins to the same position would produce a random imbalance.
- Inspect for the following conditions:
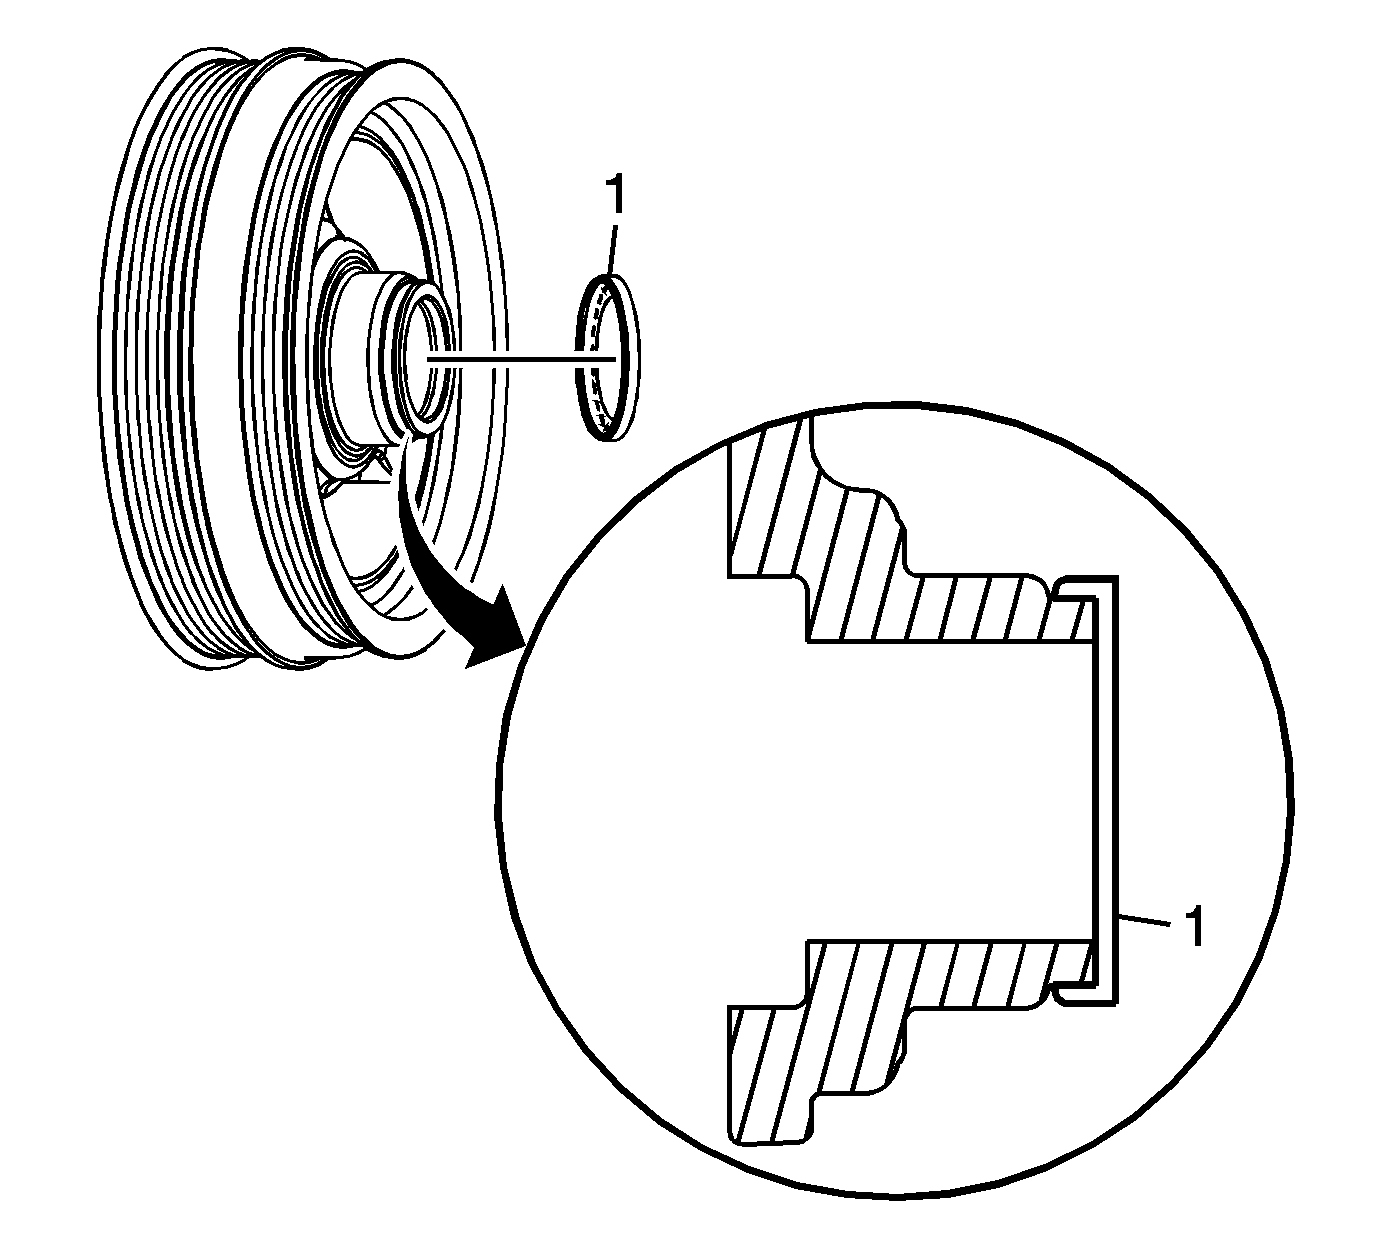
- Install the new POA friction washer onto the back of the new crankshaft balancer by hand. Refer to the illustration, item 1, for proper installation.
- Install the new balancer paying attention to line up the scribe mark.
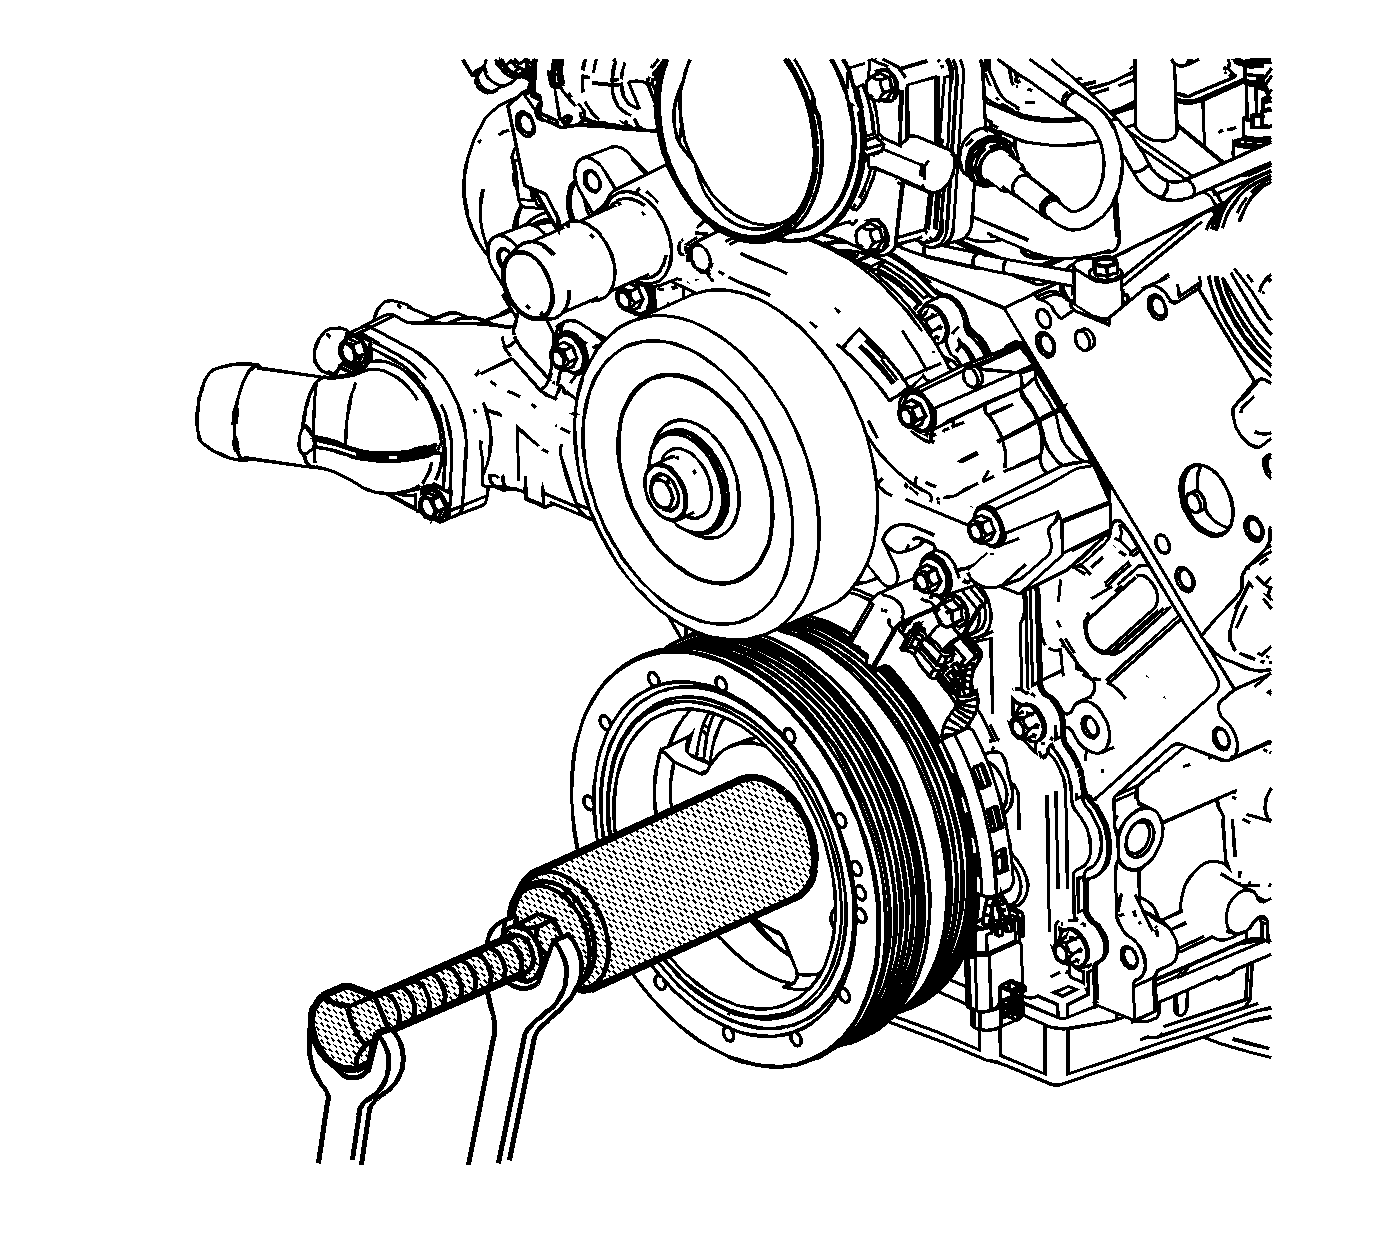
- Use the J 41665 and the J 41478 in order to install the balancer. Note that the threaded rod in the illustration above is from J 41478, Front Oil Seal Installer.
- Install the old balancer bolt and tighten.
- Remove the old bolt and measure the hub to crankshaft distance.
- Coat the three to five threads of the new bolt with thread locker (LOCKTITE™ 272) P/N 12345493 (in Canada, 10953488) before installation.
- Install and tighten the new crankshaft bolt.
- Remove the J 42386-A Flywheel Holding Tool.
- Install the starter and bolts. Tighten the starter bolts.
- Connect the starter wiring.
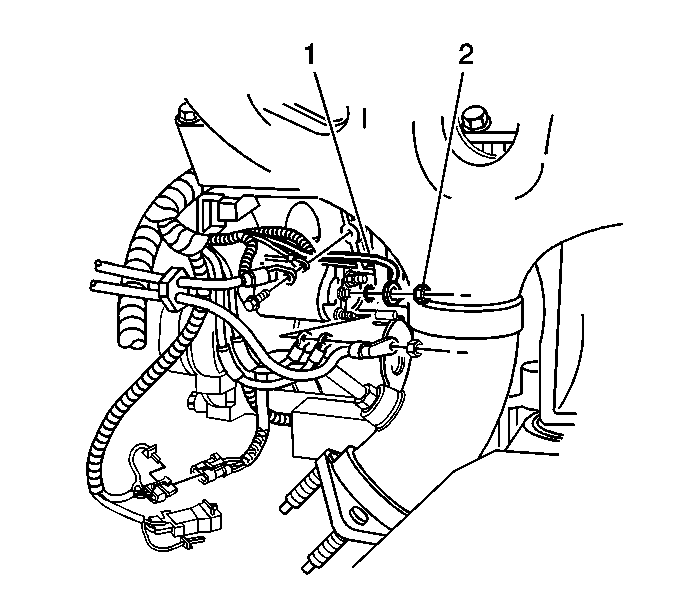
- Install the starter motor S terminal washer and purple lead wire (1).
- Install the S terminal nut (2) and tighten.
- Install the gray and rust harness leads to the solenoid.
- Raise and align the cradle.
- Install and tighten the cradle nuts.
- Install and tighten the engine mount nuts.
- Install the A/C belt.
- Install the cooler line bolts.
- Install the fan shroud assembly and bolts.
- Position the stabilizer shaft and install insulator clamps and bolts.
- Install the tie rod to the steering knuckle.
- Install the outer tie rod end stud nut to the outer tie rod end stud and tighten .
- Install the lower ball joint to the steering knuckle.
- Install the shock bolts and tighten.
- Repeat tie rod, lower ball joint and shock for the other side.
- Install the tires and lug nuts.
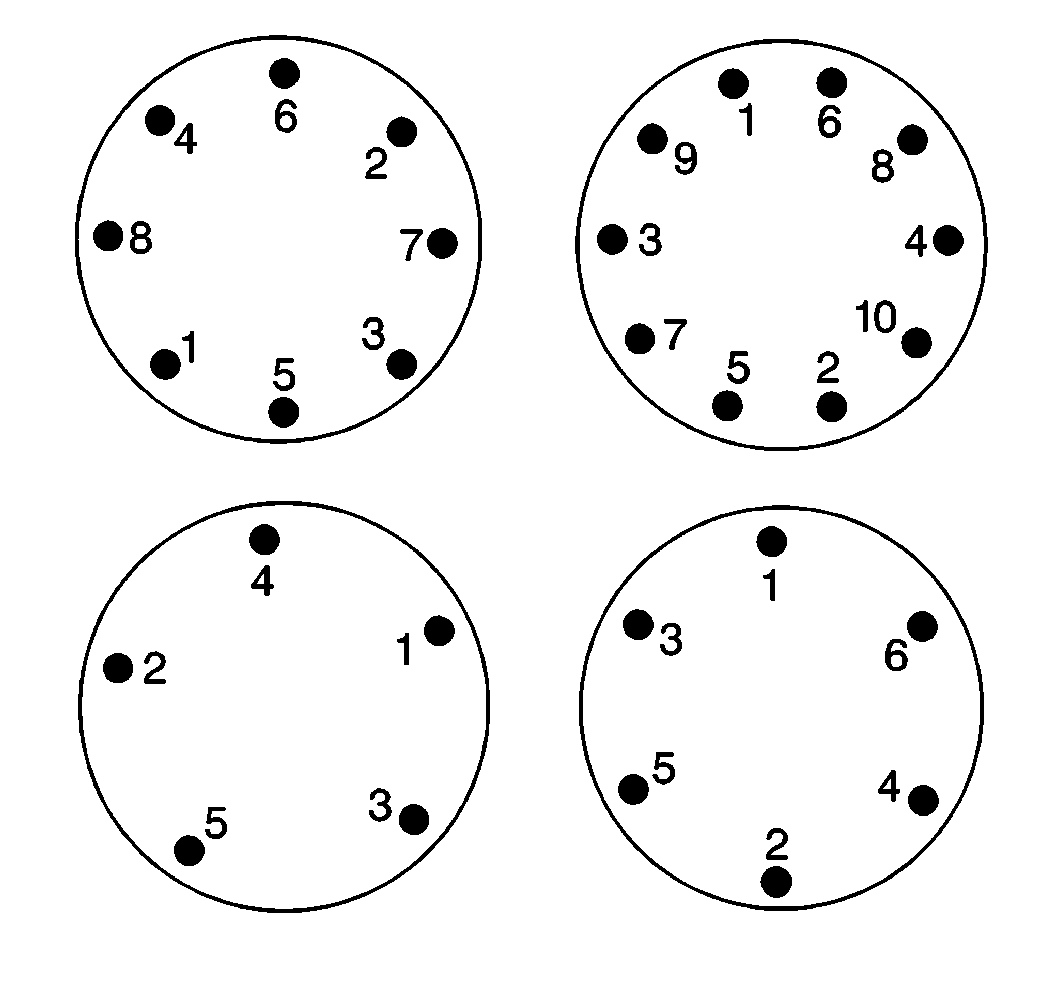
- Using the J 39544-KIT , tighten the wheel nuts in the appropriate sequence shown.
- Remove the support jack.
- Remove the Leaf Spring Compressor (J 33432-A).
- Lower the vehicle.
- Remove the engine support swivel brackets.
- Install the upper radiator support and tighten the bolts.
- Install the coolant and EVAP lines to the fan shroud.
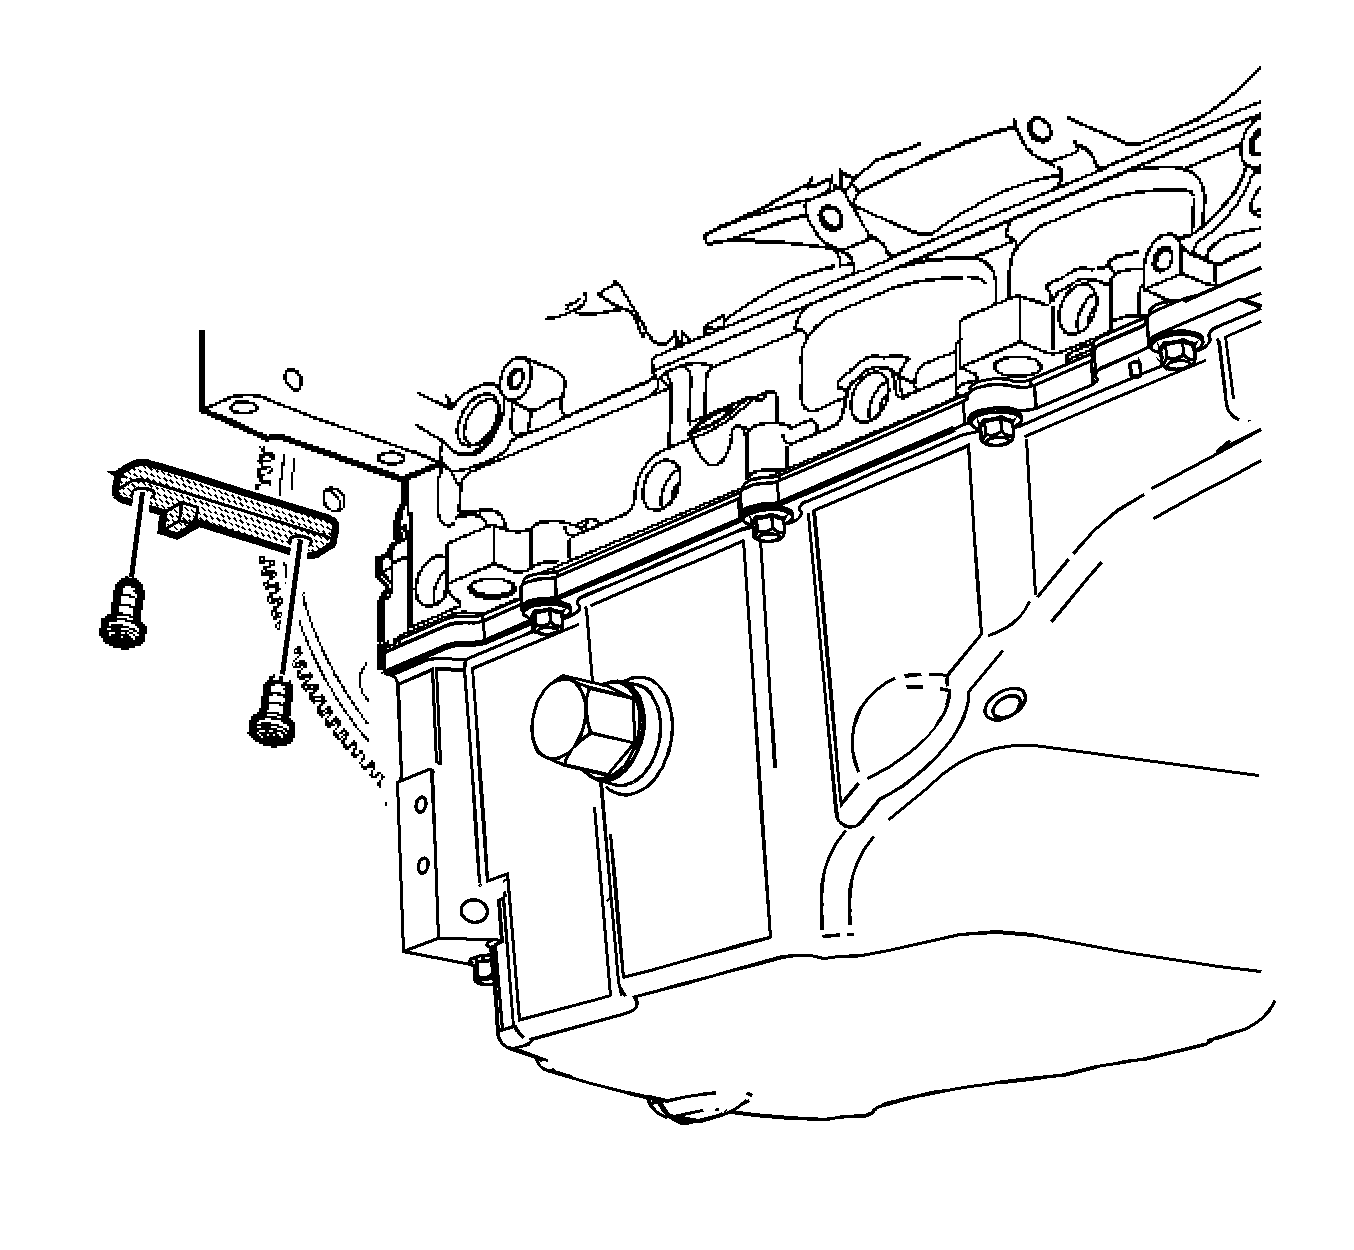
- Install the engine cover and oil fill cap.
- Install the intermediate shaft.
- LOCTITE™ the steering intermediate shaft bolts and install.
- Install the generator and tighten the bolts.
- Connect the generator wiring.
- Install the new accessory belt.
- Install the air duct and box.
- Connect the battery cable to the battery.
- Perform a crankshaft variation relearn procedure.


| • | Metal transfer to the crank post. Replace the crankshaft if metal has been transferred to it or it is damaged. |
| • | Metal transfer or damage to the timing chain sprocket face. Replace the sprocket if either condition is present. |
| • | Verify that the bolt does not bottom out in the crank post. |
| 34.1. | Assemble the J 41478 threaded rod, nut, washer and installer. Insert the smaller end of the J 41665 installer into the front of the balancer. |
| 34.2. | Use a wrench and hold the hex end of the threaded rod. |
| 34.3. | Use a second wrench and rotate the installation tool nut clockwise until the balancer is started onto the crankshaft. |
| 34.4. | Remove the tool and reverse the installation tool. Position the larger end of the installer against the front of the balancer. |
| 34.5. | Use a wrench and hold the hex end of the threaded rod. |
| 34.6. | Use a second wrench and rotate the installation tool nut clockwise until the balancer is installed onto the crankshaft. |
| 34.7. | Remove the balancer installation tool. |
Notice: Failure to apply proper torque to the old balancer bolt may result in the balancer not being fully seated. This could lead to failure of this joint in the future.
Tighten
Tighten the old balancer bolt to 330N·m(240 ft. lb).
Important: The nose of the crankshaft should be recessed 2.4-4.48 mm (0.094-0.176 in) into the balancer bore.

Notice: Be sure to follow the torque procedure for installing the new crankshaft bolt. Use of impact tools, or not using torque and angle method will result in joint failure.
| • | Tighten the crankshaft balancer bolt a first pass. |
Tighten
Tighten the crankshaft balancer bolt a first pass to 50N·m (37 lb ft).
| • | Put a paint stripe on the bolt running from the 12 o'clock to the 6 o'clock position in order to verify the correct torque requested in the next step. |
| Important: When tightening for the second pass, a minimum torque of 320 N·m (236 lb ft) should be observed. If this torque is not achieved, the bolt should be replaced. |
| • | Tighten the crankshaft balancer bolt a second pass. |
Tighten
Tighten the crankshaft balancer bolt a second pass to 140 degrees using the J 45059.
| Important: Recheck the position of the previously painted stripe to assure 140 degree rotation. Achieving the correct torque angle is critical to the success of this repair. Over-torquing or under-torquing the joint will result in an unsatisfactory repair. |
Tighten
Tighten the starter bolts to 50 N·m (37 lb ft).
Important: Orient the purple lead wire to the 10 o'clock position when installing.
Tighten
Tighten the S terminal nut to 4 N·m (35 lb in).
Important: Orient the gray and rust harness leads to the 6 o'clock and 7 o'clock position.
Tighten
Tighten the nuts, using hand tools only, to 110 N·m(81 lb ft).
Tighten
Tighten the nuts to 65 N·m(48 lb ft).
Tighten
Tighten the bolts to 5 N·m(44 lb in).
Tighten
Tighten the stabilizer shaft insulator clamp bolts to 58N·m (43 lb ft).
Tighten
Tighten the outer tie rod end stud nut to 20 N·m(15 lb ft) to seat the stud.
| 53.1. | Turn the nut an additional 160 degrees. |
| 53.2. | Check for the outer tie rod end stud nut for a minimum final torque of 45 N·m(33 lb ft). |
| 54.1. | Tighten the lower control arm ball joint stud nut. |
Tighten
Tighten the nut to 20 N·m (15 lb ft) to seat the ball joint stud.
| 54.2. | Turn the ball joint stud nut an additional 210 degrees. |
| 54.3. | Check the ball joint stud nut for a minimum final torque of 55 N·m (41 lb ft). |
Tighten
Tighten the shock absorber lower mounting nuts to 28 N·m (21 lb ft).
Important: Tighten the nuts evenly and alternately in order to avoid excessive run out of the tire and wheel assembly.
Tighten
Tighten the nuts in sequence to 140 N·m(100 lb ft).
Tighten
Tighten the bolts to 9 N·m (80 lb in).
Tighten
Tighten the lower coupling retaining bolt to 34 N·m (25 lb ft).
Tighten
Tighten the generator bolts to 50 N·m(37 lb ft).
Tighten
Tighten the battery feed cable nut to 13 N·m(10 lb ft).
Parts Information
Part Number | Description | Qty |
|---|---|---|
12557840 | Bolt, Crankshaft Balancer | 1 |
12598831 | Balancer, Crankshaft w/ POA Friction Washer | 1 |
12579229 | Belt, Water Pump, Power Steering and Generator | 1 as req'd |
12579228 | Belt, Air Conditioning Compressor | 1 as req'd |
Warranty Information
For vehicles repaired under warranty, use:
Labor Operation | Description | Labor Time |
|---|---|---|
J0720 | Pulley, Crankshaft Balancer - Replace | 4.6 hrs |
