5th Bow Limit Switch Replacement on Convertible Corvette - keywords B1291 bracket close CM7 cylinder folding inop inoperative open part power rear roof switch top

| Subject: | 5th Bow Limit Switch Replacement On Convertible Corvette |
| Models: | 2005-2006 Chevrolet Corvette |
| with Power Folding Top (RPO CM7) |
This PI has been revised to advise dealers that the hardware is no longer packaged with the switch. Please discard PIC3910A.
The following diagnosis might be helpful if the vehicle exhibits the symptom(s) described in this PI.
Condition/Concern:
When servicing the 5th bow raised or lowered limit switch on the power folding top, there is a new design switch. The switch was changed from a 2 piece design (1st design) to a 1 piece design (2nd design). When installing the new 2nd design (one piece) switch on a vehicle with a first design (two piece) switch, a new installation procedure is needed. The 2nd design switch was implemented on vehicles in November 2005 build.
A tan color convertible roof (RPO 35T), built prior to November of 2005, the second design switch will be needed and the instructions below apply.
If the vehicle has a black convertible roof (RPO 41T) and was built prior to November 2005, part numbers 89025233 and 89025239 will need to be installed. The one piece switch will not work on the black top convertibles (RPO 41T) built prior to November 2005.
Recommendation/Instructions:
Following the procedure below will allow the installation of this new second design one piece switch part number 19120624. Again, the one piece switch will not work on the black top convertibles (RPO 41T) built prior to November 2005.
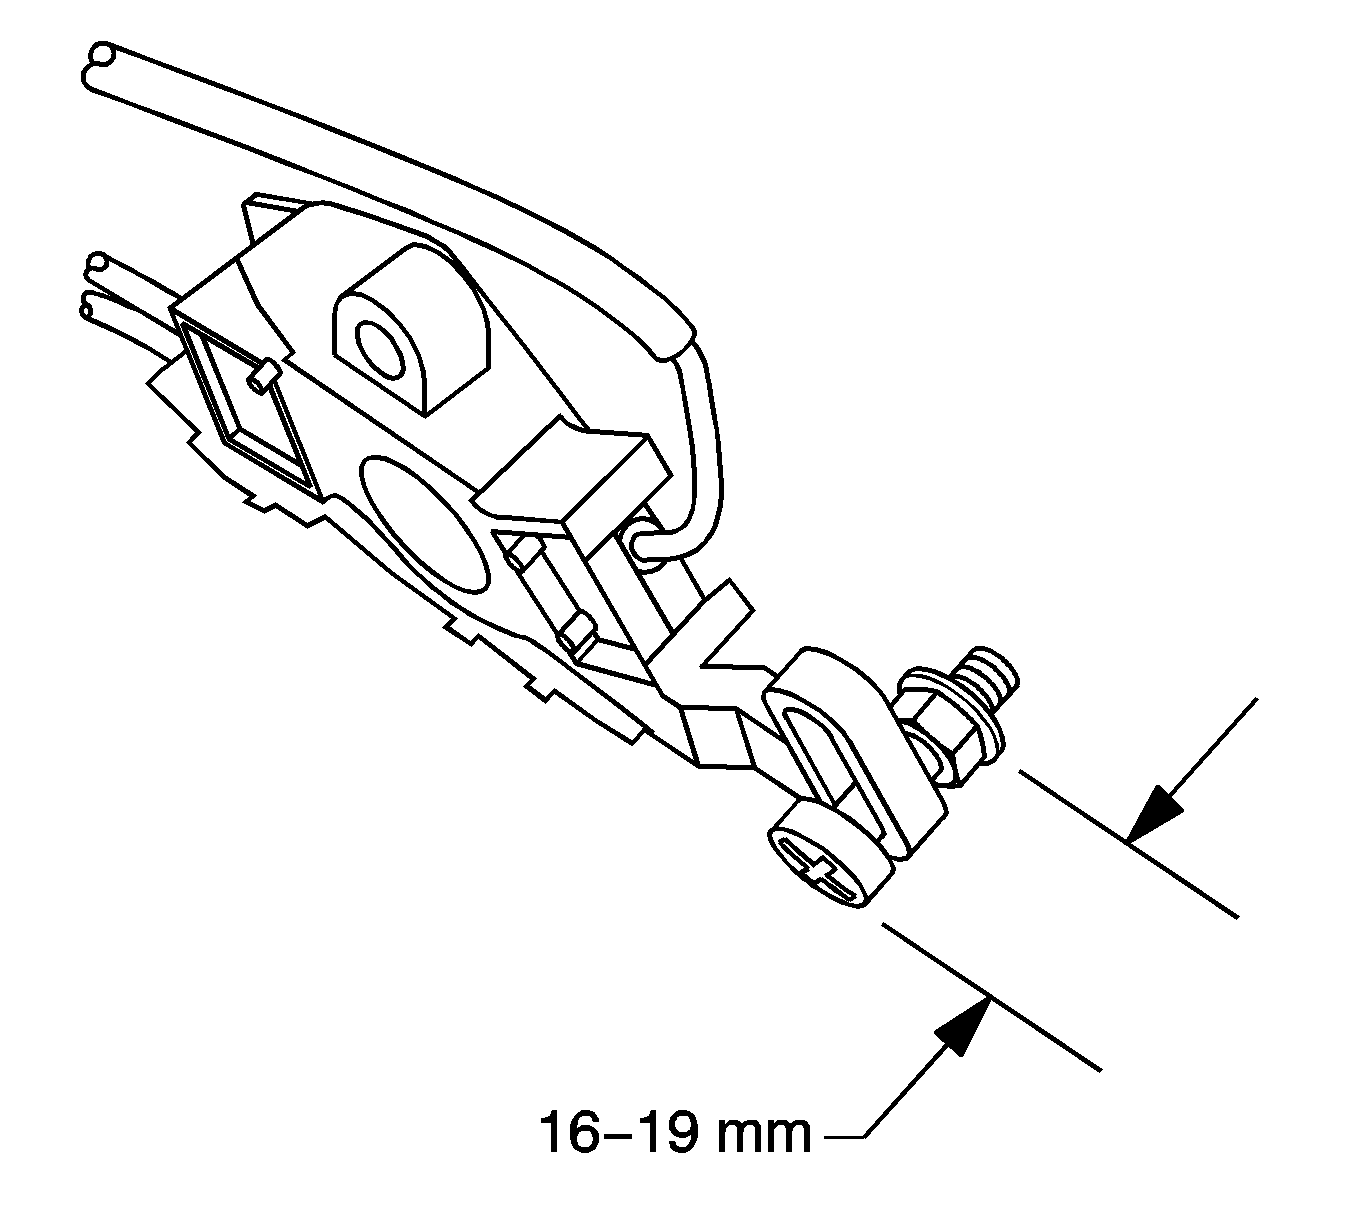
Before proceeding, It will be necessary to obtain one 16mm x m5 bolt, one 20mm x m5 bolt and one m5 nut that has a shoulder. If a photo is needed to see what type of nut and bolt is needed, refer to the illustration after step 8 below.
- Remove the 5th Bow Raised Limit Switch and Bracket Assembly.
- Remove the 5th Bow Lowered Switch and Bracket Assembly.
- Remove Cable Clips from Roof Rail Casting.
- Remove cable ties that fix the cables to the Main Cylinder.
- Remove the cable ties that bind the 5th Bow Limit Switch cables rearward in the car and disconnect the red and green two way connectors.
- Remove the 5th Bow Pivot Pin by removing the clip on the Outboard side.
- Discard the Pivot Pin and Replace it with the 20mm x m5 bolt and nut with shoulder at reassembly.
- Attach the 20mm Screw and 5m Nut w/shoulder to the Slot on the 5th Bow Limit Switch Assembly provided as shown.
- Install the new 5th Bow Pivot Pin From the Kit.
- Install Screw and Jam Nut on the 5th Bow Bracket. Torque Jam Nut to 3.2 Nm
- The Screw should extend 16-19mm from the surface of the 5th Bow Bracket.
- Place the 5th Bow Limit Switch Assembly on the Rear Rail.
- The cable for the Heated Backlight and the upper 5th Bow Limit Switch can be tucked inside the Rear Rail eliminating the need for the cable retaining clip in this area.
- Fasten the 5th Bow Limit Switch Assembly with the 16mm x m5 screw. Torque to 3.2 Nm.
- Reinstall the 3 cables into the lower Rear Rail clip.
- Reroute the Limit Switch cables through to the connectors as they were previously installed.

Please follow this diagnostic or repair process thoroughly and complete each step. If the condition exhibited is resolved without completing every step, the remaining steps do not need to be performed.
