For 1990-2009 cars only
Tools Required
| • | J 8433 Pulley Puller |
| • | J 41478 Crankshaft Front Oil Seal Installer |
| • | J 41558 Crankshaft Sprocket Remover |
| • | J 41665 Crankshaft Balancer and Sprocket Installer |
| • | J 41816-2 Crankshaft End Protector |
Removal Procedure
Notice: Do not turn the crankshaft assembly after the timing chain has been removed in order to prevent damage to the piston assemblies or the valves.
- Remove the oil pump. Refer to Oil Pump, Screen, and Crankshaft Oil Deflector Replacement .
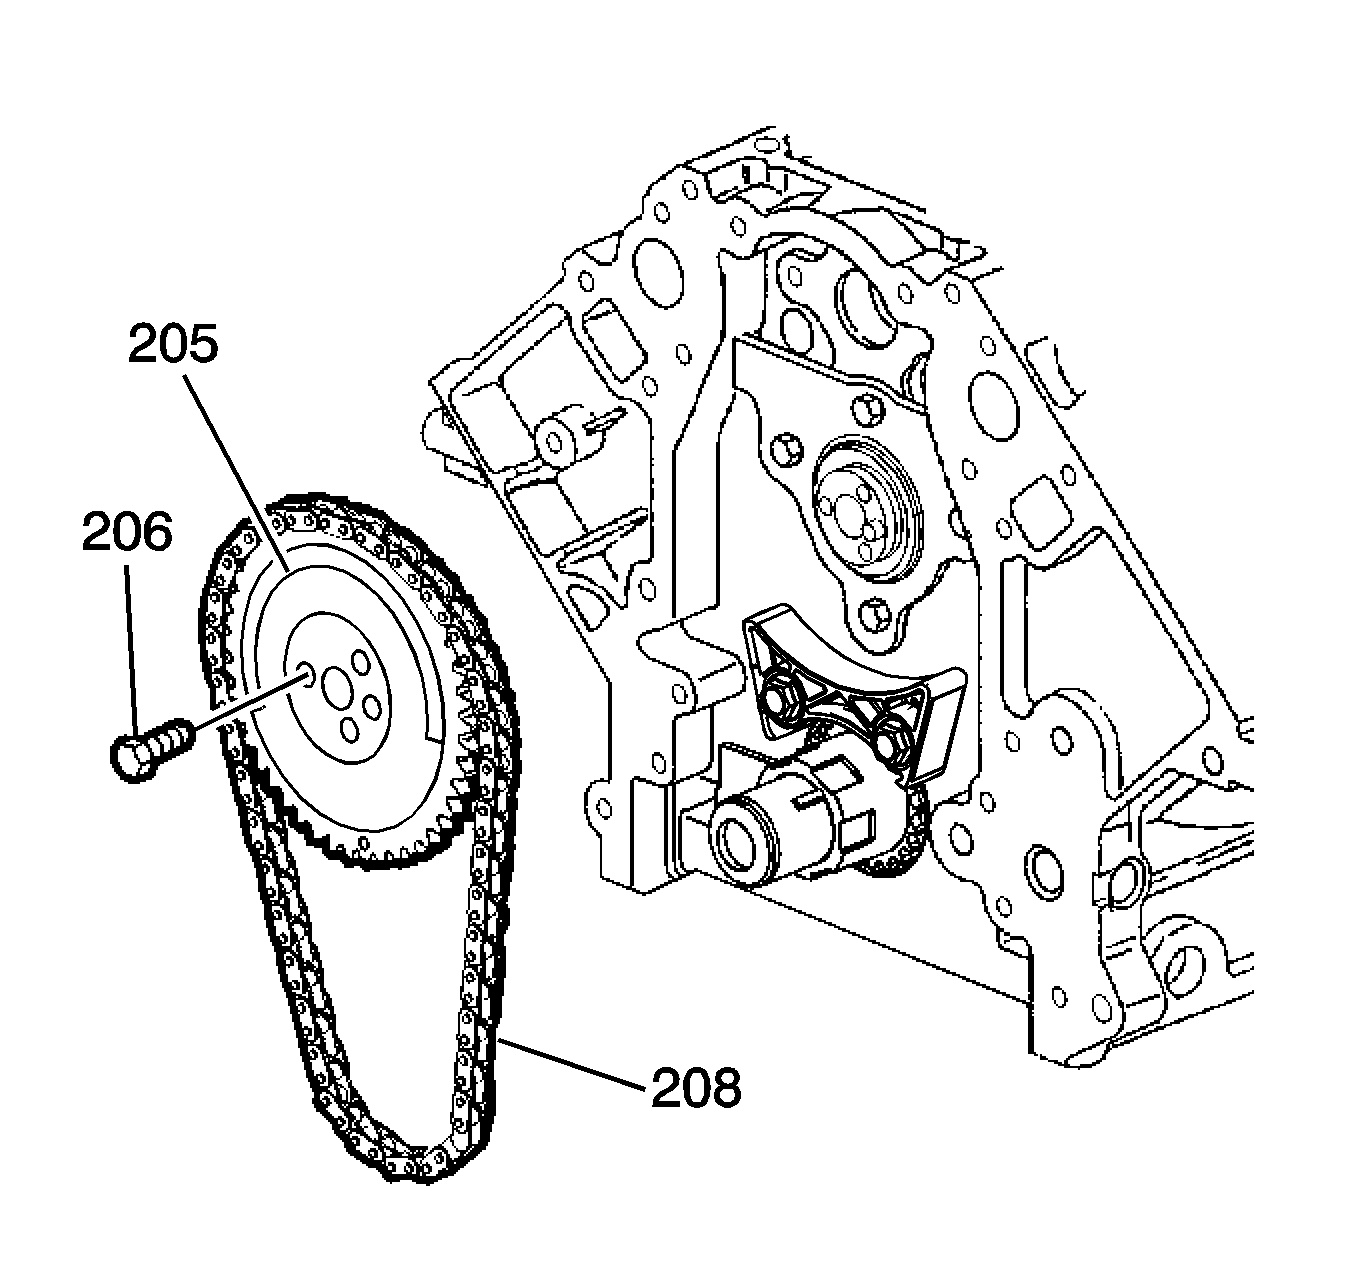
- Remove the camshaft sprocket bolts (206).
- Remove the camshaft sprocket (205) and timing chain (208).
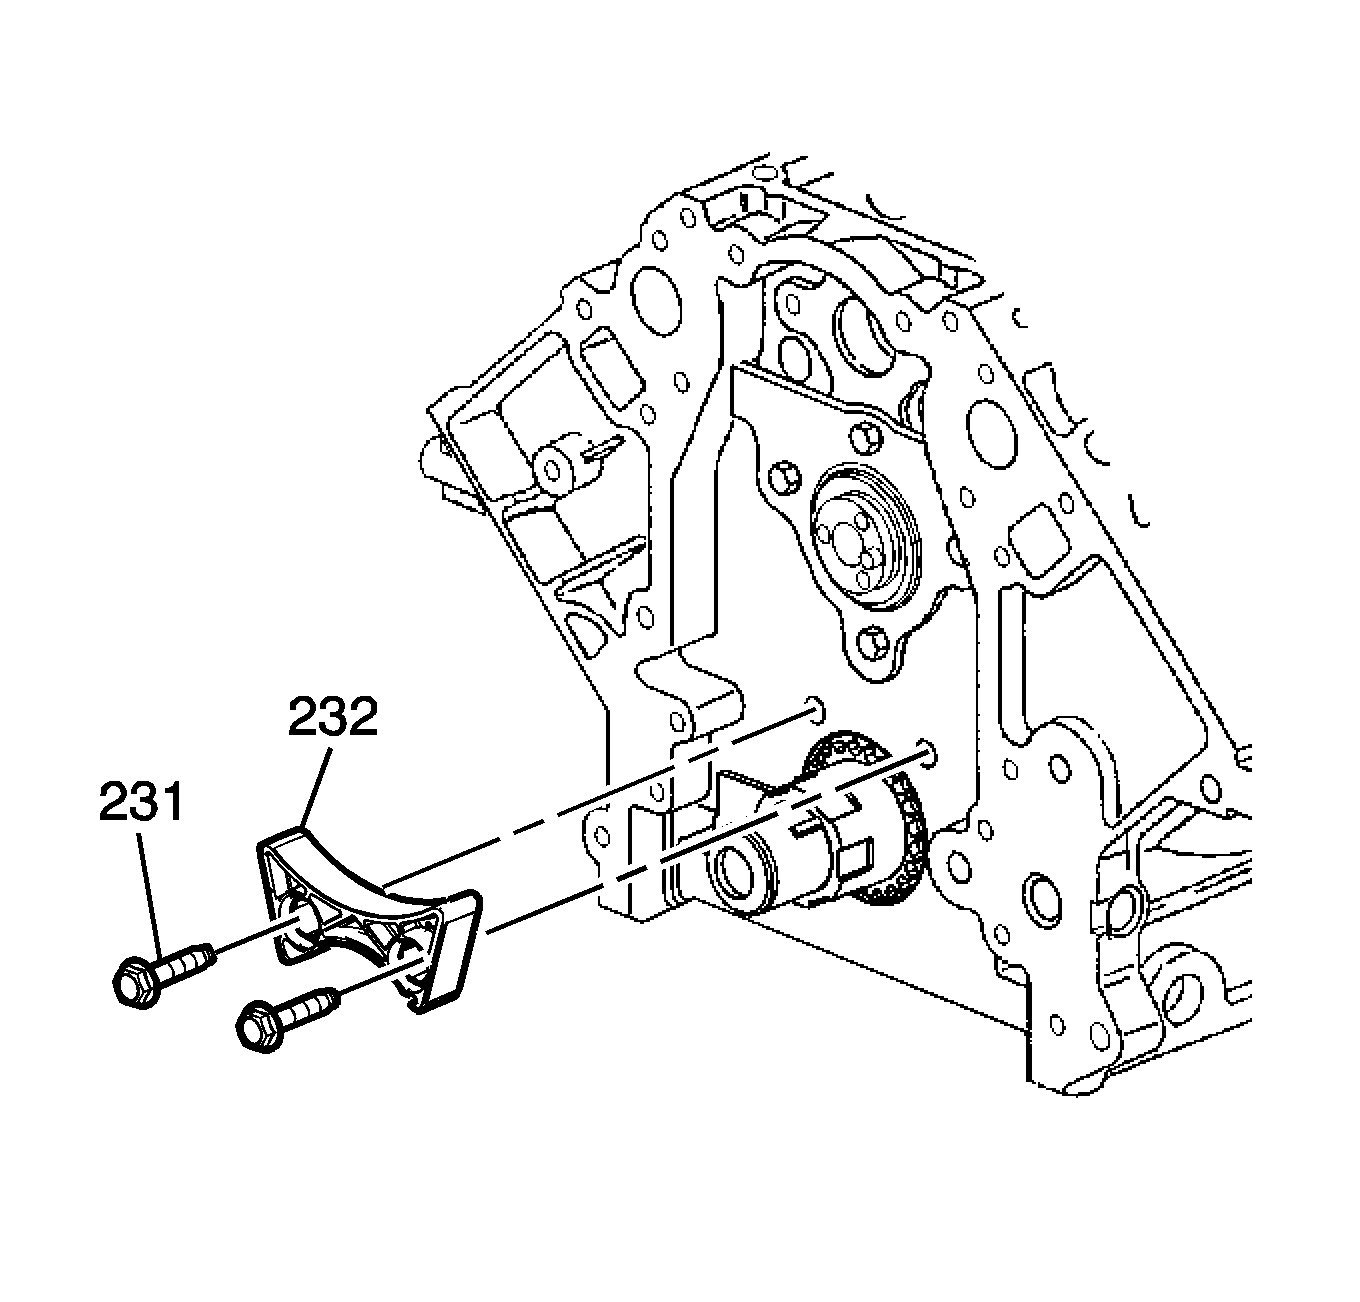
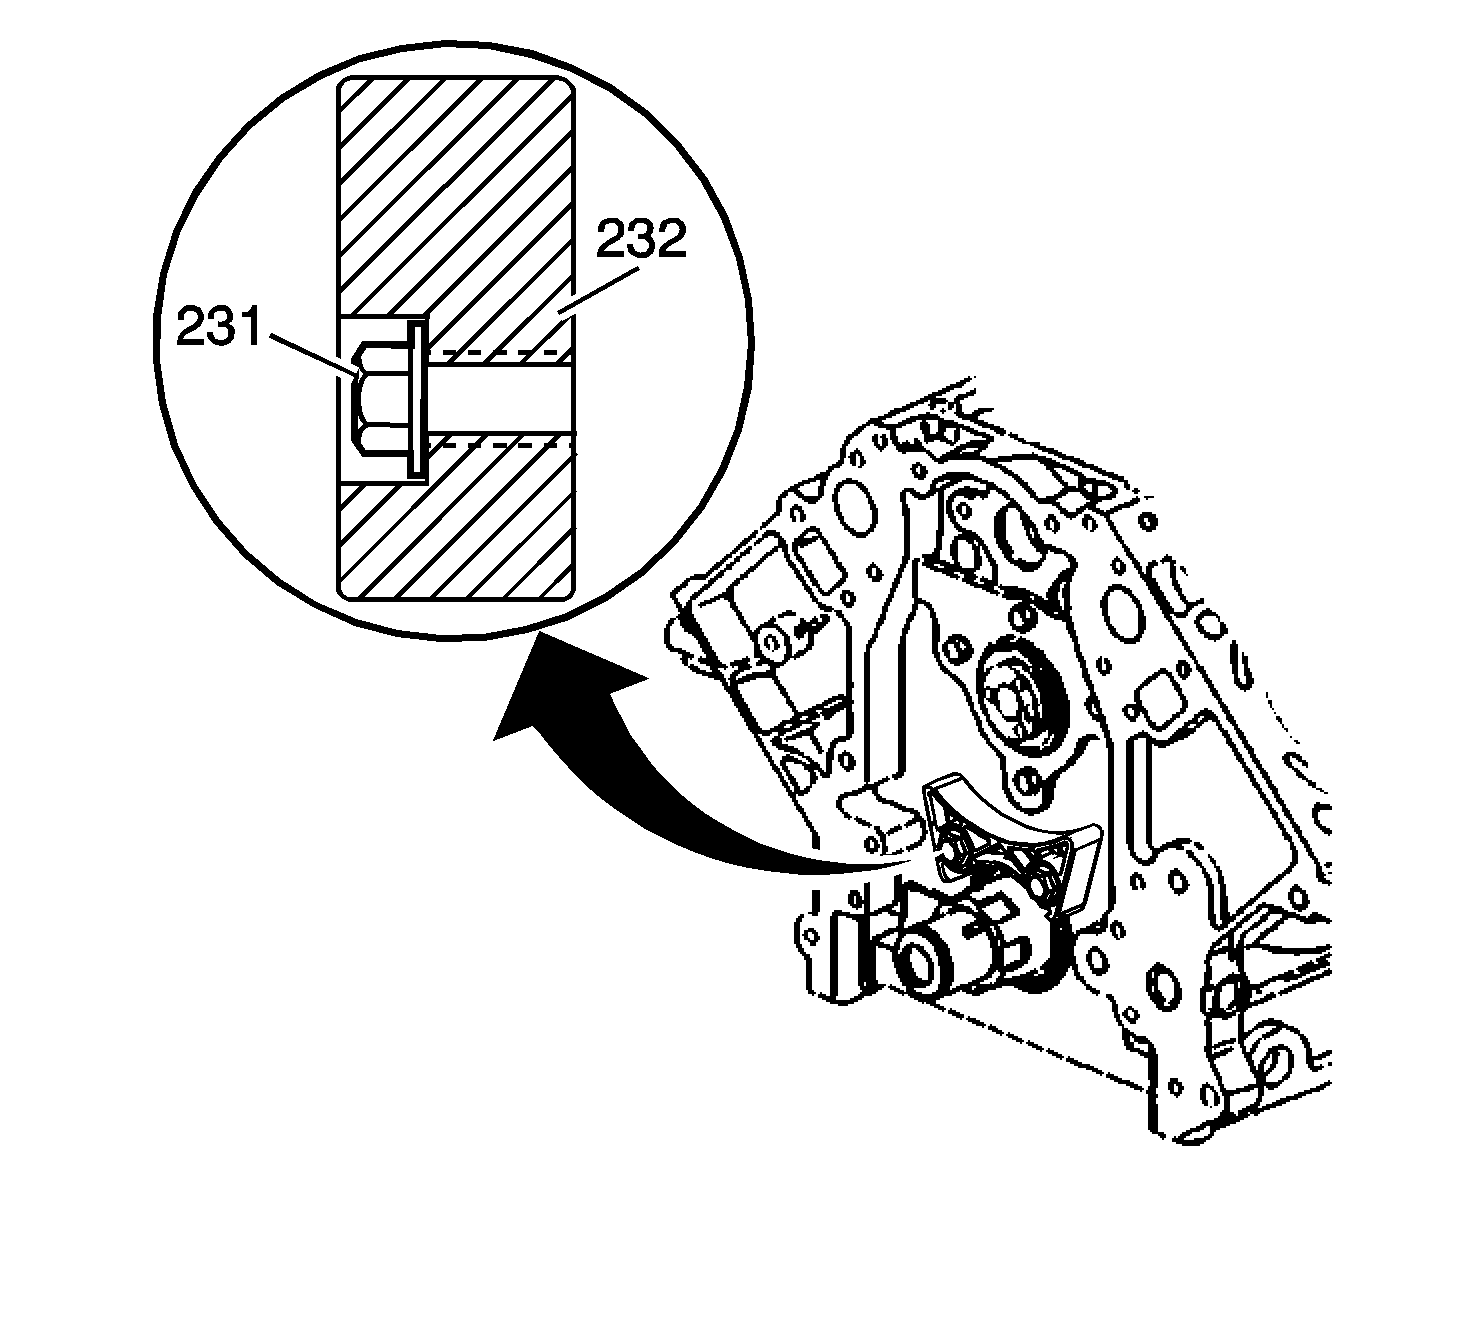
- Remove the bolts (231) and timing chain dampener (232).
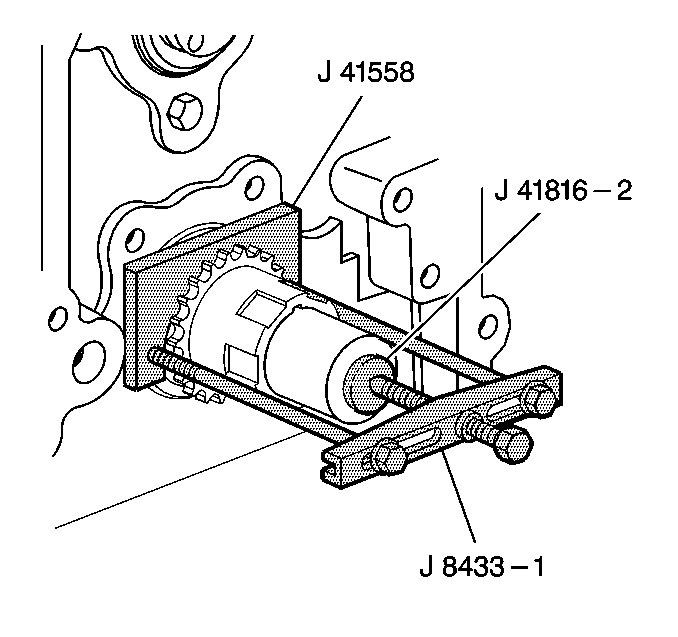
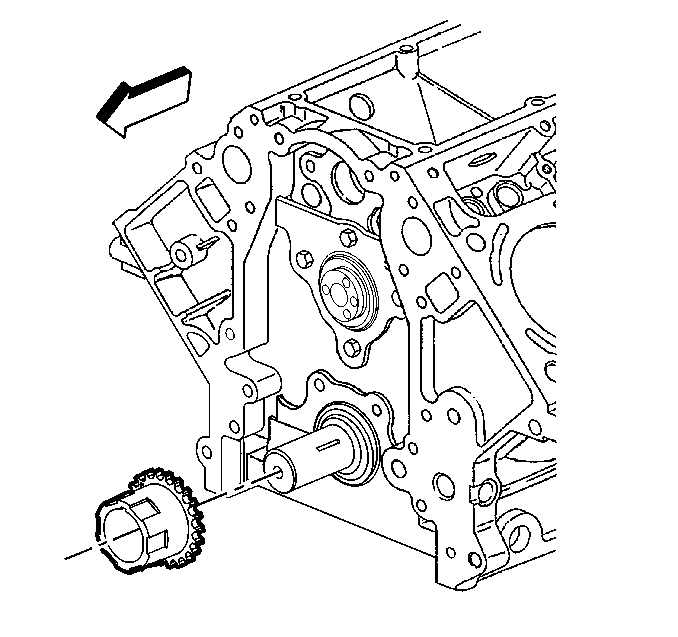
- Use the J 8433 , J 41816-2 and J 41558 in order to remove the crankshaft sprocket.
- Remove the crankshaft sprocket.
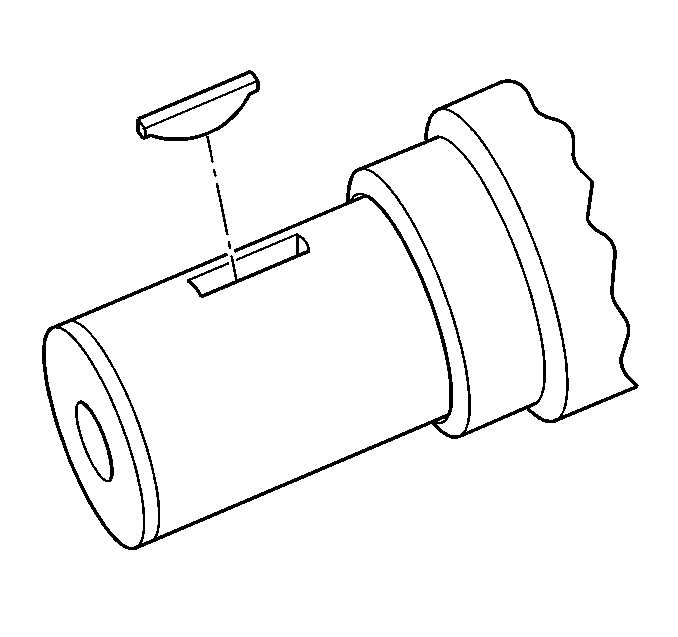
- Remove the crankshaft sprocket key (if required).
- Clean and inspect the timing chain and sprockets. Refer to Camshaft Timing Chain and Sprocket Cleaning and Inspection .
Installation Procedure
- Install the key into the crankshaft keyway, if previously removed.
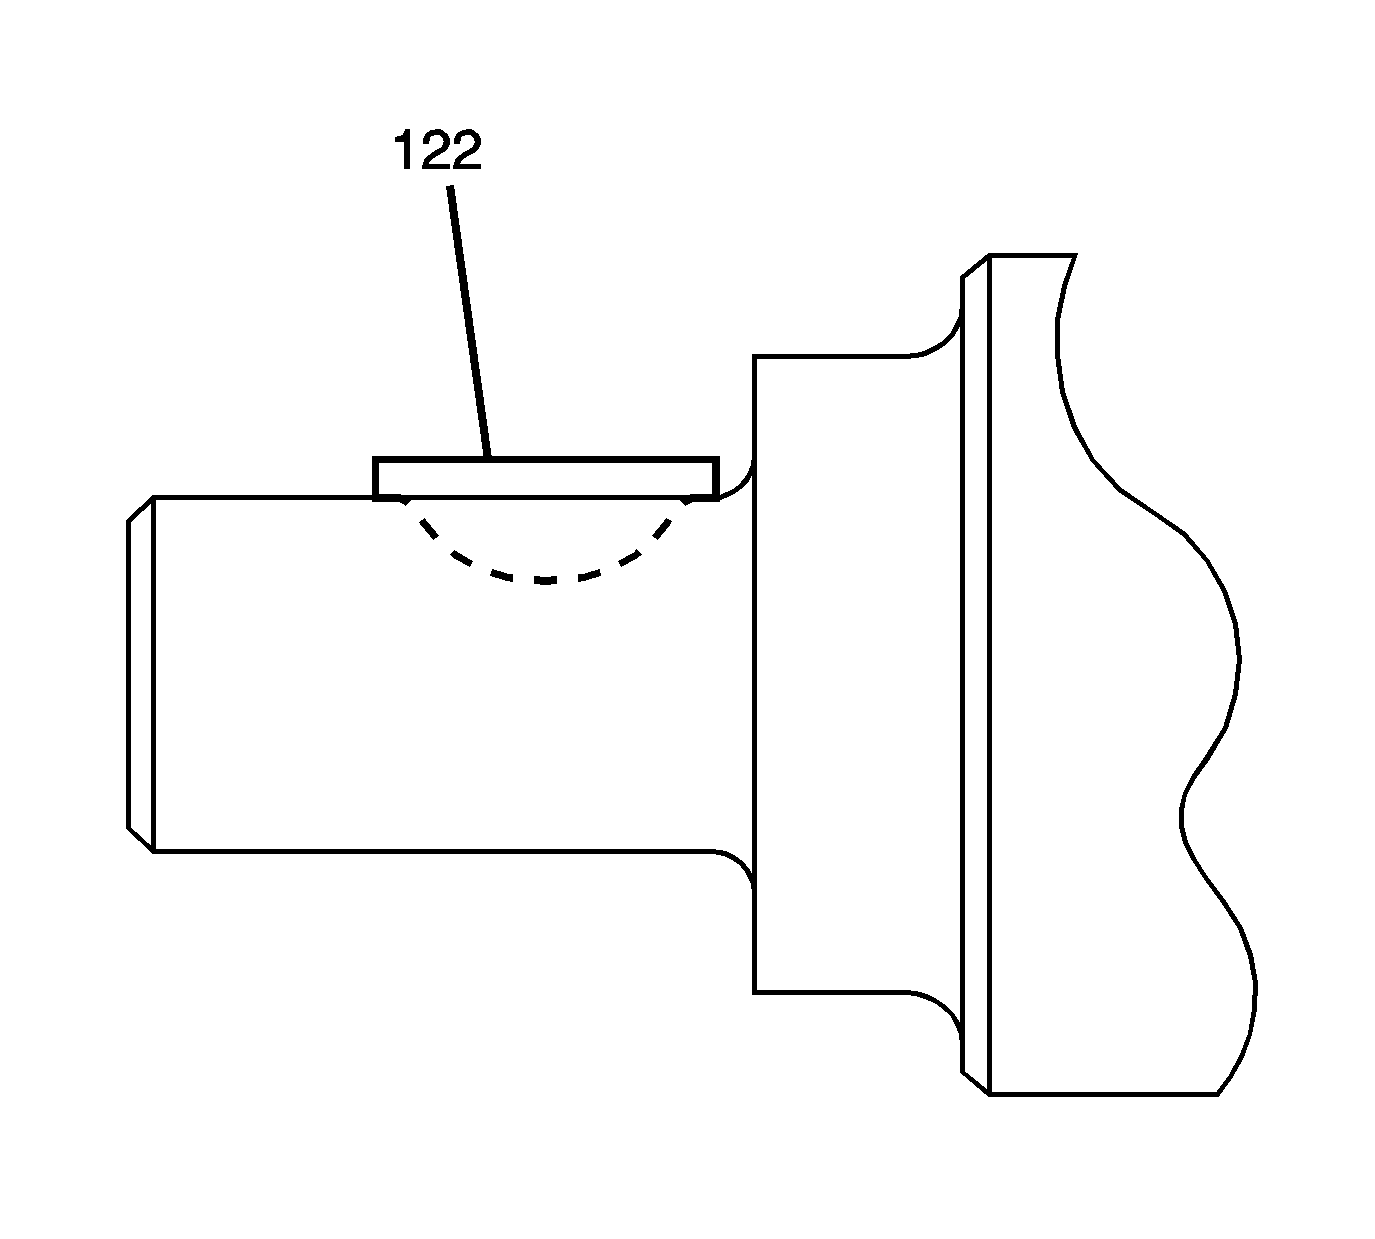
- Tap the key (122) into the keyway until both ends of the key bottom onto the crankshaft.
- Install the crankshaft sprocket onto the front of the crankshaft. Align the crankshaft key with the crankshaft sprocket keyway.
- Use the J 41478 (1) and the J 41665 (2) in order to install the crankshaft sprocket.
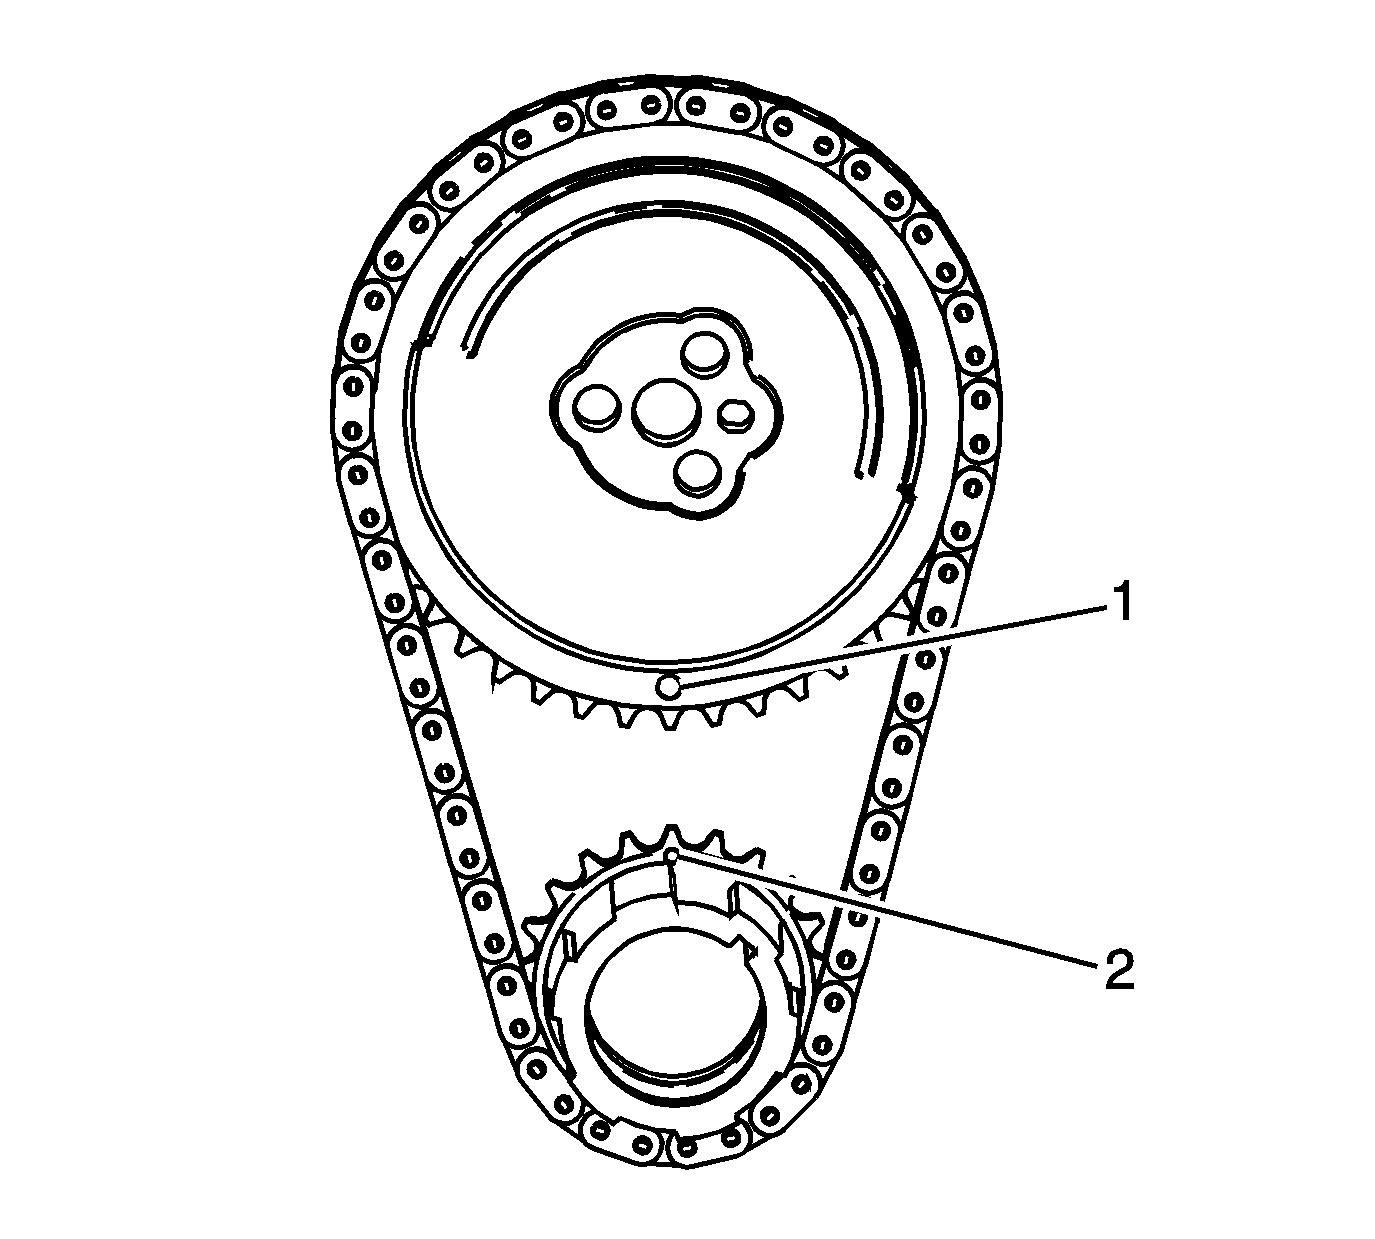
- Rotate the crankshaft sprocket until the alignment mark is in the 12 o'clock position.
- Install the timing chain dampener (232) and bolts (231).
- With the timing chain dampener properly installed, the heads of the bolts (231) should install to flush or below the face of the guide (232).
- Install the camshaft sprocket (205) and timing chain (208). If necessary, rotate the camshaft or crankshaft sprockets in order to align the timing marks.
- Install the camshaft sprocket bolts (206).
- Inspect for proper alignment of the camshaft and crankshaft sprocket timing marks (1, 2).
- Install the oil pump. Refer to Oil Pump, Screen, and Crankshaft Oil Deflector Replacement .

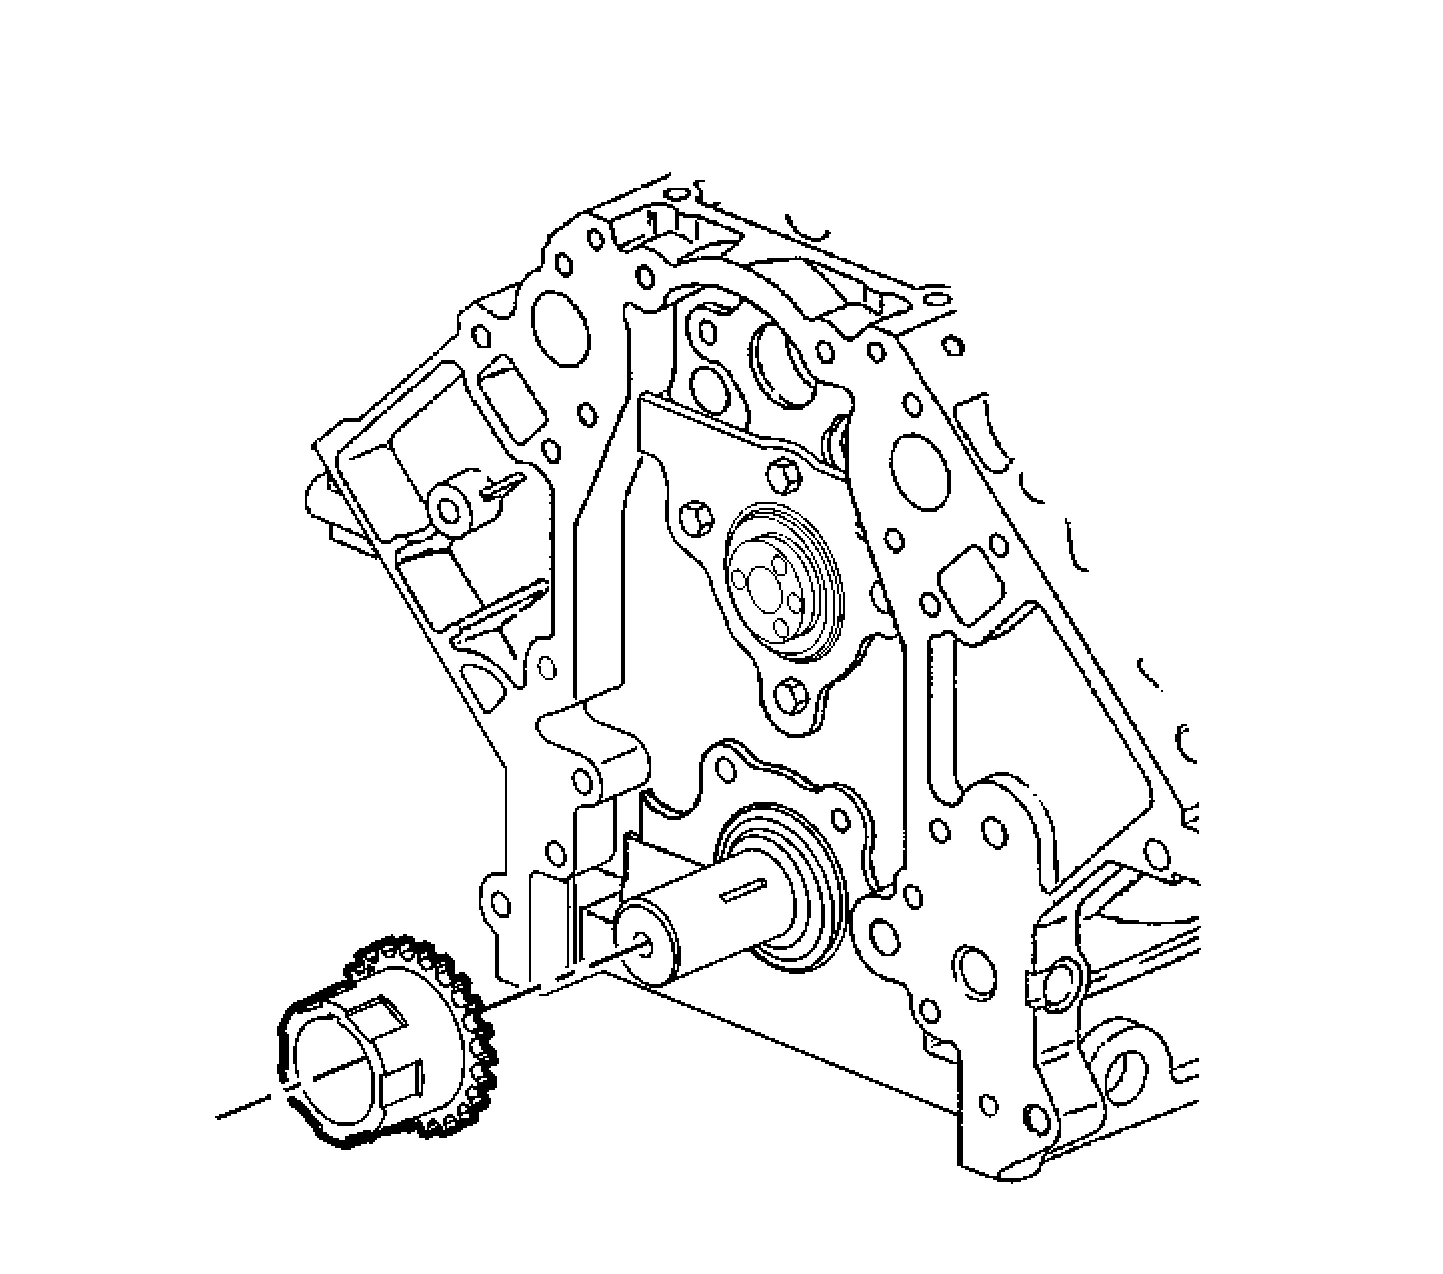
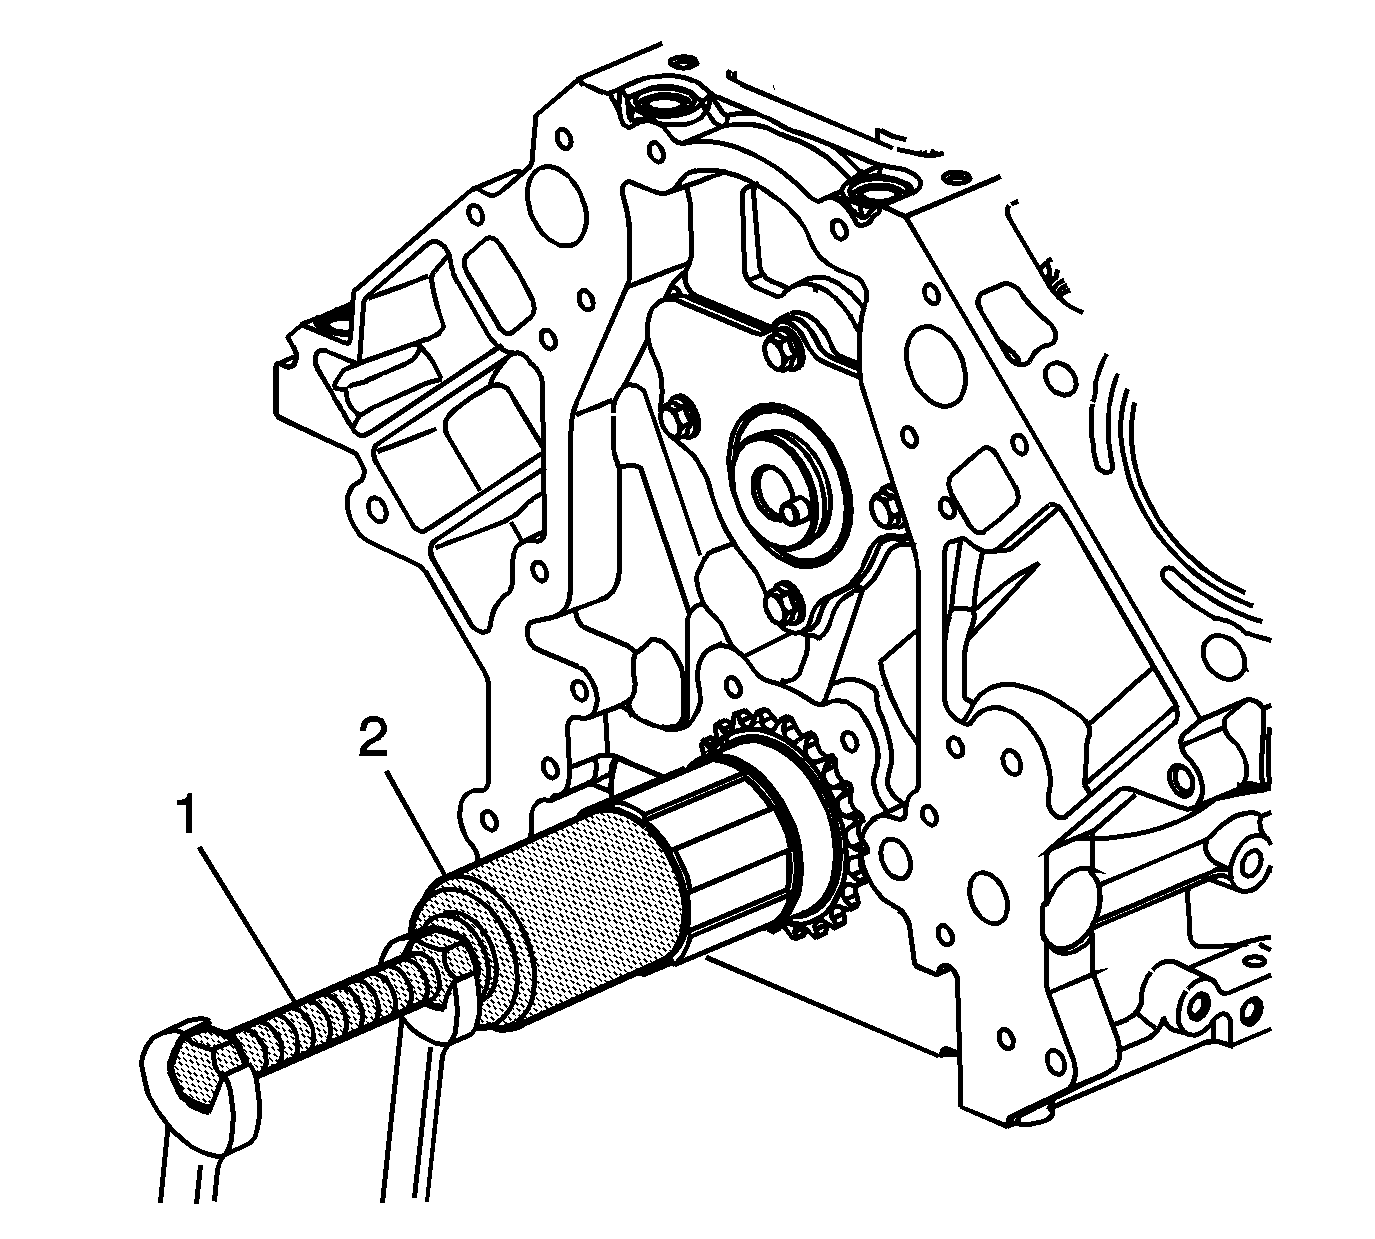
Install the sprocket onto the crankshaft until fully seated against the crankshaft flange.
Notice: Refer to Fastener Notice in the Preface section.

Tighten
Tighten the timing chain dampener bolts to 25 N·m (18 lb ft).

Important:
• Properly locate the camshaft sprocket onto the locating pin of the camshaft. • The sprocket teeth and timing chain must mesh. • The camshaft and the crankshaft sprocket alignment marks MUST be aligned properly. Position the camshaft sprocket alignment mark in the 6 o'clock position.
Tighten
Tighten the camshaft sprocket bolts to 25 N·m (18 lb ft).
