For 1990-2009 cars only
Removal Procedure
- Disconnect the negative battery cable.
- Remove the left instrument panel (I/P) lower insulator panel. Refer to Instrument Panel Insulator Panel Replacement .
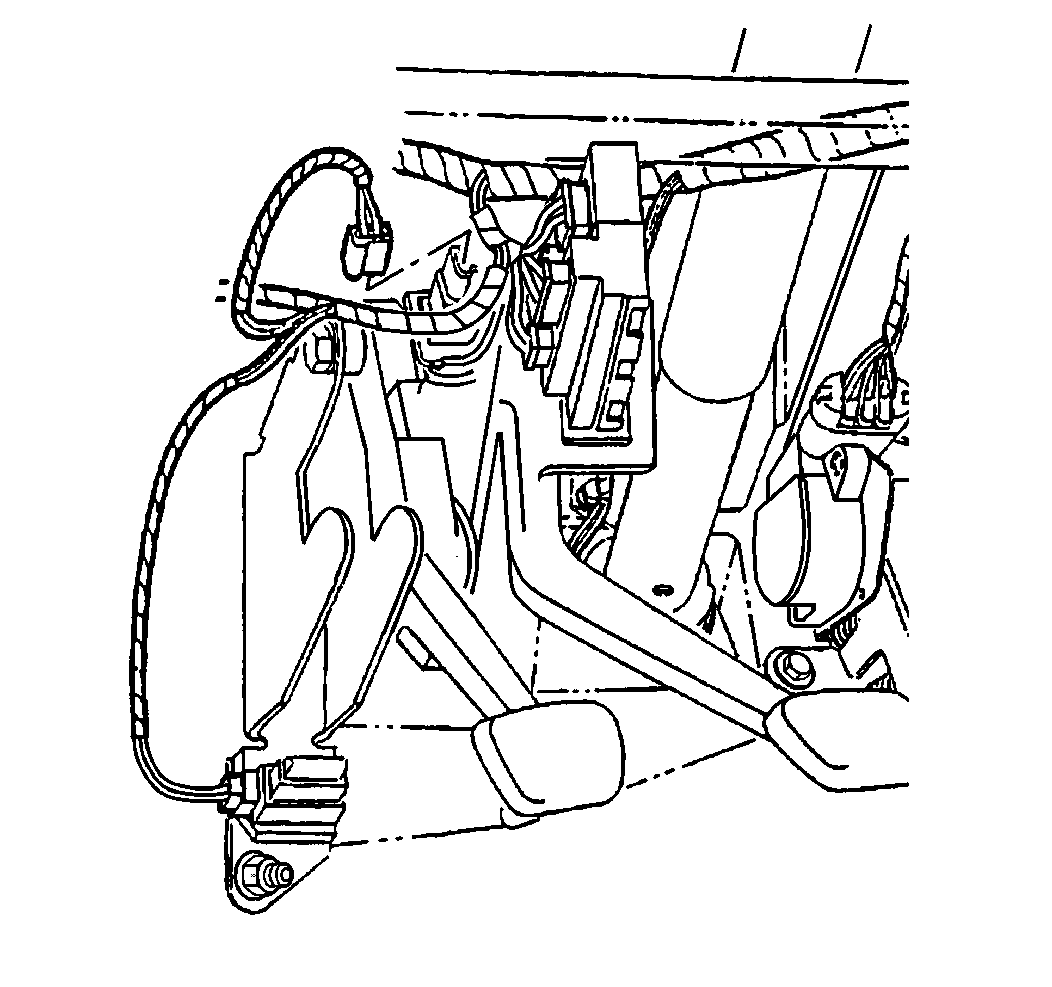
- Disconnect the cruise control release switch electrical connector.
- Remove the cruise control release switch bracket retaining bolts.
- Remove the cruise control release switch, with bracket.
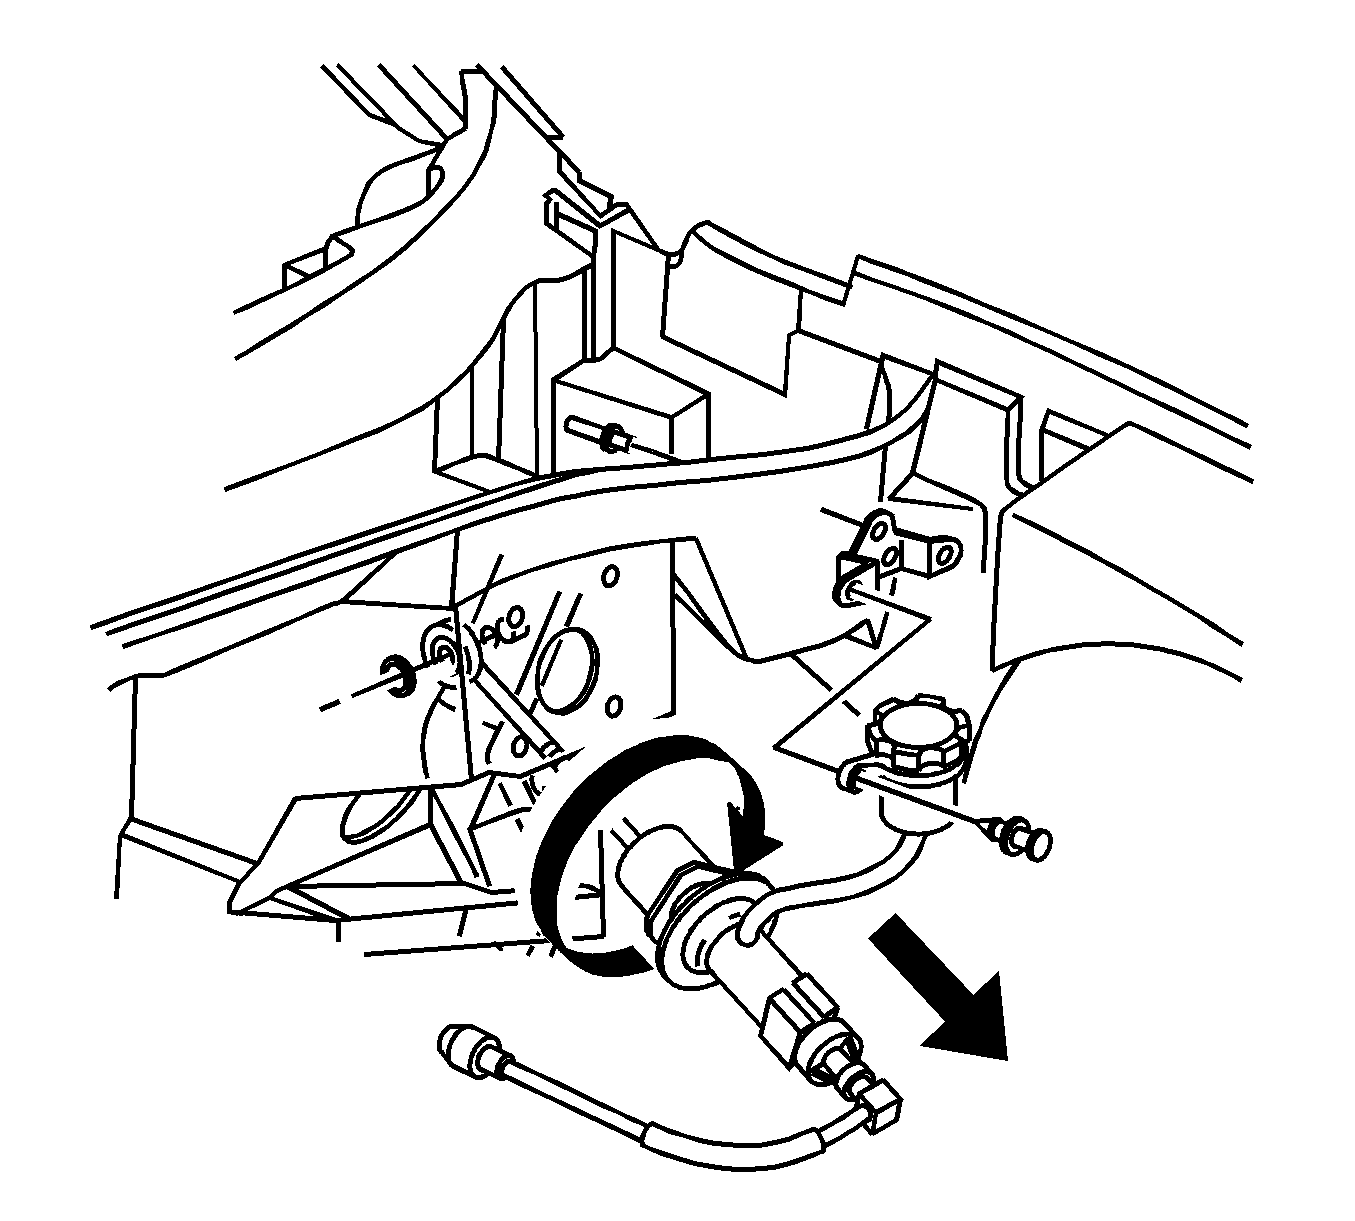
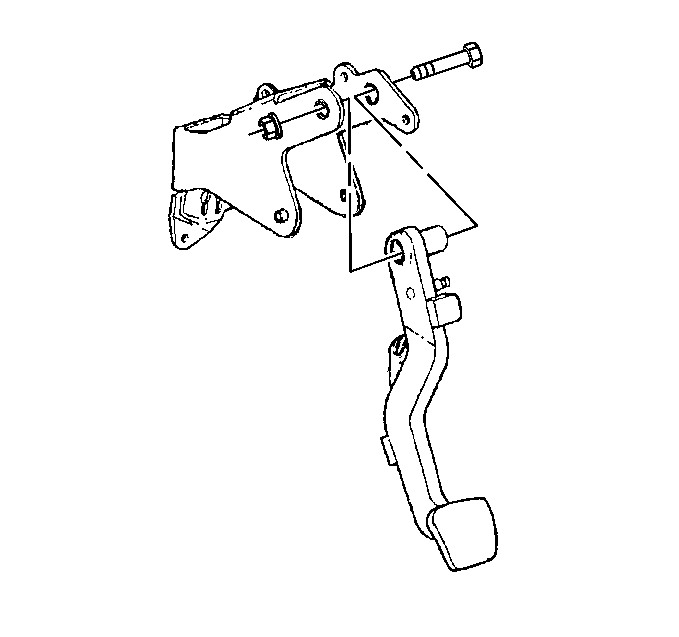
- Remove the clutch master cylinder rod retainer.
- Disconnect the clutch master cylinder rod from the clutch pedal.
- Raise and suitably support the vehicle. Refer to Lifting and Jacking the Vehicle .
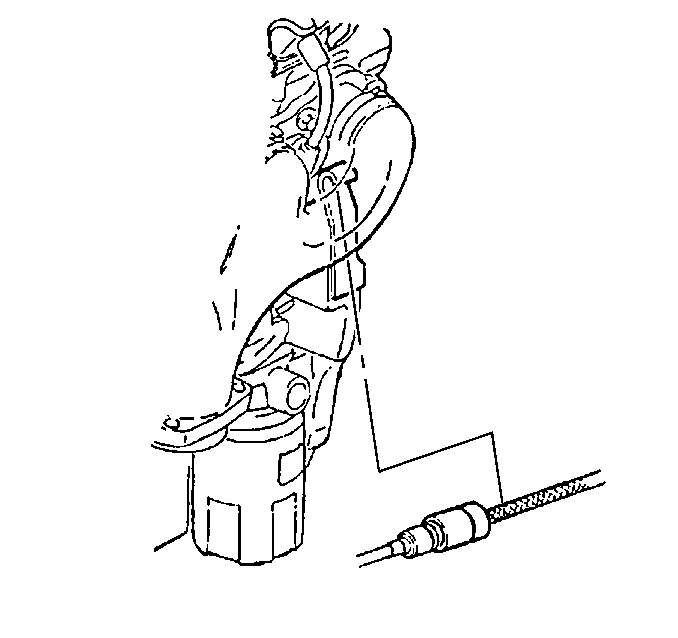
- Remove the clutch actuator cylinder hose from the hose retaining clip.
- Lower the vehicle. Leave the vehicle on the hoist.
- Remove the windshield washer solvent container. Refer to Windshield Washer Solvent Container Replacement .
- Rotate the clutch master cylinder counterclockwise 45 degrees.
- Release the clutch master cylinder from the dash panel.
- Move the clutch master cylinder away from the dash panel approximately 25 mm (1 in).
- Push down on the clutch pedal to release the pedal assist spring.
- Finesse the spring from the clutch pedal bracket.
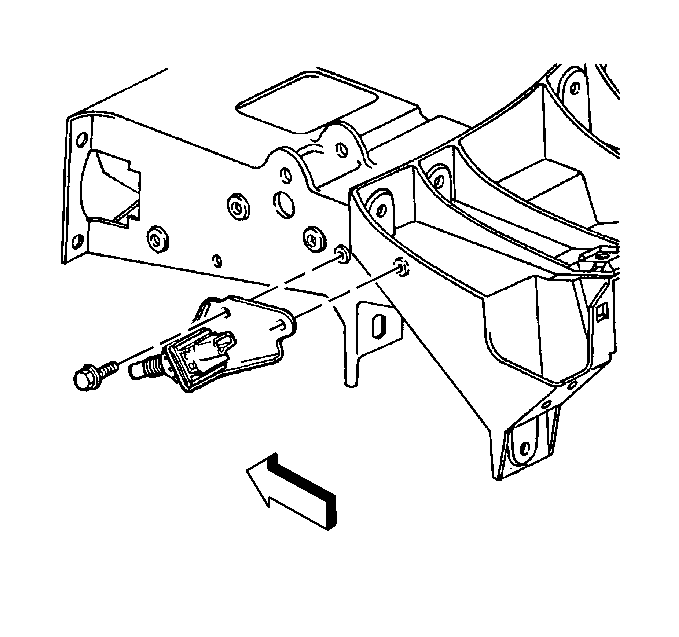
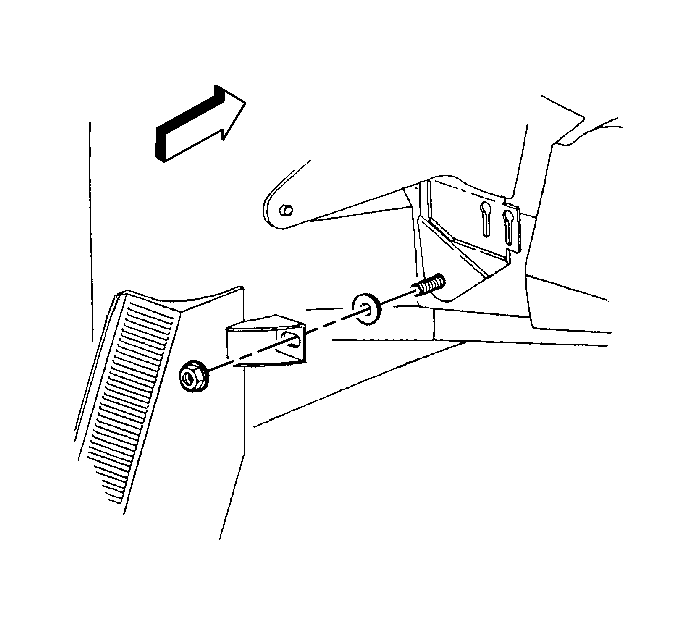
- Remove the driver foot rest bracket retaining bolt.
- Remove the driver foot rest bracket retaining nut.
- Remove the driver foot rest bracket from the vehicle.
- Remove the driver foot rest spacer from the dash panel stud.
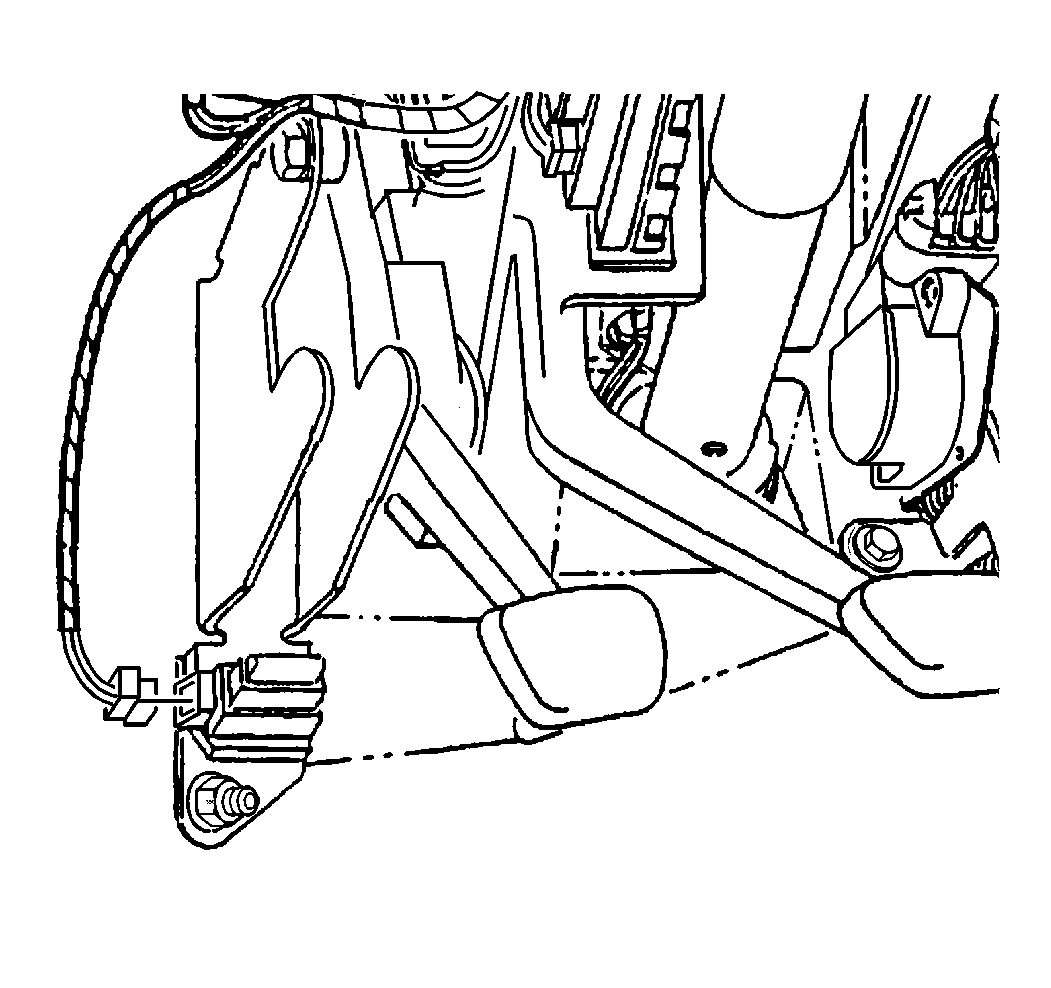
- Disconnect the clutch pedal position switch, clutch start switch electrical connector.
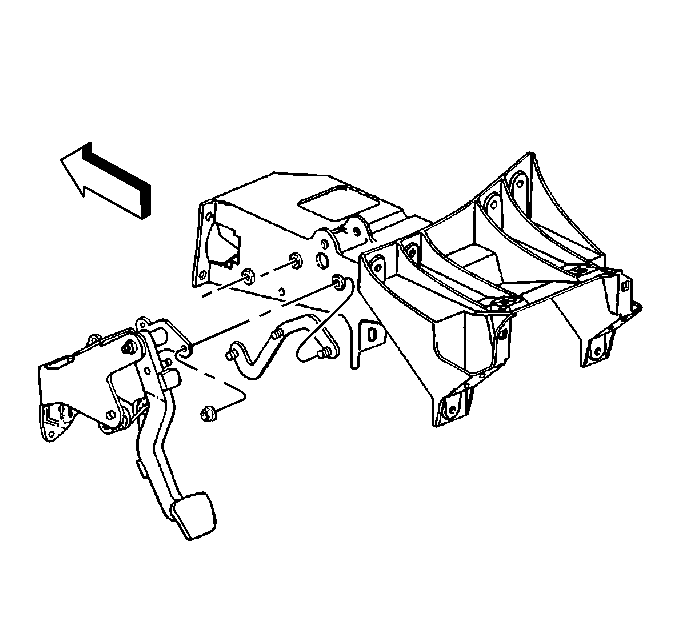
- Remove the clutch pedal bracket mounting nuts.
- Remove the clutch pedal bracket stud anchor plate.
- Remove the clutch pedal and bracket assembly from the vehicle.
- Remove the clutch pedal bolt.
- Remove the clutch pedal nut.
- Remove the clutch pedal from the clutch pedal bracket.
Caution: Refer to Battery Disconnect Caution in the Preface section.
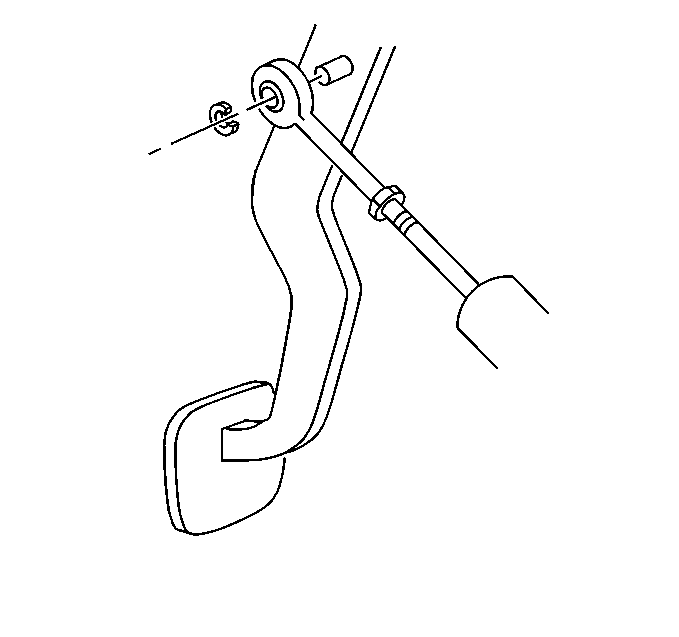
Important: Prior to disassembly take note of the direction of the clutch pedal assist spring and its relationship to the clutch pedal.
Installation Procedure
- Lubricate the clutch pedal bushings lightly with GM P/N 1052497 or equivalent.
- Install the clutch pedal to the clutch pedal bracket.
- Install the clutch pedal bolt.
- Install the clutch pedal nut.
- Install the clutch pedal and bracket assembly into position in the vehicle.
- Install the clutch pedal bracket stud anchor plate into position on the steering column bracket.
- Install the clutch pedal bracket mounting nuts.
- Connect the clutch pedal position switch, clutch start switch, electrical connector.
- Install the driver foot rest spacer onto the dash panel stud.
- Install the driver foot rest bracket to the vehicle.
- Install the driver foot rest bracket retaining nut and the retaining bolt.
- Lubricate the clutch pedal assist spring bushings lightly with GM P/N 1052497 or equivalent.
- Install the clutch pedal assist spring to the clutch pedal bracket (in the direction noted during removal).
- Align the clutch pedal to the pedal assist spring and engage.
- Install the clutch master cylinder to the dash panel.
- Install the windshield washer solvent container. Refer to Windshield Washer Solvent Container Replacement .
- Raise the vehicle.
- Install the clutch actuator cylinder hose to the hose retaining clip.
- Lower the vehicle.
- Install the clutch master cylinder rod to the clutch pedal.
- Install the clutch master cylinder rod retainer.
- Install the cruise control release switch, with bracket into position.
- Install the cruise control release switch bracket retaining bolts.
- Connect the cruise control release switch electrical connector.
- Install the left I/P lower insulator panel. Refer to Instrument Panel Insulator Panel Replacement .
- Connect the negative battery cable.
- Program the transmitters. Refer to Transmitter Programming .
Notice: Refer to Fastener Notice in the Preface section.
Tighten
Tighten the clutch pedal nut to 50 N·m (37 lb ft).
Tighten
Tighten the clutch pedal bracket mounting nuts to 27 N·m (20 lb ft).
Tighten
| • | Tighten the driver foot rest bracket retaining nut to 10 N·m (89 lb in). |
| • | Tighten the driver foot rest bracket retaining bolt to 8 N·m (71 lb in). |
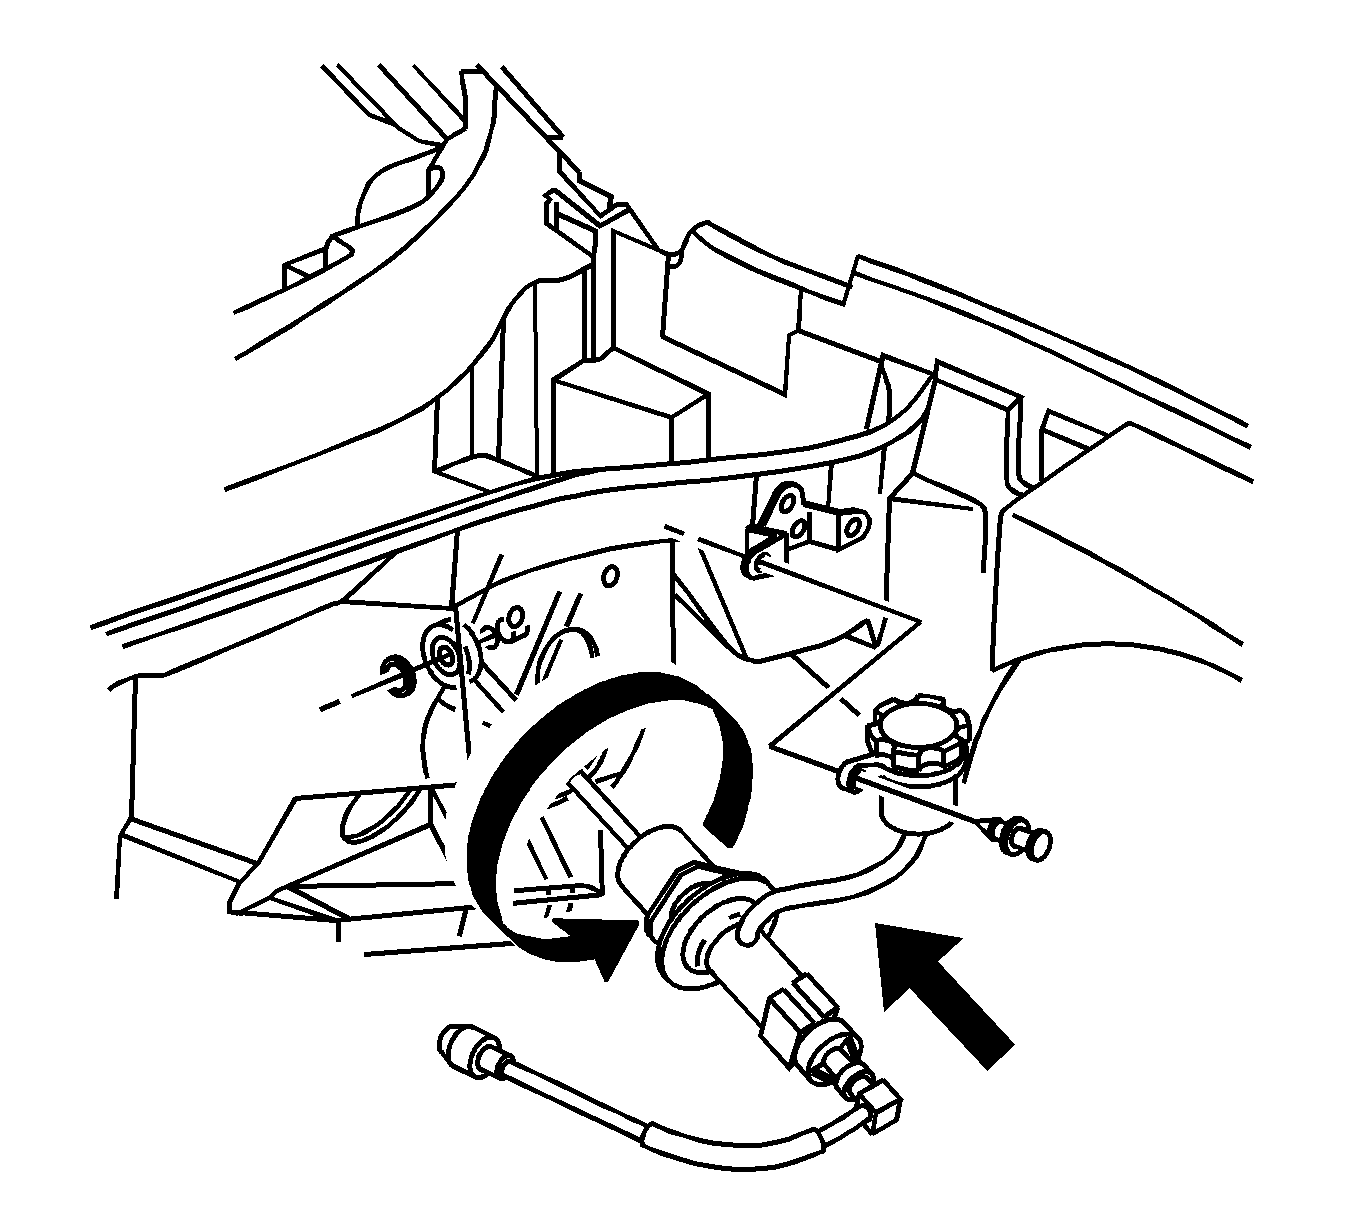
| 15.1. | Orientate the clutch master cylinder at a 45 degree angle. |
| 15.2. | Insert the clutch master cylinder into the dash panel. |
| 15.3. | Rotate the master cylinder clockwise. |
| 15.4. | Attach the master cylinder to the dash panel. |
| 15.5. | DO NOT over rotate the master cylinder or damage may occur. |
Tighten
Tighten the cruise control release switch bracket retaining bolts to 12 N·m (106 lb in).
Tighten
Tighten the negative battery cable bolt to 15 N·m (11 lb ft).
