For 1990-2009 cars only
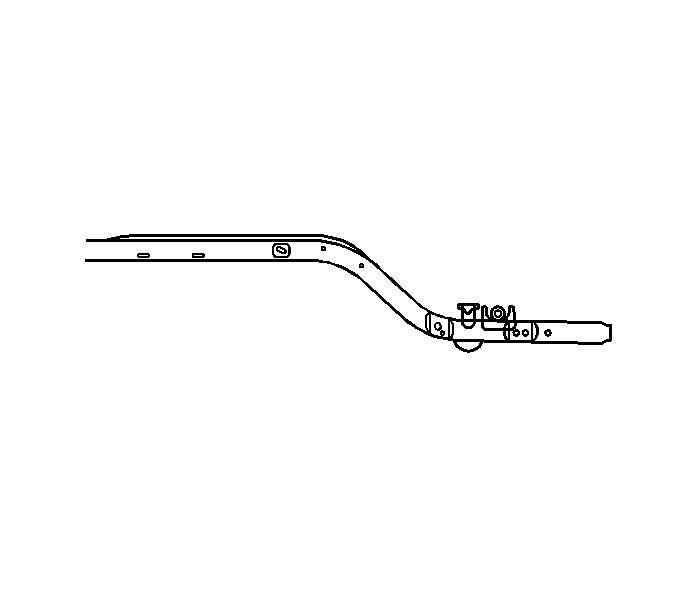
Rear Rail End Replacement Corvette
Tools Required
J 42058 Frame Adapter Clamp
Removal Procedure
Caution: Refer to Approved Equipment for Collision Repair Caution in the Preface section.
- Disable the SIR system. Refer to SIR Disabling and Enabling .
- Disconnect the negative battery cable. Refer to Battery Negative Cable Disconnection and Connection .
- Remove all related panels and components.
- Remove the rear impact bar. Refer to Rear Bumper Impact Bar Replacement .
- Note the location and remove the sealers and anti-corrosion materials from the repair area. Refer to Anti-Corrosion Treatment and Repair .
- Repair as much of the damage as possible to the factory specifications.
- Use J 42058 to secure the vehicle if pulling and straightening are required.
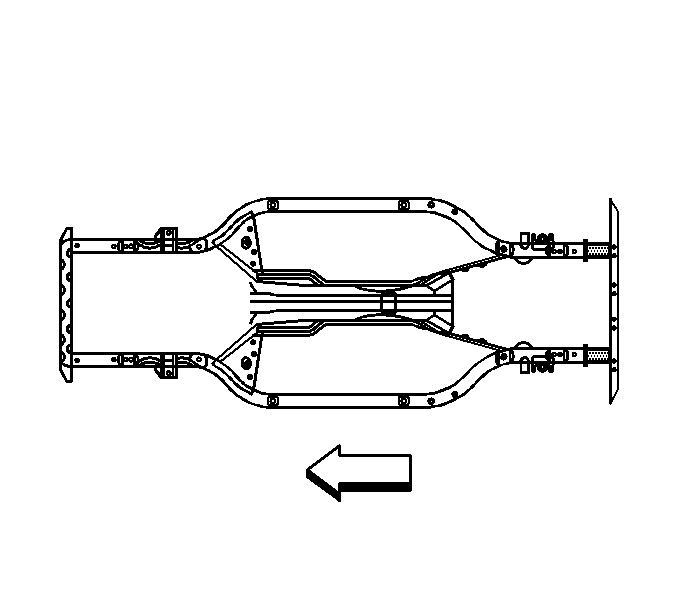
- Remove the damaged section of frame rail within the shaded area.
Installation Procedure
- Determine the sectioning joint location within the recommended area.
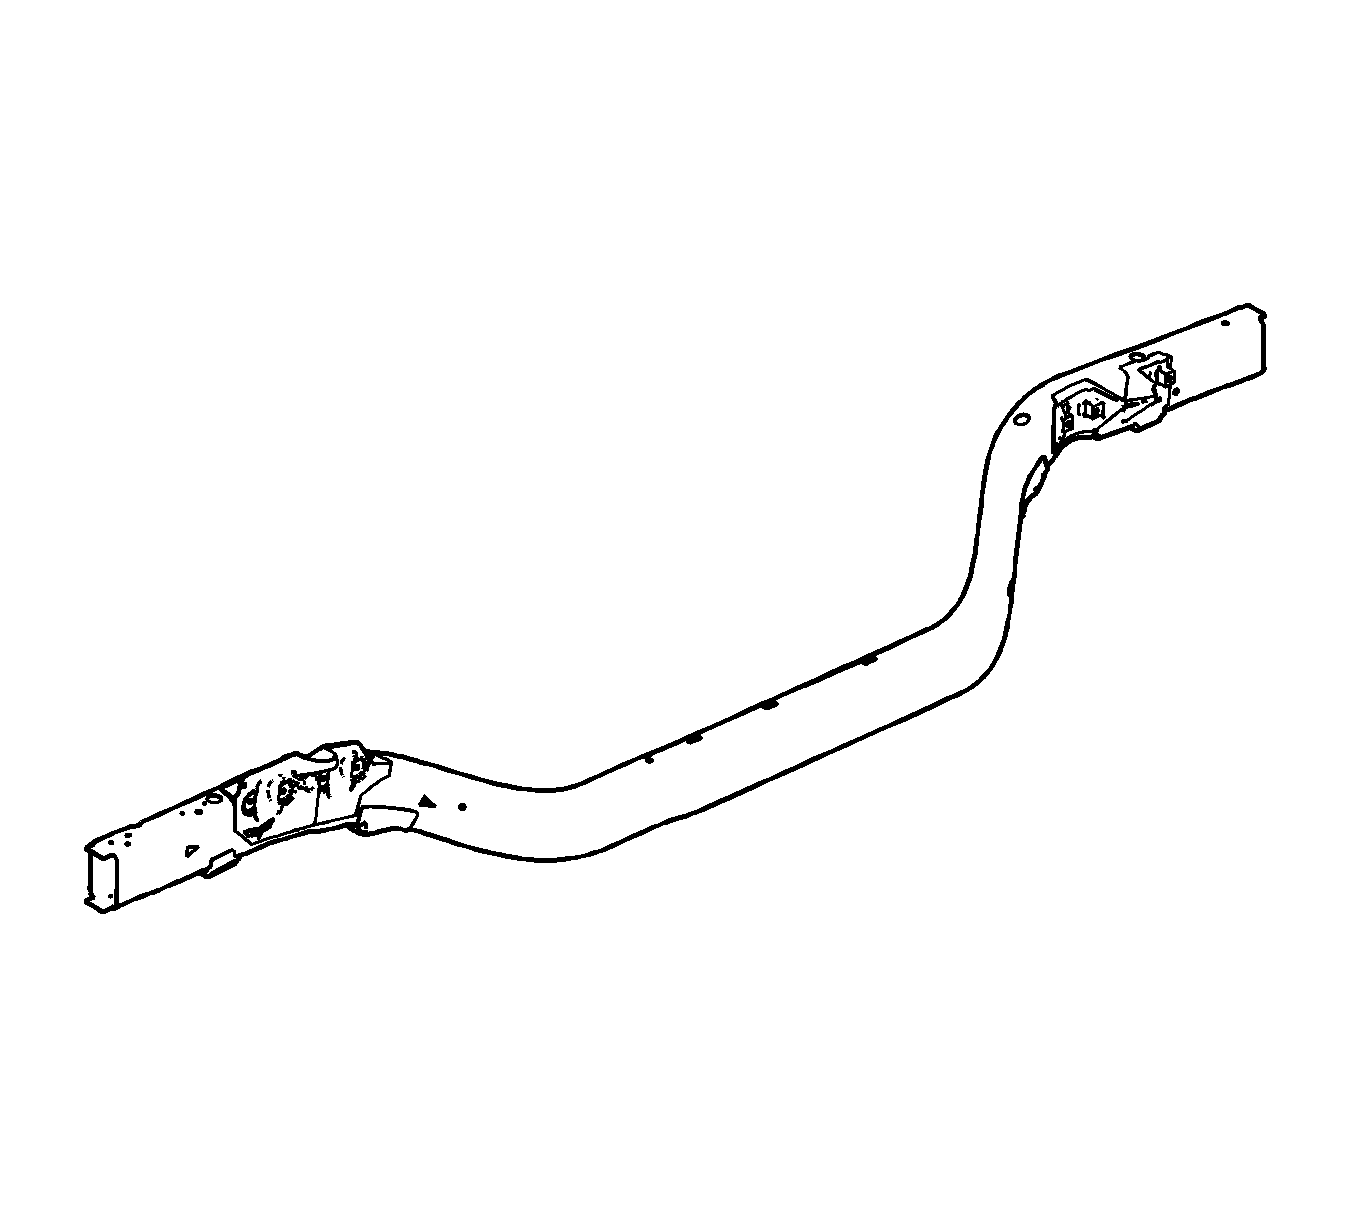
- Cut the new frame rail end from the new frame rail assembly.
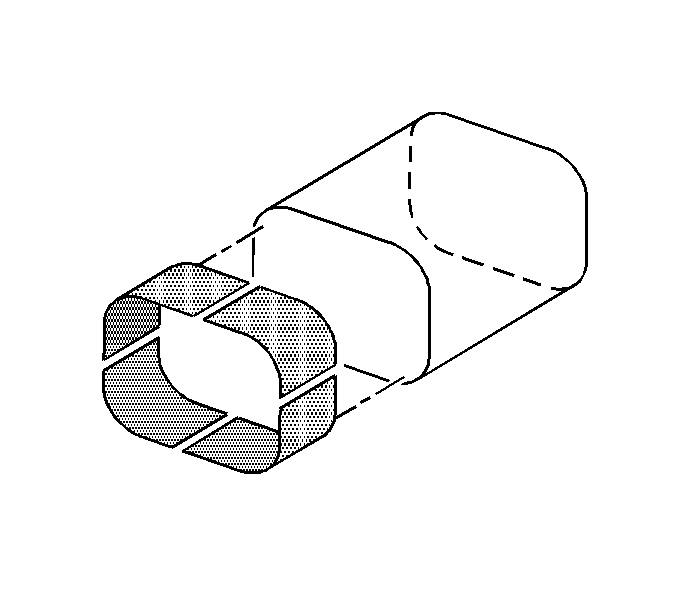
- Perform the sleeved butt-joint sectioning. Refer to Sleeved Butt Joint Repair .
- Install the rear impact bar. Refer to Rear Bumper Impact Bar Replacement .
- Apply the sealers and anti-corrosion materials to the repair area. Refer to Anti-Corrosion Treatment and Repair .
- Paint the repair area. Refer to Basecoat/Clearcoat Paint Systems .
- Install all related panels and components.
- Connect the negative battery cable. Refer to Battery Negative Cable Disconnection and Connection .
- Enable the SIR system. Refer to SIR Disabling and Enabling .
Caution: Refer to Collision Sectioning Caution in the Preface section.
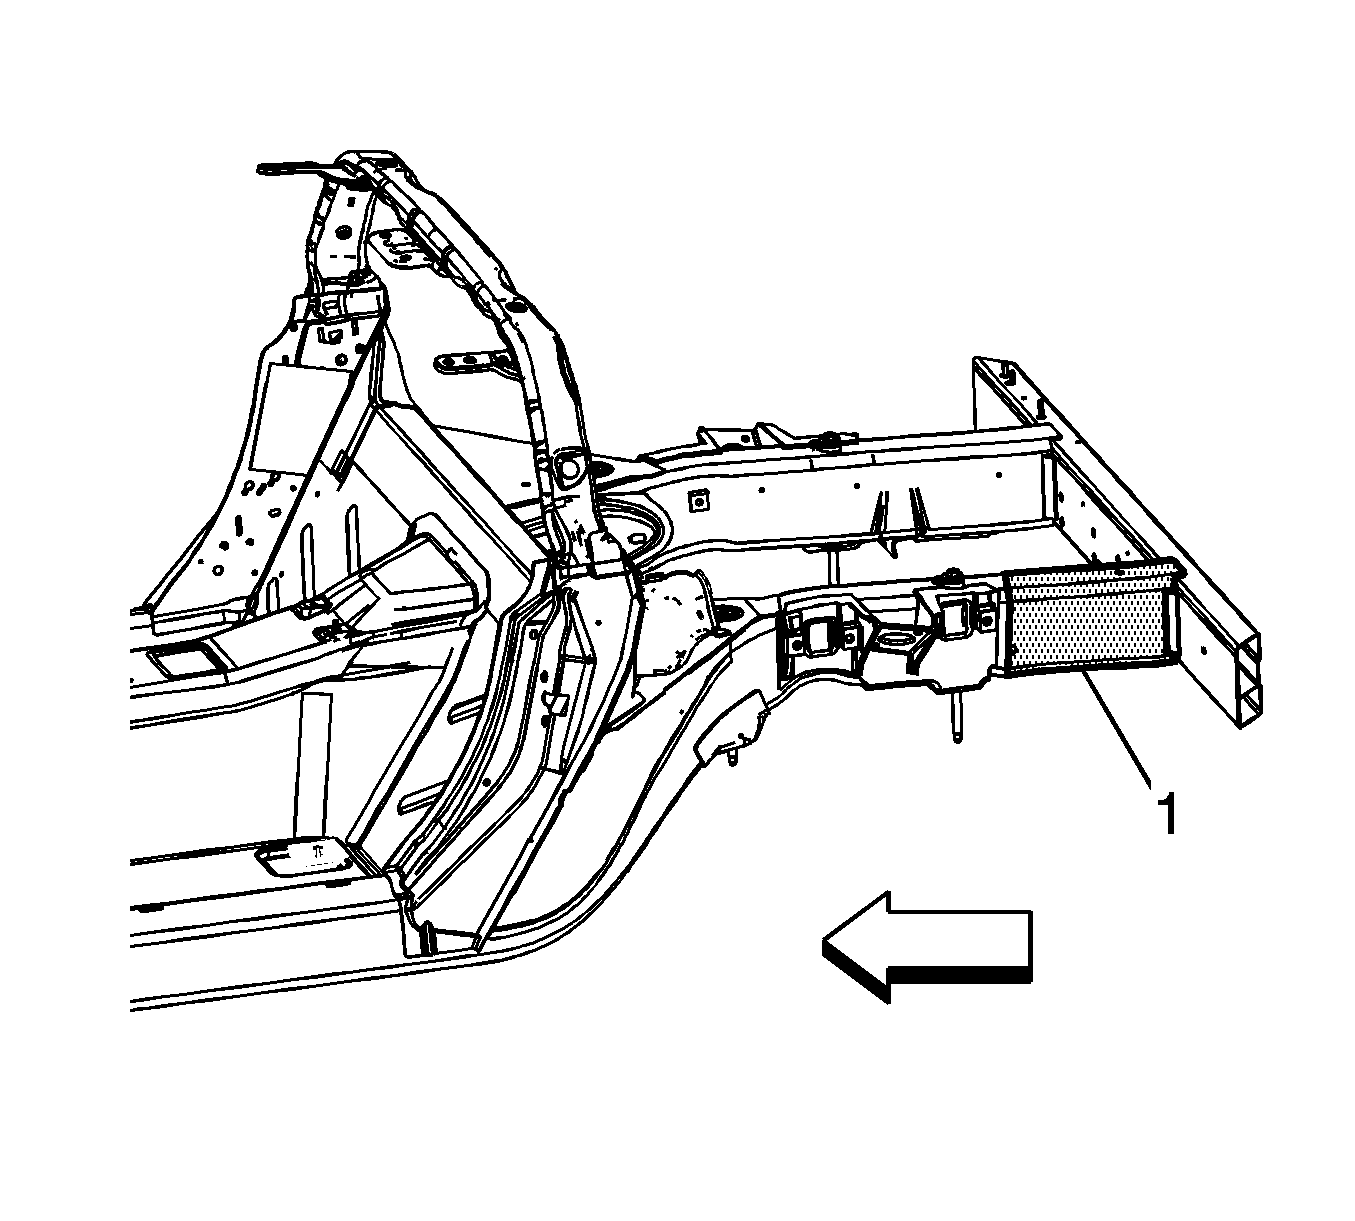
Rear Rail End Replacement Z06
Tools Required
J 42058 Frame Adapter Clamp
Removal Procedure
Caution: Refer to Approved Equipment for Collision Repair Caution in the Preface section.
- Disable the SIR system. Refer to SIR Disabling and Enabling .
- Disconnect the negative battery cable. Refer to Battery Negative Cable Disconnection and Connection .
- Remove all related panels and components.
- Remove the rear impact bar. Refer to Rear Bumper Impact Bar Replacement .
- Note the location and remove the sealers and anti-corrosion materials from the repair area. Refer to Anti-Corrosion Treatment and Repair .
- Repair as much of the damage as possible to the factory specifications.
- Use J 42058 to secure the vehicle if pulling and straightening are required.
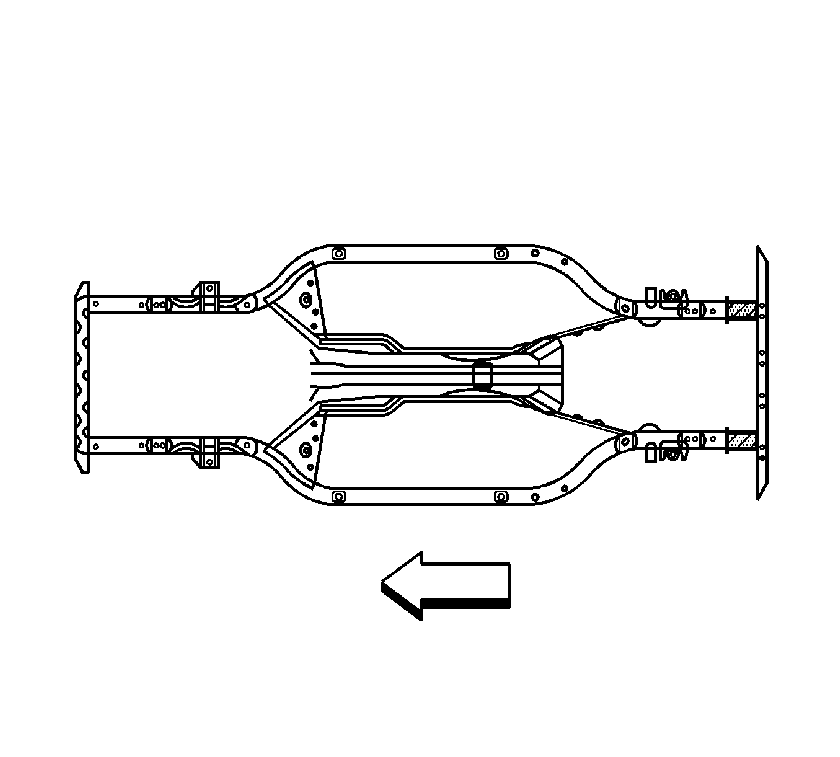
- Remove the damaged section of frame rail within the shaded area (1).
Installation Procedure
- Determine the sectioning joint location within the recommended area (1).
- Cut the new frame rail end from the new frame rail assembly.
- Perform the sleeved butt-joint sectioning. Refer to Sleeved Butt Joint Repair .
- Install the rear impact bar. Refer to Rear Bumper Impact Bar Replacement .
- Apply the sealers and anti-corrosion materials to the repair area. Refer to Anti-Corrosion Treatment and Repair .
- Paint the repair area. Refer to Basecoat/Clearcoat Paint Systems .
- Install all related panels and components.
- Connect the negative battery cable. Refer to Battery Negative Cable Disconnection and Connection .
- Enable the SIR system. Refer to SIR Disabling and Enabling .
Caution: Refer to Collision Sectioning Caution in the Preface section.