For 1990-2009 cars only
Removal Procedure
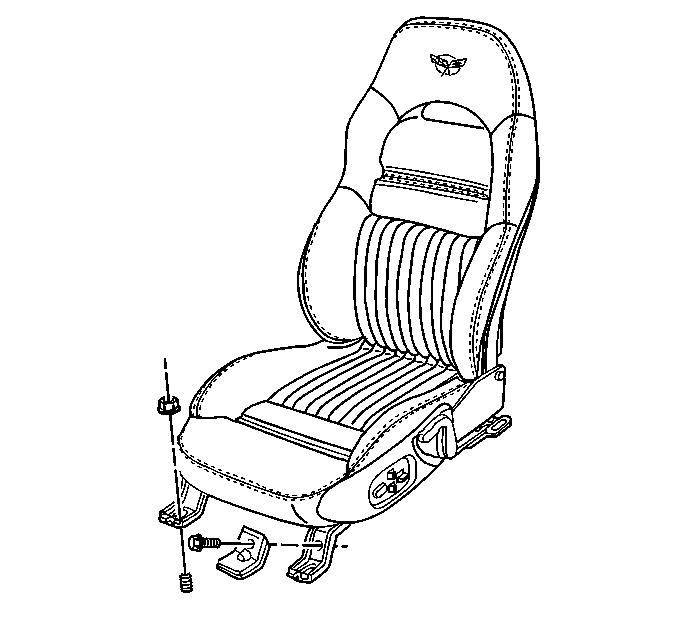
- Remove the seat. Refer to Driver and Passenger Seat Replacement .
- Remove the pretensioner and seat belt buckle. Refer to Seat Belt Buckle Pretensioner Replacement .
- Remove the side trim panel. Refer to Seat Cushion Outer Trim Panel Replacement .
- Remove the seat cushion cover and pad. Refer to Front Seat Cushion Cover and Pad Replacement .
- Remove the inflatable restraint passenger presence system. Refer to Inflatable Restraint Passenger Presence System Replacement - Front .
- Remove the lumbar pump and module and pull them up through the seat frame and lay them aside still attached to the seat back.
- Remove the memory seat module from the seat wires if equipped with memory seats.
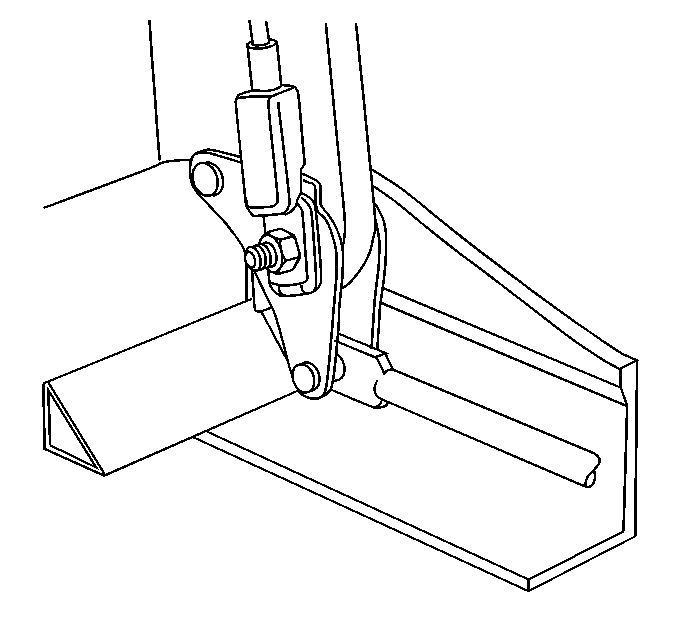
- Mark the seat back actuators to identify the right side from the left side.
- Note the routing of the recliner mechanism cables.
- Position the seat back full up to remove the tension from the actuator springs.
- Remove the forward pins from the seat back actuators.
- Remove the hinge bolts.
- Remove the seat back.
- Reposition the actuators underneath the seat frame springs.
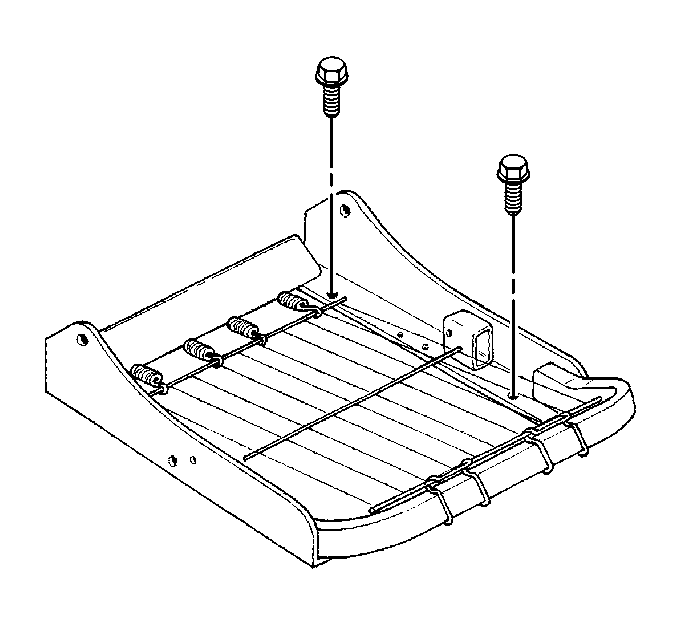
- Remove the seat cushion frame from the seat adjuster.
- Remove the recliner mechanism from the seat cushion frame.
- Remove the wire assembly from the seat cushion frame (if replacing or transferring the wire assembly).
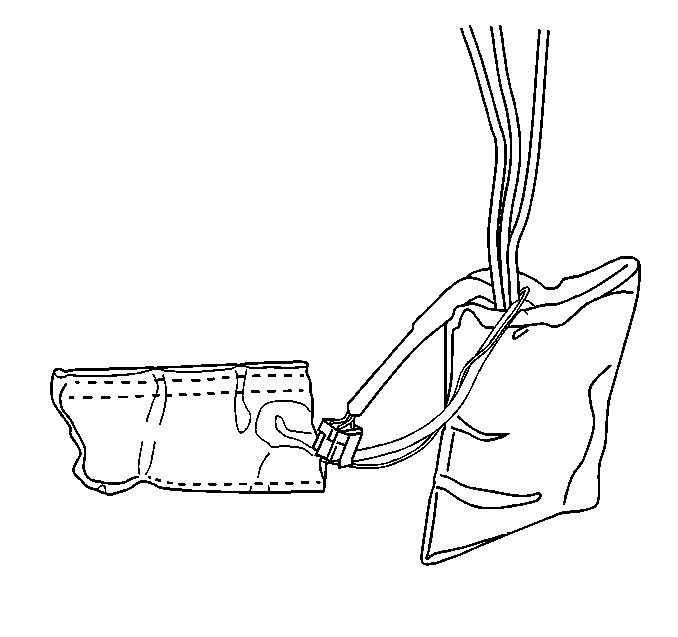
| 17.1. | Insert a screwdriver between the tension spring coils and pull toward the wires unhook the tension spring from the wire assembly. |
| 17.2. | Unhook the wire assembly from the front of the seat cushion frame. |
Installation Procedure
- Install the springs and wires to the seat cushion frame.
- Install the recliner mechanism to the seat frame.
- Install the seat adjuster to the seat cushion frame.
- Loop and route the reclining mechanism cables under the seat cushion frame springs.
- Position the actuators with the arrow on the hinge end of the actuator pointing forward and with the release cable clip opening pointed downward.
- Insert the forward ends of the actuators into the actuator brackets.
- Install the seat back and the actuator to the seat cushion frame with the hinge bolts.
- Apply LOCTITE™ 271 to the hinge bolt threads.
- Install the hinge bolt nuts.
- Install the pins to the forward ends of the actuators.
- Install the seat module, if equipped.
- Install the lumbar pump and module, if equipped.
- Install the memory module, if equipped.
- Install the trim cover and pad to the seat cushion frame. Refer to Front Seat Cushion Cover and Pad Replacement .
- Install the side trim panel. Refer to Seat Cushion Outer Trim Panel Replacement .
- Install the inflatable restraint passenger presence system. Refer to Inflatable Restraint Passenger Presence System Replacement - Front .
- Install the seat cushion cover and pad. Refer to Front Seat Cushion Cover and Pad Replacement .
- Install the pretensioner and seat belt buckle. Refer to Seat Belt Buckle Pretensioner Replacement .
- Install the seat. Refer to Driver and Passenger Seat Replacement .
- Re-zero the inflatable restraint passenger presence system whenever the seat cushion or any component of the passenger presence system is removed. Refer to Passenger Presence System Programming and Setup .
| 1.1. | Center the wire assembly to the front of the seat cushion frame. |
| 1.2. | Hook the tension springs into the rear of the seat frame. |
| 1.3. | Insert a screwdriver between the tension spring coils, stretch the spring to hook the spring to the wire assembly. |
Notice: Refer to Fastener Notice in the Preface section.
Tighten
Tighten the hinge bolt nuts to 24 N·m (18 lb ft).
Important: When working on the passenger seat the convoluted tubing for the lumbar pump must lay over the aluminum bracket and be zip tied in place.
Caution: To avoid personal injuries, re-zero the passenger presence system whenever you remove or replace the seat cushion or trim. Failure to do so may cause the system to malfunction.
