Removal Procedure
- Place the vehicle on a level surface.
- Block the wheels to keep the vehicle from moving.
- Apply the parking brake.
- Shift the floor shift control into PARK.
- Turn the ignition to OFF and remove the ignition key.
- Disconnect the negative battery cable.
- Remove the console. Refer to Console Replacement .
- Remove the instrument panel (I/P) accessory trim plate. Refer to Instrument Panel Accessory Trim Plate Replacement .
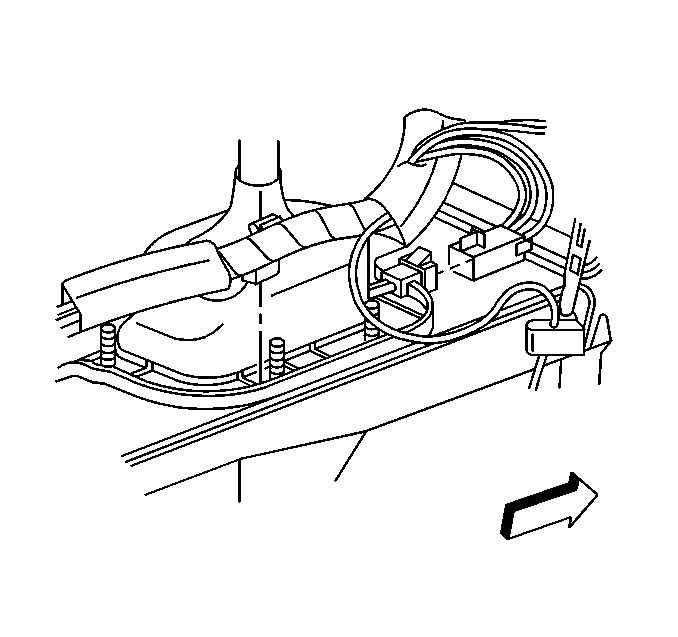
- Disconnect the floor shift control electrical connector.
- Disconnect the I/P wiring harness retaining clip from the shift control and reposition the harness.
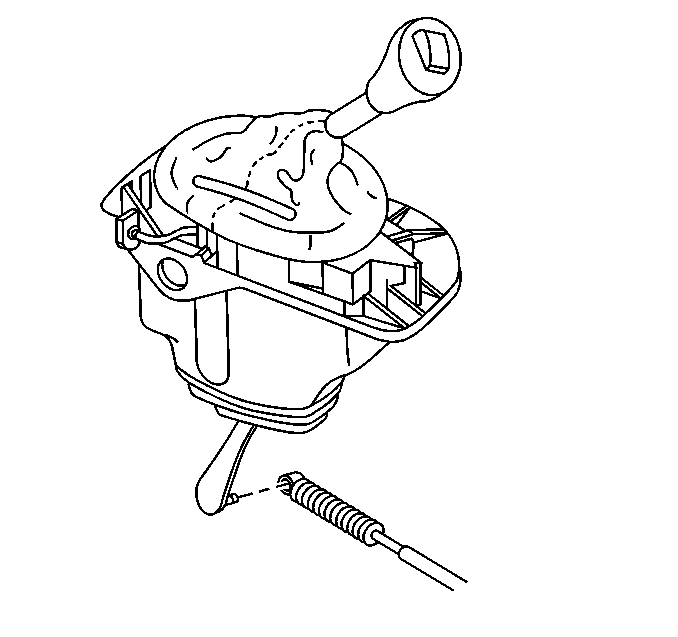
- Using a small flat-bladed screwdriver or other suitable tool, release the tab retaining the park/lock cable to the slot on the shift control.
- Lift the park/lock cable out of the shift control slot and reposition the cable.
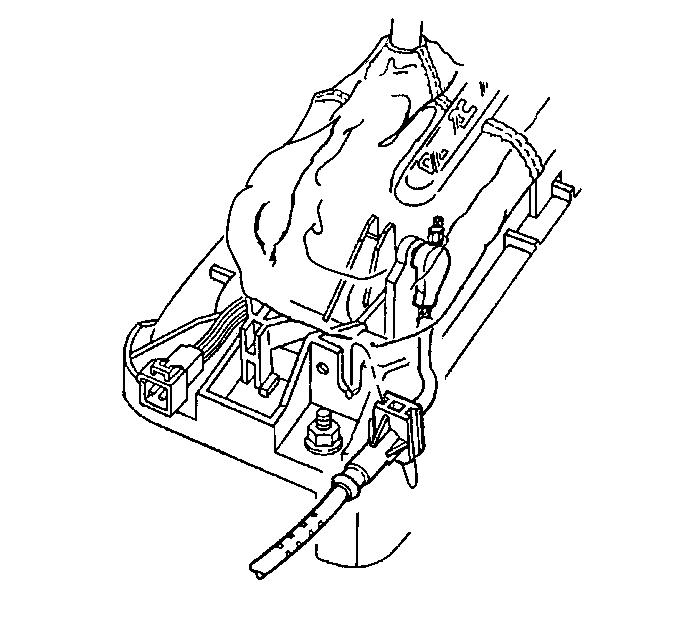
- Grasp the cable end and pull rearward in order to unlock the cable from the shifter pivot arm stud, then reposition the cable.
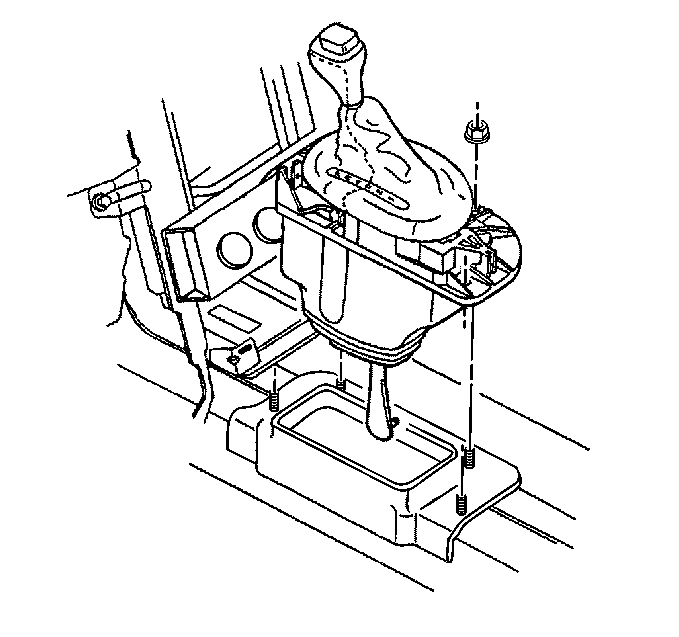
- Remove the nuts retaining the shift control to the driveline tunnel.
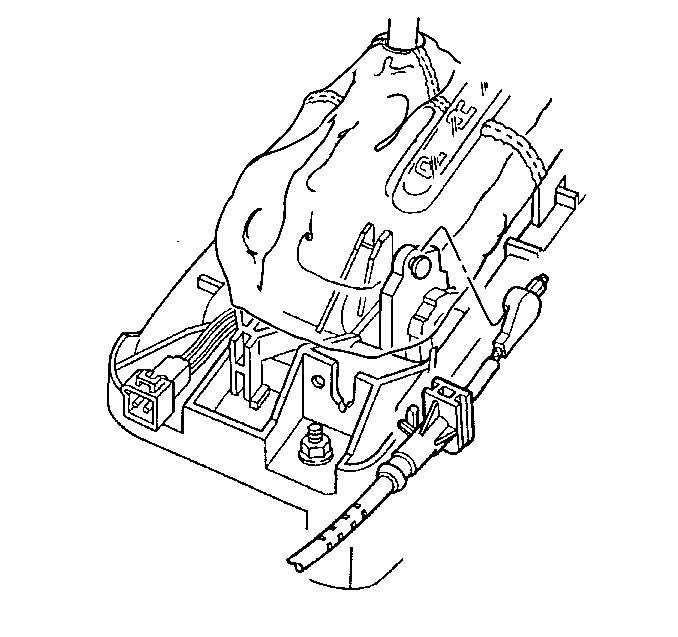
- Shift the floor shift control into FIRST.
- Slowly lift the floor shift control JUST ENOUGH to access the shift control cable end.
- Using a large flat-bladed screwdriver, CAREFULLY release the shift control cable end clip from the floor shift control arm stud.
- Ensure that the shift control cable is completely disconnected from the floor shift control arm stud.
- Remove the floor shift control.
Caution: Refer to Battery Disconnect Caution in the Preface section.
This will lengthen the shift control cable and provide slightly more movement.
Important: DO NOT lift the floor shift control any more than shown, the shift control cable rod end guide tubes are EXTREMELY INFLEXIBLE and capable of only a SLIGHT bend.
BE SURE the floor shift control remains in FIRST.
Important: Use care to not suddenly jerk either the shift control cable or the floor shift control during disassembly, the shift control cable rod end guide tubes are EXTREMELY INFLEXIBLE and capable of only a SLIGHT bend.
Installation Procedure
- Shift the floor shift control into FIRST.
- Lower the floor shift control into position.
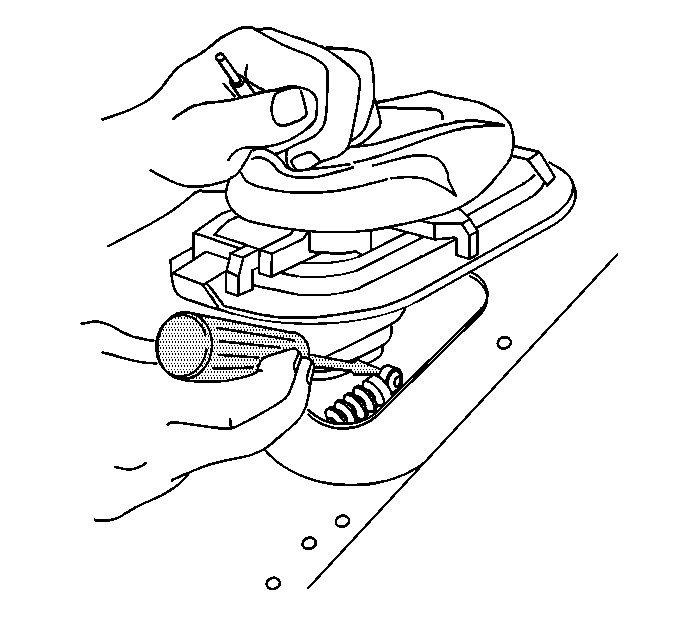
- Align the shift control cable end to the floor shift control arm stud.
- Position a large pry bar along the side of the driveline support assembly and use as an aid to secure the shift control cable end clip to the floor shift control arm stud.
- Seat the floor shift control to the driveline tunnel.
- Install the nuts retaining the floor shift control to the driveline tunnel.
- Verify that the floor shift control and the shift control cable are operating smoothly:
- Shift the floor shift control into PARK.
- Install the park/lock cable to the floor shift control pivot arm stud.
- Insert the park/lock cable into the slot on the floor shift control.
- Connect the I/P wiring harness retaining clip to the shift control.
- Connect the shift control electrical connector.
- Install the I/P accessory trim plate. Refer to Instrument Panel Accessory Trim Plate Replacement .
- Install the console. Refer to Console Replacement .
- Connect the negative battery cable.
- Program the transmitters.
- Unblock the wheels.
- Release the parking brake.
- Test drive the vehicle in an area with little traffic; ensure that the transmission will shift smoothly into, and maintain each detent position.
Important: Be sure to position the floor shift control as LOW as possible, the shift control cable rod end guide tubes are EXTREMELY INFLEXIBLE and capable of only a SLIGHT bend.
BE SURE the floor shift control remains in FIRST.
Important: Use care to not suddenly jerk either the shift control cable or the floor shift control during assembly, the shift control cable rod end guide tubes are EXTREMELY INFLEXIBLE and capable of only a SLIGHT bend.
Notice: Refer to Fastener Notice in the Preface section.
Tighten
Tighten the floor shift control retaining nuts to 10 N·m (89 lb in).
| 7.1. | Shift from FIRST to SECOND, then DRIVE and so on; pause for 1 second in each detent position. |
Take note of an audible sound from the transmission shift lever each time a shift detent is selected.
| 7.2. | Shift from PARK directly to FIRST. |
| 7.3. | Repeat steps 7.1 and 7.2 an additional 2 times. |
| 7.4. | If any binding is felt during this check, or if no audible sound was produced from the transmission shift lever, remove the floor shift control and inspect the floor shift control and the shift control cable for damage (at either end of the cable). |
Align the cable onto the arm stud then pull forward to lock.
Be sure the cable retaining tab locks into place.
Important: Prior to restoring battery power, check to be certain that the ignition key is removed from the ignition switch.
Tighten
Tighten the negative battery cable bolt to 15 N·m (11 lb ft).
Caution: Refer to Road Test Caution in the Preface section.
