Shock Absorber Replacement w/o F55
Tools Required
Removal Procedure

- Raise and support the vehicle. Refer to
Lifting and Jacking the Vehicle
.
- Remove the tire and wheel assembly. Refer to
Tire and Wheel Removal and Installation
.
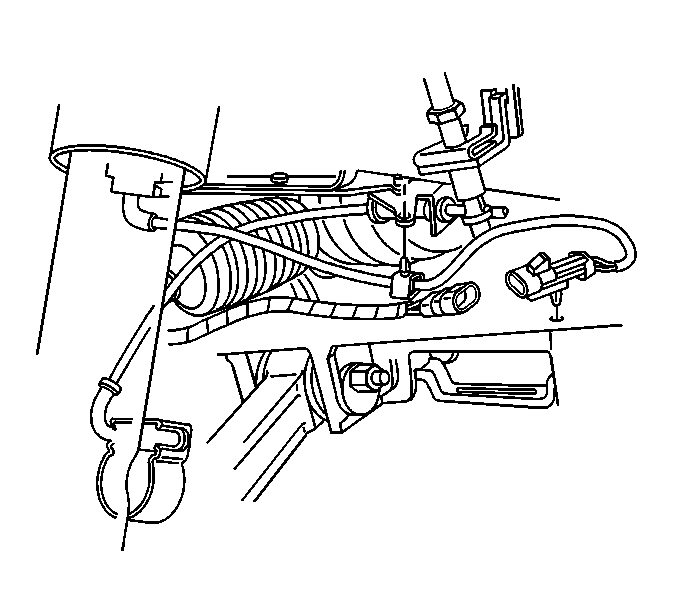
- Disconnect the electronic suspension control electrical connector from the shock, if equipped.
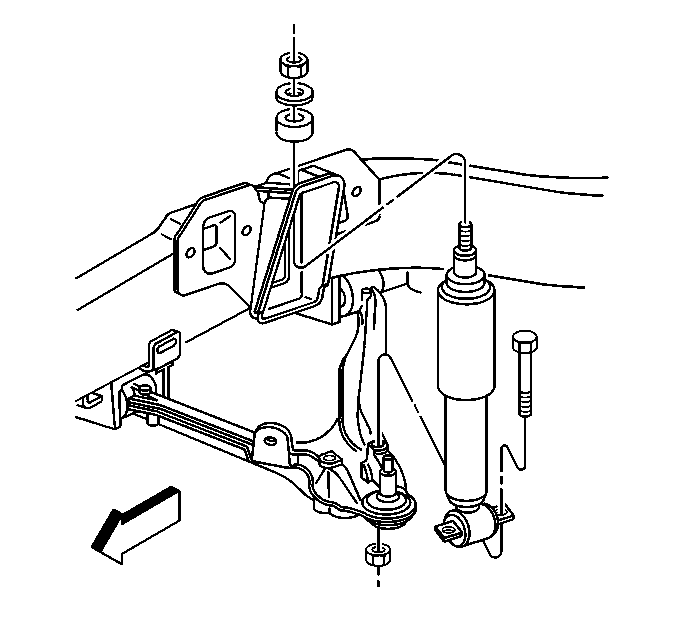
- Remove the upper mounting nut, insulator retainer, and insulator.

- Remove the shock absorber lower mounting bolts and nuts.
- Remove the shock absorber from the upper shock tower and the vehicle.
- Remove the insulator and retainer from shock absorber.
- For vehicles equipped with heavy duty shocks (FE3) perform the following steps.
| | Notice: During this procedure, use care not to scratch the transverse spring.
|
| 8.2. | Using a pry bar compress the shock absorber from the bottom upward. |
| 8.3. | Install the
J 43822
to the shock absorber while the shock is compressed. |
| 8.4. | Remove the shock absorber from the shock tower and the vehicle. |
| 8.5. | Remove
J 43822
from the shock absorber. |
Installation Procedure

- Install the retainer and insulator to the shock absorber.
- Install the shock absorber to the upper shock tower.
Notice: Use the correct fastener in the correct location. Replacement fasteners
must be the correct part number for that application. Fasteners requiring
replacement or fasteners requiring the use of thread locking compound or sealant
are identified in the service procedure. Do not use paints, lubricants, or
corrosion inhibitors on fasteners or fastener joint surfaces unless specified.
These coatings affect fastener torque and joint clamping force and may damage
the fastener. Use the correct tightening sequence and specifications when
installing fasteners in order to avoid damage to parts and systems.
- Install the upper insulator, retainer, and nut.
Tighten
Tighten the shock absorber upper mounting nut to 26 N·m (19 lb ft).
- Install the shock absorber lower mounting bolts and nuts.
Tighten
Tighten the shock absorber lower mounting nuts to 28 N·m (21 lb ft).

- Connect the electronic suspension control electrical connector to the shock, if equipped.
- Remove
J 33432-A
from the spring.
- Install the tire and wheel assembly. Refer to
Tire and Wheel Removal and Installation
.
- Lower the vehicle.
- For vehicles equipped with heavy duty shocks (FE3) perform the following steps.
| 9.1. | Install the
J 43822
to the shock absorber. |
| 9.2. | Install the shock absorber into the vehicle. |
| 9.3. | Install the upper insulator, retainer, and nut. |
Tighten
Tighten the shock absorber upper mounting nut to 26 N·m (19 lb ft).
| 9.4. | Remove
J 43822
from the shock absorber. |
| 9.5. | Install
J 33432-A
to the spring and compress. |
| 9.6. | Raise the lower control arm and install the shock absorber lower mounting bolts and nuts. |
Tighten
Tighten the shock absorber lower mounting nuts to 28 N·m (21 lb ft).
Shock Absorber Replacement W/F55
Tools Required
Removal Procedure

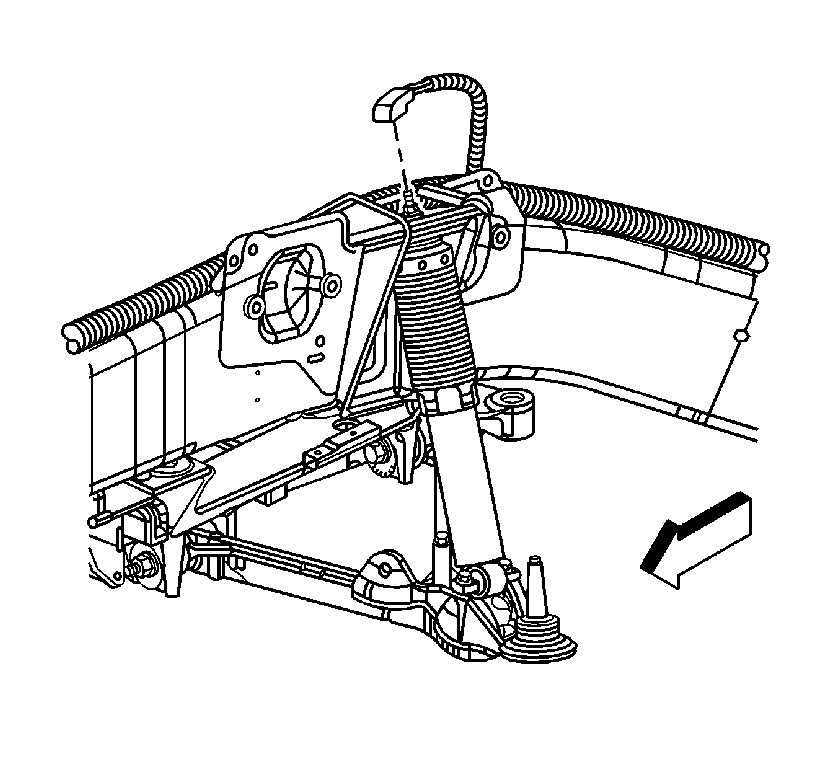
- Disconnect the front shock ESC harness connector.
- Raise and support the vehicle. Refer to
Lifting and Jacking the Vehicle
.
- Remove the tire and wheel assembly. Refer to
Tire and Wheel Removal and Installation
.

Important: The ESC connector seals to the upper shock shaft. If the upper shock shaft is damaged, the shock will need replacement.
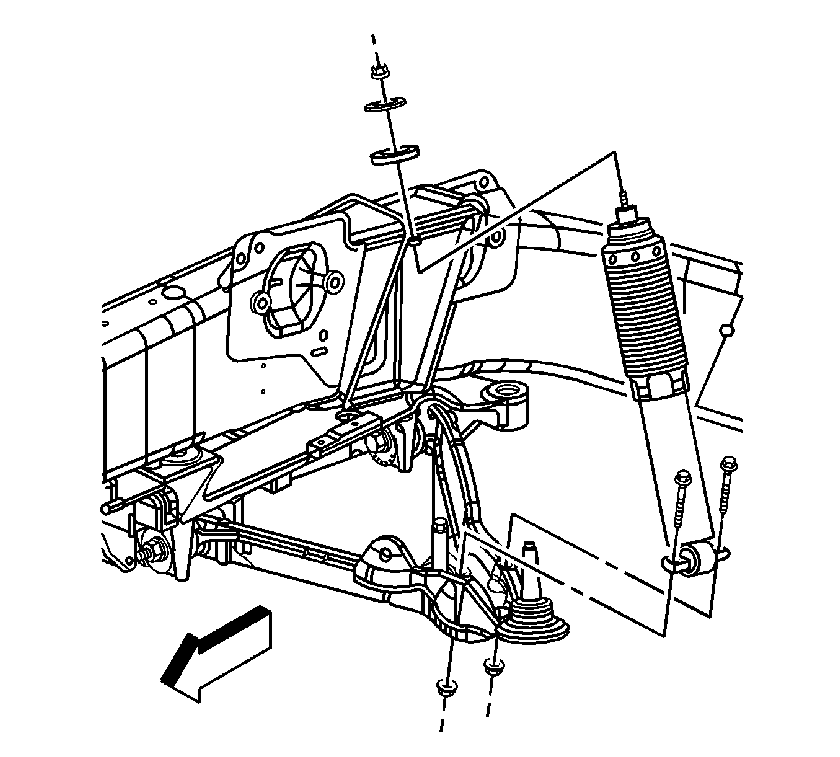
- Using only hand tools, remove the upper mounting nut, insulator retainer and insulator.
- Remove the shock absorber lower mounting bolts and nuts.
- Using a pry bar, compress the shock absorber from the bottom upward.
- While the shock is in the compressed position, install the
J 43822
.
- Remove the shock absorber from the vehicle.
- Remove the
J 43822
from the shock absorber.
- Remove the insulator and insulator retainer from the shock absorber.
Installation Procedure
- Install the
J 43822
to the shock absorber.
- Install the insulator and insulator retainer to the shock absorber.

- Position the shock absorber between the upper shock support and lower control arm.
Notice: Refer to Fastener Notice in the Preface section.
- Install the insulator, insulator retainer and nut to the upper shock shaft.
Tighten
Tighten the nut to 26 N·m (19 lb ft).
- Remove the
J 43822
from the shock absorber.
- Using the
J 33432-A
, compress the coil spring.
- Raise the lower control arm to the shock absorber lower mounting and install the bolts and nuts.
Tighten
Tighten the nut to 28 N·m (21 lb ft).
- Remove the
J 33432-A
from the coil spring.
- Install the tire and wheel assembly. Refer to
Tire and Wheel Removal and Installation
.
- Lower the vehicle.

- Connect the ESC harness connector. Check the connection by lightly pulling upwards on the connector.


