Rear Axle Upper Control Arm Replacement Except RPO FE4
Tools Required
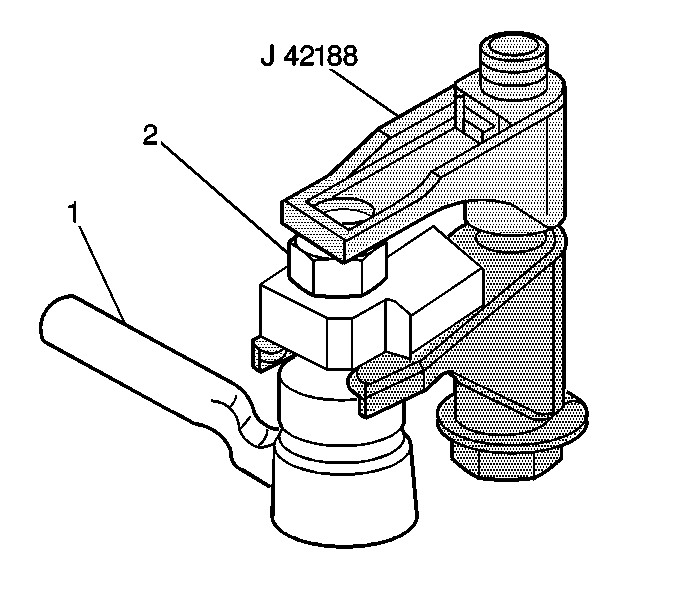
J-42188-B Ball Joint Separator
Removal Procedure
- Raise and support the vehicle. Refer to Lifting and Jacking the Vehicle.
- Remove the tire and wheel assembly. Refer to Tire and Wheel Removal and Installation.
- Disconnect the wheel speed sensor electrical connector.
- Disconnect the electronic suspension control sensor link. Refer to Electronic Suspension Rear Position Sensor Replacement.
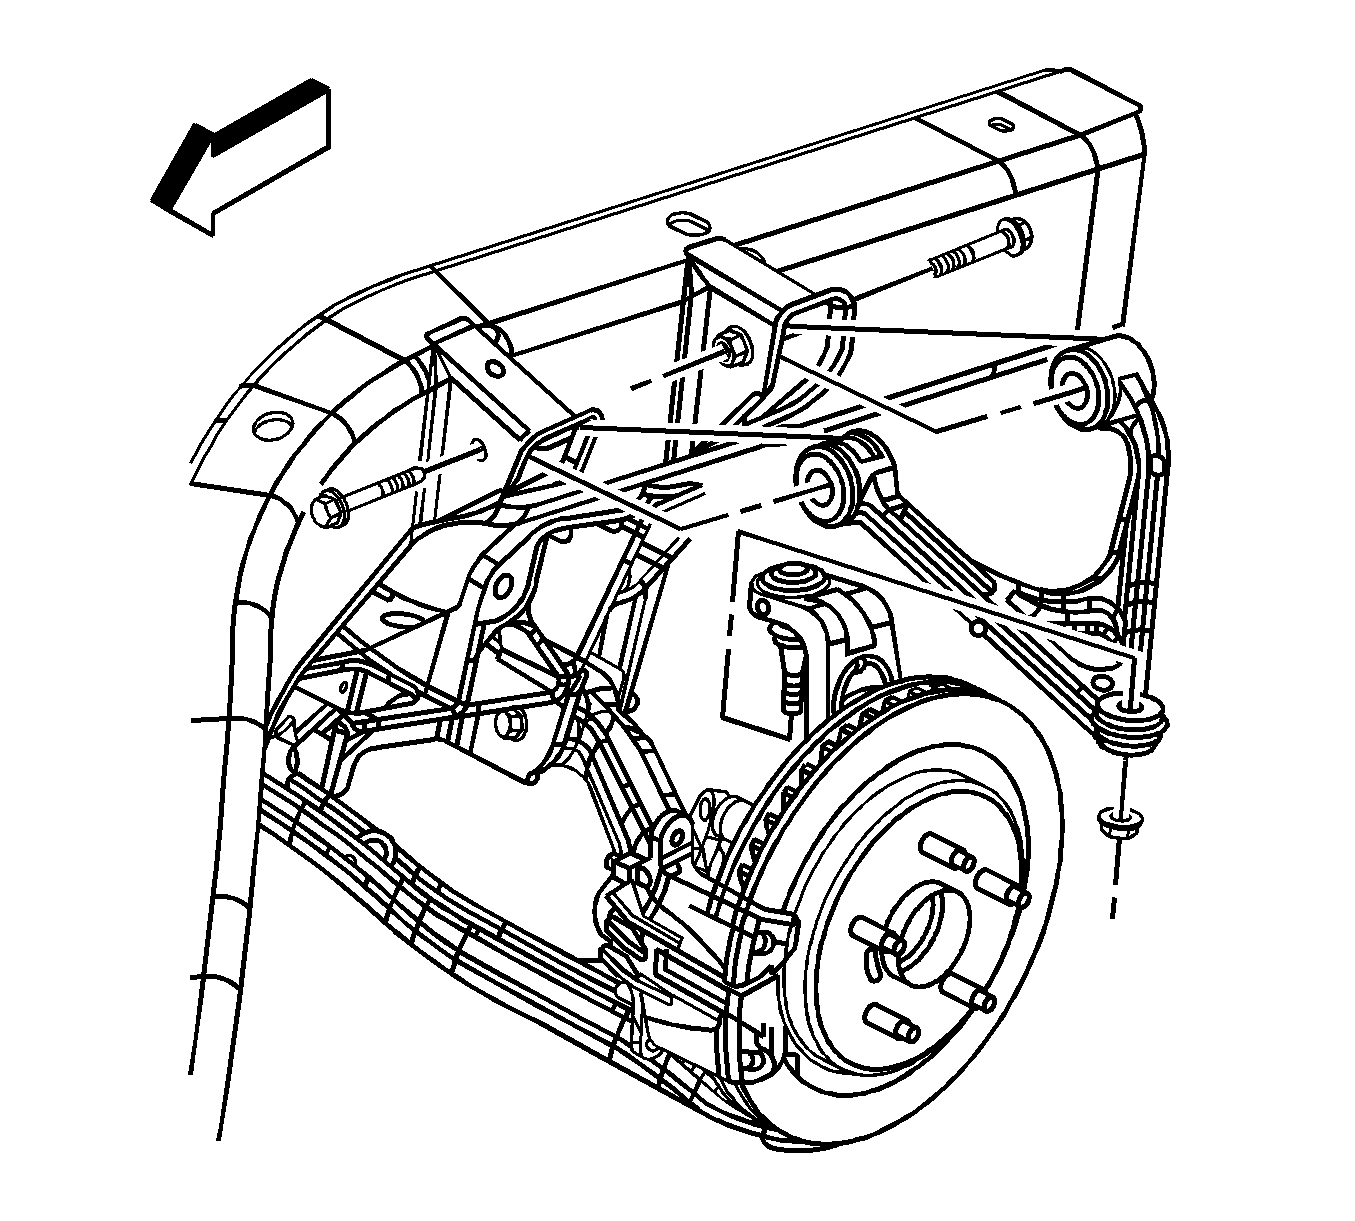
- Using the J-42188-B , separate the suspension knuckle (1) from the upper control arm.
- Support the lower control arm with a jack stand.
- Loosen the upper ball joint stud nut, but do not remove the nut.
- Remove the bolts retaining the upper control arm to the frame.
- Remove the upper control arm from the vehicle.

Installation Procedure
- Install the upper control arm to the vehicle.
- Install the upper control arm mounting bolts and to the frame.
- Install the suspension knuckle upper ball joint stud into the upper control arm.
- Install the upper ball joint stud nut.
- Connect the wheel speed sensor electrical connector.
- Connect the electronic suspension control sensor link. Refer to Electronic Suspension Rear Position Sensor Replacement.
- Remove the jack stand from the lower control arm.
- Install the tire and wheel assembly. Refer to Tire and Wheel Removal and Installation.
- Lower the vehicle.
- Perform a rear wheel alignment. Refer to Wheel Alignment Measurement.
Notice: Refer to Fastener Notice in the Preface section.
Tighten
Tighten the upper control arm mounting bolts to 110 N·m (81 lb ft).
It may be necessary to use an allen wrench to keep the ball joint stud from spinning while tightening the ball joint stud nut.
Tighten
Tighten the suspension knuckle ball joint stud nut to 30 N·m (22 lb ft) plus 195 degrees.
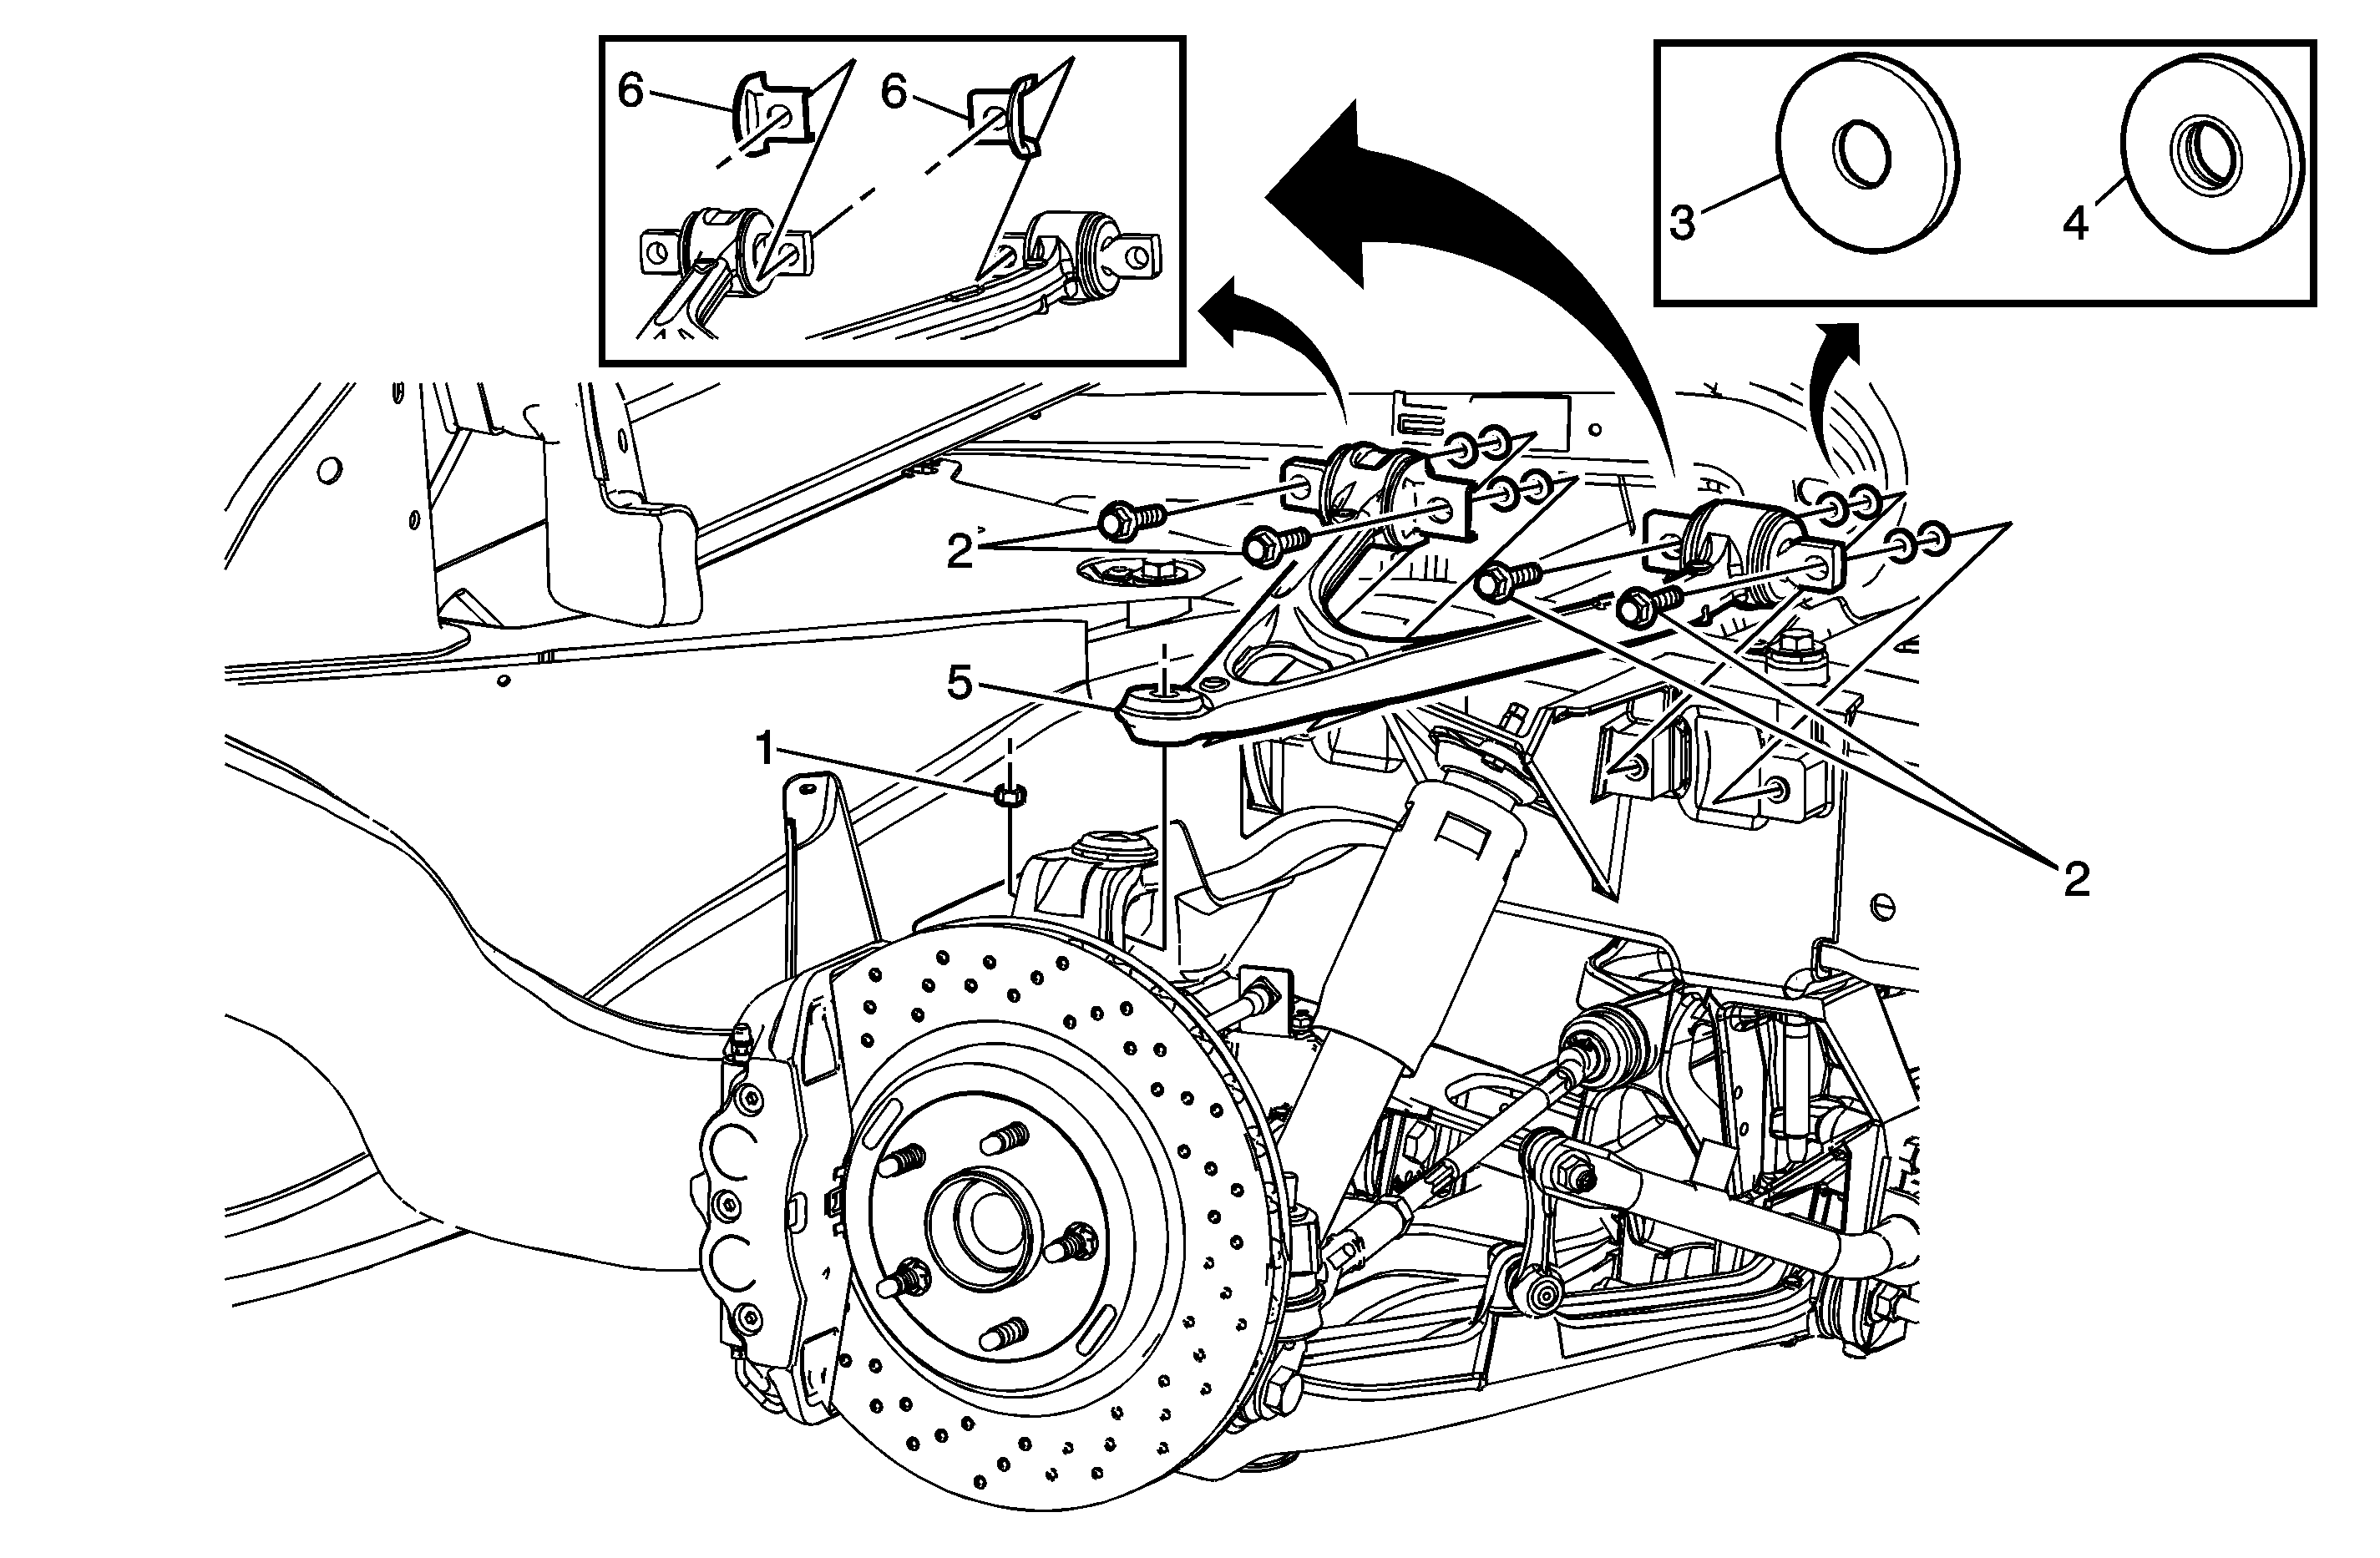
Rear Axle Upper Control Arm Replacement RPO FE4 (Z06)
Callout | Component Name | ||||
|---|---|---|---|---|---|
|
Notice: Refer to Fastener Notice in the Preface section. Fastener Tightening Specifications: Refer to Fastener Tightening Specifications. Tool RequiredJ-42188-B Ball Joint Separator Preliminary Procedures
| |||||
1 | Upper Ball Joint Nut Important: Suitably support the lower control arm before removing the ball joint nut. Tip Tighten | ||||
2 | Upper Control Arm Bolt (Qty: 4) Tighten | ||||
3 | Upper Control Arm Washer (Qty: 4) Important:
| ||||
4 | Upper Control Arm Washer With Insert (Qty: 4) Important:
| ||||
5 | Limiter Brackets (Qty: 2) Tip | ||||
6 | Rear Upper Control Arm | ||||
