For 1990-2009 cars only
Removal Procedure
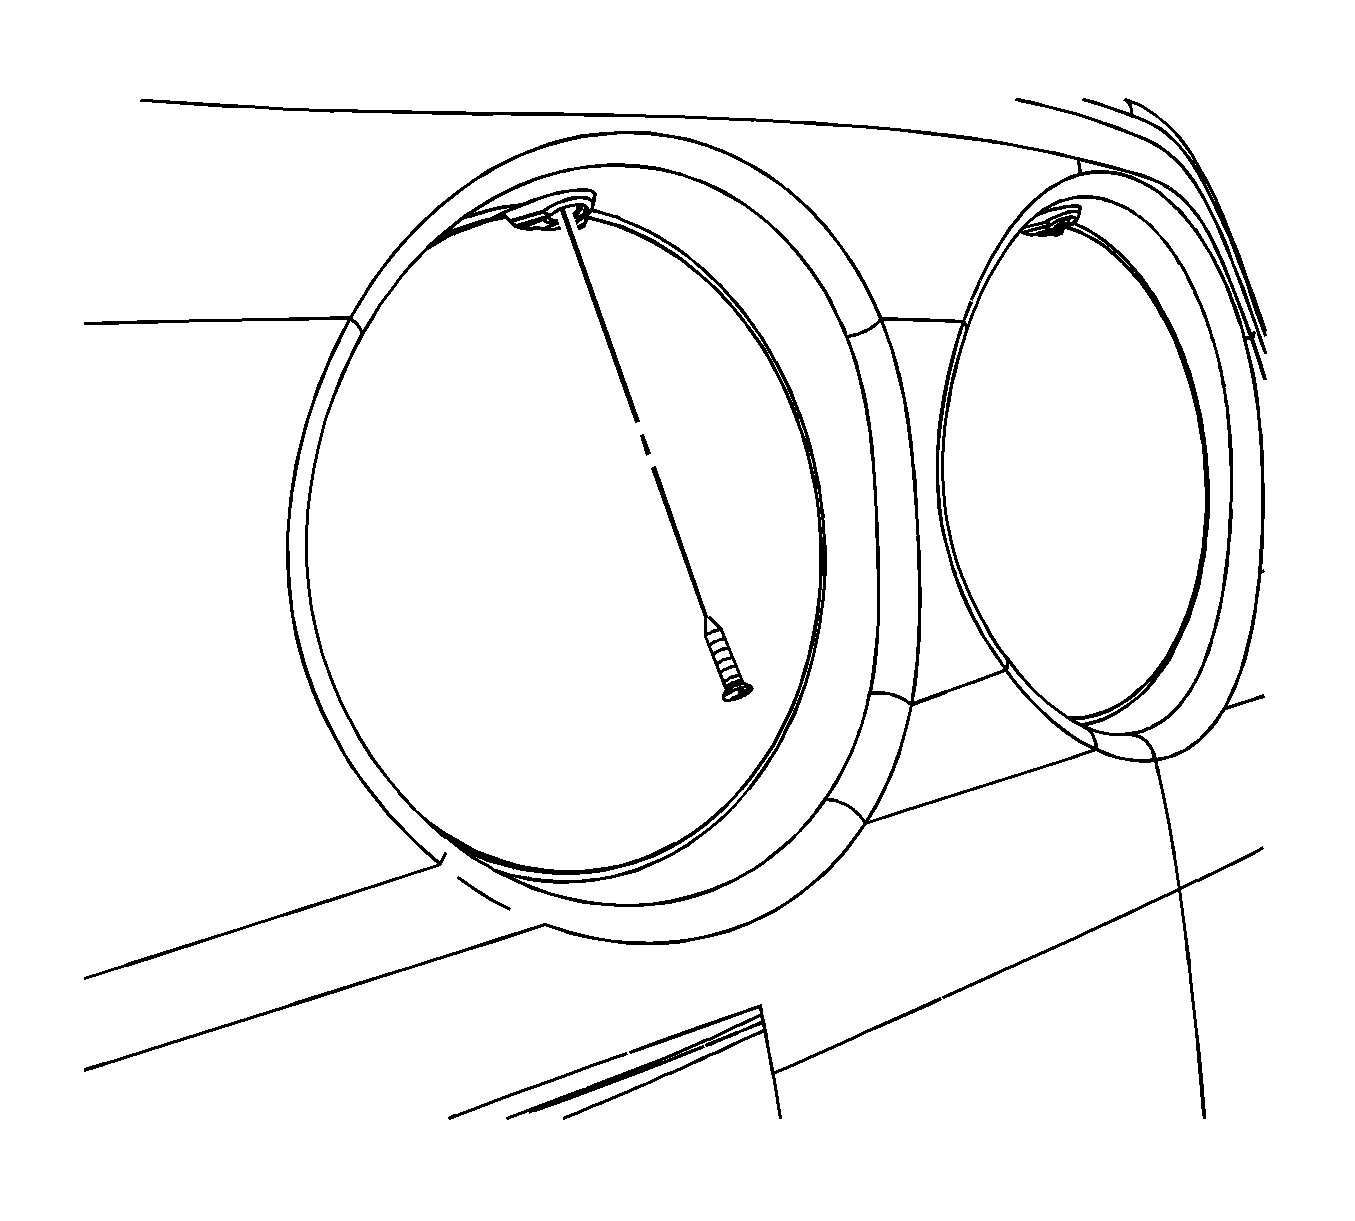
- Remove the right inner tail lamp lens screw.
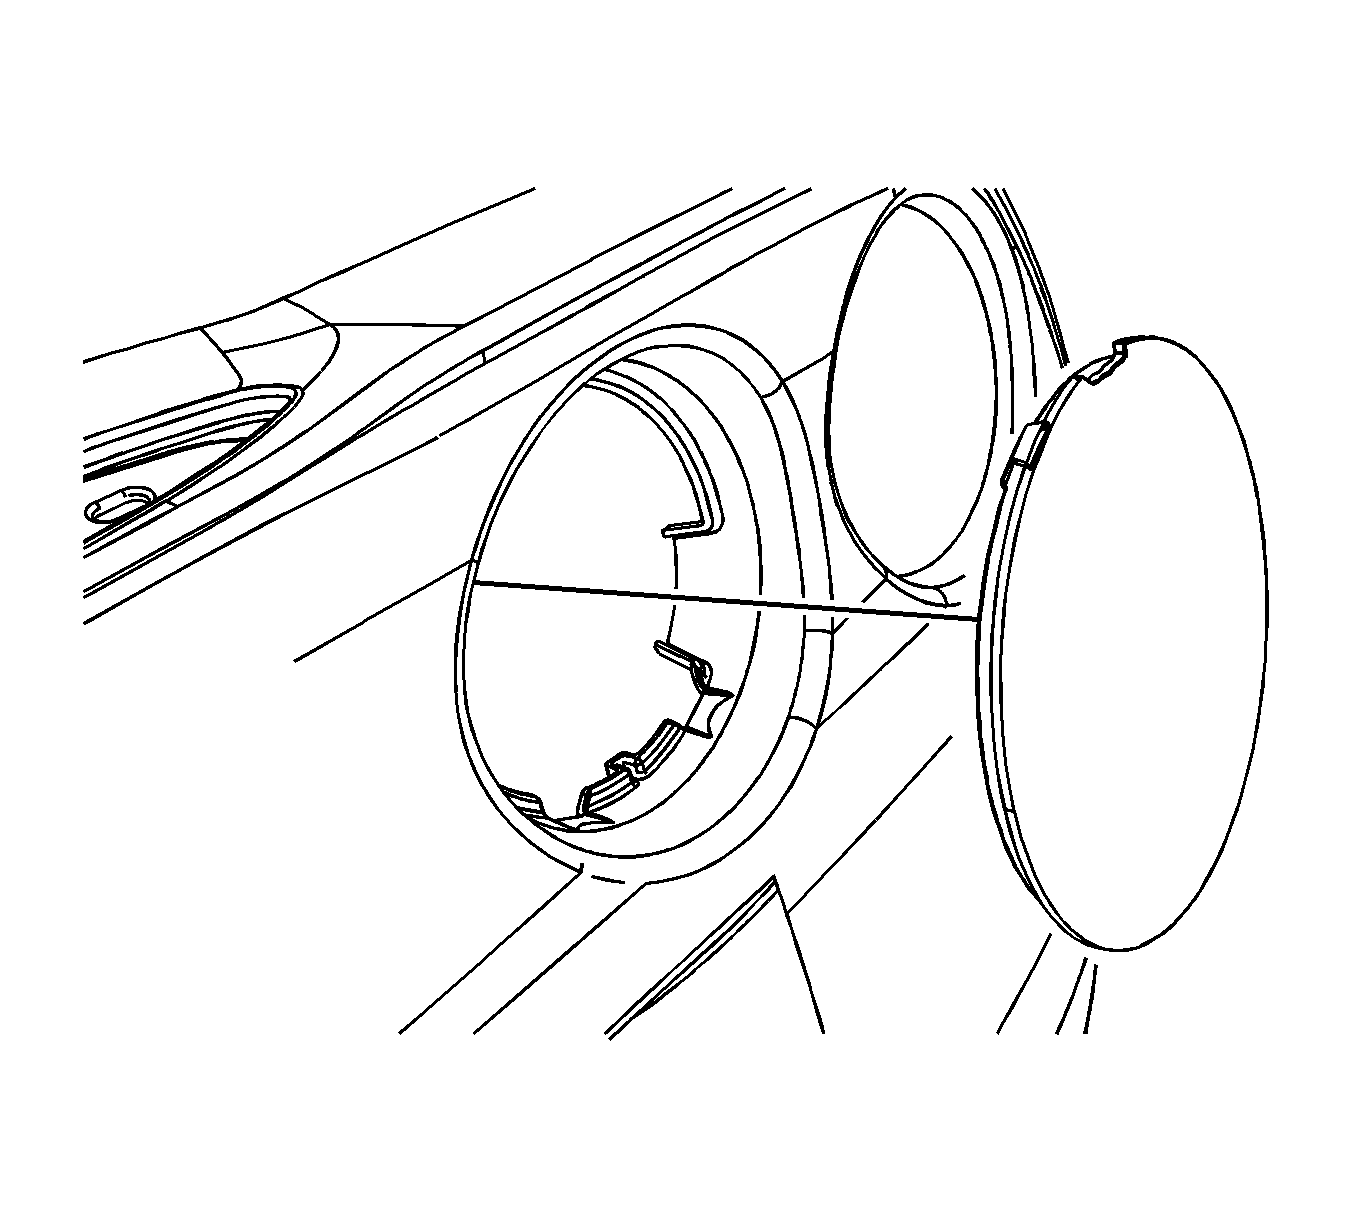
- Remove the right inner tail lamp lens.
- Working through the tail lamp opening, remove the flow control valve solenoid shield.
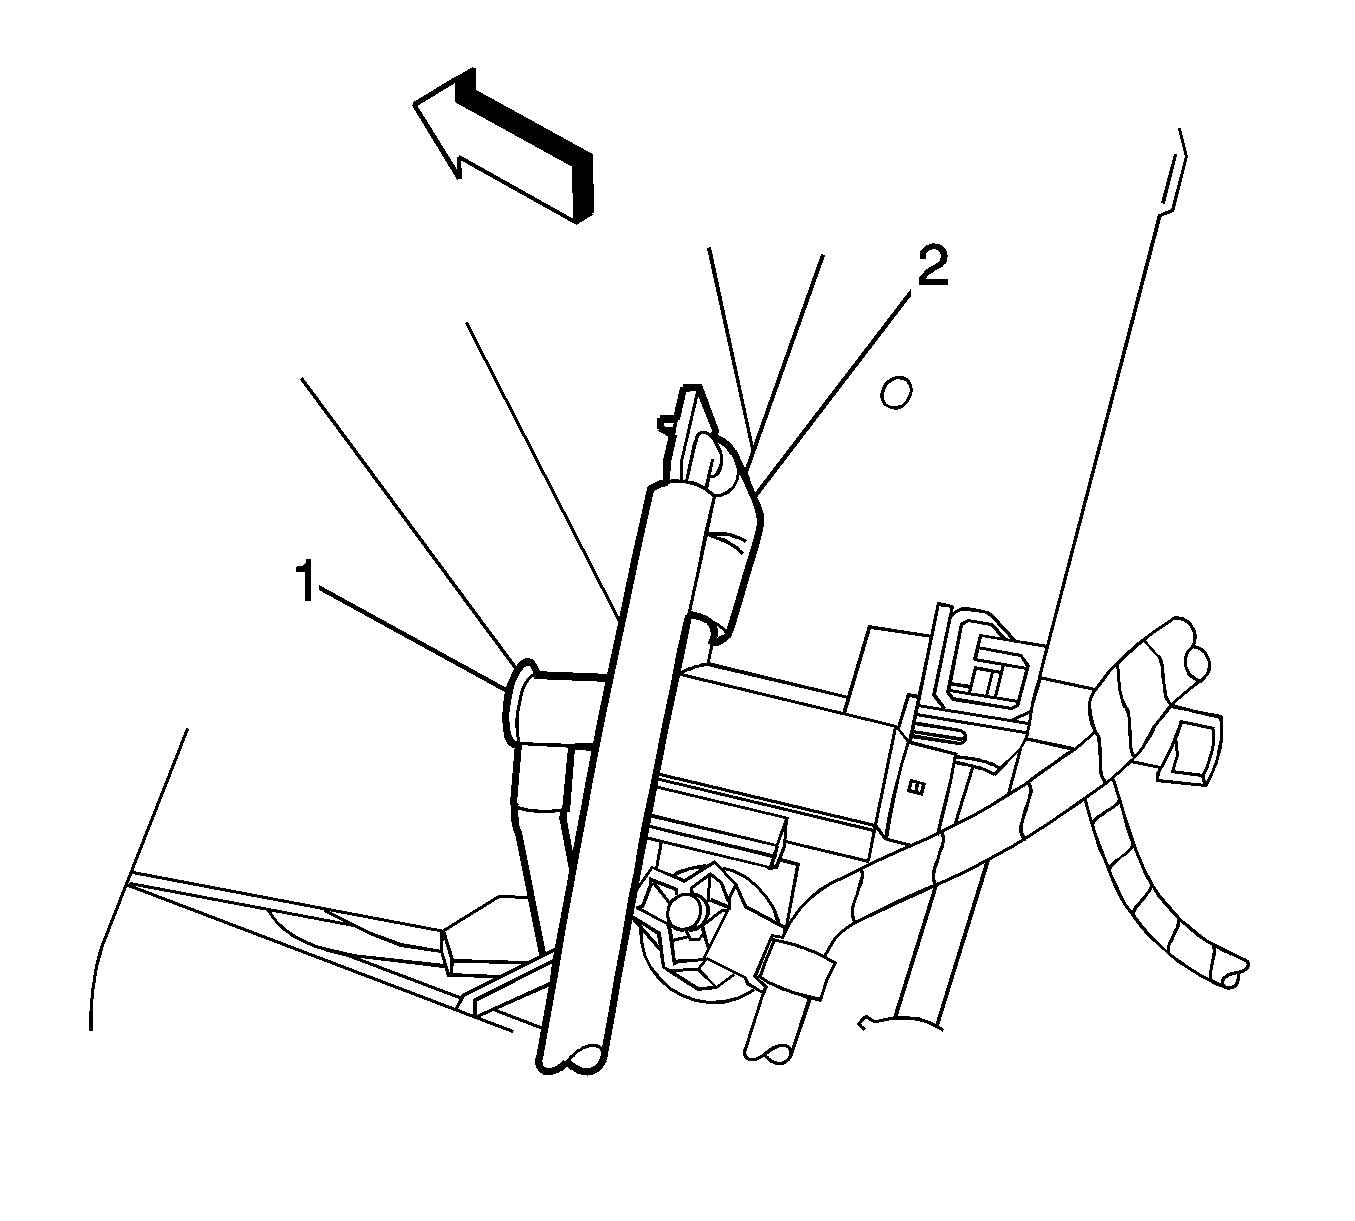
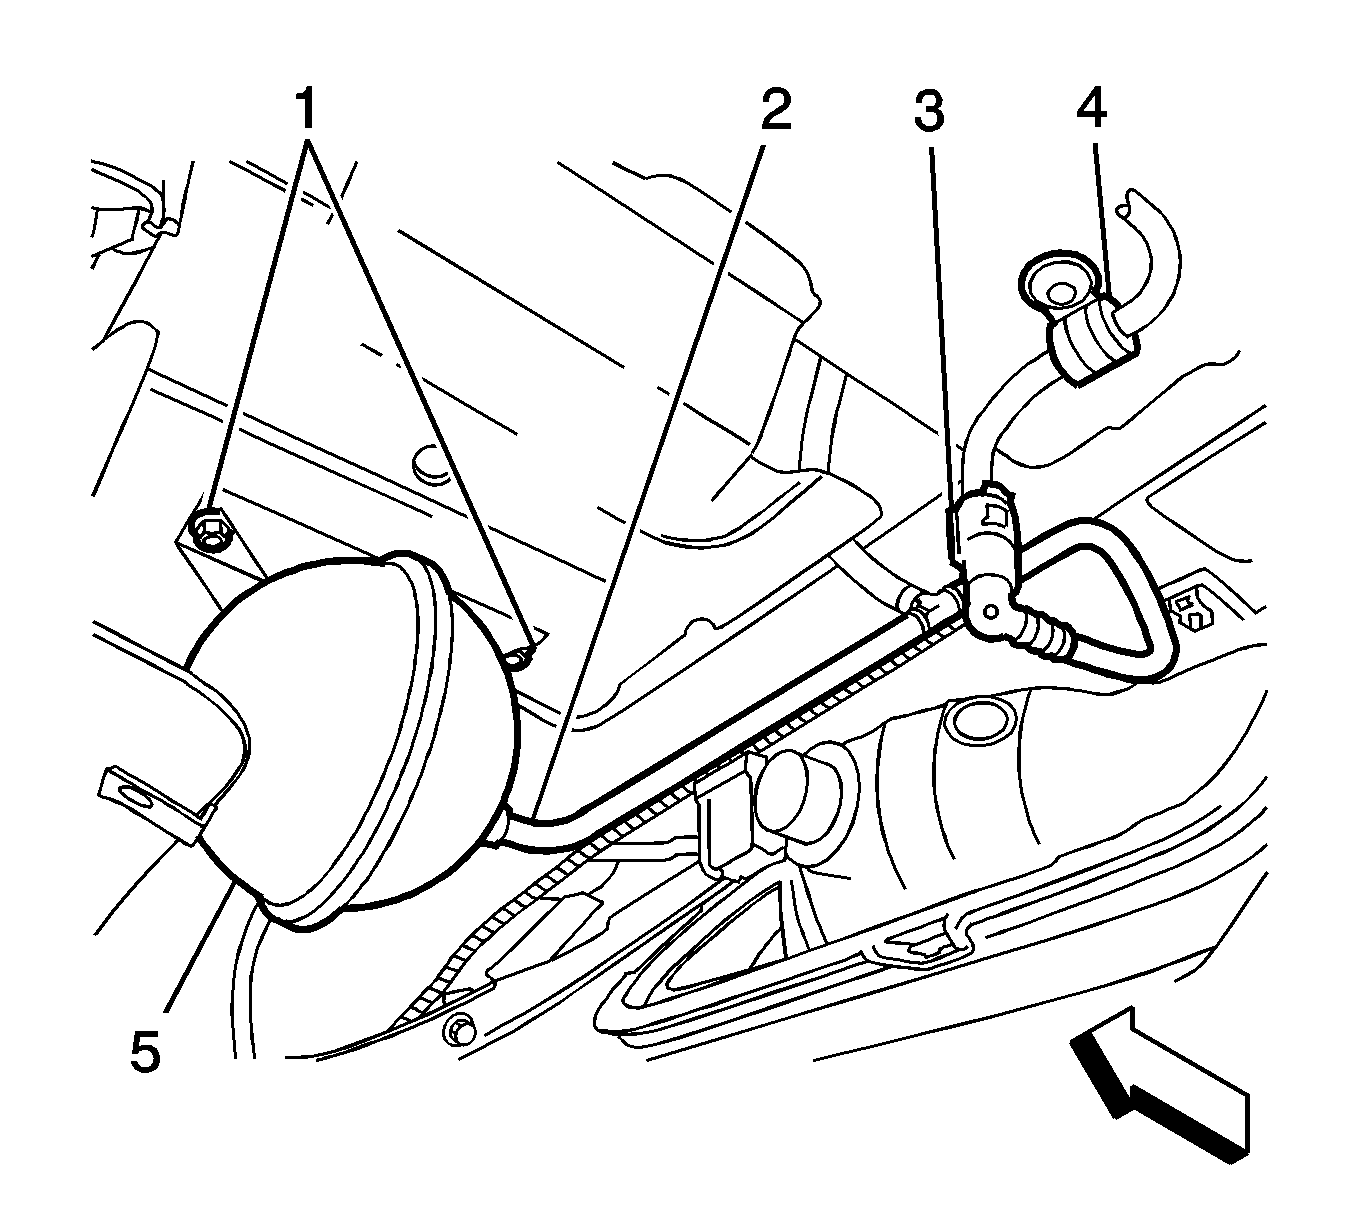
- Disconnect the vacuum line fitting (1) from the flow control valve solenoid.
- Raise the vehicle. Refer to Lifting and Jacking the Vehicle .
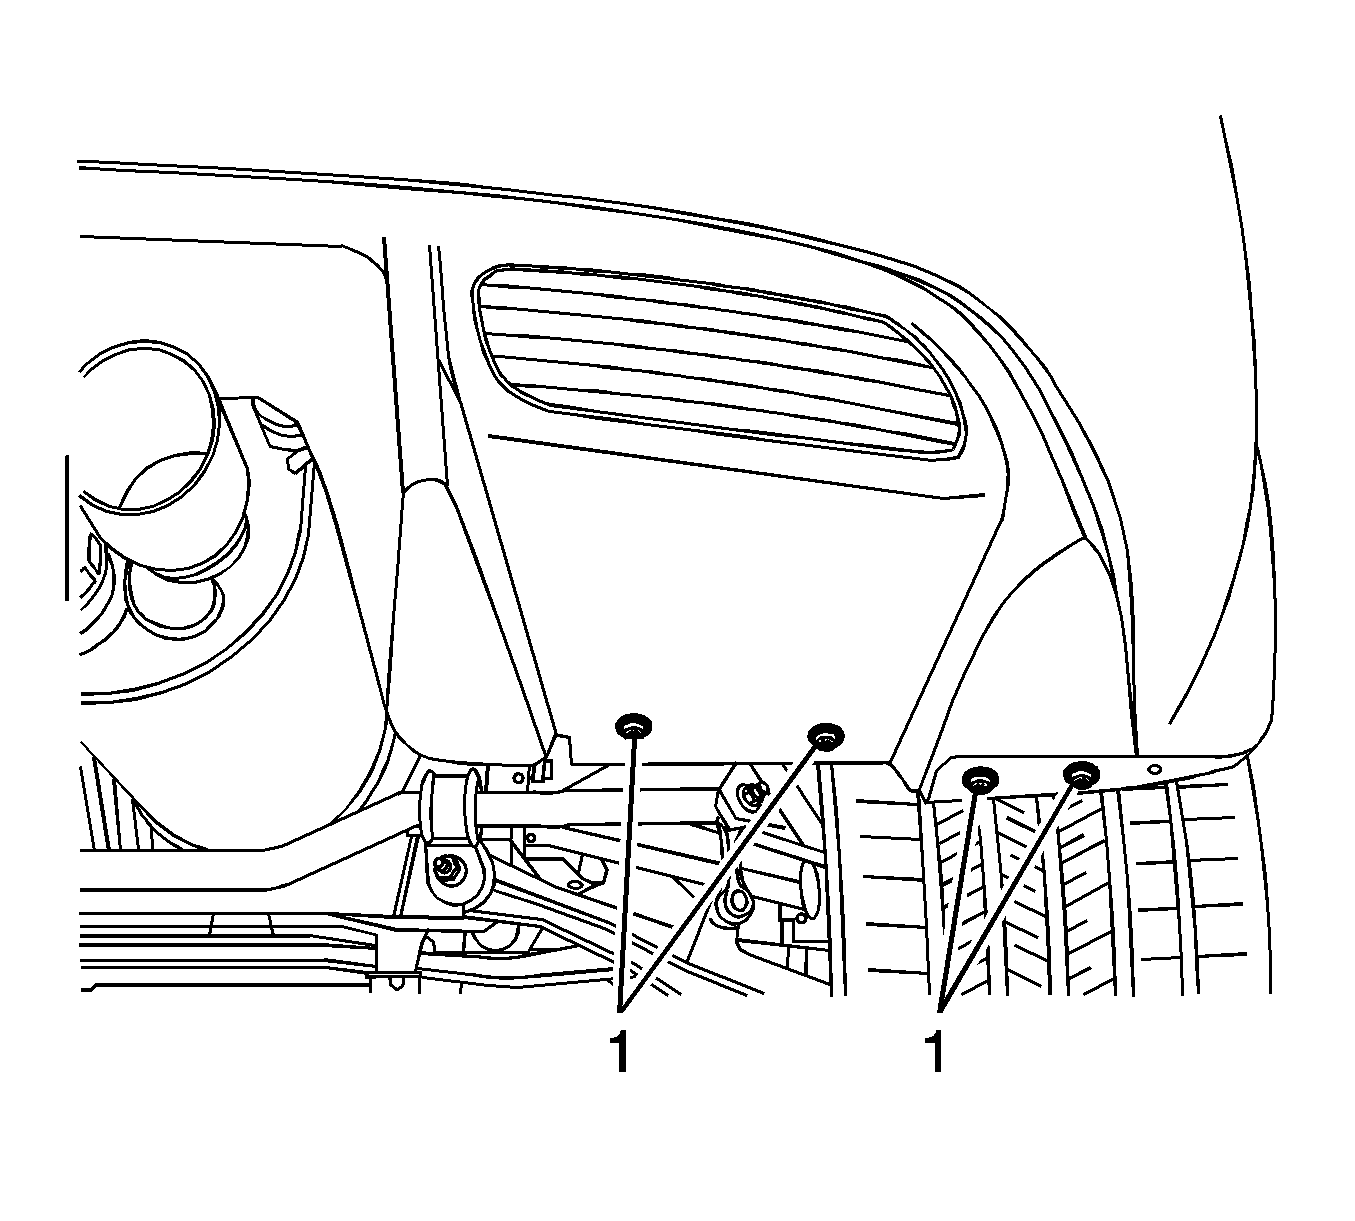
- Remove the screws (1) from the bottom of the rear fascia to gain access to the vacuum line fittings.
- Disconnect the vacuum line fitting (2) from the vacuum tank.
- Disconnect the vacuum line quick connect fitting (3). Refer to Plastic Collar Quick Connect Fitting Service .
- Remove the vacuum line from the vehicle.
Installation Procedure
- Install the vacuum line to the vehicle.
- Connect the vacuum line quick connect fitting (3). Refer to Plastic Collar Quick Connect Fitting Service .
- Connect the vacuum line fitting (2) to the vacuum tank.
- Install the rear fascia screws (1).
- Lower the vehicle.
- Connect the vacuum line fitting (1) to the flow control valve solenoid.
- Install the flow control valve solenoid shield.
- Install the right inner tail lamp lens.
- Install the right tail lamp lens screw.
Notice: Refer to Fastener Notice in the Preface section.
Tighten
Tighten the rear fascia screws to 5 N·m (44 lb in).
Tighten
Tighten the tail lamp lens screw to 2 N·m (18 lb in).
