For 1990-2009 cars only
Removal Procedure
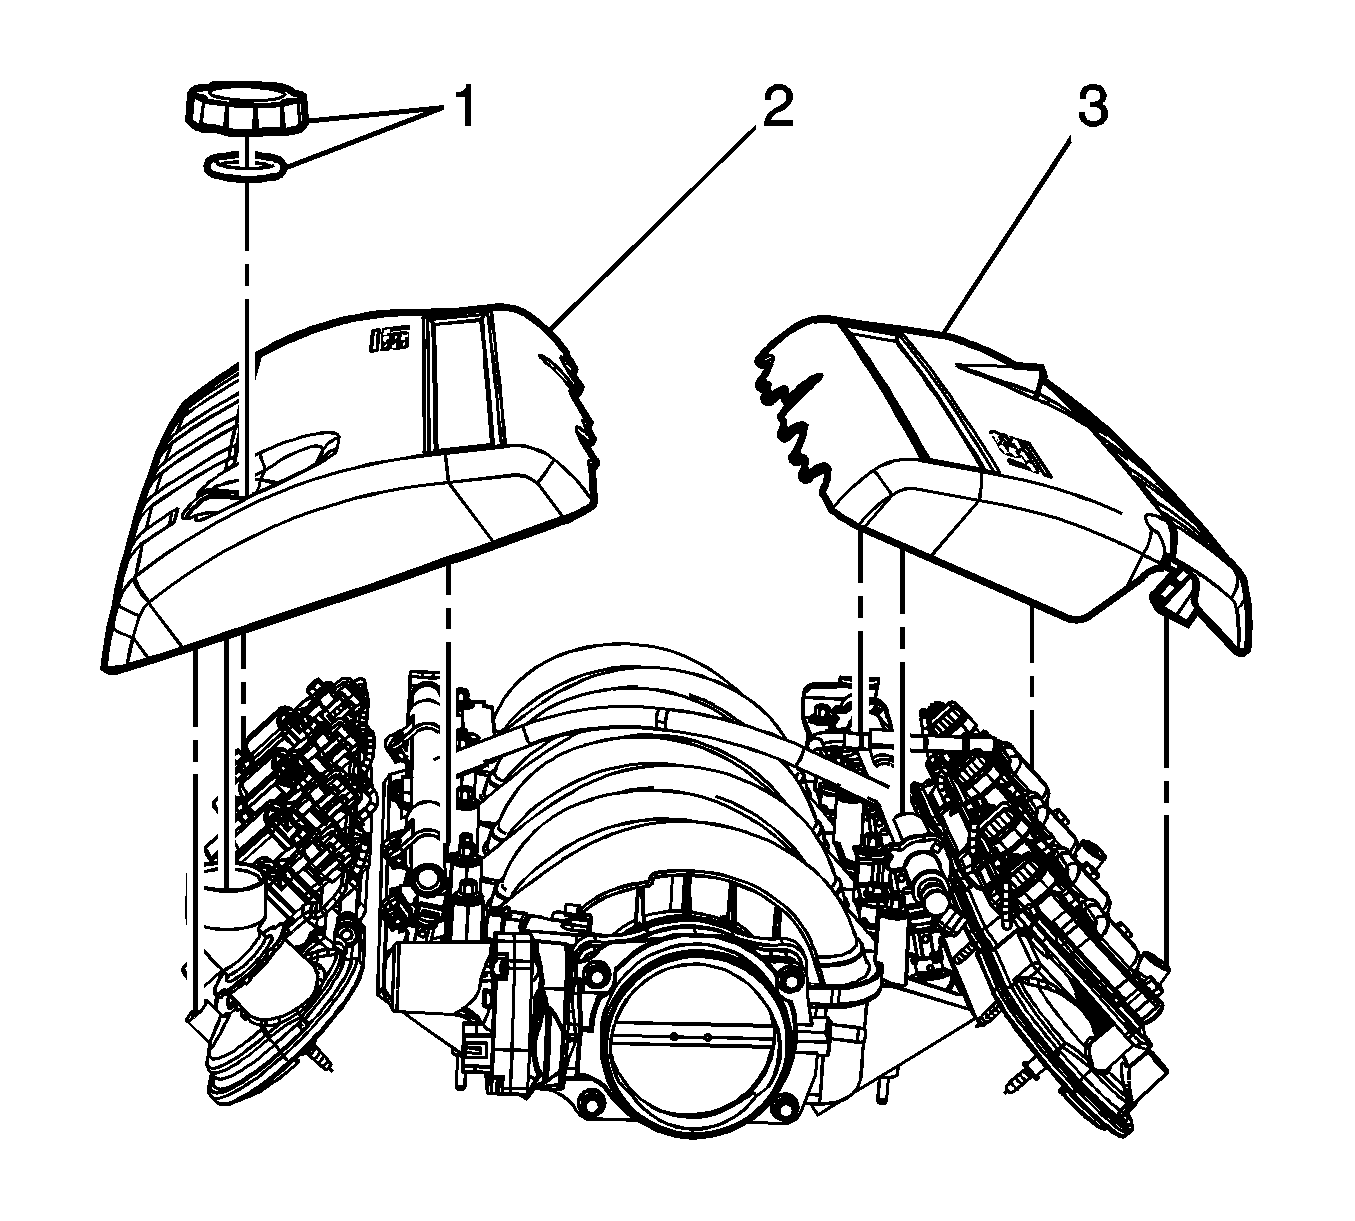
- Remove the engine sight covers (2, 3). Refer to Upper Intake Manifold Sight Shield Replacement .
- Disconnect the electrical connector (1) for the fuel injectors.
- Disconnect the electrical connectors (3) from the throttle body.
- Disconnect the fuel feed for the fuel injectors.
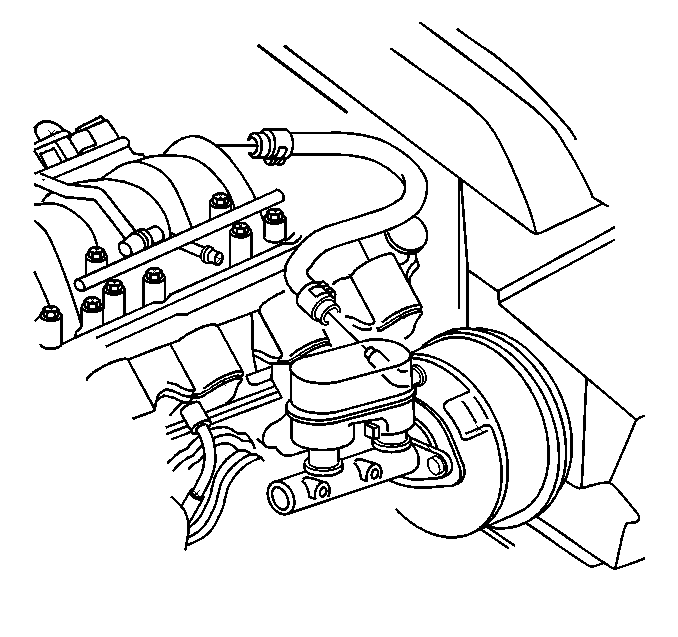
- Remove the vacuum hose from the brake booster.
- Disconnect the electrical connector from the manifold absolute pressure (MAP) sensor.
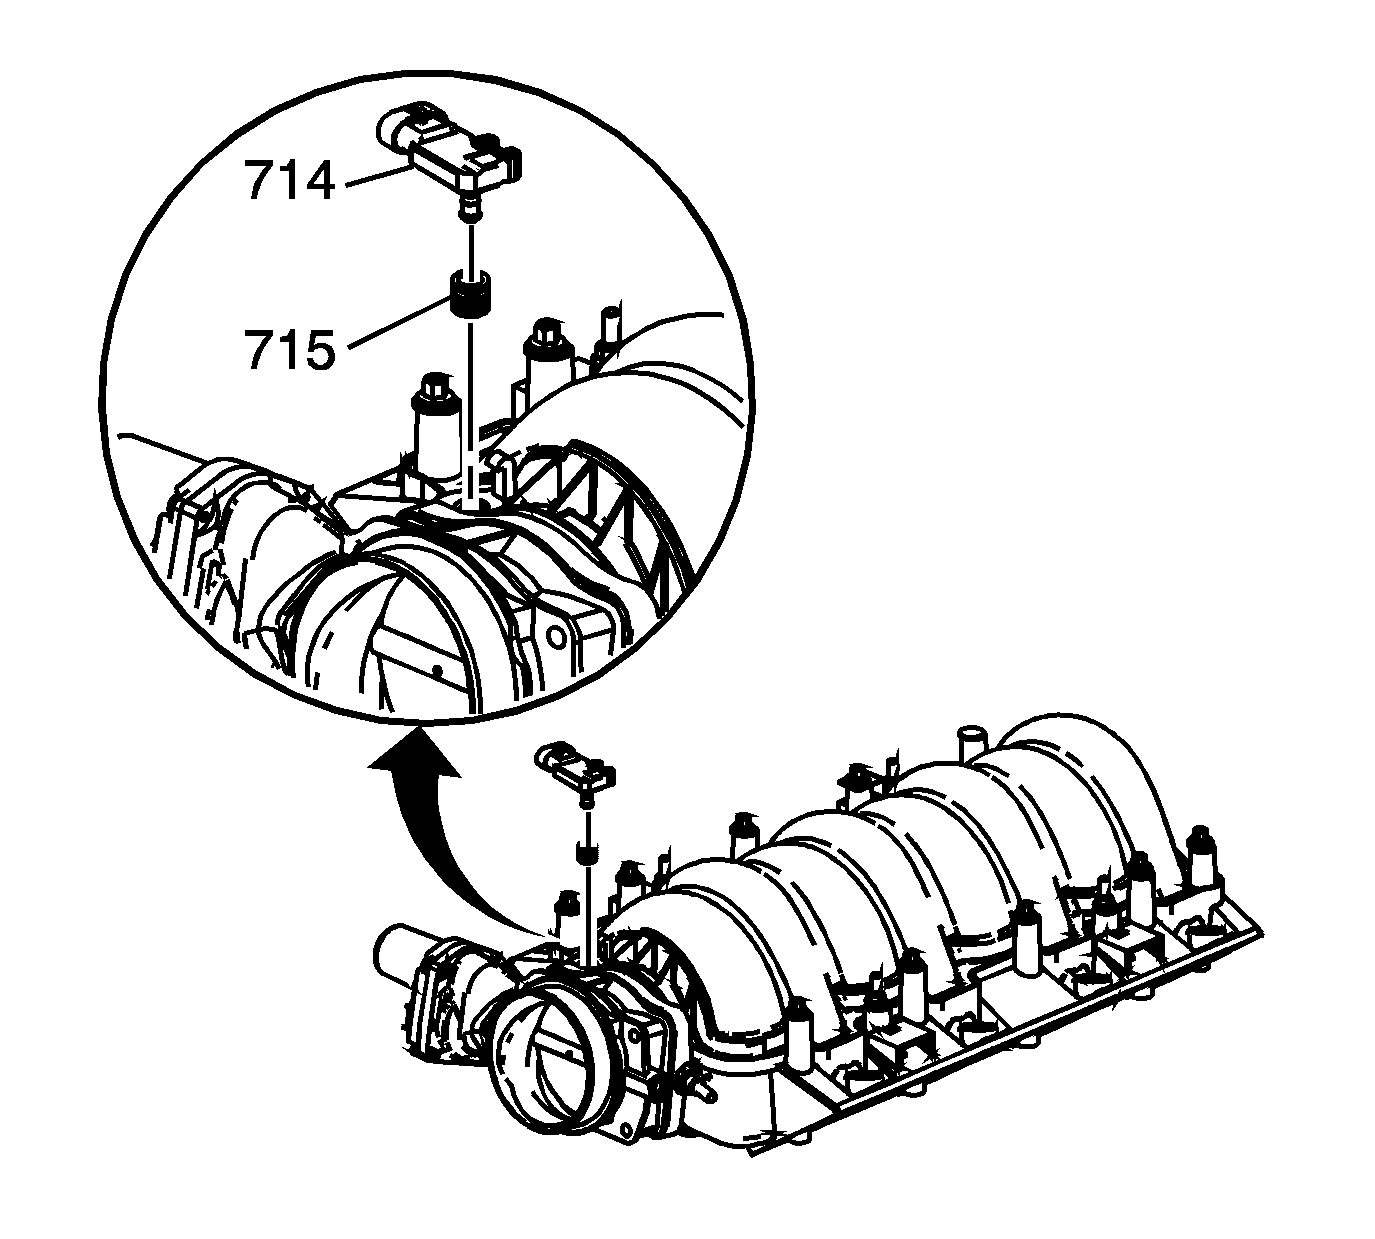
- Remove the MAP sensor (714).
- Remove the grommet (715) from the sensor, as required.
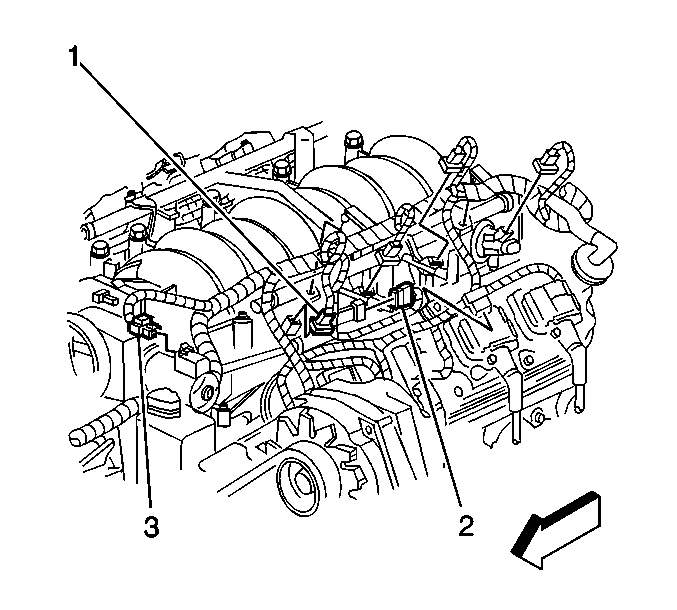
- Remove the evaporative emission (EVAP) clip (740), bolt (742), bracket (741), valve (730), and tubes (729, 735).
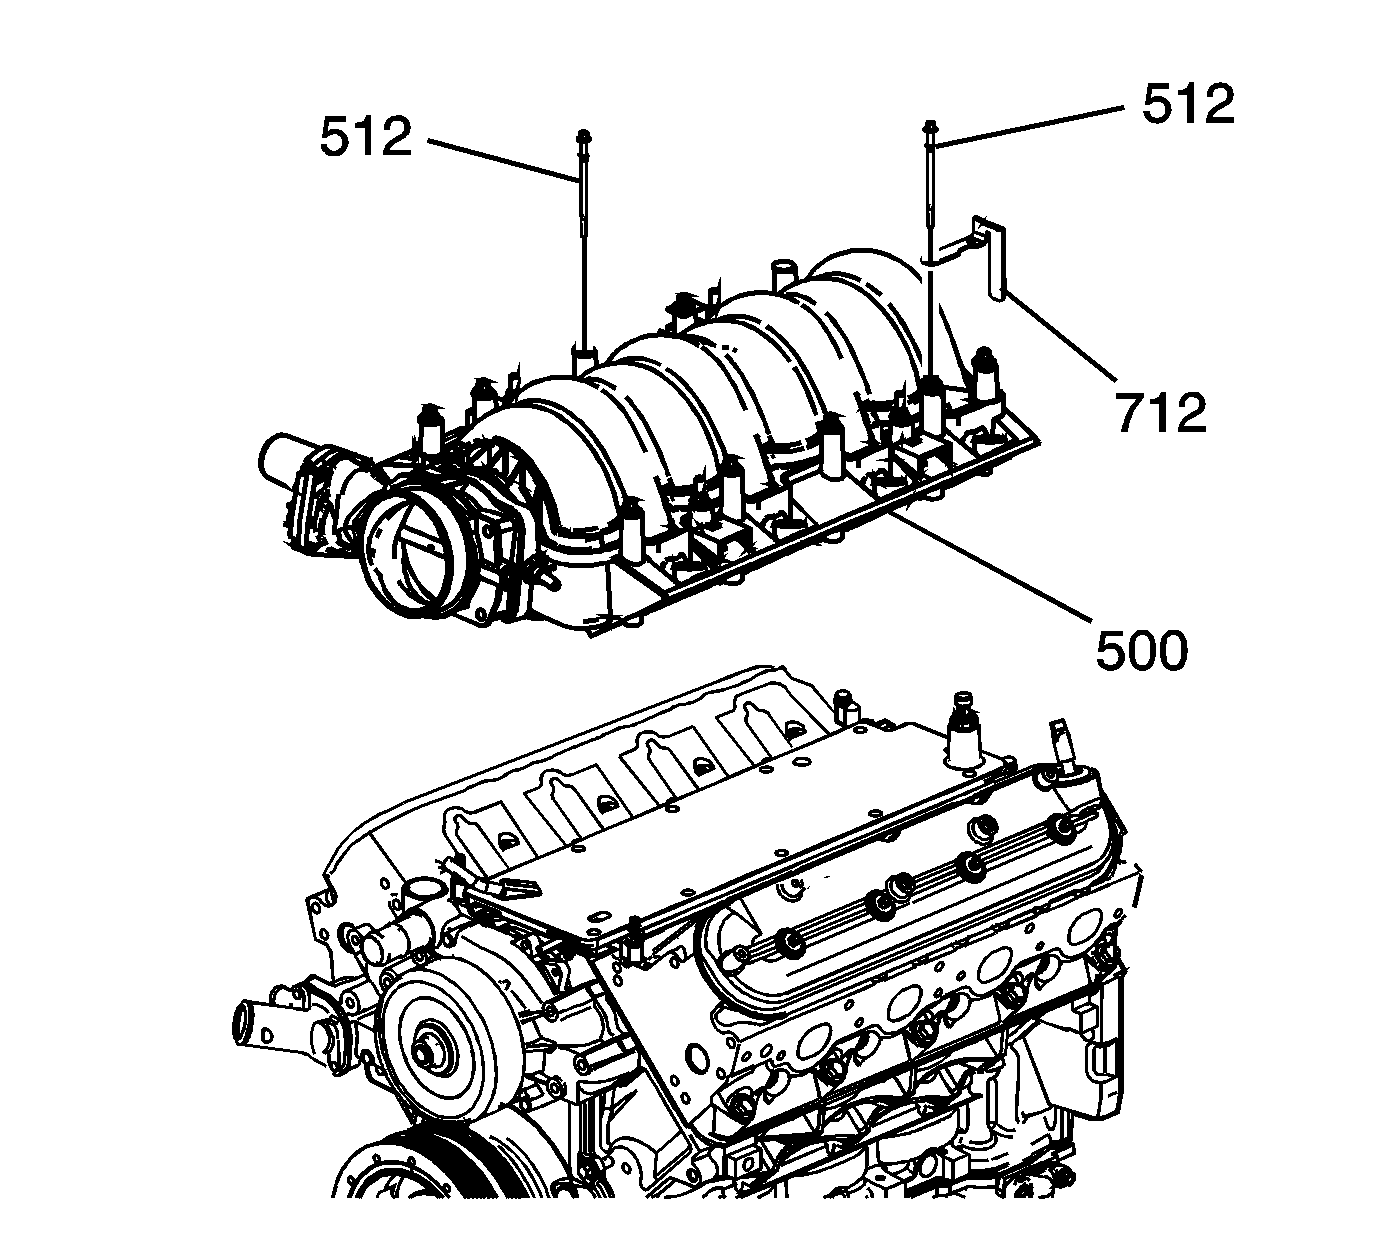
- Remove the intake manifold bolts (512) and fuel rail stop bracket (712).
- Remove the intake manifold (500).
- Remove the intake manifold gaskets (514).
- Discard the intake manifold gaskets.
Important: The intake manifold, throttle body, fuel injection rail, and injectors may be removed as an assembly. If not servicing the individual components, remove the manifold as a complete assembly.


Installation Procedure
- Install NEW intake manifold-to-cylinder head gaskets (514).
- Install the intake manifold (500).
- Apply a 5 mm (0.20 in) band of threadlocker to the threads of the intake manifold bolts (512). Refer to Adhesives, Fluids, Lubricants, and Sealers for the correct part number.
- Install the fuel rail stop bracket (712).
- Install the intake manifold bolts (512).
- Tighten the intake manifold bolts to the sequence below:
- Lubricate the MAP sensor grommet (715) with clean engine oil.
- Install the MAP sensor (714) and grommet (715).
- Install the EVAP valve (730), bracket (741), and bolt (742).
- Install the EVAP tubes (729, 735).
- Install the fuel rail. Refer to Fuel Rail and Injectors Installation .
- Reconnect the electrical connector for the MAP sensor.
- Install the vacuum hose for the brake booster.
- Reconnect the electrical connectors (3) throttle body.
- Reconnect the electrical connector (1) for the fuel injectors.
- Refill the cooling system. Refer to Cooling System Draining and Filling .
- Install the engine sight covers (2, 3). Refer to Upper Intake Manifold Sight Shield Replacement .
Important: DO NOT reuse the intake manifold gaskets. Install NEW intake manifold gaskets.
Important:
• The intake manifold, throttle body, fuel injection rail and fuel injectors may be removed as an assembly. If not servicing the individual components, install the intake manifold as a complete assembly. • DO NOT use the intake manifold gaskets again. Install NEW intake manifold-to-cylinder head gaskets.
Notice: Refer to Fastener Notice in the Preface section.
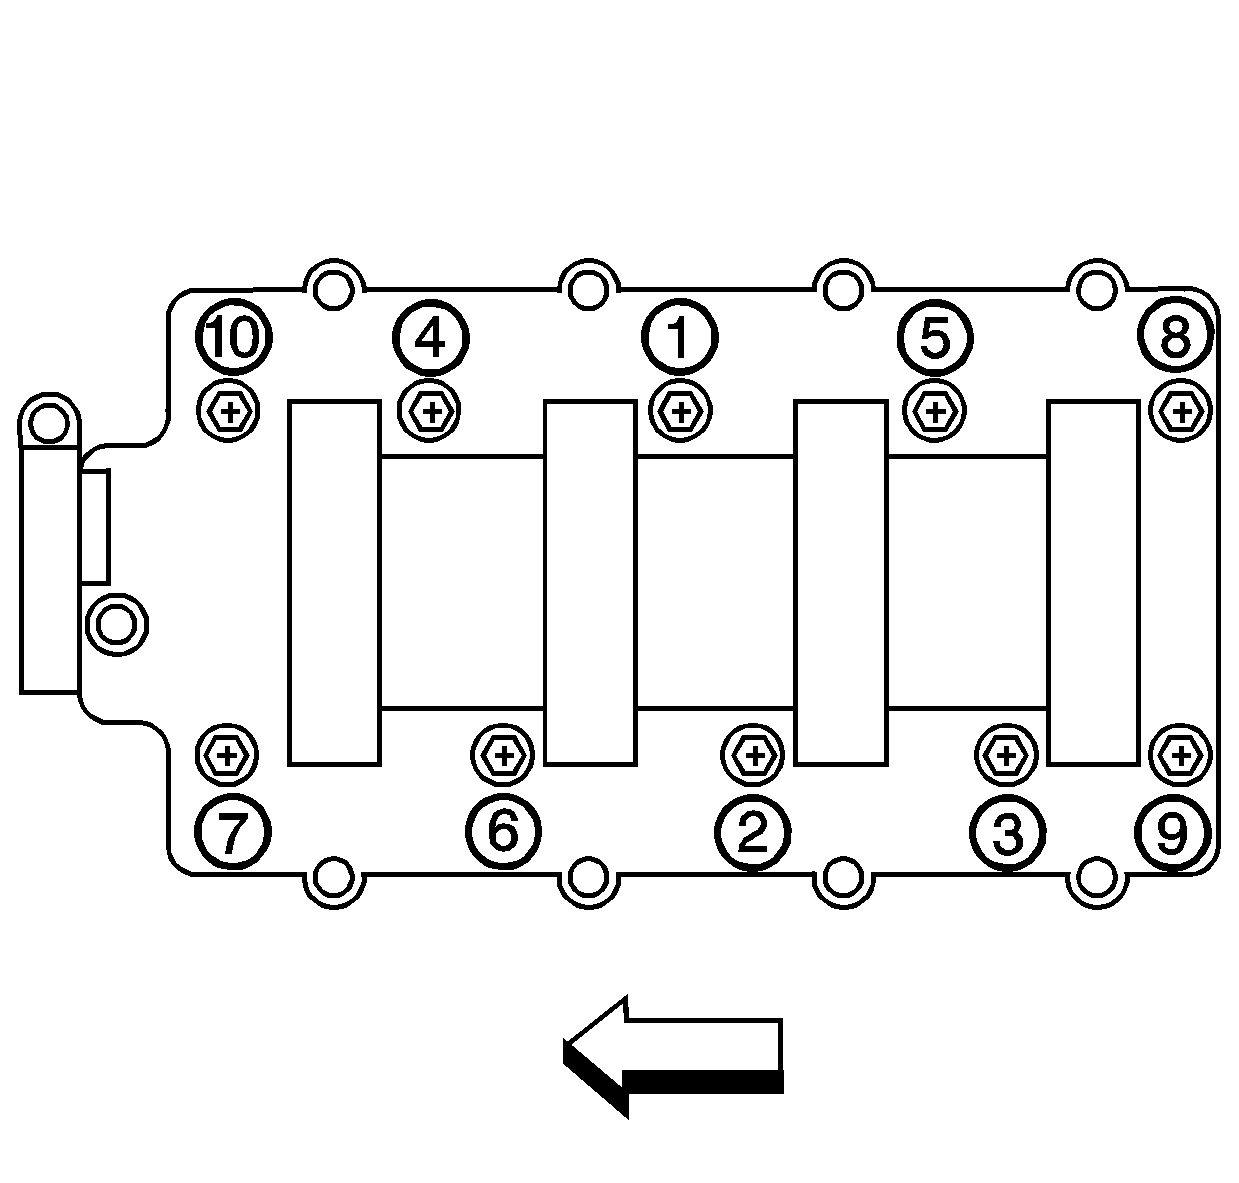
Tighten
| • | First Pass: Tighten the intake manifold bolts in sequence to 5 N·m (44 lb in). |
| • | Final Pass: Tighten the intake manifold bolts in sequence to 10 N·m (89 lb in). |
Tighten
Tighten the bolt to 50 N·m (37 lb ft).
