For 1990-2009 cars only
Removal Procedure
- Raise and support the vehicle. Refer to Lifting and Jacking the Vehicle .
- Lower and support the rear of the exhaust system.
- Install a drain pan under the vehicle.
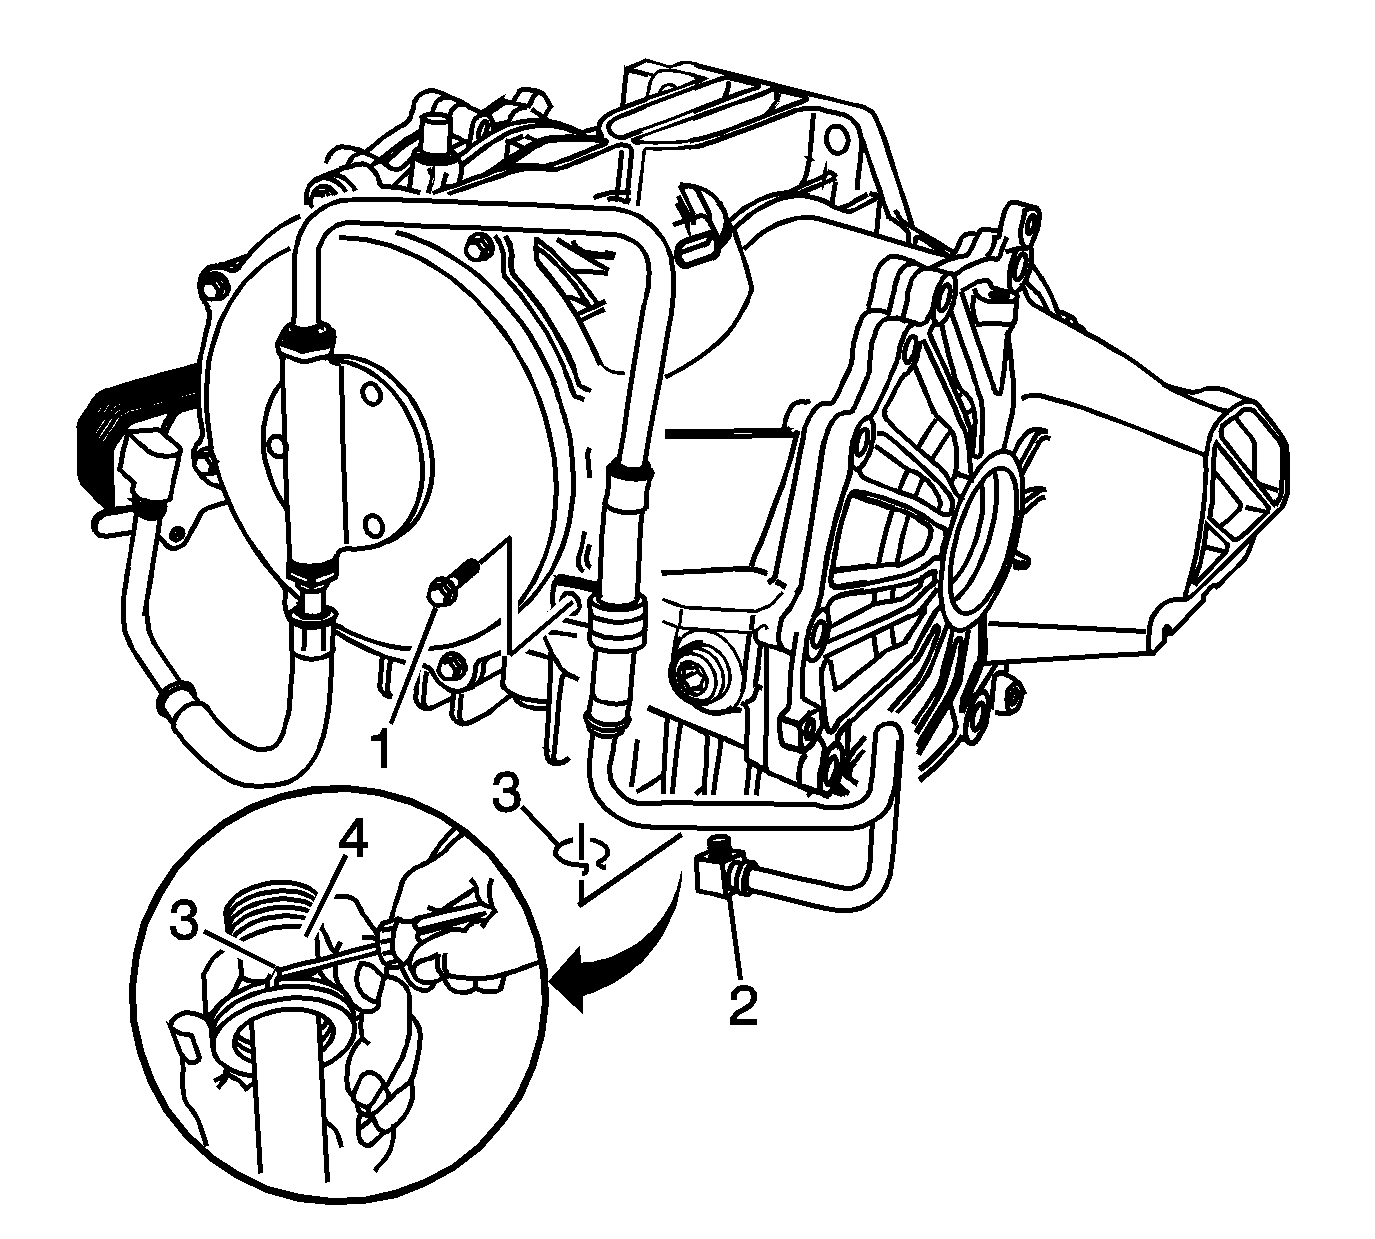
- Remove the differential cooler inlet pipe bolt (1).
- Using a bent tip screwdriver, remove the quick connect fitting retaining ring (3) from the quick connect fitting (4) and discard the retaining ring.
- Remove the differential cooler inlet pipe from the differential nut.
- Disconnect the differential cooler pump inlet pipe from the differential. Refer to Differential Cooler Hose/Pipe Quick Connect Fitting .
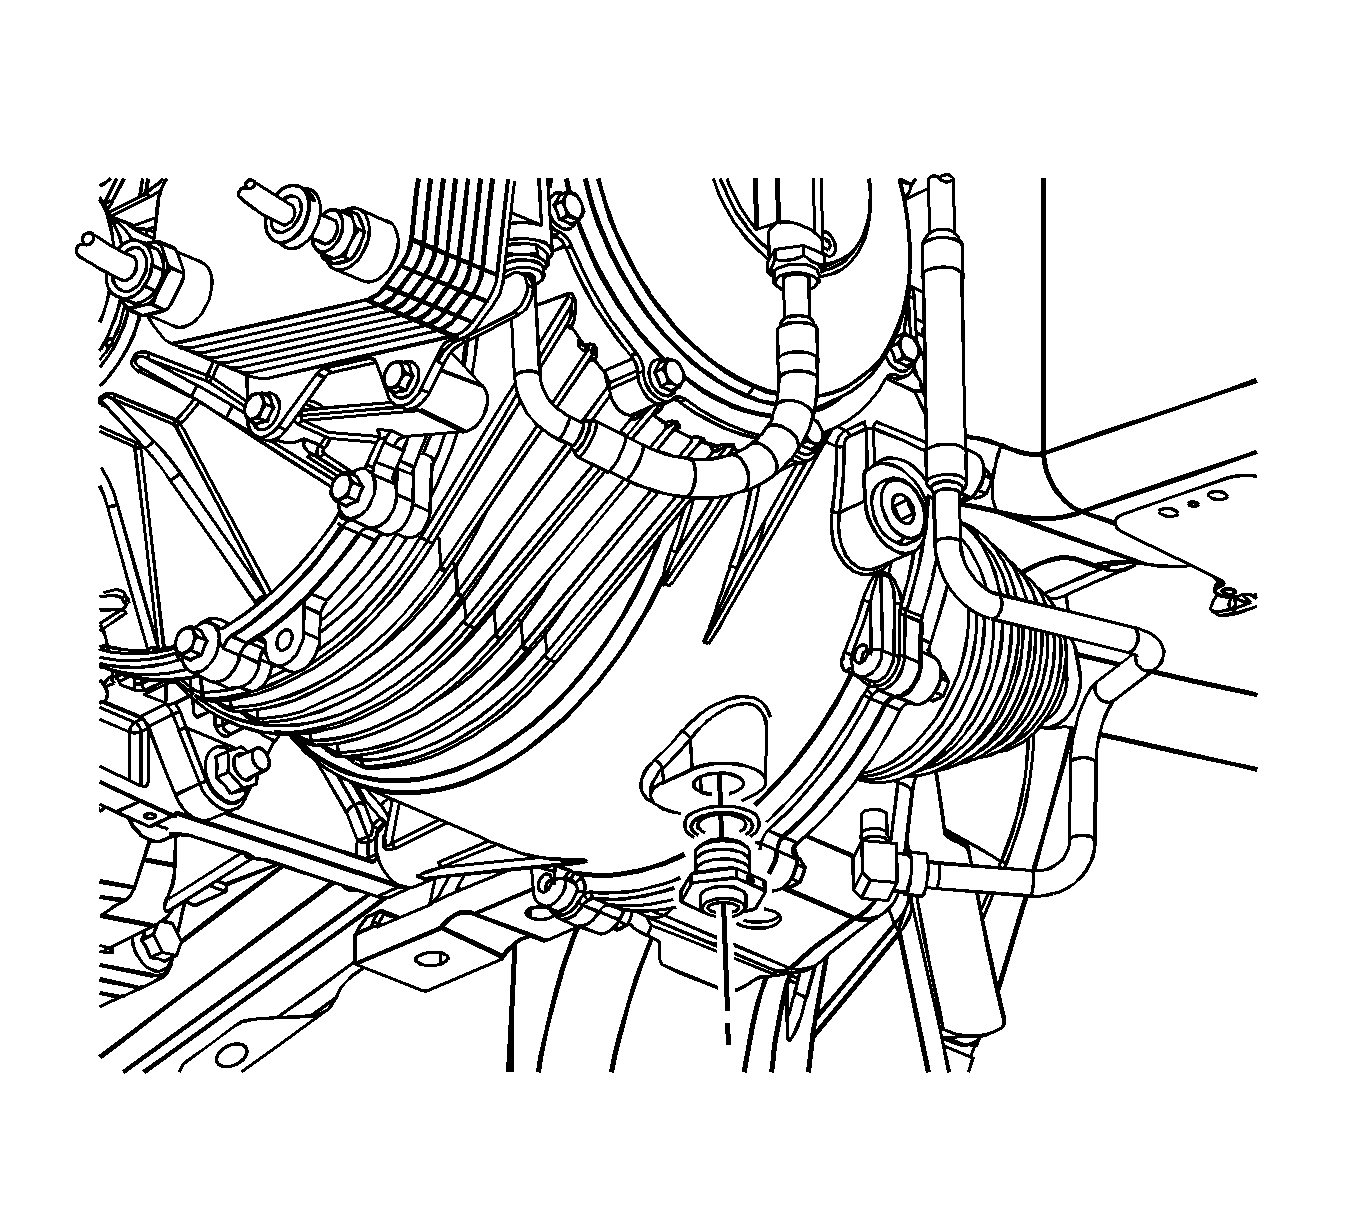
- Remove the differential cooler adaptor nut from the differential.


Installation Procedure
- Install the differential cooler adaptor nut to the vehicle.
- Connect the differential cooler pump inlet pipe to the differential.
- To ensure the cooler line is properly installed, give the cooler pipe a gentle pull.
- Install the differential cooler inlet pipe bolt (1).
- Fill the differential fluid. Refer to Rear Axle Lubricant Level Inspection .
- Raise and secure the rear of the exhaust system.
- Remove the drain pan from under the vehicle.
- Lower the vehicle. Refer to Lifting and Jacking the Vehicle .
Notice: Refer to Fastener Notice in the Preface section.

Important: Inspect the differential cooler adaptor nut for signs of wear or damage. Replace the component if necessary. Replace the retaining clip when the adaptor nut is being reused.
Tighten
Tighten the nut to 18 N·m (13 lb ft).
A distinct snap should be heard or felt when assembling the cooler pipe to the fitting.

Tighten
Tighten the nut to 10 N·m (89 lb in).
