Windshield Side Reveal Molding Replacement Coupe and Convertible
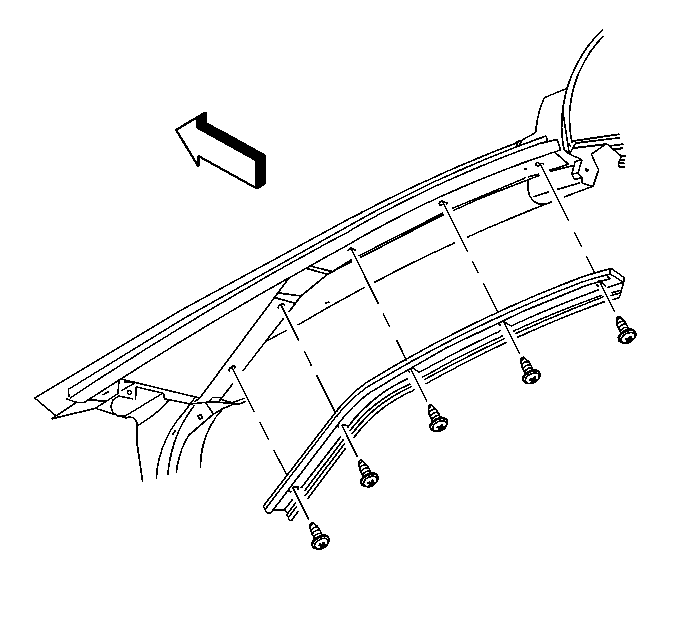
Removal Procedure
- Remove the windshield weatherstrip side retainer. Refer to Weatherstrip Side Retainer Replacement .
- Remove the windshield side reveal molding screws.
- Peel away the reveal molding with the applique from the windshield frame.
- Remove the applique from the reveal molding.
- Clean all surfaces.


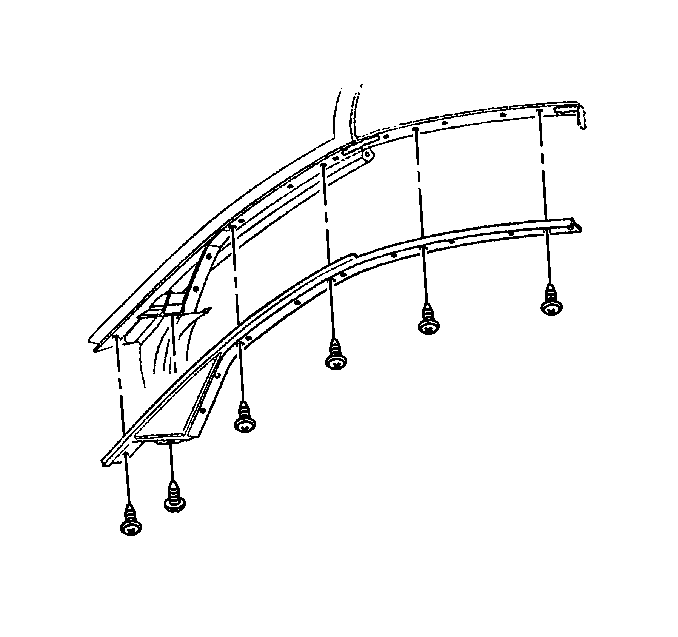
Installation Procedure
- Insert the forward edge of the applique into the side reveal molding.
- Firmly press the applique and the reveal molding together.
- Replace the foam sealing tape if reusing the reveal molding.
- Position the windshield side reveal molding on the windshield frame.
- Install the windshield side reveal molding screws.
- Install the windshield weatherstrip side retainer and the weatherstrip. Refer to Weatherstrip Side Retainer Replacement .
| • | Extend the tape 2.0 mm (0.08 in) beyond the reveal molding ends. |
| • | Do not stretch the tape to fit. The tape may shrink back, or creep, after installation, resulting in a gap which may cause a leak. |
Notice: Use the correct fastener in the correct location. Replacement fasteners must be the correct part number for that application. Fasteners requiring replacement or fasteners requiring the use of thread locking compound or sealant are identified in the service procedure. Do not use paints, lubricants, or corrosion inhibitors on fasteners or fastener joint surfaces unless specified. These coatings affect fastener torque and joint clamping force and may damage the fastener. Use the correct tightening sequence and specifications when installing fasteners in order to avoid damage to parts and systems.
Tighten
Tighten the windshield side reveal molding screws to 1.8 N·m (16 lb in).
Windshield Side Reveal Molding Replacement Hardtop
Removal Procedure
- Remove the weatherstrip, the weatherstrip retainer, and the blow out clip. Refer to Weatherstrip Side Retainer Replacement .
- Remove the screws attaching the reveal molding.
- Remove the side reveal molding.
- Clean the mounting surfaces.
Installation Procedure
- Apply a 100 mm (4 in) long bead of sealant GM P/N 12345097, or equivalent, across the seam where the roof and windshield header meet.
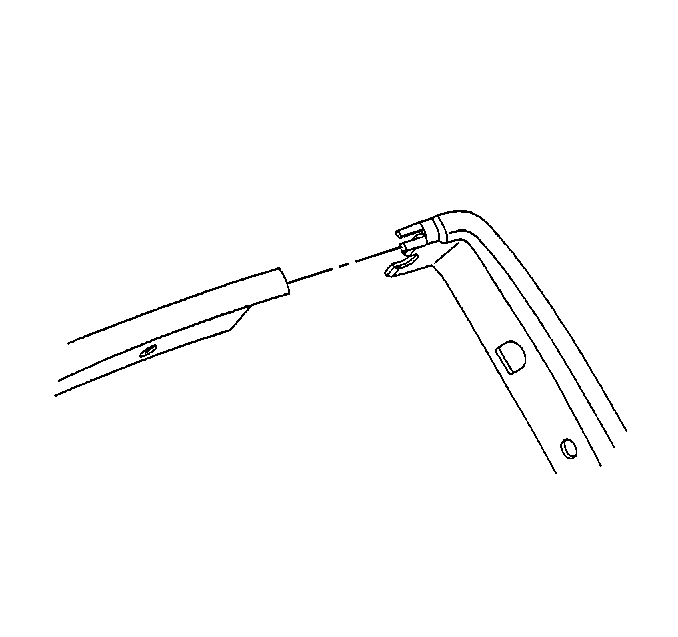
- Install the reward end of the side reveal molding over the lock pillar upper molding.
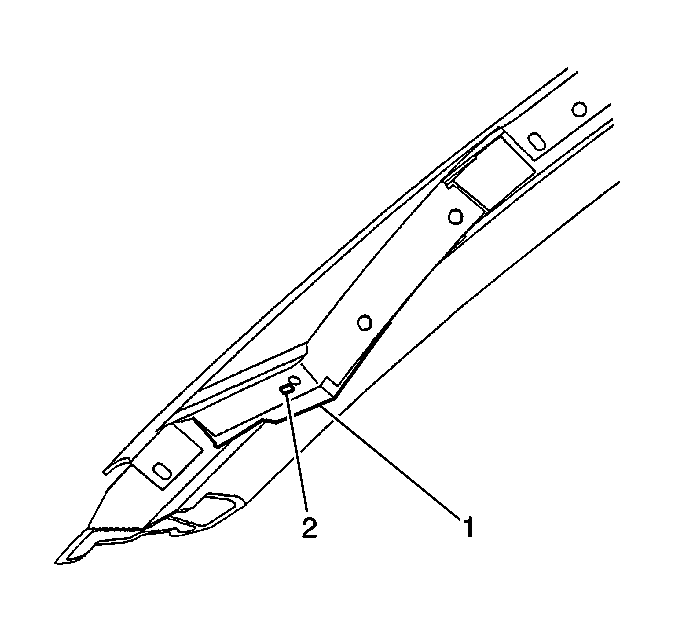
- Align the applique to the slot (2) in the filler panel (1).
- Loosely install the side reveal molding screws.
- Tighten the screws in sequence (1-6), starting in the center as illustrated.
- Apply sealant, install the weatherstrip retainer, the blow out clip, and the weatherstrip. Refer to Weatherstrip Side Retainer Replacement .

Notice: Use the correct fastener in the correct location. Replacement fasteners must be the correct part number for that application. Fasteners requiring replacement or fasteners requiring the use of thread locking compound or sealant are identified in the service procedure. Do not use paints, lubricants, or corrosion inhibitors on fasteners or fastener joint surfaces unless specified. These coatings affect fastener torque and joint clamping force and may damage the fastener. Use the correct tightening sequence and specifications when installing fasteners in order to avoid damage to parts and systems.
Tighten
Tighten the side reveal molding screws to 2.5 N·m (22 lb in).
