For 1990-2009 cars only
Clutch Assembly Replacement LS3/LS7
Special Tools
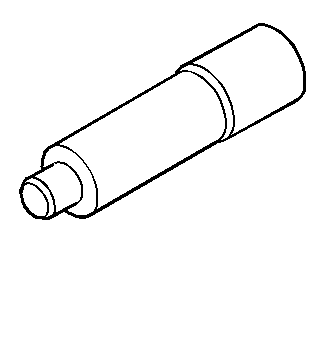
| • | J 38836 Pilot Bushing Installer/Clutch Alignment Arbor |
| • | J 42386-A Flywheel Holding Tool |
Removal Procedure
- Disconnect the negative battery cable.
- Raise and suitably support the vehicle. Refer to Lifting and Jacking the Vehicle.
- Remove the driveline support assembly with the transaxle. Refer to Driveline Support Assembly Replacement.
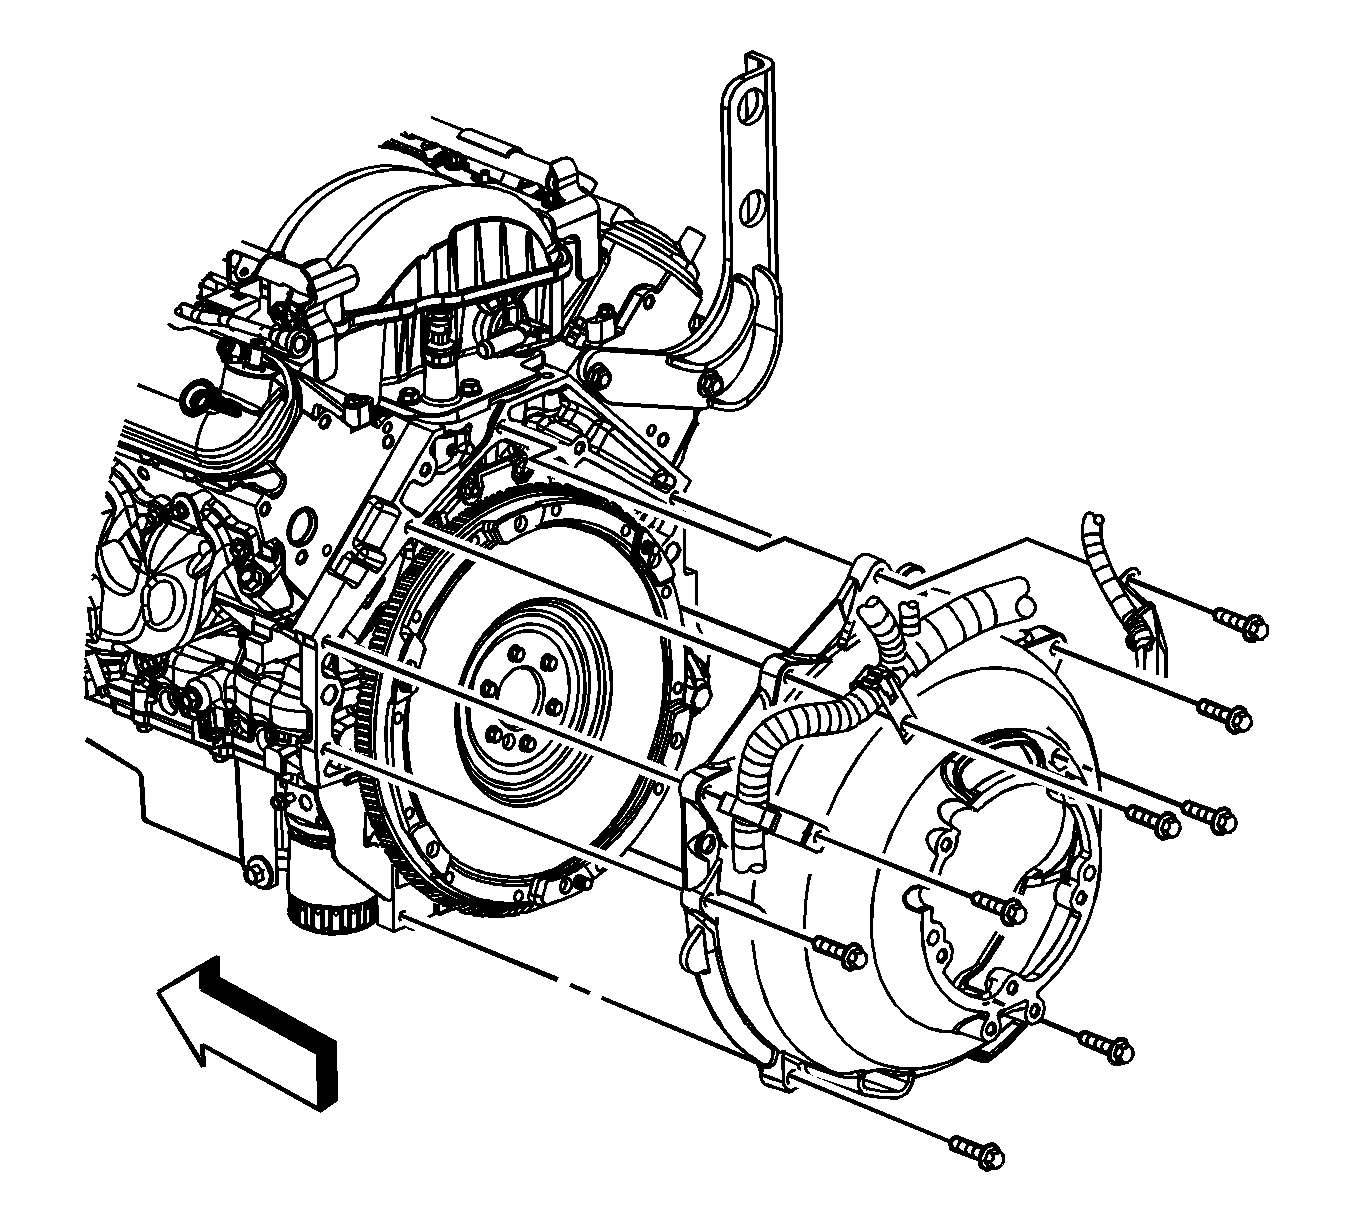
- Remove the bell housing bolts. The upper bolts can be accessed by lowering the engine cradle approximately 25 mm (1 in) and tipping the engine back.
- Mark the clutch pressure plate and flywheel with adjacent alignment marks before removing the pressure plate.
- Loosen the visible clutch pressure plate bolts.
- Rotate the engine flywheel.
- Repeat steps 7 and 8 until all the bolts have been loosened.
- Remove the visible clutch pressure plate bolts.
- Rotate the engine flywheel.
- Repeat steps 10 and 11 until all the bolts have been removed.
- Remove the clutch pressure plate bolts from the flywheel.
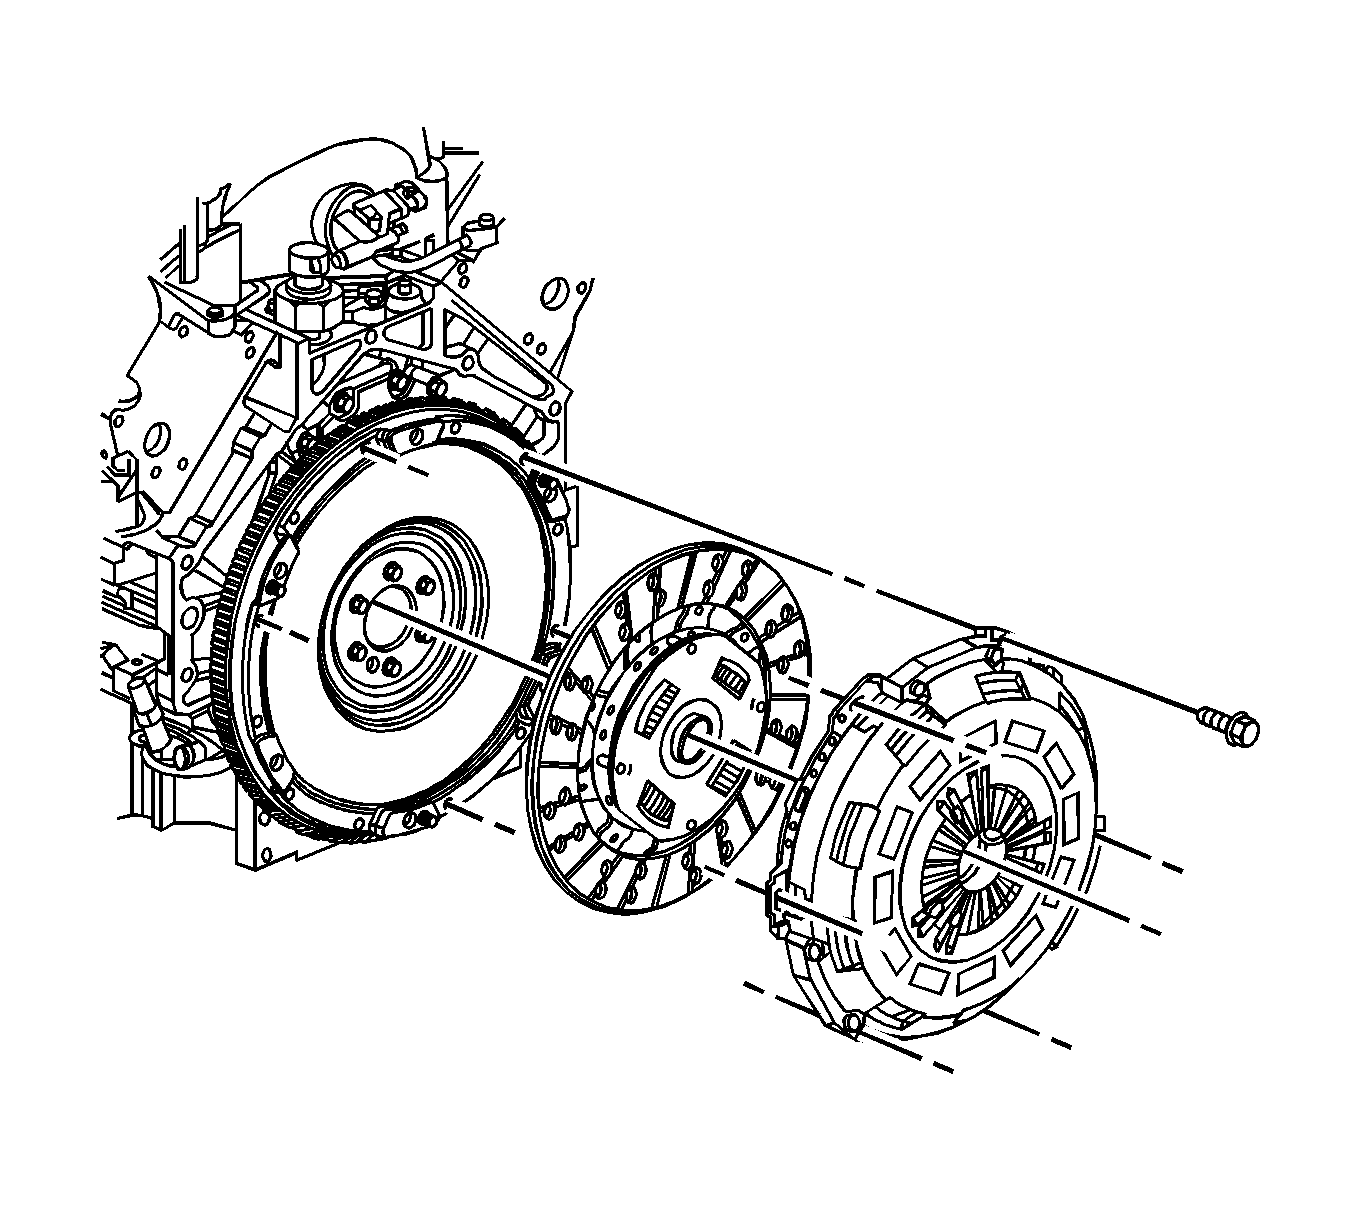
- Remove the clutch pressure plate and the clutch driven plate.
Caution: Refer to Battery Disconnect Caution in the Preface section.
Installation Procedure
- Inspect the clutch pressure plate and the clutch driven plate for wear or damage. Repair or replace as necessary.
- Inspect the engine flywheel. Refer to Engine Flywheel Replacement.
- Adjust the clutch pressure plate, if necessary. Refer to Clutch Pressure Plate Adjustment.
- If reusing the clutch pressure plate, align the previously created mark on the flywheel with the alignment mark on the pressure plate.
- Install the clutch driven plate and clutch pressure plate to the engine flywheel.
- Install the visible clutch pressure plate bolts finger tight.
- Rotate the engine flywheel.
- Repeat steps 5 and 6 until all the bolts are installed finger-tight.
- Using the J 38836 , align the clutch driven plate to the pilot bearing.
- Install J 42386-A and bolts. Use one M10 1.5 X 120 mm and one M10 1.5 X 45 mm bolt for proper tool operation.
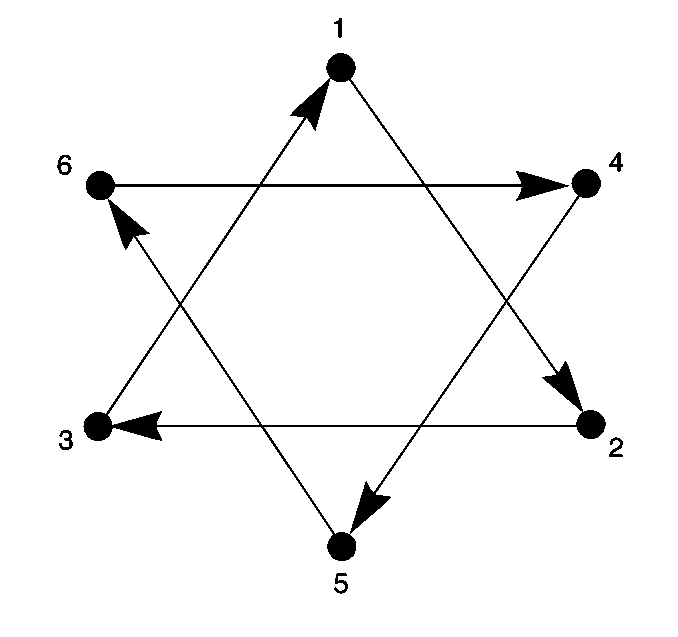
- Tighten the clutch pressure plate bolts in the sequence shown, starting with the number one and following in numerical order.
- Install the bell housing bolts.
- Install the driveline support assembly and the transaxle. Refer to Driveline Support Assembly Replacement.
- Connect the negative battery cable.
- Lower the vehicle.
Notice: Refer to Fastener Notice in the Preface section.
Tighten
Tighten the
J 42386-A
bolts to 50 N·m (37 lb ft).
Tighten
Tighten the clutch pressure plate bolts in sequence and evenly over 3 increments with the fourth increment to 70 N·m (52 lb ft).
Tighten
Tighten the bolts to 50 N·m (37 lb ft).
Tighten
Tighten the negative battery cable bolt to 15 N·m (11 lb ft).
