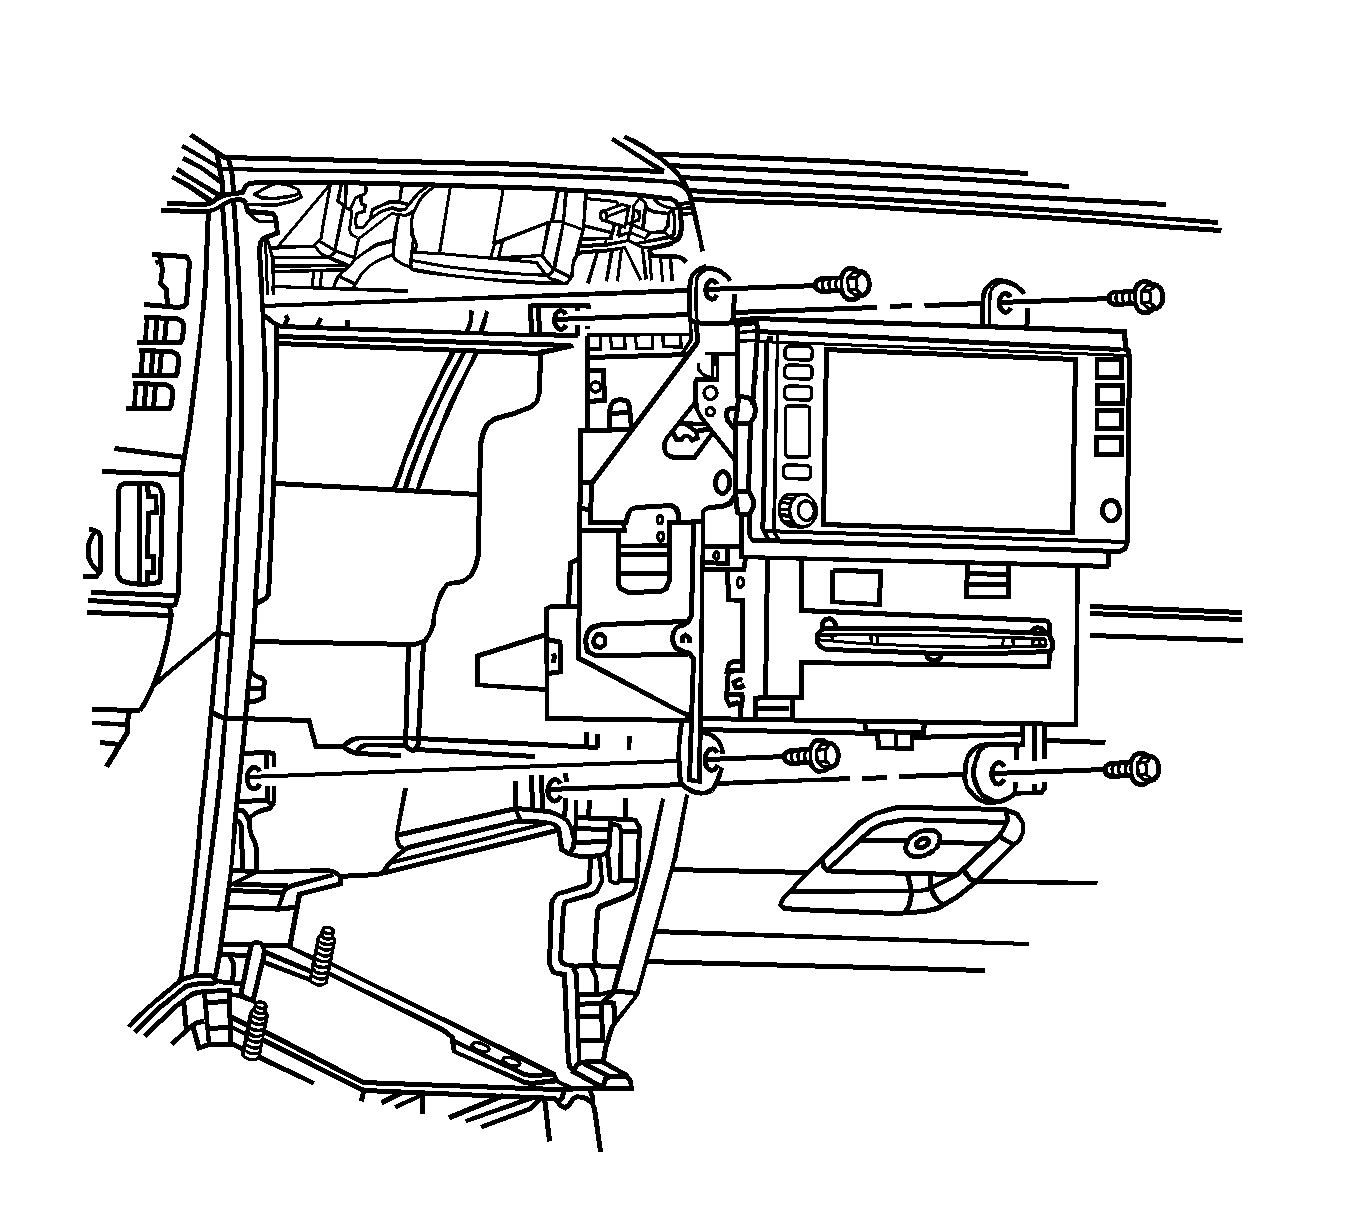
For 1990-2009 cars only
Removal Procedure
- Remove the cover from the instrument panel (I/P) electrical center.
- Remove the RDO/CD MiniFuse® #5 from the I/P electrical center.
- Remove the I/P accessory trim plate. Refer to Instrument Panel Accessory Trim Plate Replacement .
- Remove the HVAC control module. Refer to HVAC Control Module Replacement .
- Remove the screws retaining the radio control to the I/P center support bracket.
- Begin to remove the radio control from the center support bracket enough to access the connectors at rear of the radio control.
- Disconnect the electrical/audio and coaxial cable connectors from the radio control.
- Remove the radio control.

Installation Procedure
- Connect the electrical/audio and coaxial cable connectors to the radio control.
- Install the radio control into position in the I/P center support bracket.
- Install the radio control retaining screws.
- Install the HVAC control module. Refer to HVAC Control Module Replacement .
- Install the I/P accessory trim plate. Refer to Instrument Panel Accessory Trim Plate Replacement .
- Install the RDO/CD MiniFuse® #5 to the I/P electrical center.
- Install the cover to the I/P electrical center.
- Refer to Control Module References for programming and setup information.
Align the radio control locator tab into the center support bracket locator hole.
Notice: Refer to Fastener Notice in the Preface section.

Tighten
Tighten the screws to 2.5 N·m (22 lb in).
