For 1990-2009 cars only
Removal Procedure
- Open the folding top to fully open position.
- Place a protective covering over the interior of the vehicle and the adjacent body panels.
- Using a grease pencil, mark the location of the striker.
- Remove the upper garnish molding. Refer to Windshield Upper Garnish Molding Replacement .
- Remove the locating striker screws (1).
- If doing the left side striker, disconnect the electrical connector.
- Remove the striker from the windshield header.
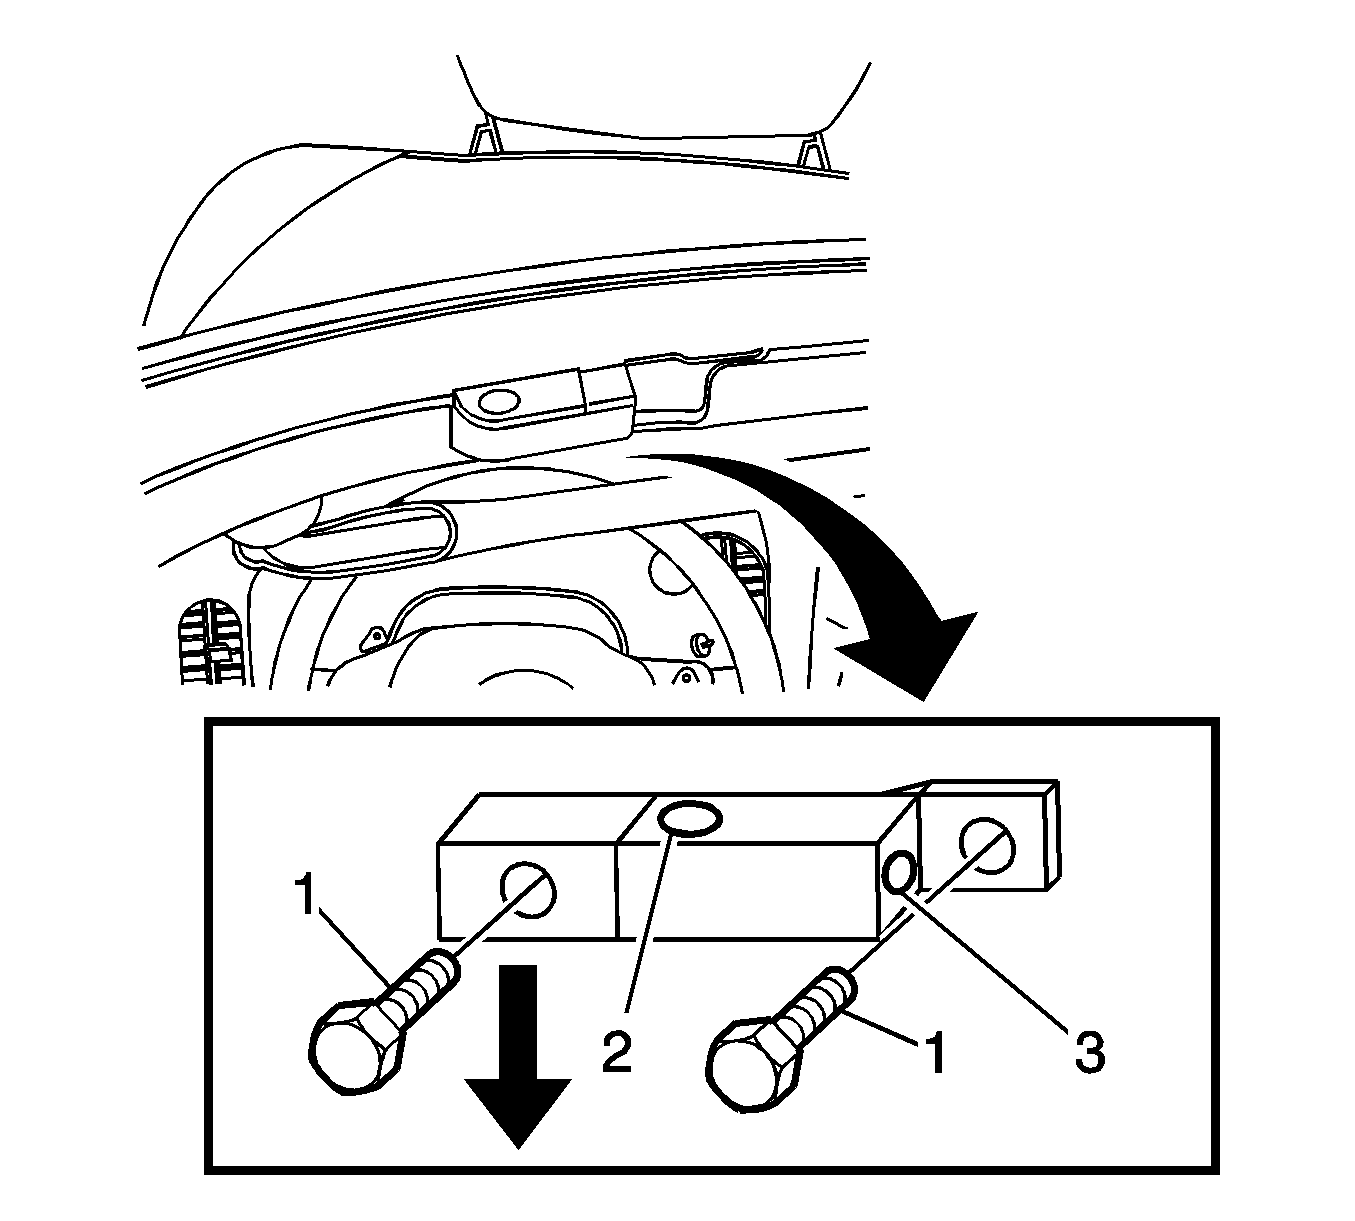
Note the location and the amount of any shims that may be present.
Installation Procedure
- Install the same shims in the original locations.
- Position the striker to the windshield header (3).
- Install the striker screws. Do NOT tighten.
- Install the electrical connector to the striker on the left only.
- Position the folding top panel so that the panel is resting unlatched on the windshield header, with the locating pins in the strikers.
- Manually latch the folding top. Apply pressure to the locating pin so that the rubber bumper is contacting the striker.
- Open the folding top.
- Close the folding top while inspecting the alignment of the locating pin to the striker. Close and latch the folding top.
- Remove the protective covering.
- Cycle the folding top one complete cycle in both directions.
- Inspect the folding top for proper operation.
Notice: Refer to Fastener Notice in the Preface section.
Tighten
Tighten the bolts to 8 N·m (71 lb in).
