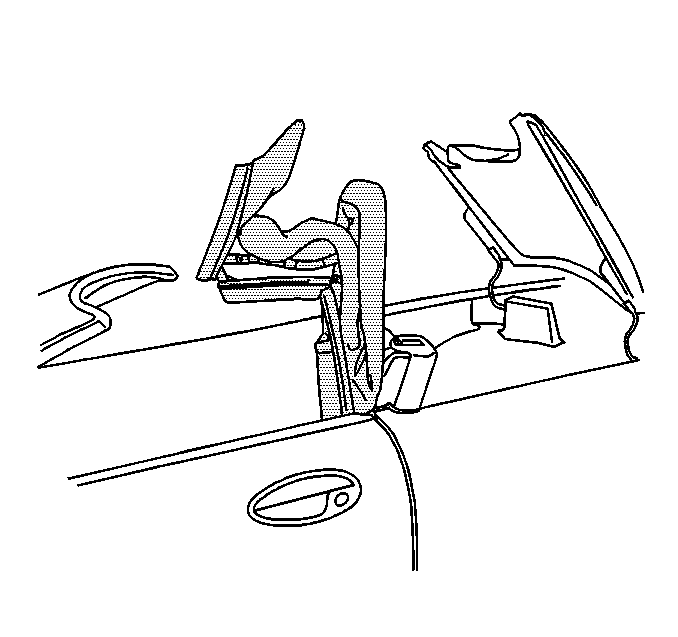
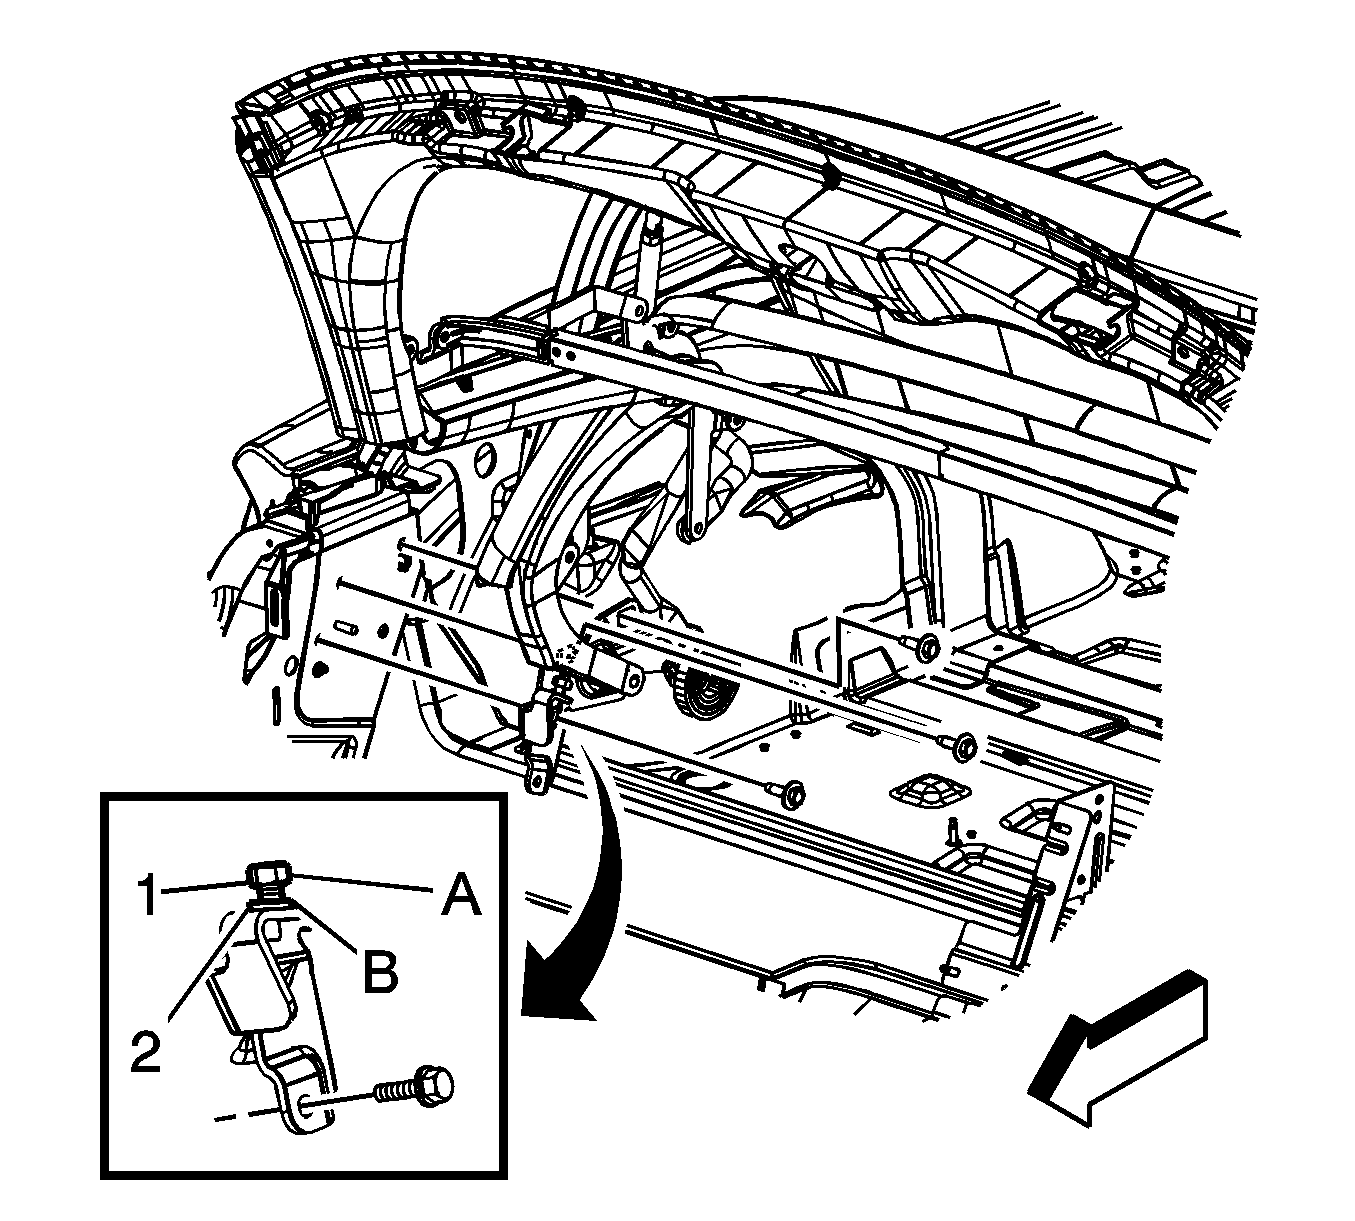
Pressure Link- Five Bow Pressure on Stowage Lid
Important: If working on a power top, locate the hydraulic pump bypass valve bolt on the front side turn it counterclockwise one revolution.
Adjust the lower pressure link to change the #5 bow pressure to the stowage compartment lid.
| • | Decrease the pressure if the top material is contacting and marring the lid. |
| • | Increase the pressure if water is leaking between the top and the lid. |
- Position the folding top with the #1 bow and the #5 bow up.
- Loosen the jamb nut (1) on the pressure link where the adjuster attaches to the #5 bow.
- Mark the pressure link large adjustment nut (2) to aid in determining the amount of adjustment.
- Adjust the pressure link by rotating the large adjustment nut (2) one turn at a time.
- Rotate the large adjustment nut (2) clockwise to increase the downward pressure of the #5 bow on the stowage lid. Turn the jamb nut (1) counter clockwise to decrease the downward pressure.
- Raise the top.
- Check the gap between the lid (2) and the #5 bow top cover material (1) .
- Check the alignment of the front latch pins with their receivers.
- Lower the top and re-adjust the pressure link as necessary.
- Position the folding top with the #1 bow and the #5 bow up.
- Tighten the jamb nut (1).
- Raise and close the folding top to ensure proper alignment.
- Water test the folding top. Refer to Waterleak Test Preparation .
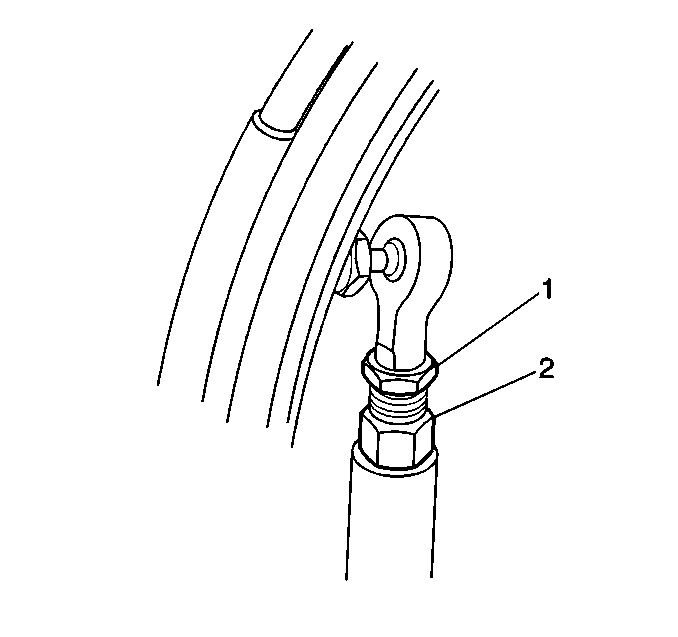
Important: The jamb nuts (1) are left handed thread.
When adjusting pressure link, each side be adjusted evenly.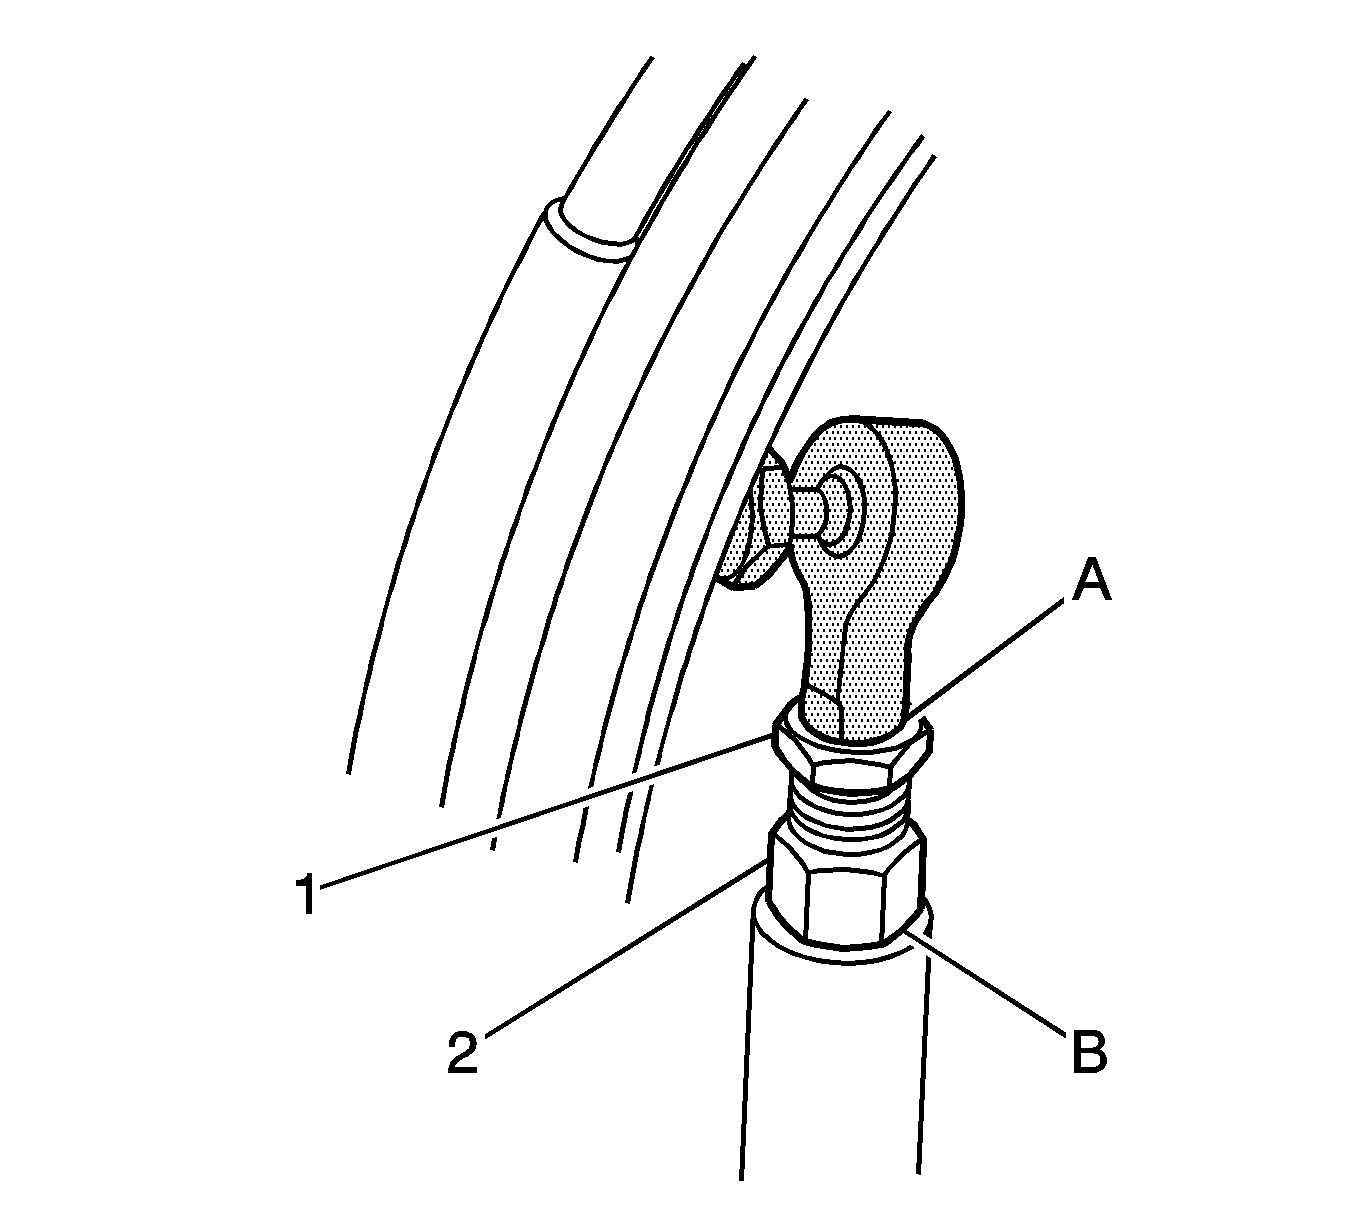
Important: The maximum measurement on the pressure link is 32 mm (1.3 in) from the top of the threads (a) to the bottom of the large adjustment nut (b).
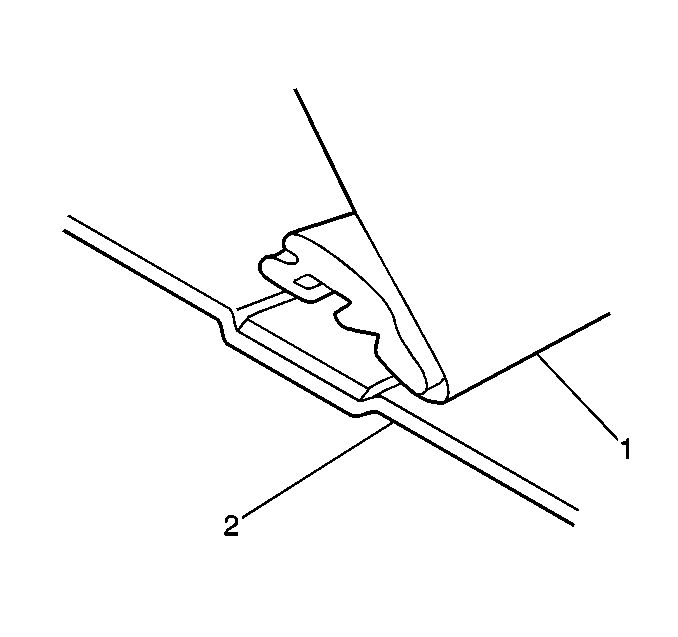
The gap between the lid and the top material should be 5 mm (0.2 in).
The gap between the five bow top material and the lid should be the same all the way across.
The front latch pins should be aligned so that when the top is raised the pins drop into the receivers.
Notice: Use the correct fastener in the correct location. Replacement fasteners must be the correct part number for that application. Fasteners requiring replacement or fasteners requiring the use of thread locking compound or sealant are identified in the service procedure. Do not use paints, lubricants, or corrosion inhibitors on fasteners or fastener joint surfaces unless specified. These coatings affect fastener torque and joint clamping force and may damage the fastener. Use the correct tightening sequence and specifications when installing fasteners in order to avoid damage to parts and systems.
Tighten
Tighten the nut to 14 N·m (10 lb ft).
Stopper Adjustment
Adjust top parallel side to side.
- Lower the folding top.
- Remove the body lock pillar upper trim to grain access the stopper.
- Loosen the adjuster jamb nut (2).
- Mark the adjuster nut to aid in determining the amount of adjustment.
- Loosen the adjustment stopper (1), turn the nut one turn at a time.
- Raise and check the top for proper adjustment, readjust as needed.
- Check the alignment of the front latch pins with their receivers. The front latch pins should be aligned so that when the top is raised the pins drop into the receivers.
- Lower and re-adjust the top using the adjuster as necessary.
- Tighten the jamb nut.
- Ensure that all the top adjustments are tighten and the power top works properly.
- Water test the folding top. Refer to Waterleak Test Preparation .
Important: When adjusting the jamb nut Do not exceed (A)21 mm (B)(0.827 in) from the top of the jamb nut (1) to the bottom of the nut (2).
Notice: Use the correct fastener in the correct location. Replacement fasteners must be the correct part number for that application. Fasteners requiring replacement or fasteners requiring the use of thread locking compound or sealant are identified in the service procedure. Do not use paints, lubricants, or corrosion inhibitors on fasteners or fastener joint surfaces unless specified. These coatings affect fastener torque and joint clamping force and may damage the fastener. Use the correct tightening sequence and specifications when installing fasteners in order to avoid damage to parts and systems.
Tighten
Tighten the nut to 12 N·m (9 lb ft).
