For 1990-2009 cars only
Oil Tank Assemble 7.0L
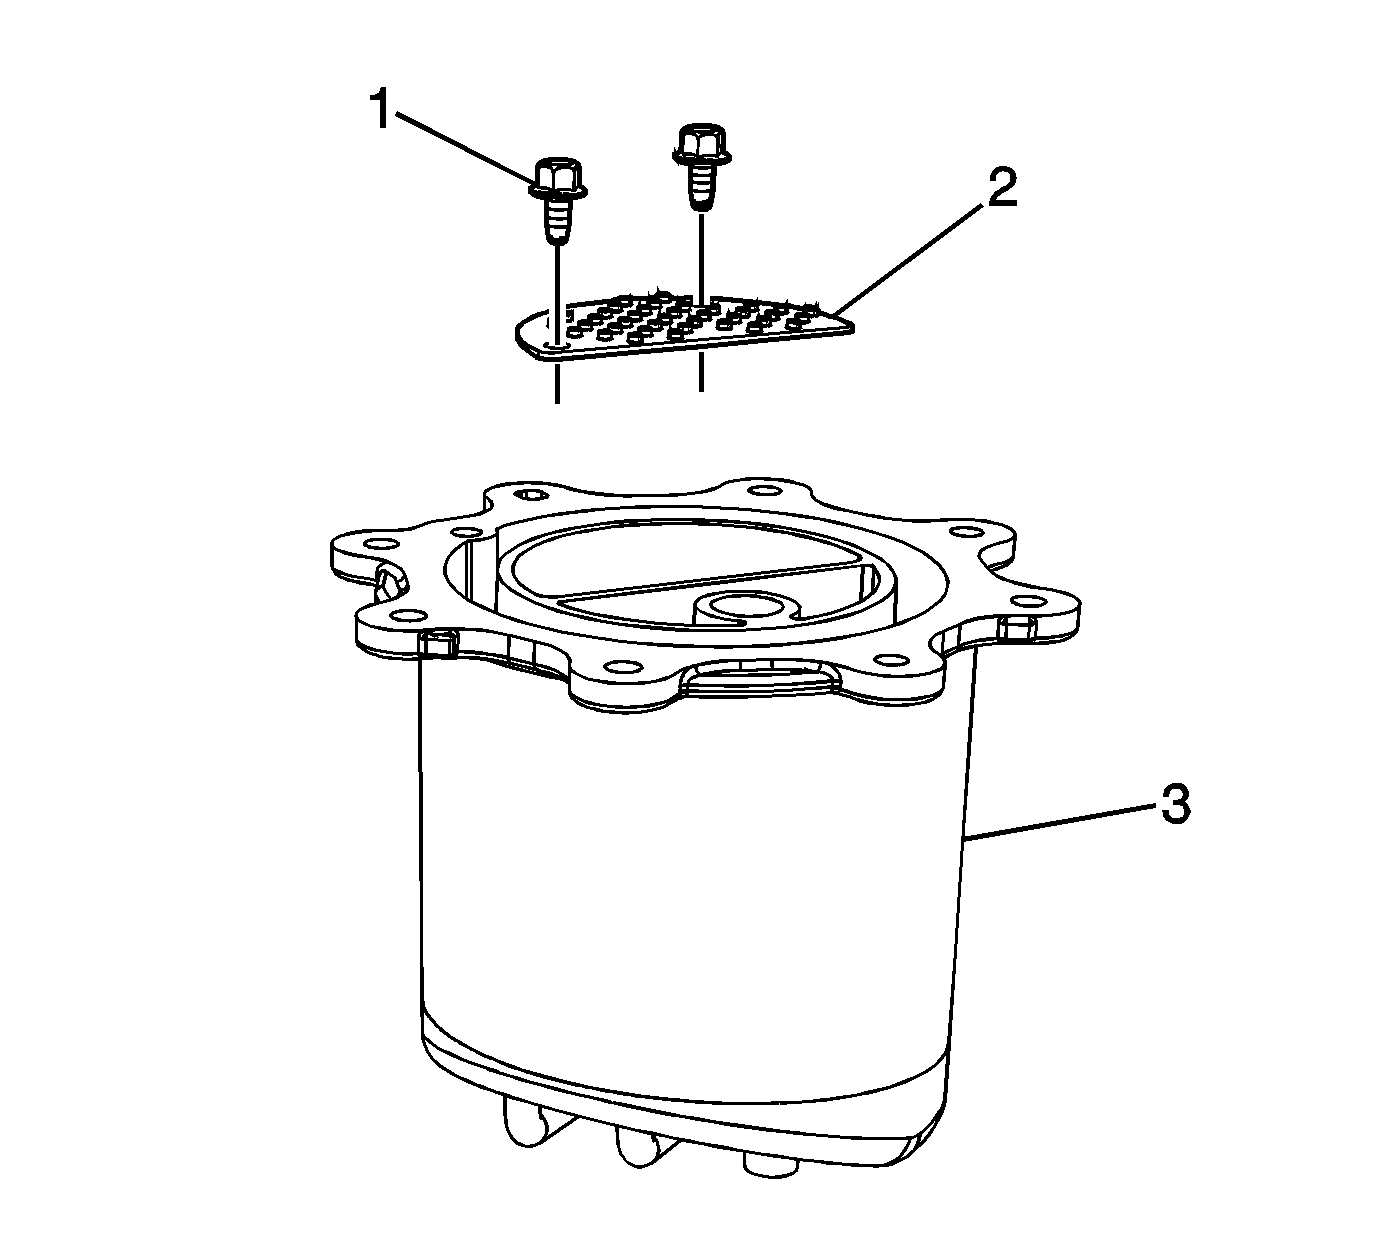
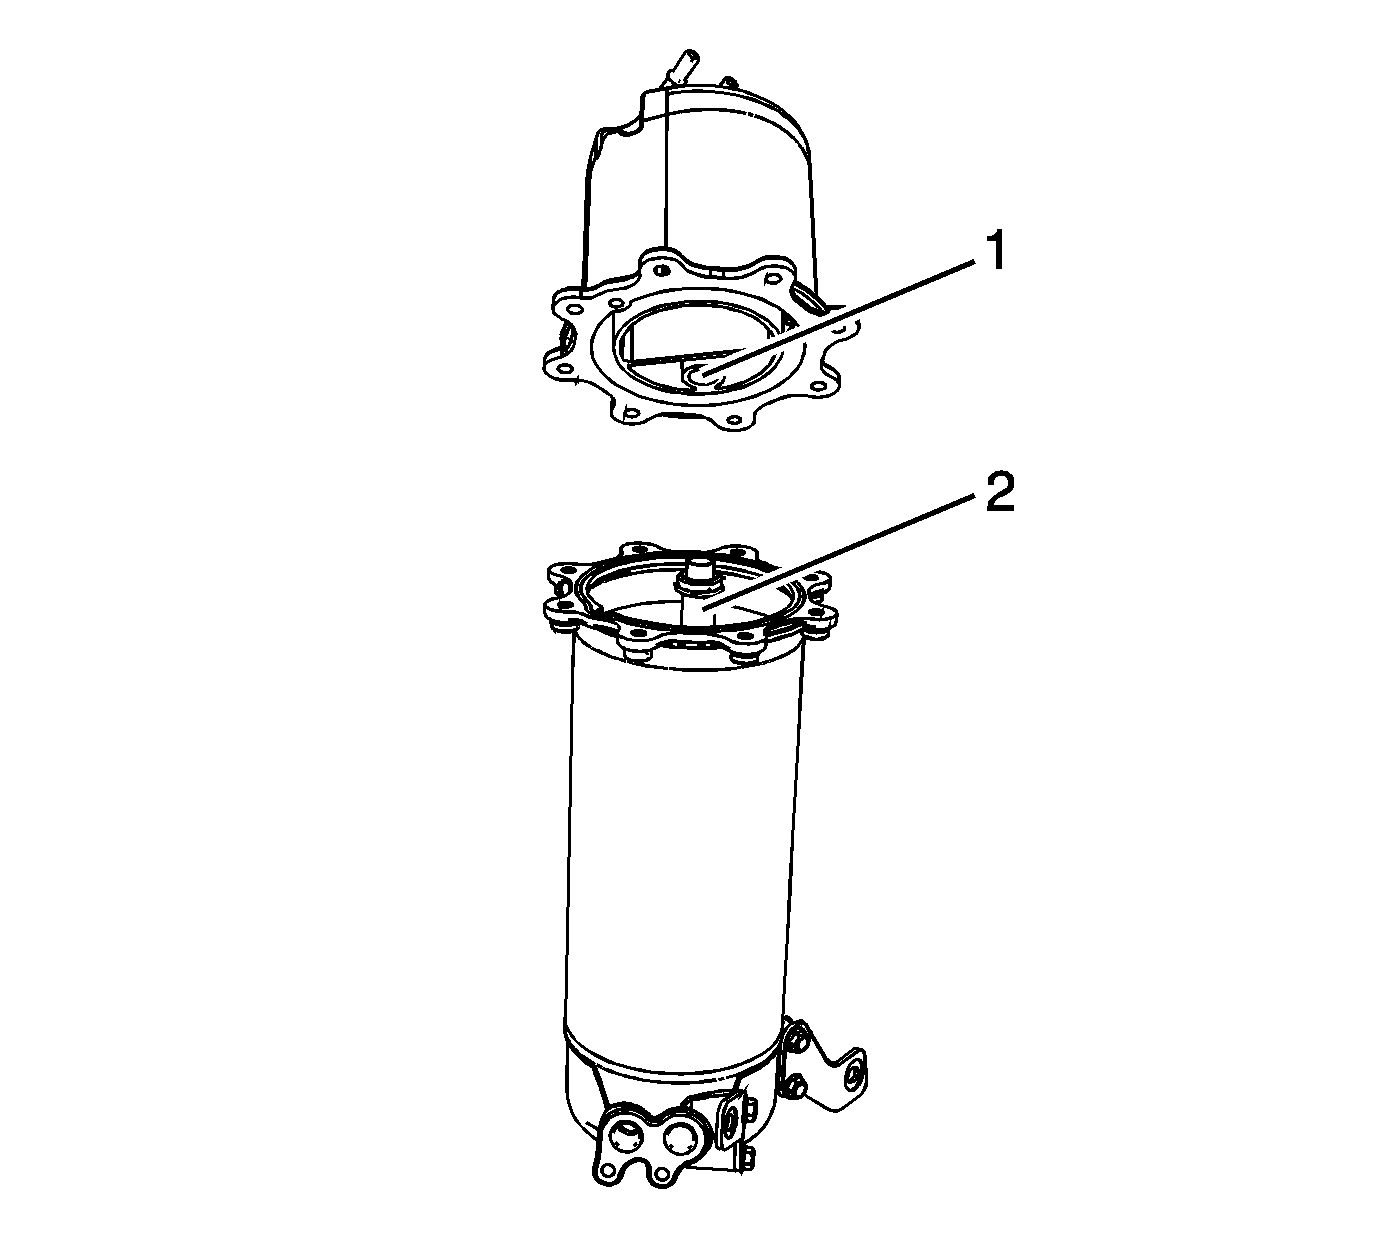
- Install the bolts (1) and baffle (2) to the upper portion of the tank (3).
- Install the screen (1) into the tank. Push the screen into the bore until the locking tabs locate in the groove of the bore. The screen locking tabs may have broken upon removal. If the screen has a broken locking tab, replace with a new screen.
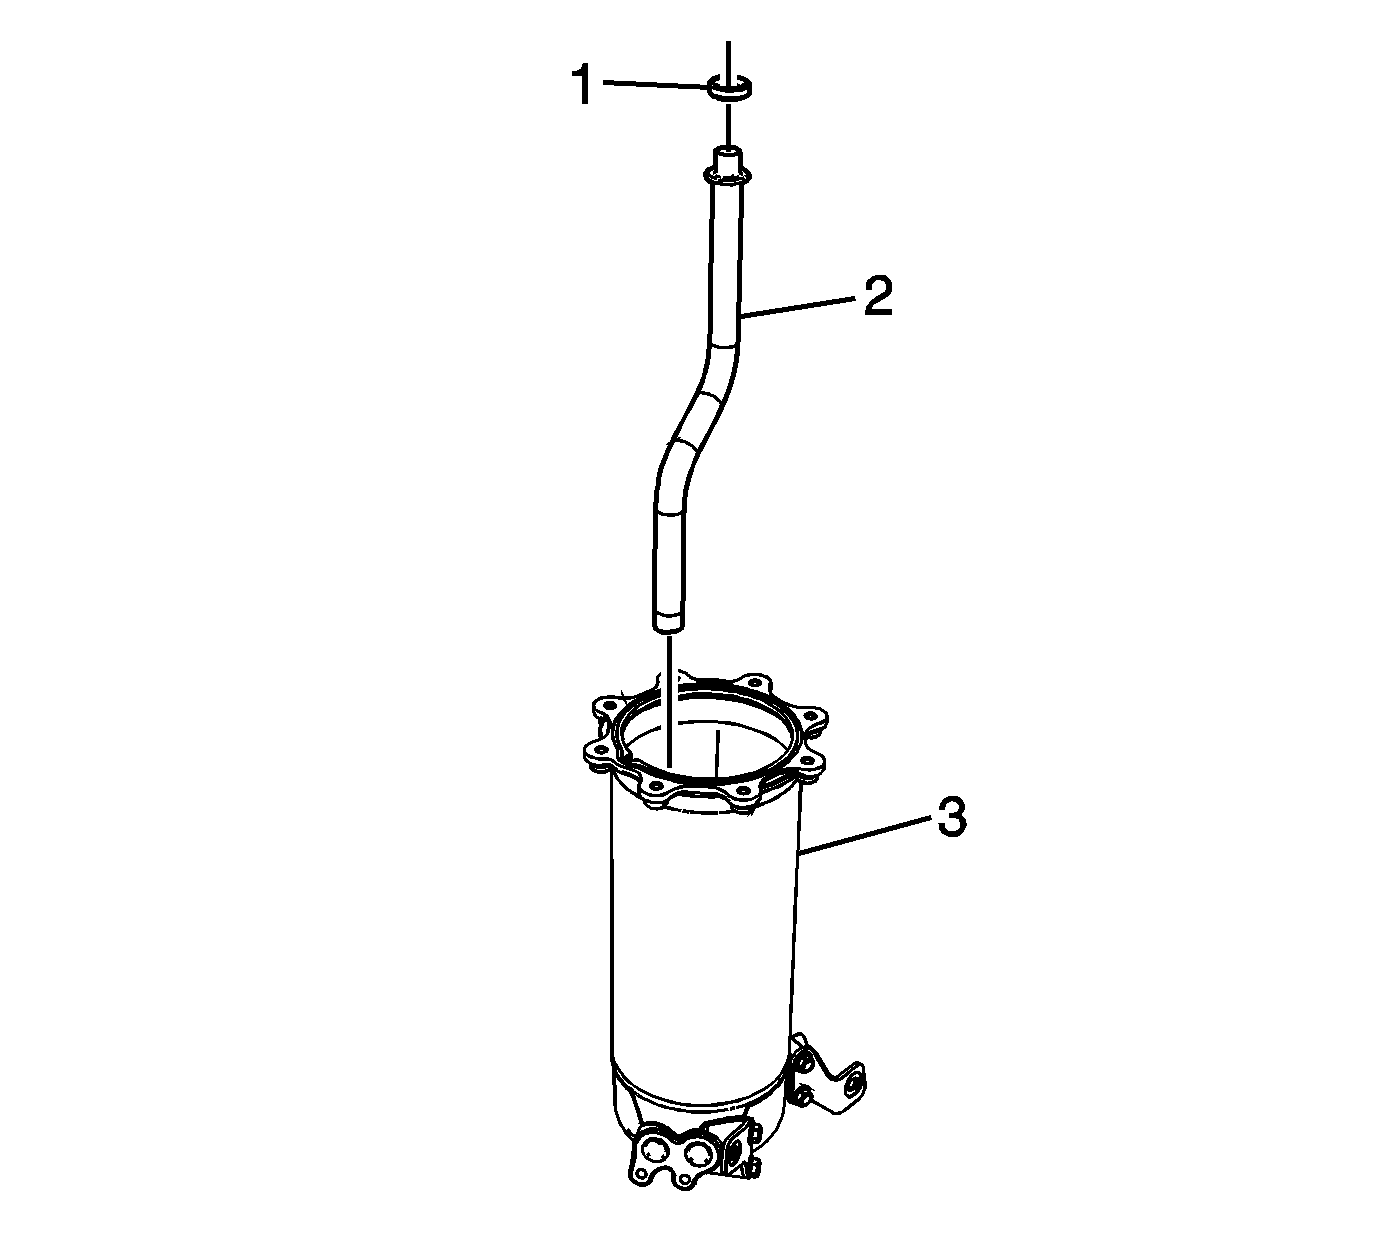
- Install the O-ring (1) to the tube.
- Install the tube (2) to the tank (3).
- Install the O-ring seal (4).
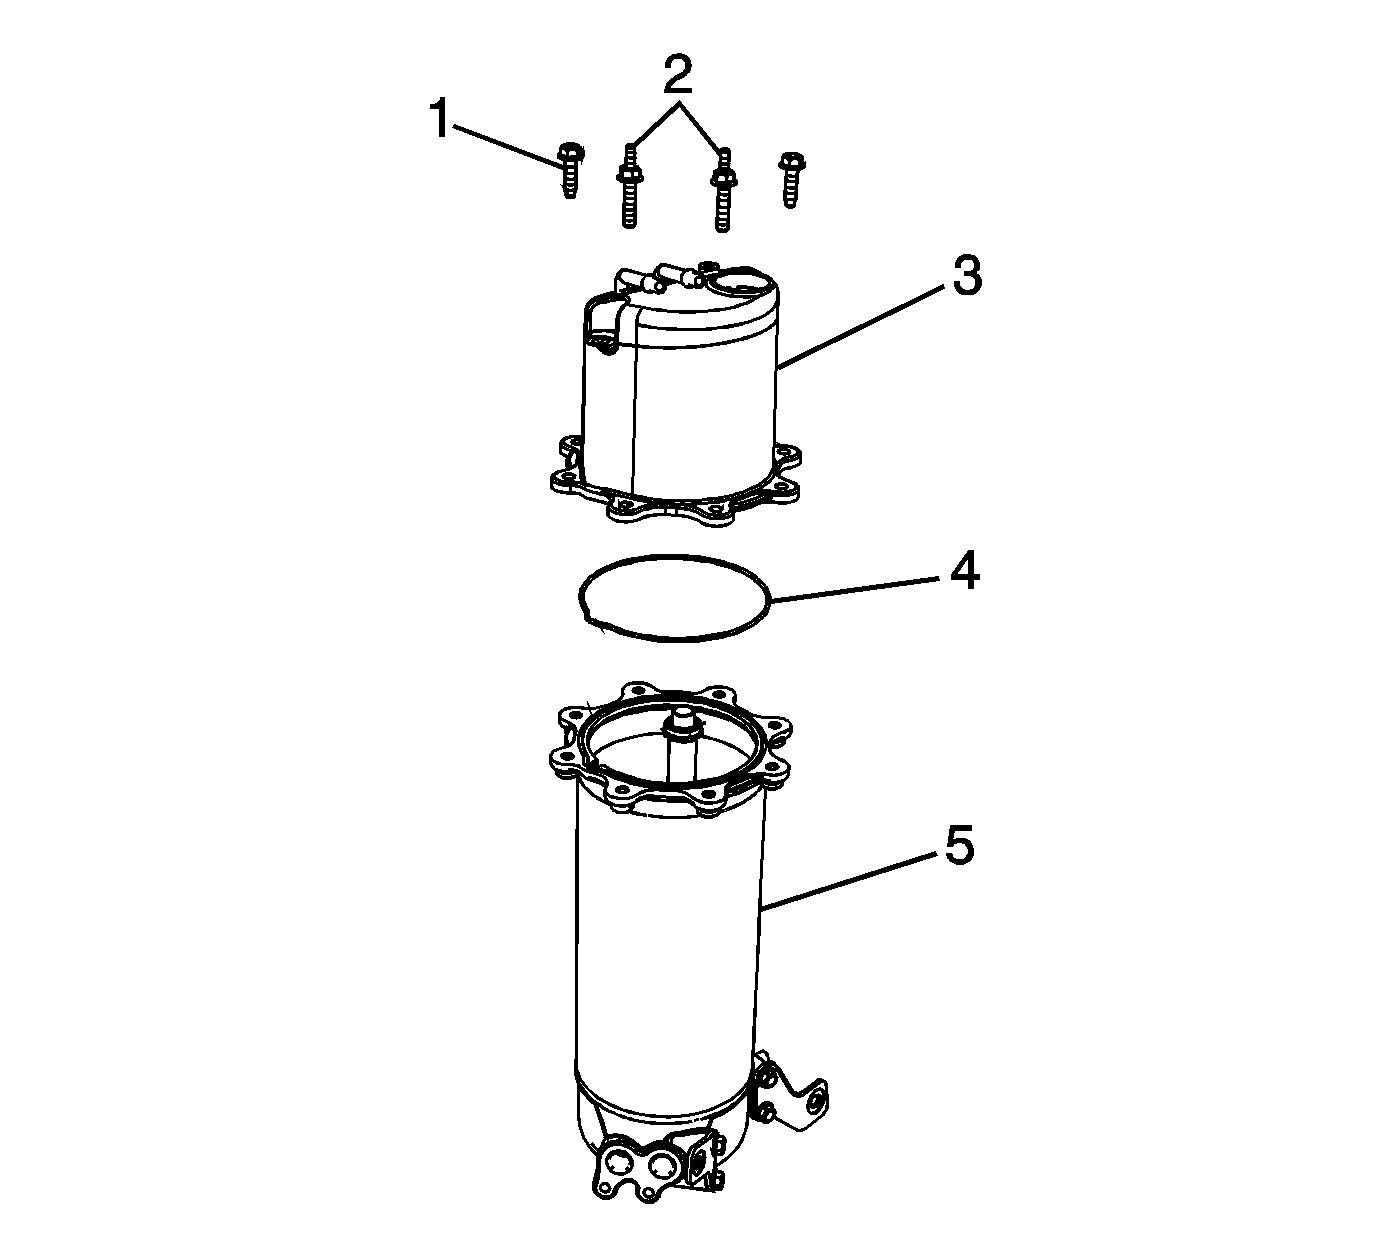
- Assemble the upper (3) and lower (5) portions of the tank. Aligning the markings made prior to disassembly.
- Inspect for proper installation of the tube to top tank. The top of the tube (2) should locate into the opening (1) in the top portion of the tank.
- Install the bolts (1) and bolt/studs (2) to the tank. Note the locations of the bolt/studs during reassembly.
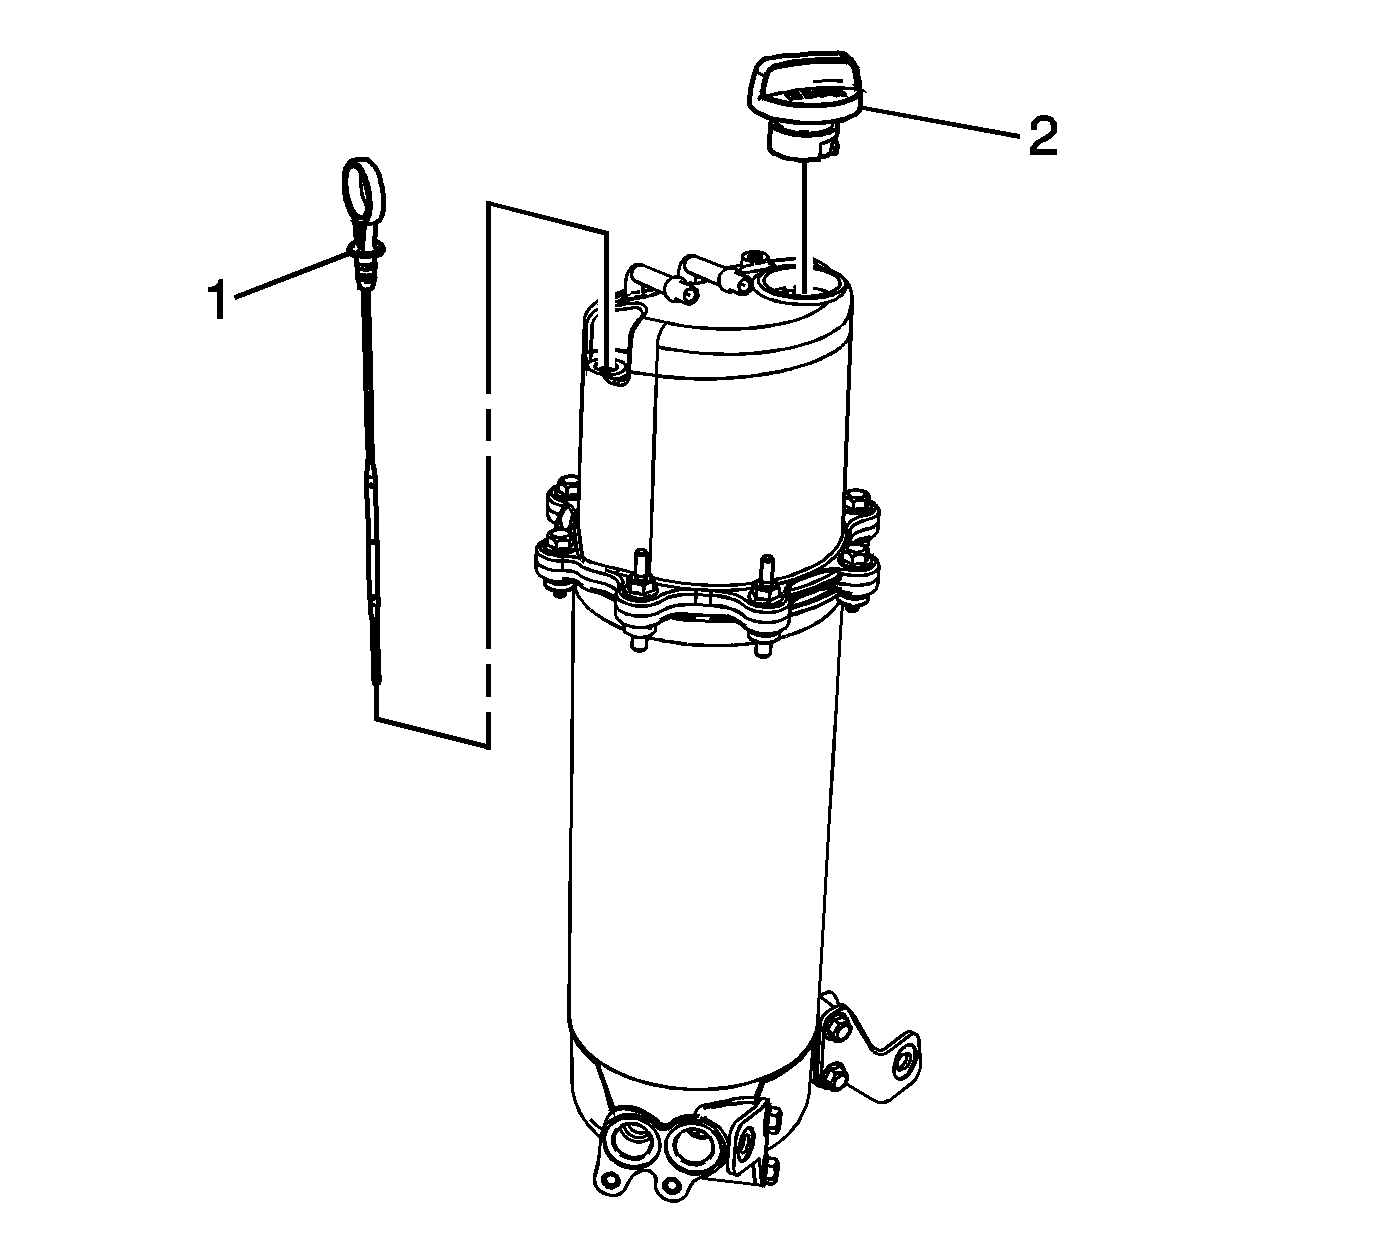
- Install the oil level indicator (1) and oil fill cap (2).
Notice: Refer to Fastener Notice in the Preface section.
Tighten
Tighten the bolts to 10 N·m (88 lb in).

Tighten
Tighten the bolt and bolt/studs to 25 N·m (18 lb ft).