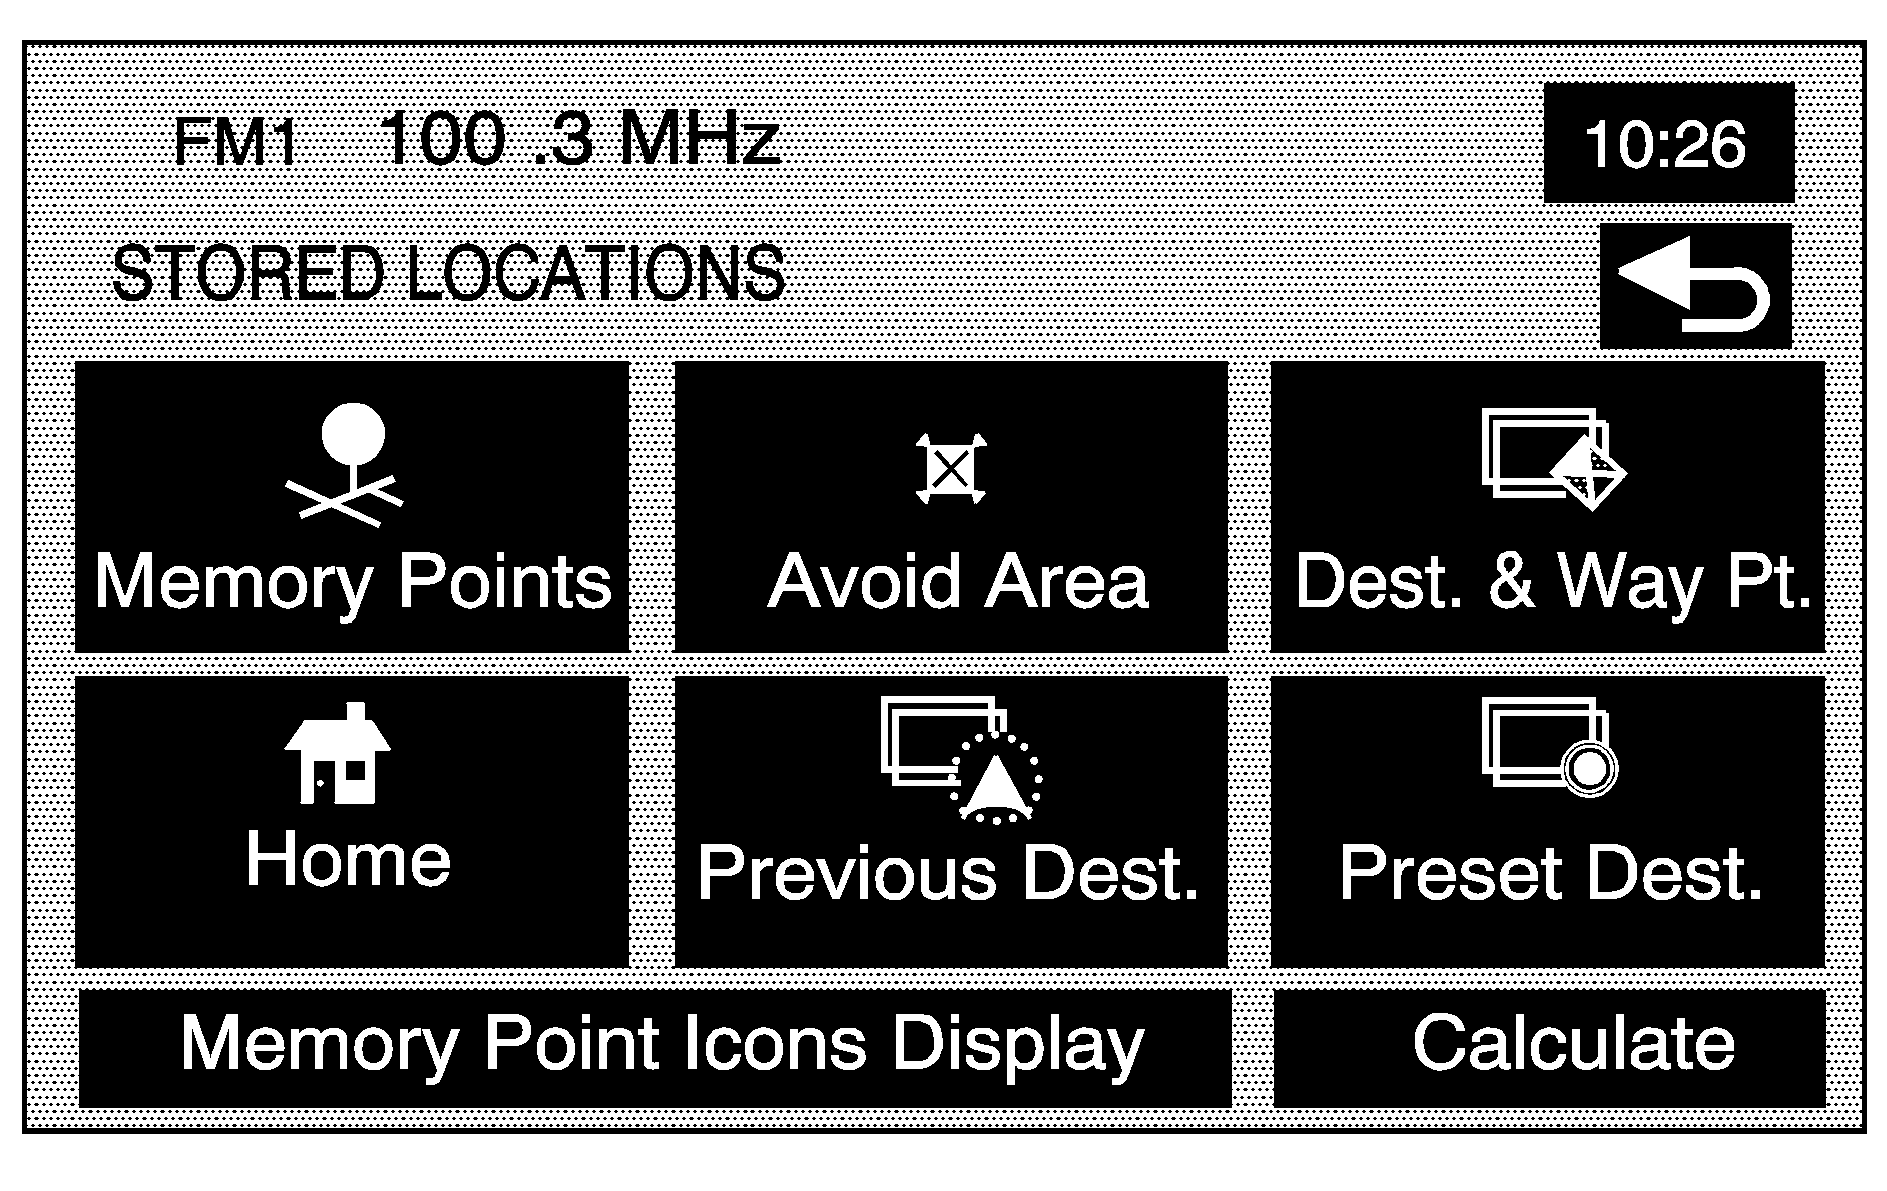
Select the Stored Locations screen button from the NAV. MENU to access the STORED LOCATIONS screen. From this screen, you can access the following options:

Memory Points
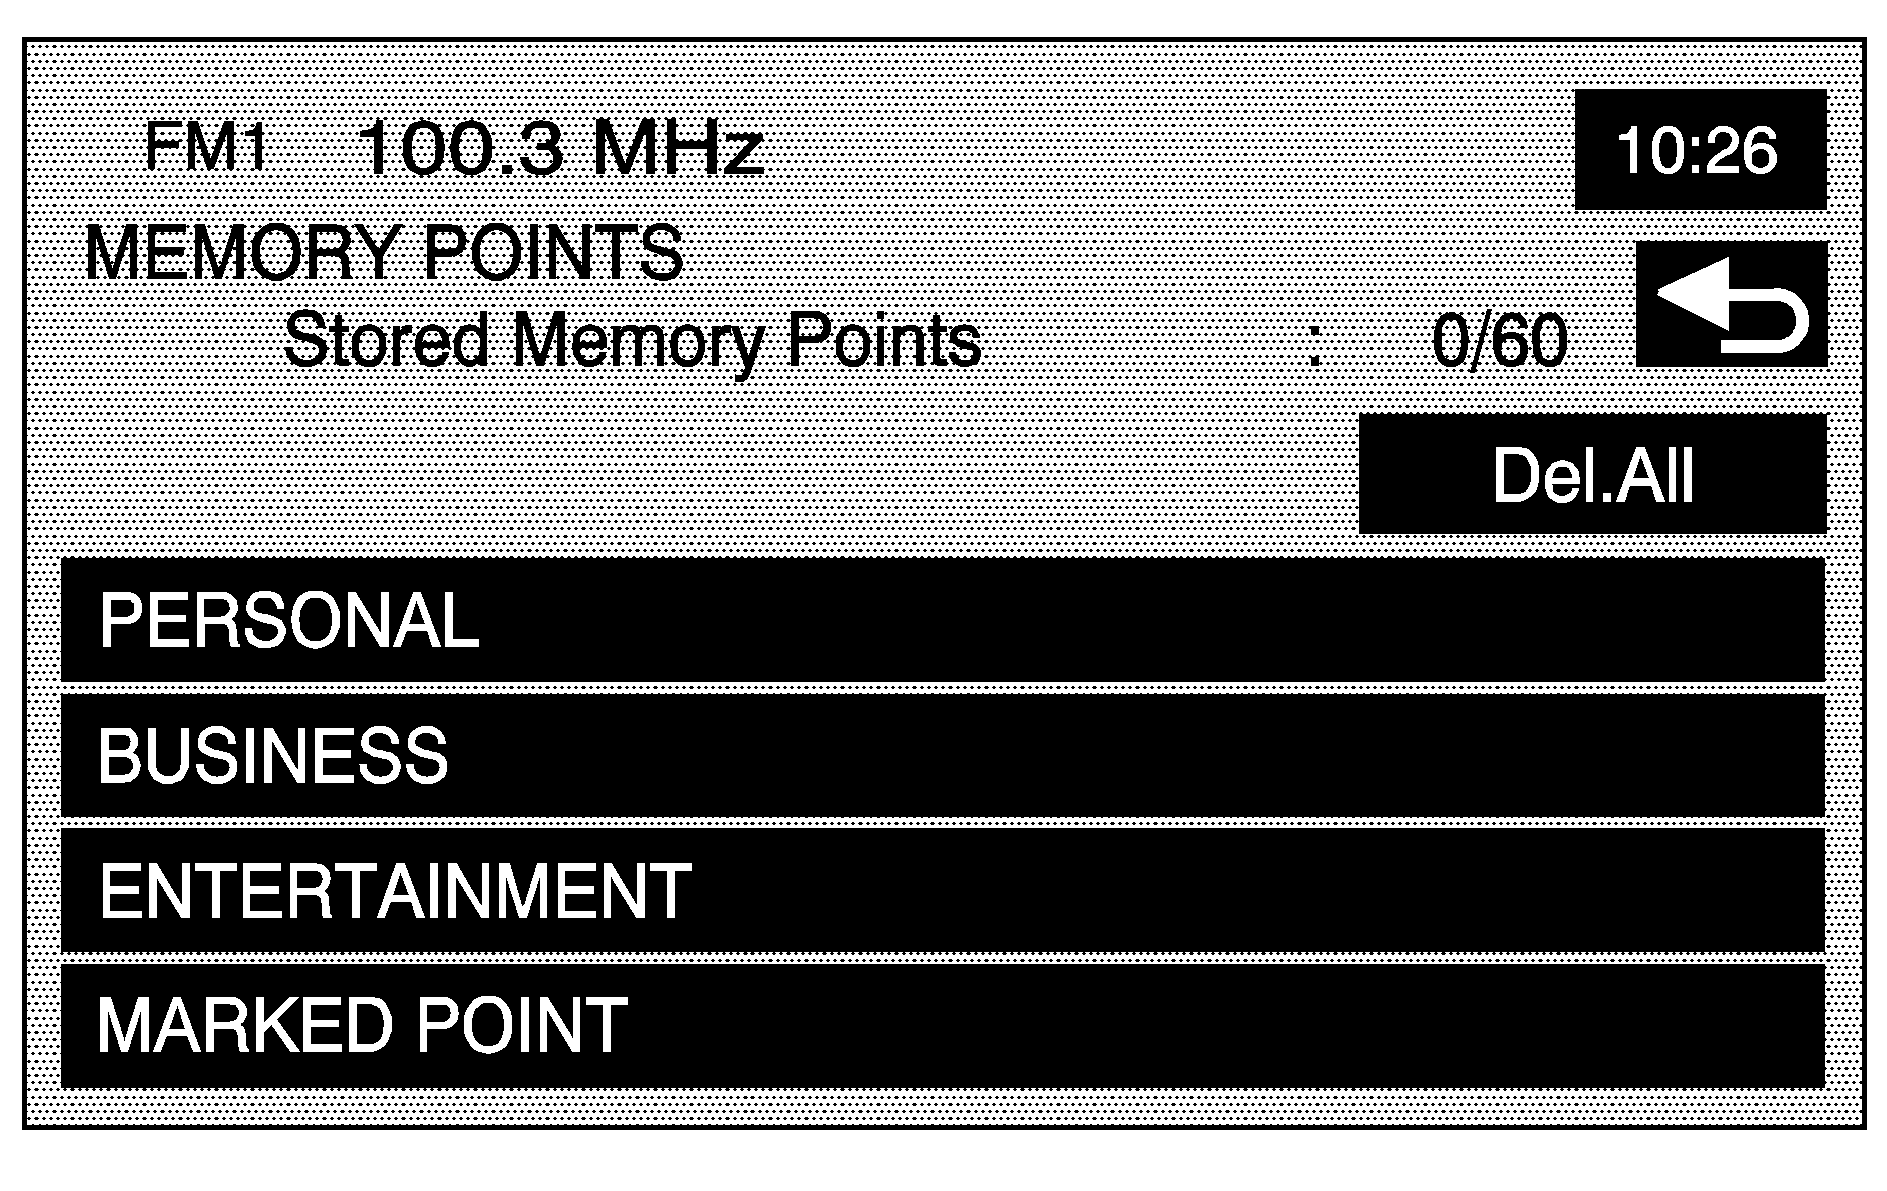
Memory Points: This feature can store memory points in these four categories: Personal, Business, Entertainment, and Marked Point. The category names can be changed.
To store a point:
- Touch the Memory Points screen button from the STORED LOCATIONS screen.
- Select one of the folders/categories listed.
- Select the Add screen button.
- Select the desired method of entering a destination to enter the memory point. See Enter Destination for more information. A map screen appears displaying the selected memory point location.
- If available, touch the INFO button to view the address information of the selected point.
- Touch OK to store the point as a memory point.
To edit the name of a stored point:
- Touch the Memory Points screen button from the STORED LOCATIONS screen.
- Select the folder/category that the memory point exists in.
- Select the List screen button.
- Select the memory point to edit. Use the sort feature to sort by distance, icon, name, or date as needed.
- Touch the Name screen button from the EDIT MEMORY POINT screen.
- Use the backspace screen button to delete the current name or use the alpha keypad to make changes.
- Touch the back screen button to store the change.
Select the Show Name On screen button to have the name of the point appear on the map screen.
To change the icon associated with a memory point:
- Touch the Memory Points screen button from the STORED LOCATIONS screen.
- Select the folder/category that the memory point exists in.
- Select the List screen button.
- Select the memory point to edit. Use the sort feature to sort by distance, icon, name, or date as needed.
- Touch the Icon screen button from the EDIT MEMORY POINT screen.
- Select the desired icon. There are two pages (52) icons, six icons that have sounds associated with them, and a No Icon button to select from.
- Touch the back screen button to store the change.
Select the With Sound screen button, and the sound icons display. To hear the sound of the icon, touch the Sound screen button next to each icon. If the sound icons are used, the associated sound is heard when the vehicle is approximately 650 ft (200 m) from the memory point.
Select the No Icon screen button to not have an icon associated with the point.
The new icon displays in the EDIT MEMORY POINT screen, next to the Icon screen button.
To move the memory point from one folder/category to another:
- Touch the Memory Points screen button from the STORED LOCATIONS screen.
- Select the folder/category that the memory point currently exists in.
- Select the List screen button.
- Select the memory point to edit. Use the sort feature to sort by distance, icon, name, or date as needed.
- Touch the Category screen button from the EDIT MEMORY POINT screen.
- Touch the new folder/category button you want to move the memory point to.
The system displays a message confirming the move.
To modify the position of the stored point:
- Touch the Memory Points screen button from the STORED LOCATIONS screen.
- Select the folder/category that the memory point exists in.
- Select the List screen button.
- Select the memory point to edit. Use the sort feature to sort by distance, icon, name, or date as needed.
- Touch the Position screen button from the EDIT MEMORY POINT screen.
- Touch the map to move the position of the memory point.
- Touch OK when you have moved the memory point to the appropriate location.
- The system returns to the EDIT MEMORY POINT screen and displays the new address, longitude, and latitude for the changed memory point.
The system displays the map screen with the destination marked.
To change the phone number of a memory point:
- Touch the Memory Points screen button from the STORED LOCATIONS screen.
- Select the folder/category that the memory point exists in.
- Select the List screen button.
- Select the memory point to edit. Use the sort feature to sort by distance, icon, name, or date as needed.
- Touch the Tel. (telephone) screen button from the EDIT MEMORY POINT screen.
- Use the numeric keypad to change the phone number.
- Touch OK to store the changed phone number.
To delete a memory point:
- Touch the Memory Points screen button from the STORED LOCATIONS screen.
- Select the folder/category that the memory point exists in.
- Select the Delete screen button.
- Select the memory point to delete from the DELETE POINT screen. Use the sort feature to sort by distance, icon, name or date as needed.
- The system displays the map screen with the position address and a pop-up confirmation message. Select Yes to delete the point; select No to return to the DELETE POINTS screen and not delete the point.
To delete all of the memory points in a folder/category:
- Touch the Memory Points screen button from the STORED LOCATIONS screen.
- Select the desired folder/category.
- Select the Del.All screen button.
- The system displays a pop-up confirmation message. Select Yes to delete all the points in the folder/category; select No to cancel the operation.
To change the name of the folder/category:
- Touch the Memory Points screen button from the STORED LOCATIONS screen.
- Select the desired folder/category.
- Select the Edit Category screen button.
- Use the alpha keypad to change the name of the folder/category.
- Touch the OK screen button to save the changes.
Avoid Area
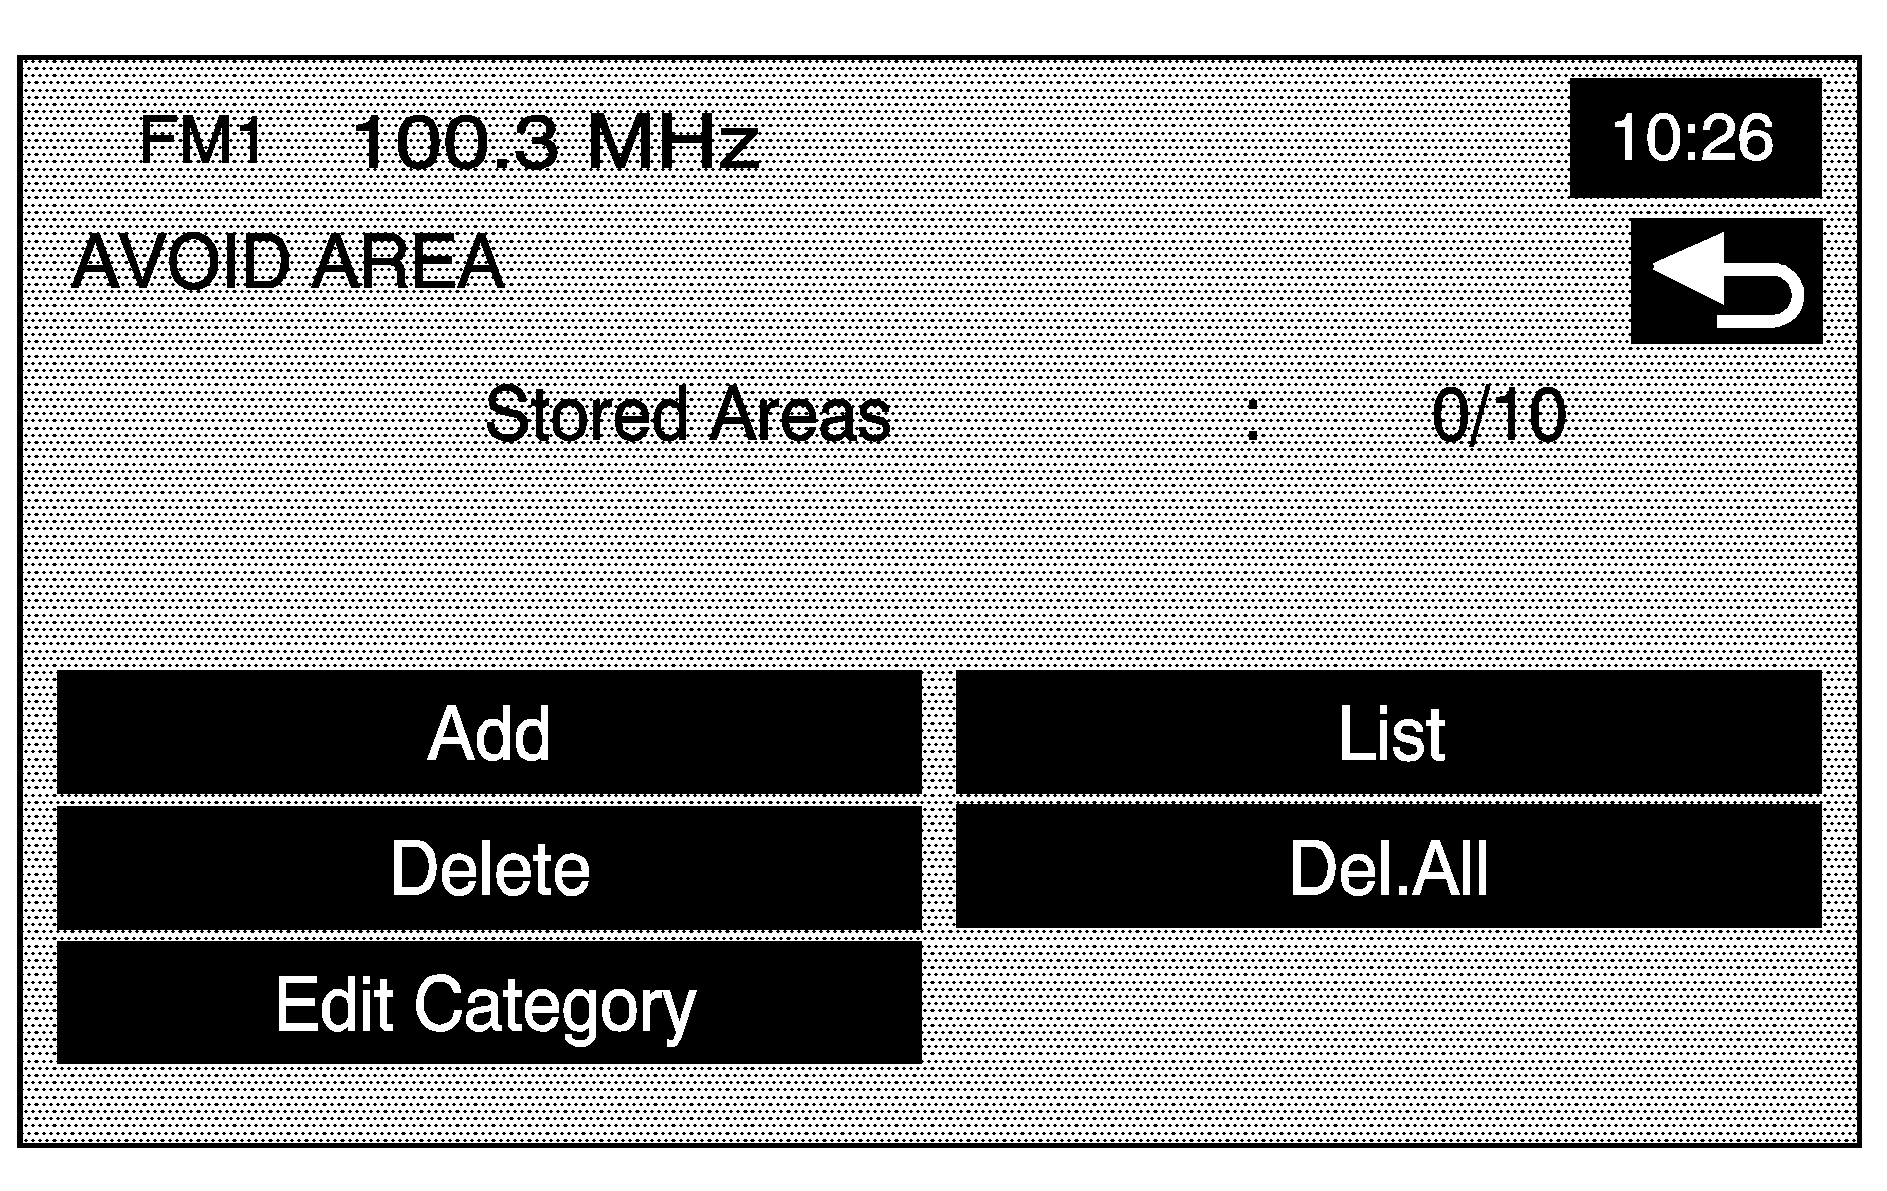
Avoid Area: This feature lets you store an area to be avoided while planning a route. Up to 10 points can be stored.
To store an avoid area point:
- Touch the Avoid Area screen button from the STORED LOCATIONS screen.
- Touch the Add screen button from the AVOID AREA screen.
- Select the desired method of entering a destination to enter the memory point. See Enter Destination for more information. A map screen appears displaying the selected memory point location.
- If desired, reduce or enlarge the area around the point you want to avoid by using the Reduce or Enlarge screen buttons.
- Touch OK to store the area.
It is recommended that when avoiding locations on freeways, you reduce the avoid area to the minimum scale. This produces an X on the map rather than a box. This ensures that the system knows you want to avoid the freeway itself, not necessarily the area around the freeway.
To change the name of the point to be avoided:
- Touch the Avoid Area screen button from the STORED LOCATIONS screen.
- Touch the List screen button from the AVOID AREA screen.
- Select the point to be changed.
- Touch the Name screen button.
- Use the alpha keypad to add or to change the name.
- Touch the OK screen button to save the changes.
Select the Show Name On screen button to have the name of the point appear on the map screen.
To change the position of the point to be avoided:
- Touch the Avoid Area screen button from the STORED LOCATIONS screen.
- Touch the List screen button from the AVOID AREA screen.
- Select the point to be changed.
- Touch the Position screen button.
- Touch the map to move the location.
- If desired, reduce or enlarge the area around the point you want to avoid by using the Reduce or Enlarge screen buttons.
- Touch OK to store the area.
To delete a point to be avoided:
- Touch the Avoid Area screen button from the STORED LOCATIONS screen.
- Touch the Delete screen button from the AVOID AREA screen.
- Select the point to delete. Use the scrolling arrows as needed.
- The system displays the map screen with the name of the point and a pop-up confirmation message. Touch Yes to have the point deleted; touch No to cancel the function.
To delete all of the points to be avoided:
- Touch the Avoid Area screen button from the STORED LOCATIONS screen.
- Touch the Del.All screen button from the AVOID AREA screen.
- The system displays a pop-up confirmation message. Touch Yes to have all of the points deleted; touch No to cancel the function.
Destination & Waypoint
Dest. & Way Pt. (Destination & Waypoint): Waypoints are destinations that can be added to your route before reaching the final destination. Waypoints can be added before or after entering a final destination. Waypoints that were entered prior to setting a final destination, will delete if a final destination has not been entered. Up to five points can be stored as waypoints.To add a waypoint:
- Touch the Dest. & Way Pt. screen button from the STORED LOCATIONS screen.
- Touch the Add screen button from the DEST. & WAY POINT screen.
- Using the desired method of entering a destination, enter the way point. See Enter Destination for more information.
- Select the (Way point) symbol on the map screen to save the way point.
- Repeat Steps 2 - 6 to add up to five way points to your route. After the first waypoint has been saved, the ADD WAY POINT screen appears and the waypoint is on the screen. The second through the fifth waypoint does not appear on the ADD WAY POINT screen until the ADD button, next to the corresponding waypoint row, is pressed. After the ADD button has been pressed, the system returns to the STORED LOCATIONS screen.
A map screen appears with the way point marked.
To change the order of the waypoints:
- Touch the Dest. & Way Pt. screen button from the STORED LOCATIONS screen.
- Touch the List screen button from the DEST. & WAY POINT screen.
- From the CHANGE ORDER screen, select on the addresses, in the order you would like them to fall on the route. After selecting the address line, a number, indicating the order, appears next to the corresponding row.
- Select OK to save the changes. The system returns to the STORED LOCATIONS screen.
To change the location of a way point:
- Touch the Dest. & Way Pt. screen button from the STORED LOCATIONS screen.
- Touch the List screen button from the DEST. & WAY POINT screen.
- Touch the Chg. Loc. screen button from the CHANGE ORDER screen.
- From the CHANGE LOCATION screen, select the address of the location to change. A map screen displays with the destination marked.
- Touch on the map to move the location of the waypoint.
- Touch the OK screen button to save the changes. The system returns to the STORED LOCATIONS screen.
To delete a way point from the current route:
- Touch the Dest. & Way Pt. screen button from the STORED LOCATIONS screen.
- Touch the Delete screen button from the DEST. & WAY POINT screen.
- Select the way point/destination to delete.
- The system displays a pop-up confirmation message. Choose Yes to delete the way point; touch No to cancel this operation.
To delete all of the way points on the route:
- Touch the Dest. & Way Pt. screen button from the STORED LOCATIONS screen.
- Touch the Del.All screen button from the DEST. & WAY POINT screen.
- The system displays the map screen with a pop-up confirmation message. Choose Yes to delete all of the way points; touch No to cancel this operation.
Home
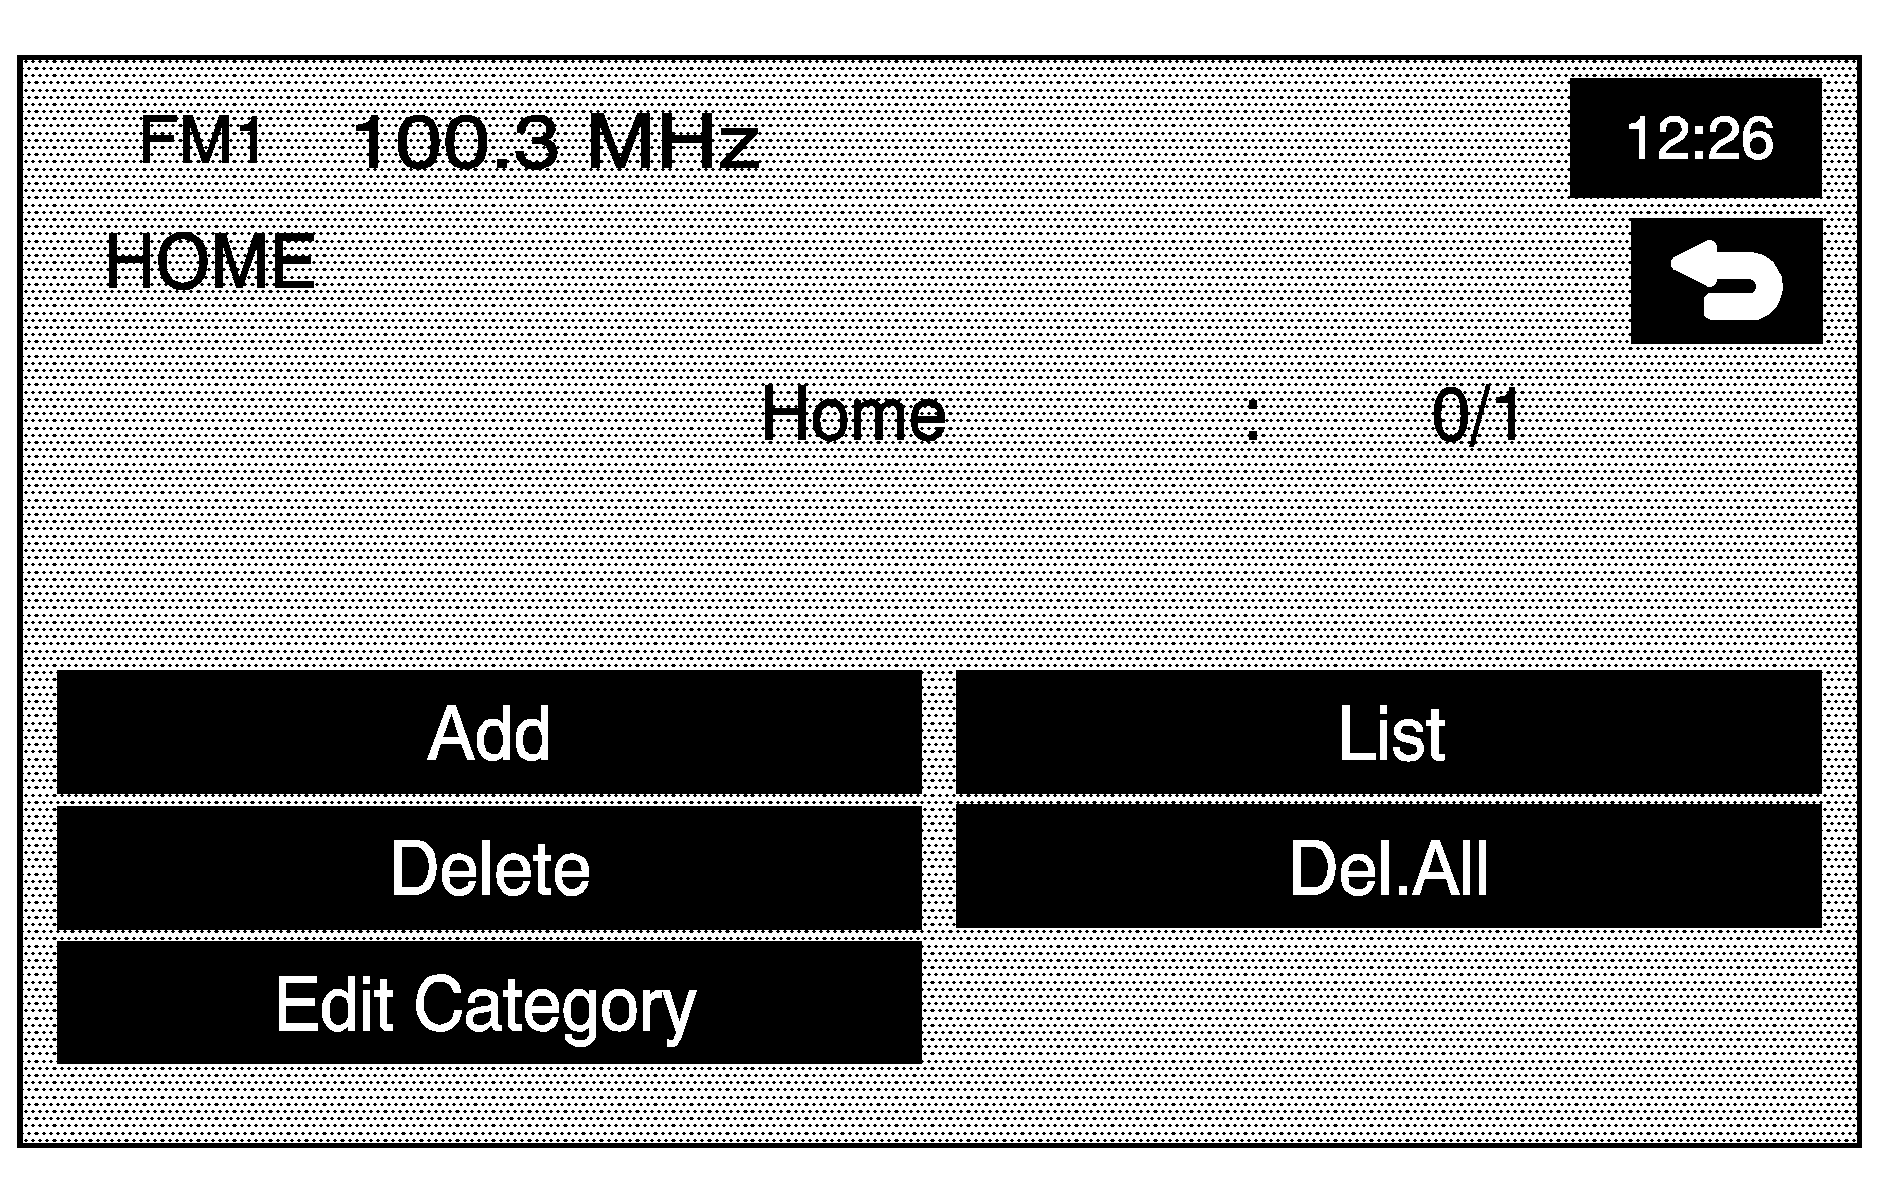
Home: This feature lets you store, delete, and edit a home point destination.
To store the home destination:
- Touch the Home screen button from the STORED LOCATIONS screen.
- Select the Add screen button.
- Select a destination entry method from the SET HOME screen. See Enter Destination for more information.
- Set the destination and touch OK.
- Touch OK on the map screen and the destination stores. The home icon now is highlighted on the ENTER DESTINATION screen.
To edit the home destination, do the following:
- Touch the Home screen button from the STORED LOCATIONS screen.
- Select List from the HOME screen to change the location.
- Touch the map to move the location of the point.
- Touch OK to save the change.
To delete the home point:
- Touch the Home screen button from the STORED LOCATIONS screen.
- Select Delete from the HOME screen.
- The system displays the map screen with a pop-up confirmation message. Select Yes to delete the stored home position; select No to cancel the operation.
Previous Destination
Previous Dest. (Previous Destination): The system automatically stores up to 100 points that have been previously entered. As new destinations are entered, the system automatically deletes the oldest destinations and adds the new entries. See Enter Destination for more information.To delete a specific destination from the previous destinations list:
- Touch the Previous Dest. screen button from the STORED LOCATIONS screen.
- Touch the Delete screen button.
- Select a destination from the list.
- The system displays the map screen with a pop-up confirmation message. Select Yes to delete the stored destination; select No to cancel the operation.
To delete all destinations from the previous destinations list:
- Touch the Previous Dest. screen button from the STORED LOCATIONS screen.
- Touch the Del.All screen button.
- The system displays the map screen with a pop-up confirmation message. Select Yes to delete all of the stored destinations; select No to cancel the operation.
Preset Destination
Preset Dest. (Preset Destination): This feature lets you store up to five preset destinations. These destinations are stored on the numbered buttons shown on the bottom of the ENTER DESTINATION screen.To store a preset destination:
- Touch the Preset Dest. screen button from the STORED LOCATIONS screen.
- Select Add to add a preset destination, then select the numbered preset button for the destination to appear as.
- Select a destination entry method from the STORE PRESET DEST. screen. See Enter Destination for more information.
- Set the destination and touch OK.
- Touch OK on the map screen and the destination stores. The preset destination number is now highlighted on the ENTER DESTINATION screen.
To edit the name of a preset destination:
- Touch the Preset Dest. screen button from the STORED LOCATIONS screen.
- Select the List screen button.
- Select the preset destination to edit.
- Touch the Name screen button and use the alpha keypad to edit or add the name.
- Touch the OK screen button to save the change.
Select the Show Name On screen button to have the name appear on the map screen.
The new name displays.
To change the position of a preset destination, do the following:
- Touch the Preset Dest. screen button from the STORED LOCATIONS screen.
- Select the List screen button.
- Select the preset destination to change.
- Touch the Position screen button from the EDIT PRESET DEST. screen. The system displays the map screen with the destination marked.
- Touch the map to move the position of the memory point.
- Touch the OK screen button to save the change.
To add or change the phone number of a preset destination:
- Touch the Preset Dest. screen button from the STORED LOCATIONS screen.
- Select the List screen button.
- Select the preset destination to change.
- Touch the Tel. (telephone) screen button and use the numeric keypad to enter or change the phone number.
- Touch the OK screen button to save the change.
To delete a preset destination:
- Touch the Preset Dest. screen button from the STORED LOCATIONS screen.
- Select the Delete screen button.
- Select the memory point to delete from the DELETE PRESET DEST. screen.
- The system displays the map screen with the position address and a pop-up confirmation message. Select Yes to delete the point; select No to cancel the operation and to return to the DELETE PRESET DEST. screen.
To delete all of the preset destinations:
- Touch the Preset Dest. screen button from the STORED LOCATIONS screen.
- Select the Del.All screen button.
- The system displays a pop-up confirmation message. Select Yes to delete all of the preset destinations; select No to cancel the operation.
Calculate: Touch this button to calculate your route. This button is available after a destination has been set.
