For 1990-2009 cars only
Charge Air Cooling System Draining and Filling Static Fill
Special Tools
7000081 Tech 2 Kit
Draining Procedure
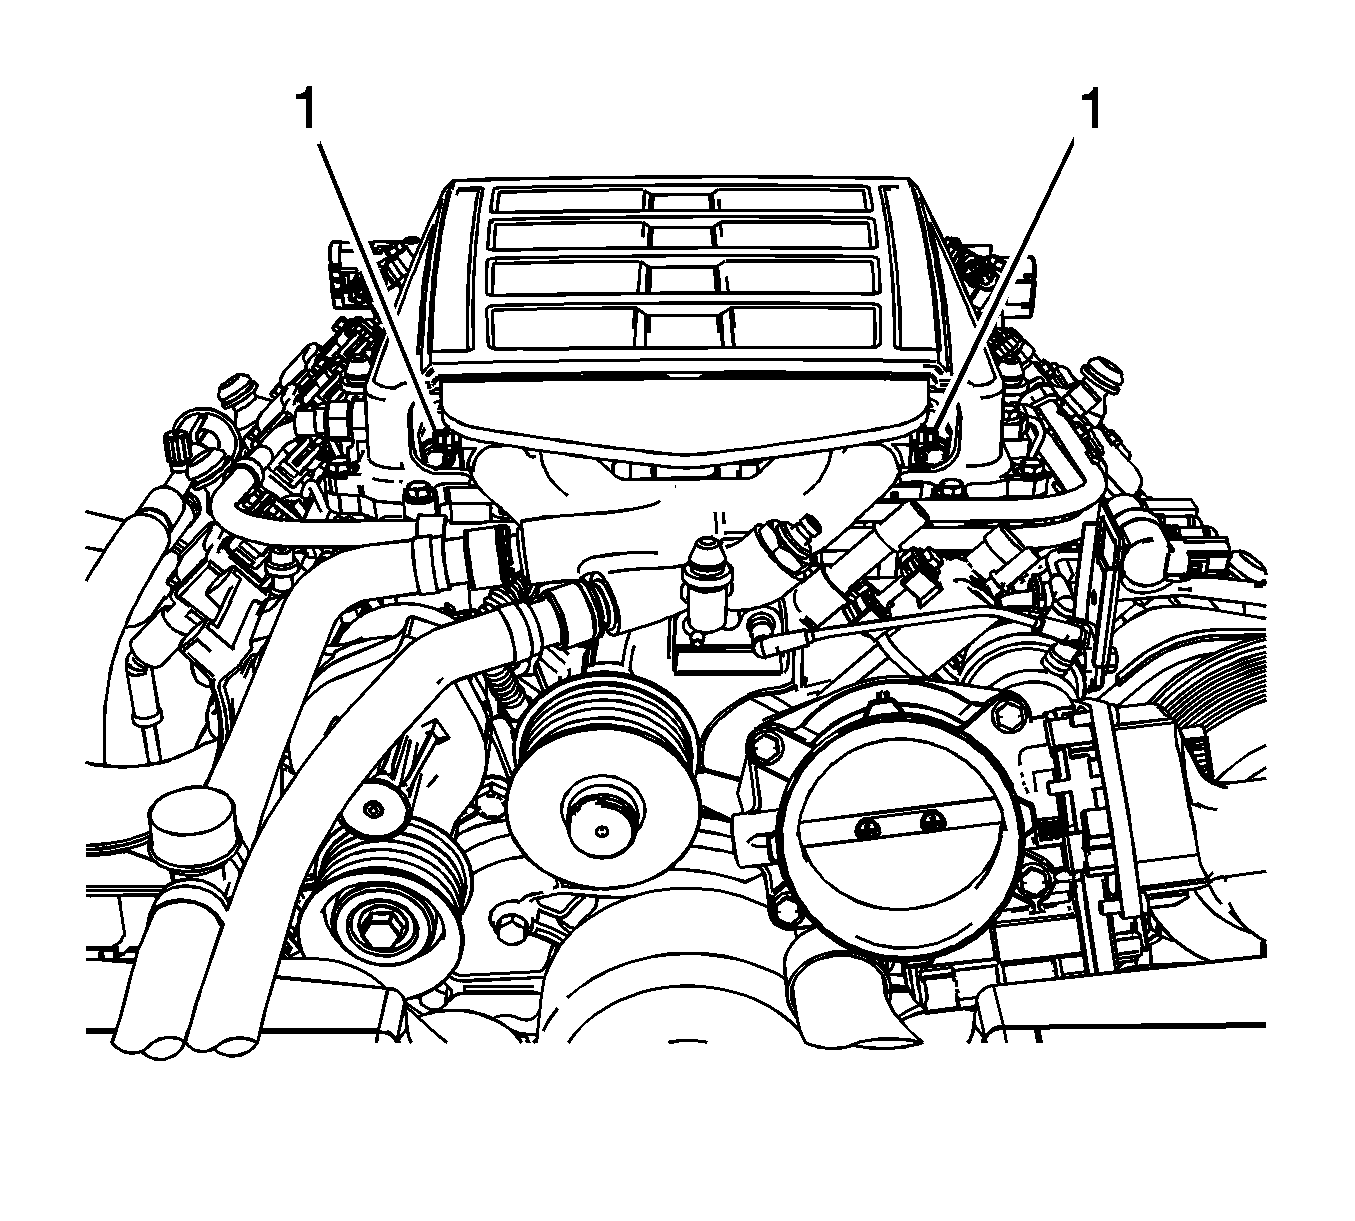
- Loosen both bleeder valves (1) on the supercharger manifold.
- Elevate and support the charge air cooler (CAC) inlet hose with the service T-fitting to a point slightly higher than all other CAC cooling components.
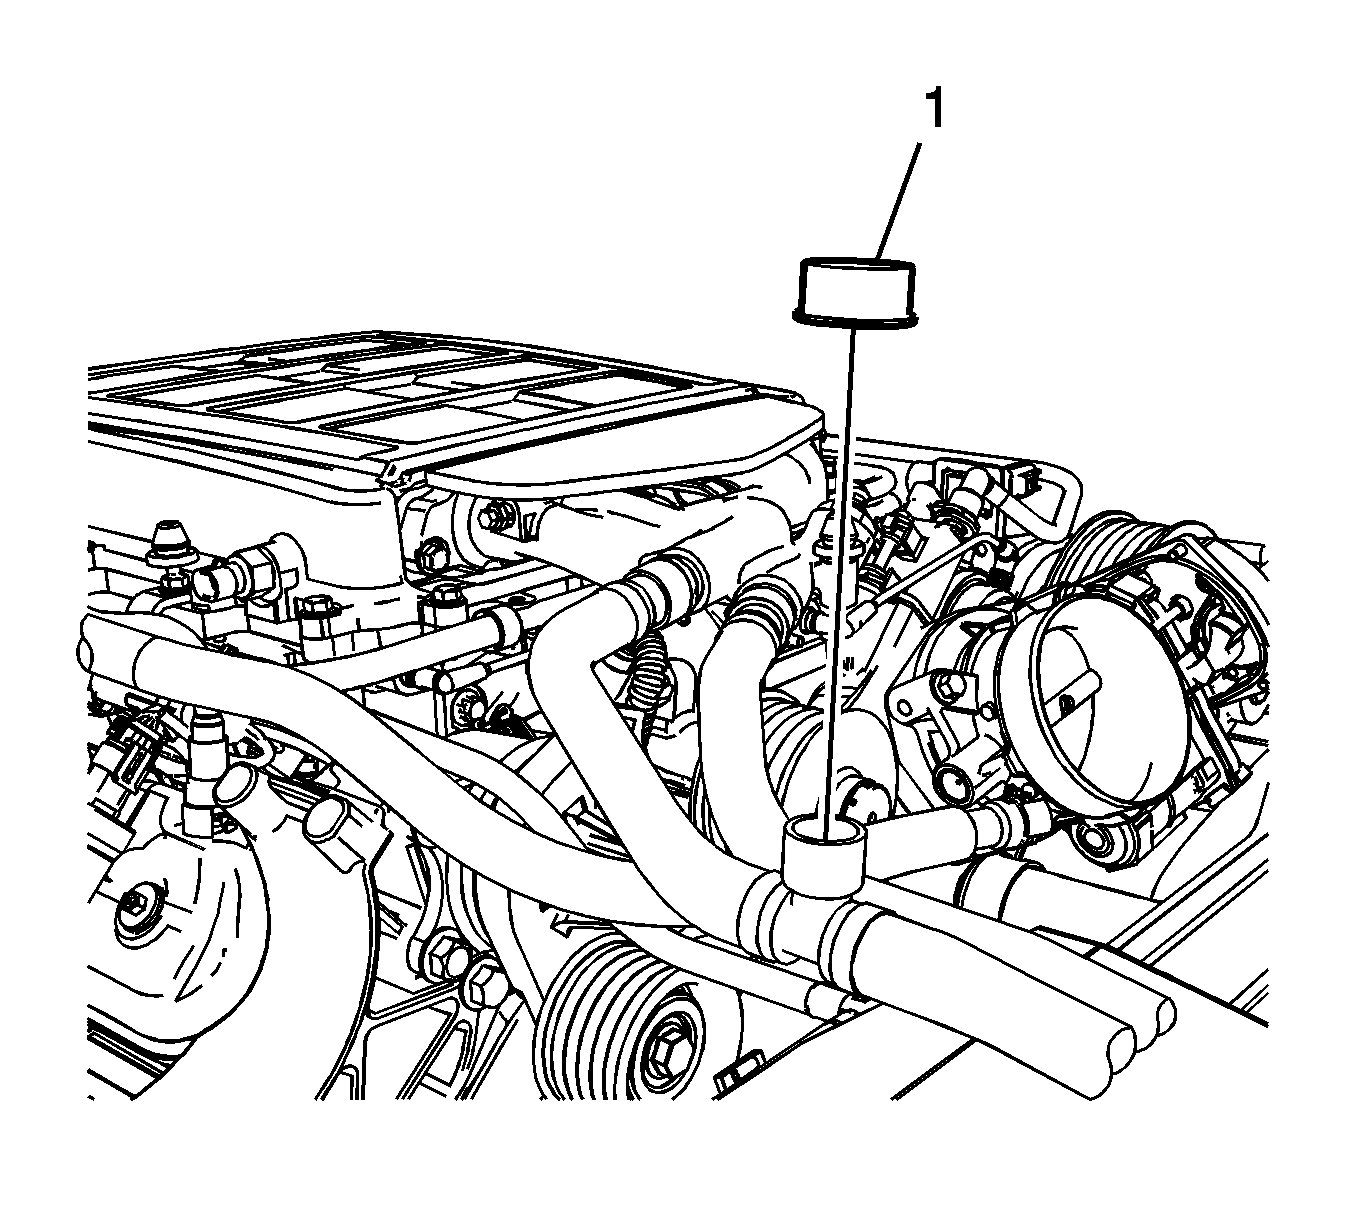
- Remove the service T-fitting cap (1).
- Raise and suitable support the vehicle. Refer to Lifting and Jacking the Vehicle
- Remove front wheelhouse liner. Refer to Front Wheelhouse Liner Replacement
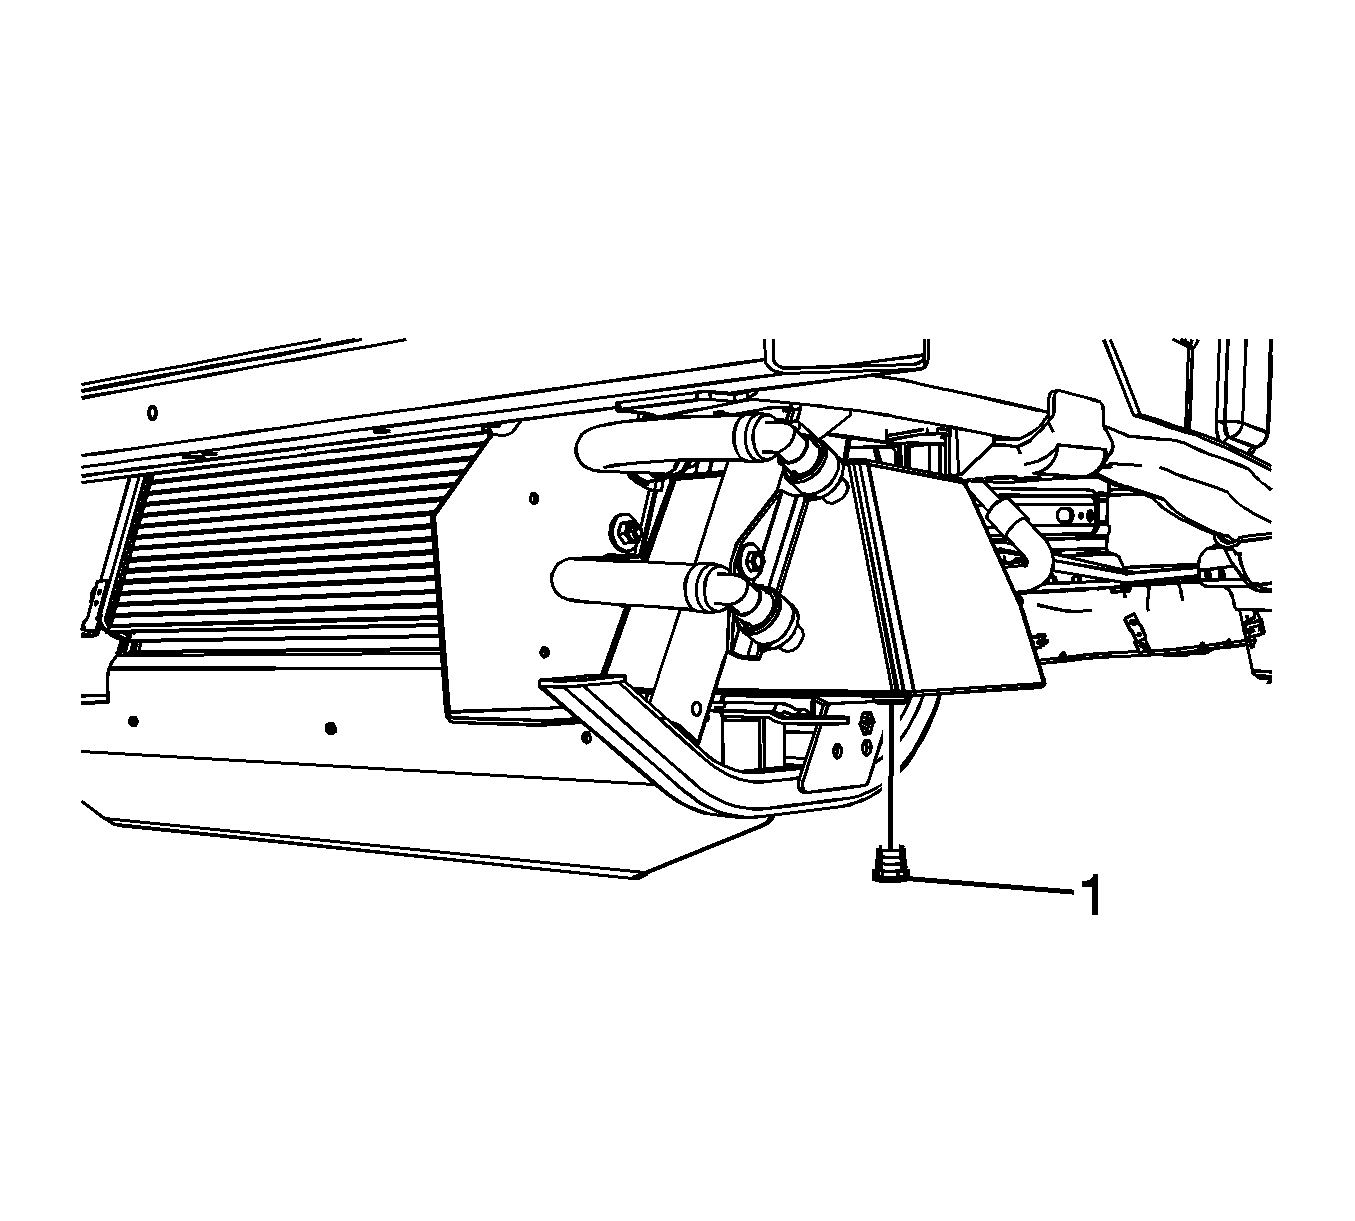
- Remove the drain bolt (1) at the CAC remote reservoir assembly.
- Allow the system to fully drain into a clean container.
- Measure and record the amount of coolant drained.
- Apply Pipe Sealant w/Teflon® GM Part # 12346004 Canadian Part # 10953480 or equivalent to the drain bolt threads.
- Install and tighten the drain bolt at CAC remote reservoir assembly to 9.6 N·m (85 lb in).
- Install front wheelhouse liner. Refer to Front Wheelhouse Liner Replacement
- Lower the vehicle.
- Tighten the bleeder screws (1) at the supercharger manifold to 2.8 N·m (25 lb in).
- Install and hand tighten the service T-fitting cap.
- Reposition the CAC inlet hose with service T-fitting back to the original position.
Warning: To avoid being burned, do not remove the radiator cap or surge tank cap while the engine is hot. The cooling system will release scalding fluid and steam under pressure if radiator cap or surge tank cap is removed while the engine and radiator are still hot.


Caution: Refer to Fastener Caution in the Preface section.


Filling Procedure
- Install absorbent rags under both bleeder valves (1) to absorb any coolant loss.
- Loosen both bleeder valves on the supercharger manifold.
- Elevate and support the CAC inlet hose with the service T-fitting to a point slightly higher than all other CAC cooling components.
- Remove the service T-fitting cap.
- Slowly fill coolant through the service T-fitting until the coolant becomes present at both bleeder valves, closing one if coolant becomes present before the other.
- Tighten the bleeder valves to 2.8 N·m (25 lb in).
- Remove the absorbent rags from below the bleeder valves.
- Continue to fill the CAC cooling system with coolant until the level rises to the top of the service T-fitting.
- Install the service T-fitting cap.
- Using the Tech 2, cycle the CAC pump ON for 60 seconds and then to the OFF position.
- Remove the service T-fitting cap and wait a minimum of 2 minutes till air purges from the CAC cooling system.
- Continue to slowly fill the CAC cooling system with coolant until the level rises to the top of the T-fitting.
- Install the service T-fitting cap.
- Using the 7000081 Tech 2 Kit , cycle the CAC pump ON for 60 seconds and then back to the OFF position.
- Repeat steps 9 -12 until additional coolant can not be added through the service T-fitting into the system. Refer to Approximate Fluid Capacities
- Inspect the CAC cooling system for leaks.
- Rinse away any excess coolant from the engine and the engine compartment.


Note: Use a 50/50 mixture of DEX-COOL antifreeze and clean, drinkable water.
Caution: Refer to Fastener Caution in the Preface section.
Note: It is critical that the system must be completely free of air to prevent CAC pump noise and loss of system performance.
Note: Wait a minimum of 2 minutes to allow air remaining in the CAC cooling system enough time to travel back to the service T-fitting.
