For 1990-2009 cars only
Battery Positive and Negative Cable Replacement LS3
Removal Procedure
- Disconnect the negative cable lead from the battery. Refer to Battery Negative Cable Disconnection and Connection.
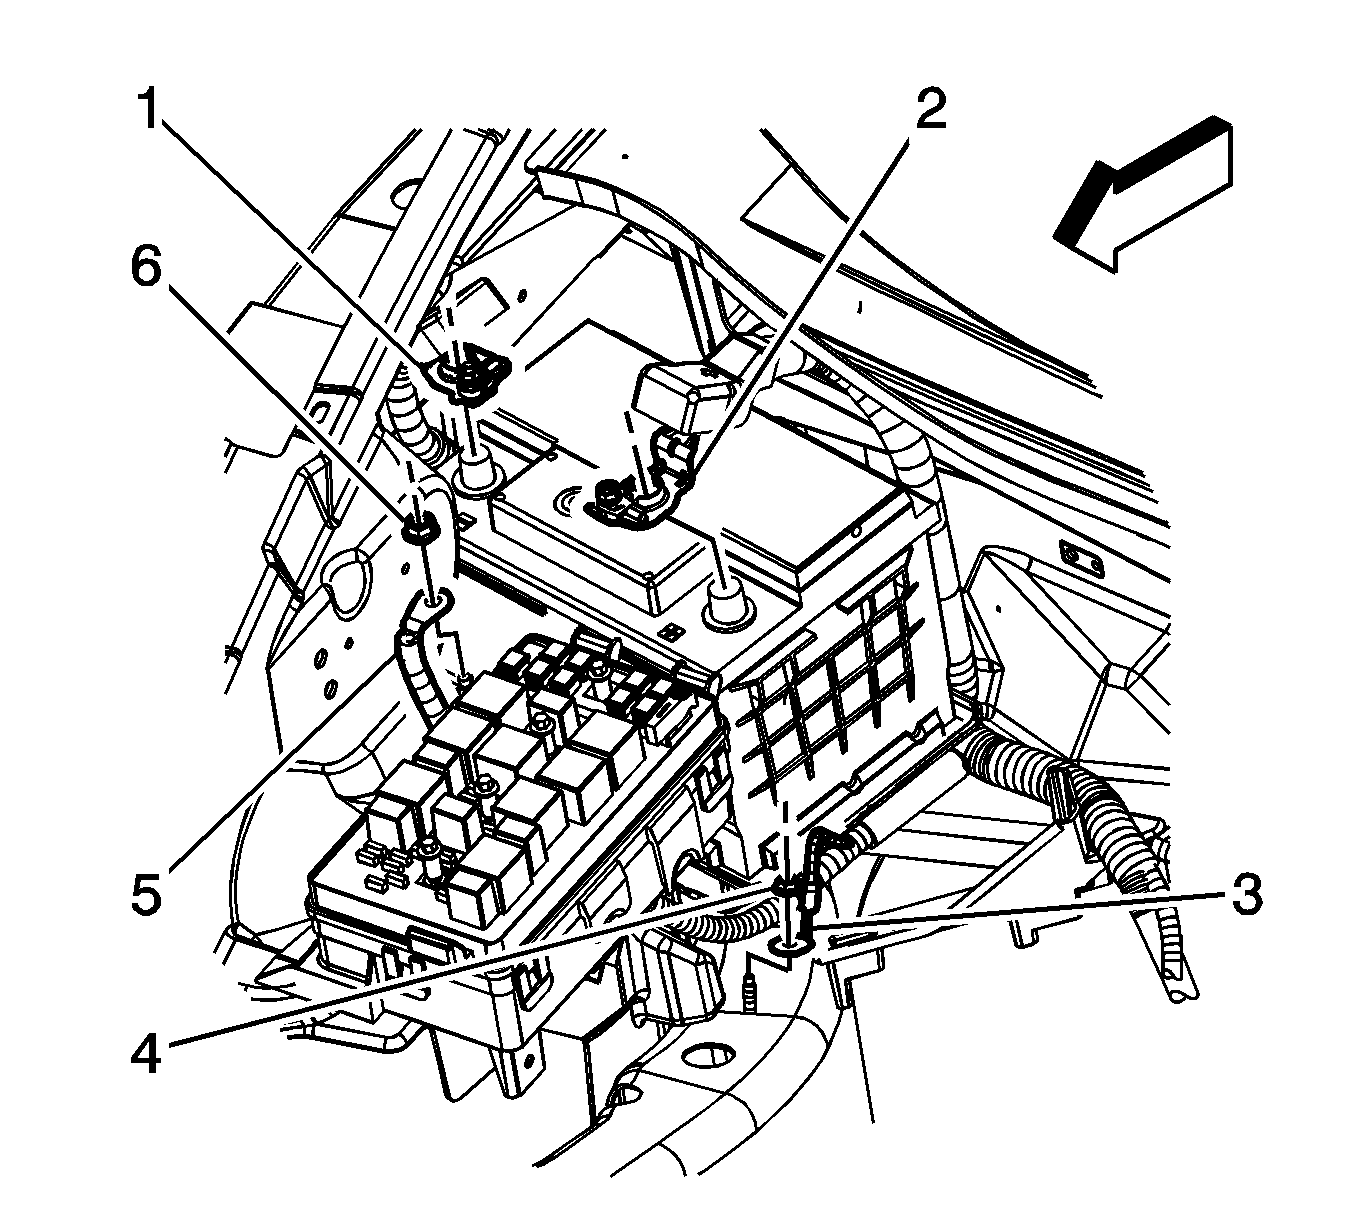
- Disconnect the positive cable lead (2) from the battery.
- Remove the battery positive cable to fuse/relay center nut (6) and disconnect the cable (5) from the stud.
- Remove the battery ground cable nut (4) and disconnect the cable (3) from the stud.
- Raise and support the vehicle. Refer to Lifting and Jacking the Vehicle.
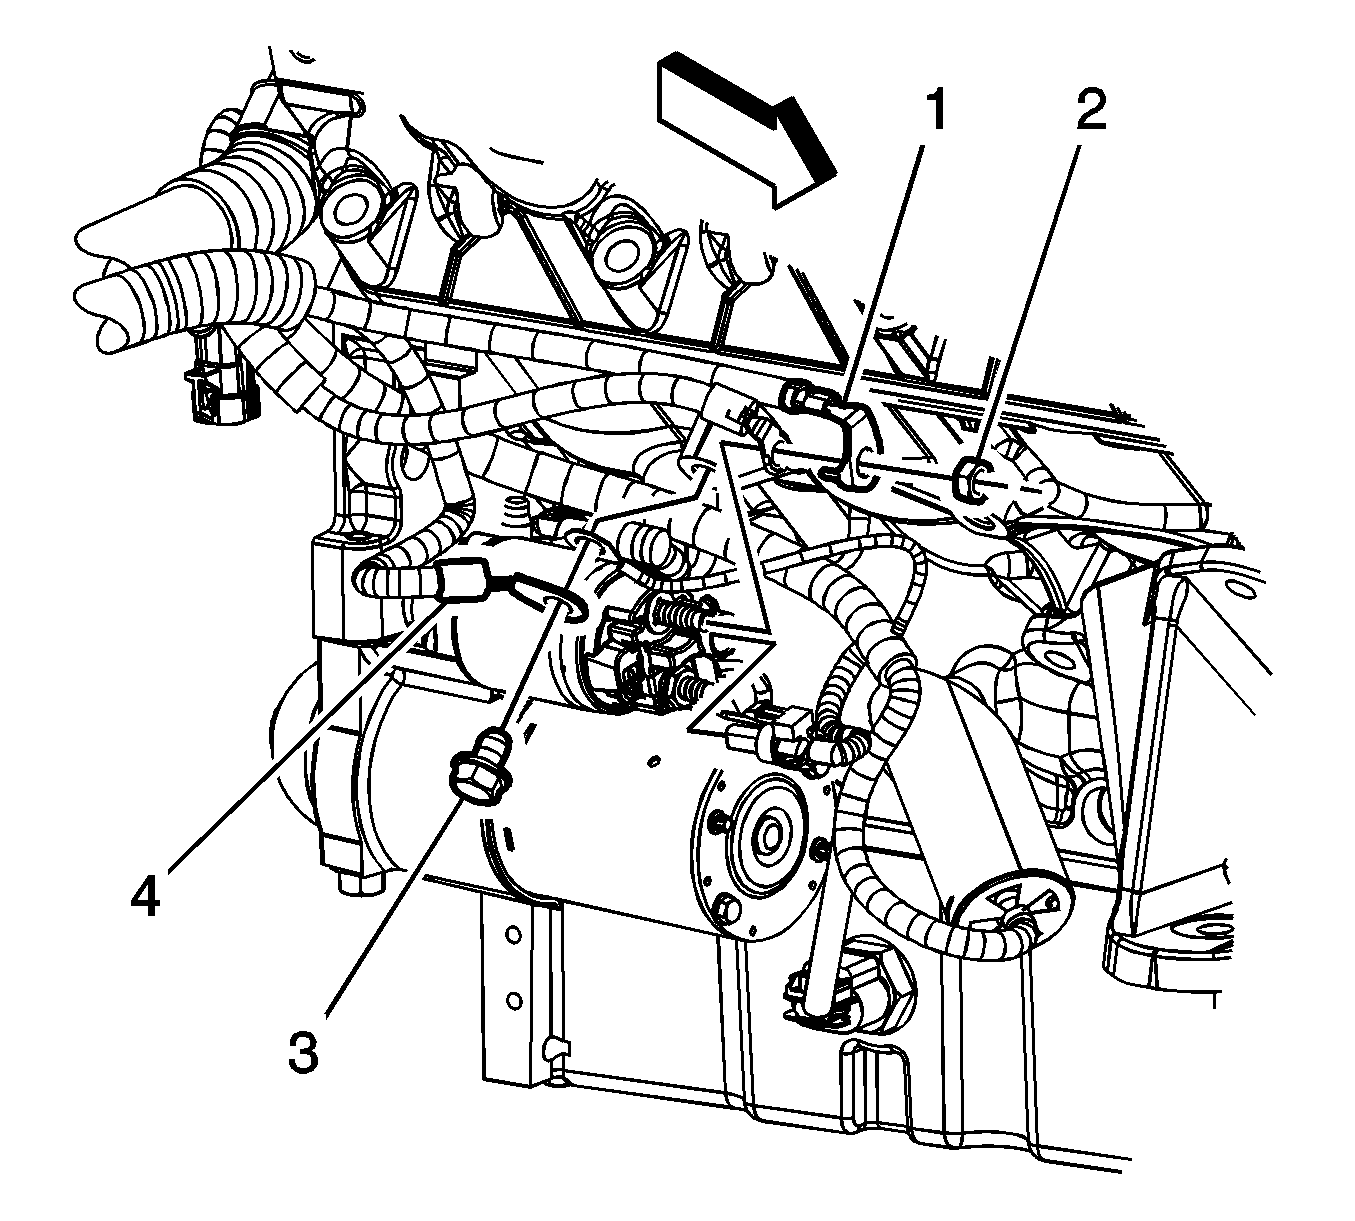
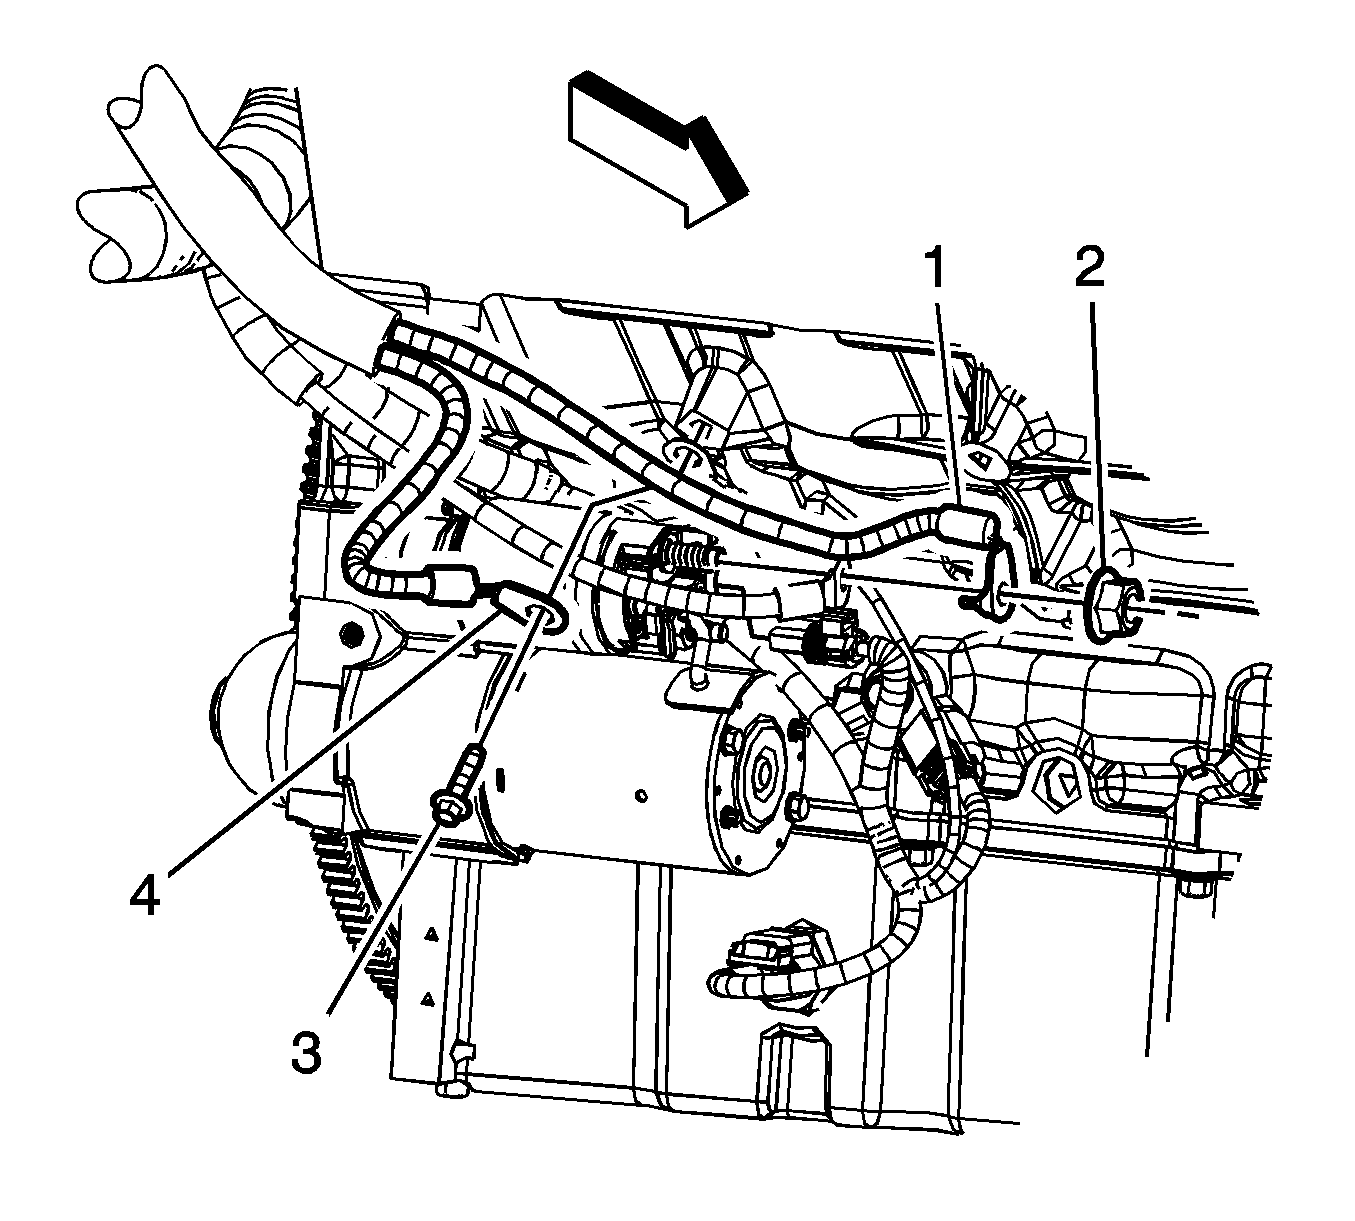
- Remove the battery positive/negative cable to engine bolt (3).
- Remove the positive battery cable to starter solenoid nut and disconnect the cable (1) from the stud.
- Remove the battery positive/negative cable from the vehicle.
Installation Procedure
- Position the battery positive/negative cable to the vehicle.
- Install the positive battery cable (1) to the stud and install the positive battery cable to starter solenoid nut (2) and tighten to 10 N·m (89 lb in).
- Position the negative battery cable (4) and install the battery positive/negative cable to engine bolt and tighten to 40 N·m (30 lb ft).
- Lower the vehicle.
- Position the battery ground cable (3) and install the battery ground cable nut (4) and tighten to 8 N·m (71 lb in).
- Position the battery positive cable (5) to the stud and install the battery positive cable to fuse/relay center nut (6) and tighten to 10 N·m (89 lb in).
- Connect the positive cable lead (2) to the battery and tighten to 8 N·m (71 lb in).
- Connect the negative cable lead to the battery. Refer to Battery Negative Cable Disconnection and Connection.
Caution: Refer to Fastener Caution in the Preface section.


Battery Positive and Negative Cable Replacement LS7 or LS9
Removal Procedure
- Disconnect the negative battery cable. Refer to Battery Negative Cable Disconnection and Connection.
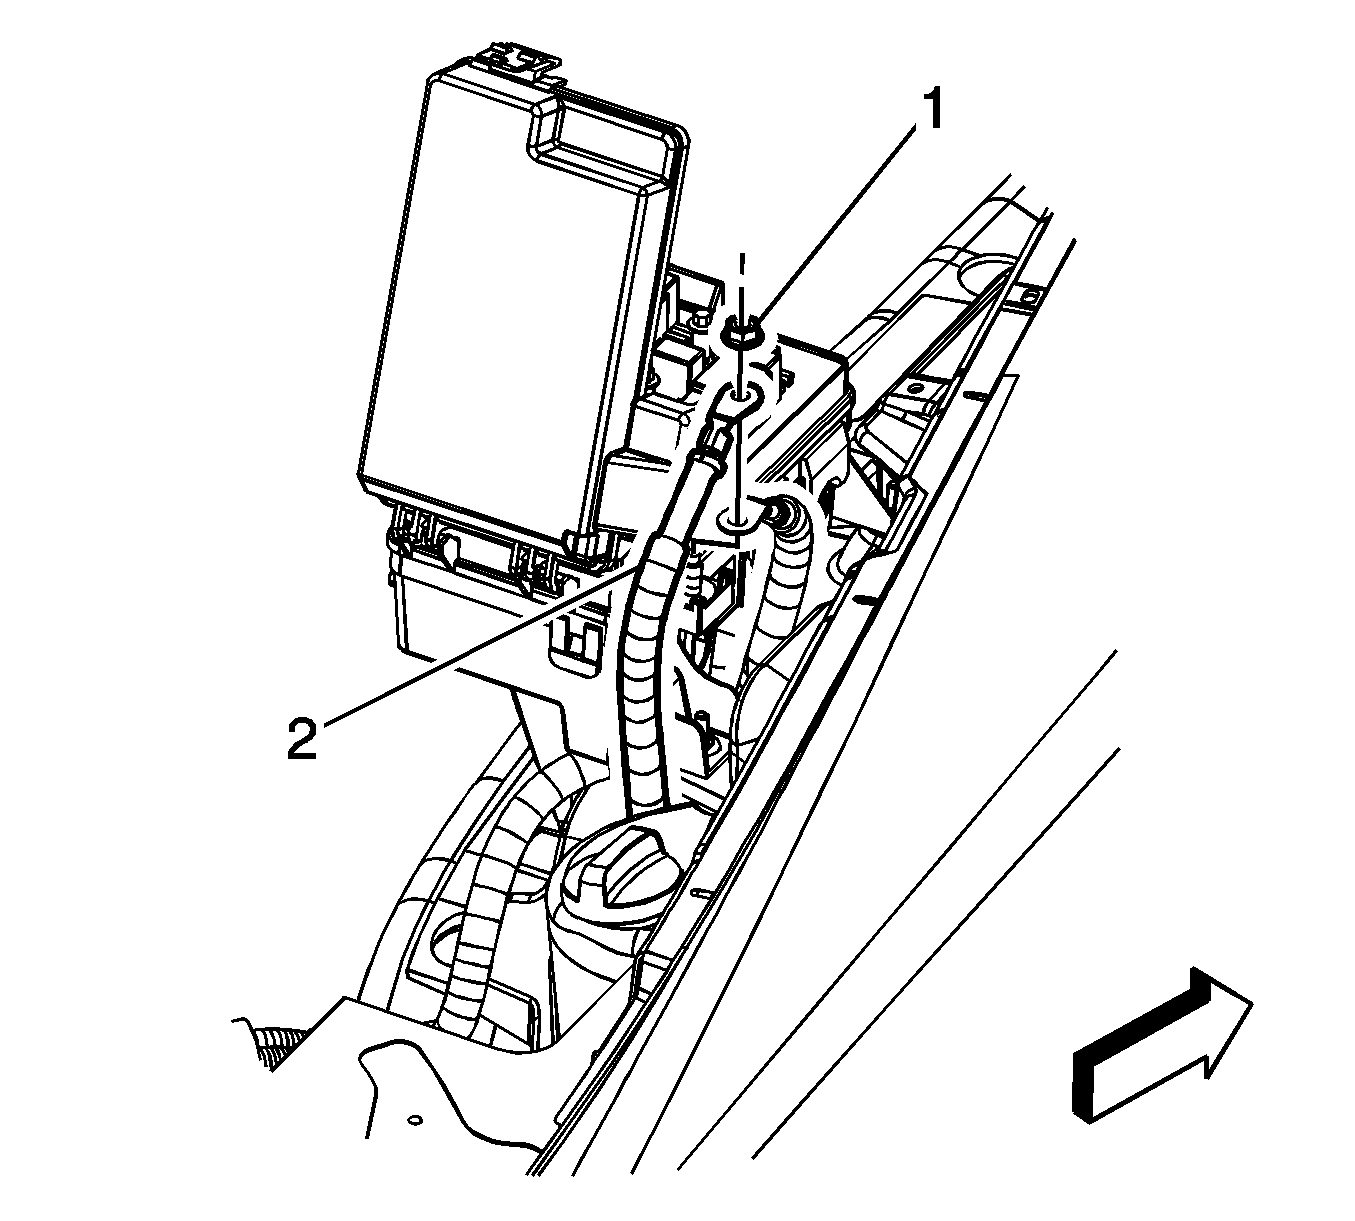
- Remove the battery positive cable nut (1) and remove the battery positive/negative cable lead (2).
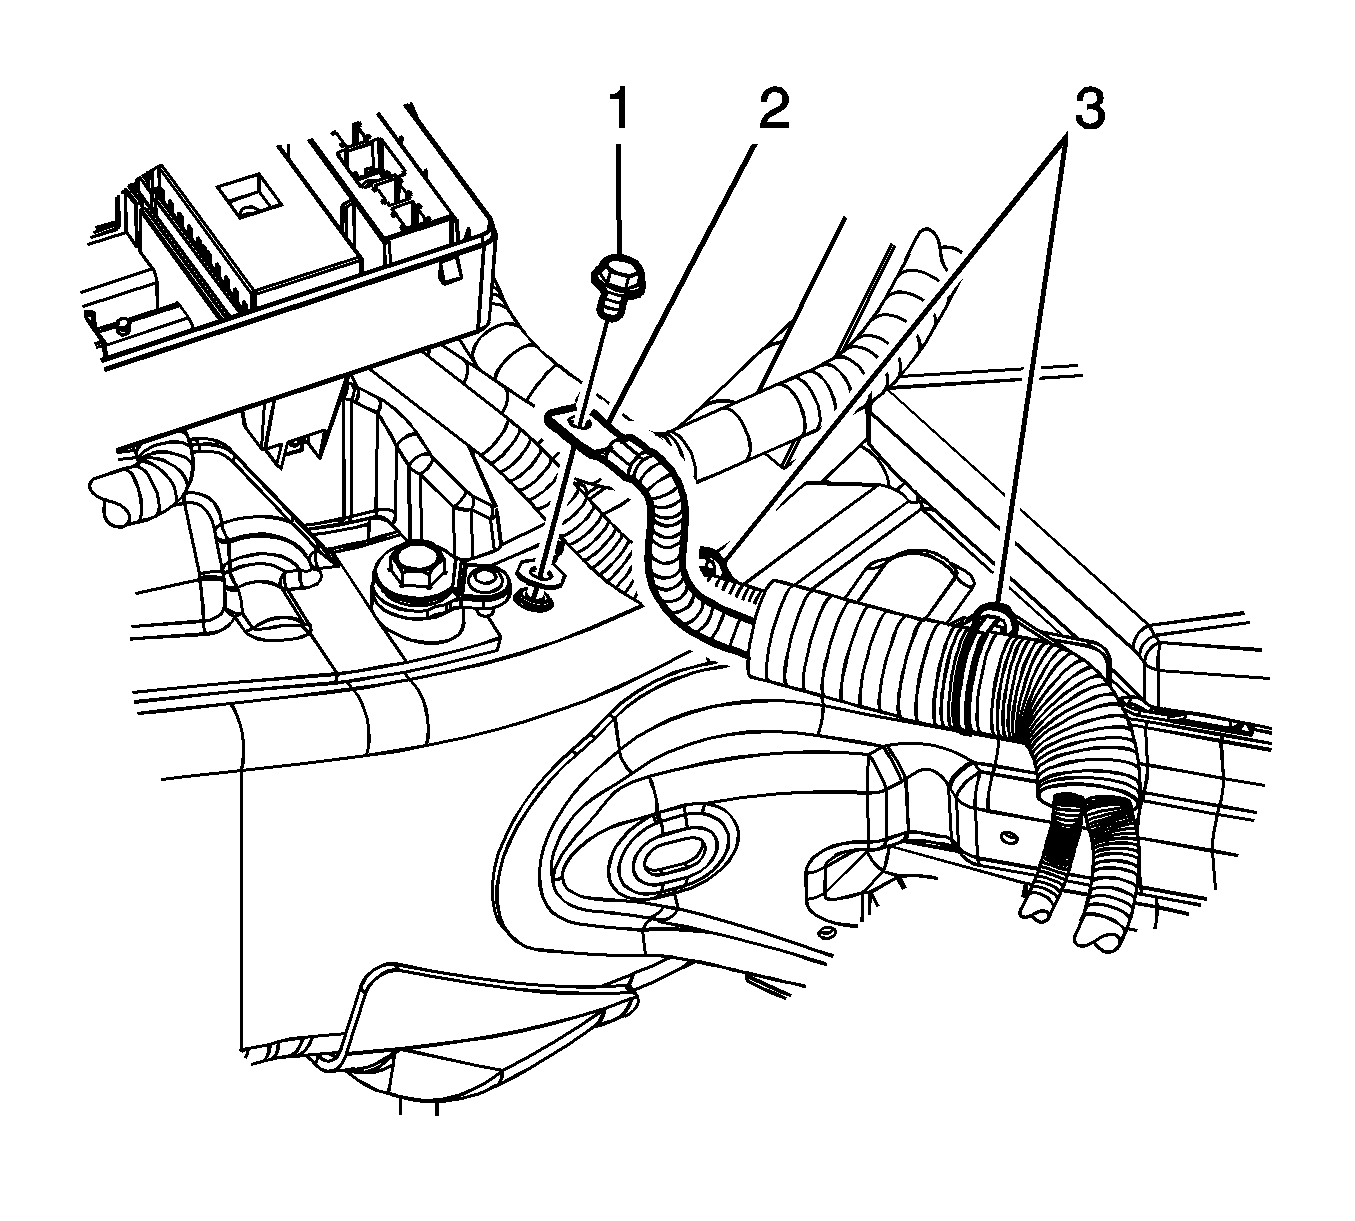
- Remove the battery positive/negative cable bolt (1) and release the wiring harness retainers (3).
- Raise and support the vehicle. Refer to Lifting and Jacking the Vehicle.
- Remove the battery positive/negative cable bolt (3) from the engine block.
- Remove the battery positive/negative cable nut (2) from the starter solenoid.
- Remove the battery positive/negative cable from the vehicle.
Installation Procedure
- Position the battery positive/negative cable into the vehicle.
- Install the battery positive/negative cable nut (2) to the starter solenoid and tighten to 10 N·m (89 lb in).
- Install the battery positive/negative cable bolt (3) to the engine block and tighten to 40 N·m (30 lb ft).
- Lower the vehicle.
- Install the battery positive/negative cable bolt (1) and attach the wiring harness retainers (3) and tighten to 25 N·m (18 lb ft).
- Install the battery positive cable nut (1) and tighten to 8 N·m (71 lb in).
- Connect the negative battery cable. Refer to Battery Negative Cable Disconnection and Connection.
Caution: Refer to Fastener Caution in the Preface section.


