For 1990-2009 cars only
Special Tools
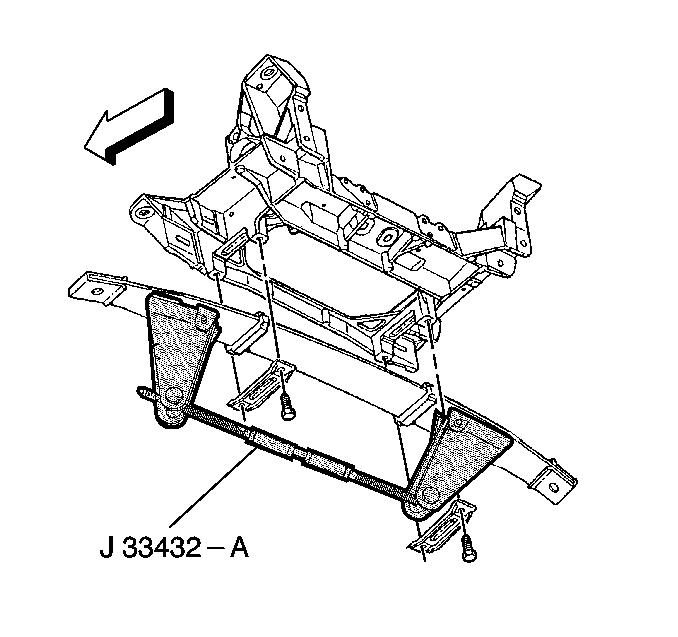
J 33432 Transverse Spring Compressor
Removal Procedure
- Raise and support the vehicle. Refer to Lifting and Jacking the Vehicle.
- Remove the tire and wheel assembly. Refer to Tire and Wheel Removal and Installation.
- Disconnect the suspension position sensor link, if equipped from the control arm link stud. Refer to Electronic Suspension Rear Position Sensor Replacement
- Using the J 33432 Transverse Spring Compressor , compress the transverse spring.
- Disconnect the shock absorber from the lower control arm. Refer to Shock Absorber Replacement.
- Separate the lower control arm from the rear knuckle. Refer to Knuckle Replacement.
- Remove the stabilizer link from the lower control arm. Refer to Stabilizer Shaft Link Replacement.
- Support the lower control arm with a jackstand.
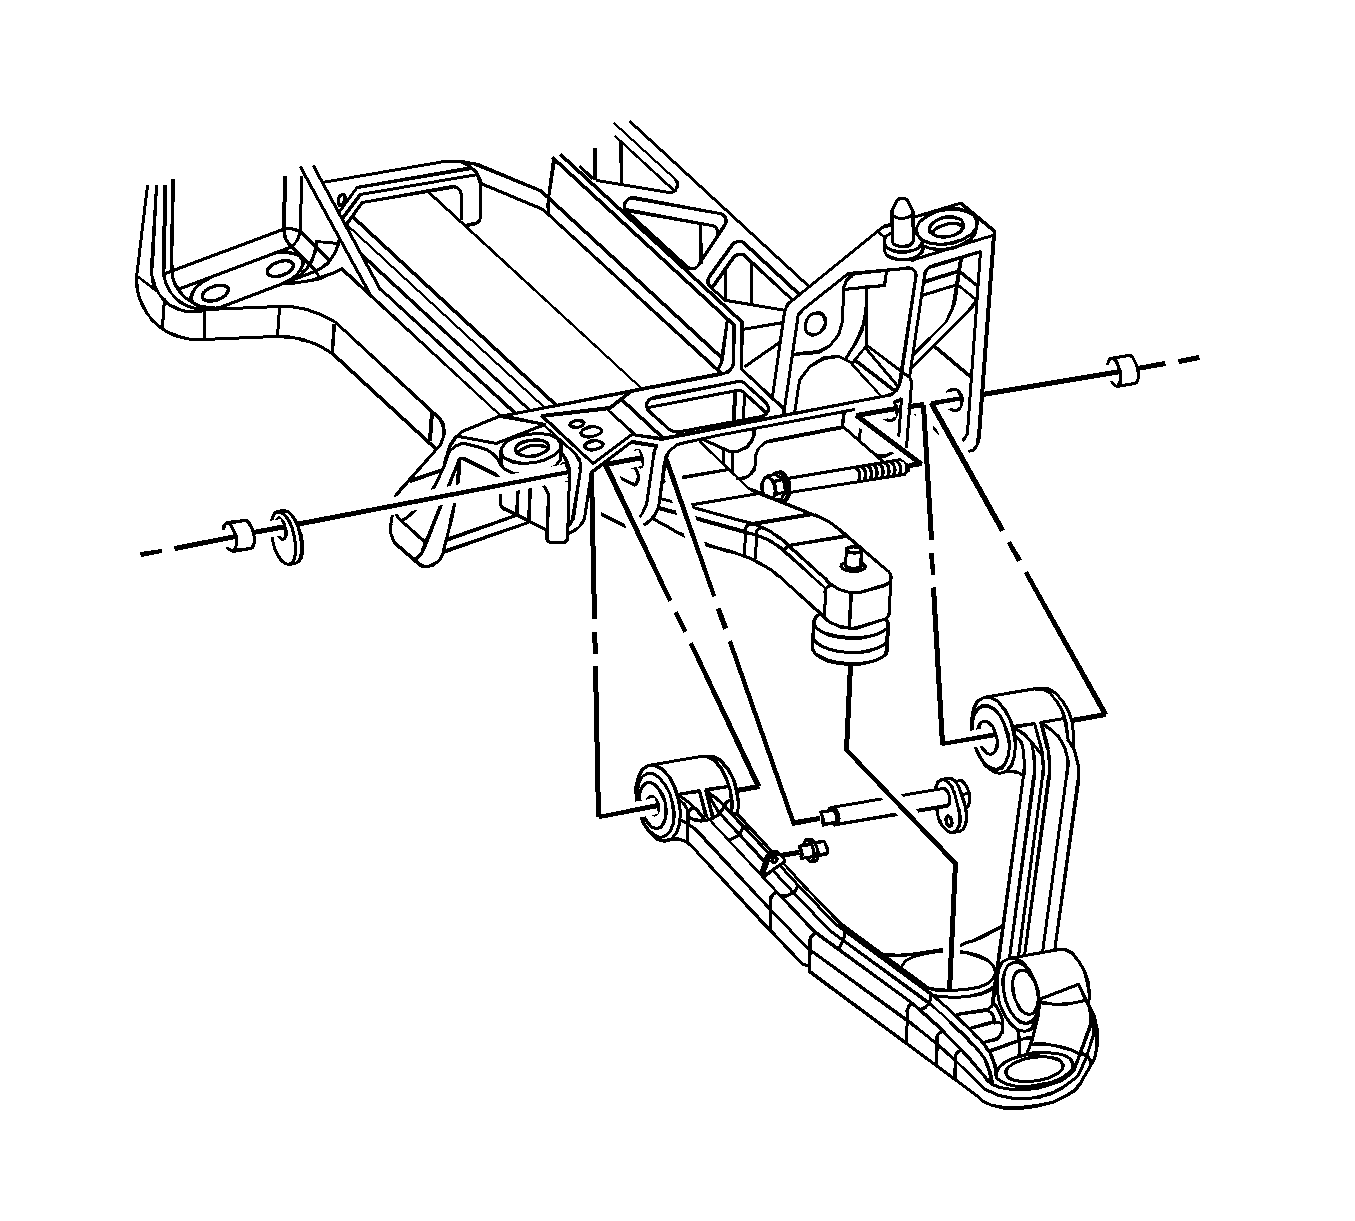
- Mark the position of, and then remove the cam bolts, washers, and nuts retaining the control arm to the crossmember.
- Remove the jack stand from under the lower control arm.
- Remove the lower control arm from the vehicle.

Note: During this procedure, use care not to scratch the transverse spring.

Installation Procedure
- Install the lower control arm to the vehicle.
- Support the lower control arm with a jack stand.
- Install the lower control arm front cam bolt and tighten to 170 N·m (125 lb ft) , washers, and nuts retaining the lower control arm to crossmember and tighten to.
- Install the lower control arm rear cam bolt and tighten to 60 N·m (44 lb ft) + 60°.
- Install the lower control arm ball joint stud into the suspension knuckle. Refer to Knuckle Replacement
- Install the stabilizer shaft link to the control arm. Refer to Stabilizer Shaft Link Replacement.
- Install the shock absorber to the lower control arm. Refer to Shock Absorber Replacement.
- Remove the J 33432 Transverse Spring Compressor , compress the transverse spring.
- Remove the jackstand.
- Release and remove J 33432-A from the transverse spring.
- Align the rear suspension.
Caution: Do not remove the transverse leaf spring compressor tool until after the shock absorber has been installed. The pad on the transverse leaf spring bolt could move out of position resulting in damage to the pad or a rattle in the suspension.

Caution: Refer to Fastener Caution in the Preface section.
Note: Place the cam bolts at the position marked during removal.

Note: During this procedure, use care not to scratch the transverse spring.
| • | To adjust the rear camber, refer to Rear Camber Adjustment. |
| • | To adjust the rear toe, refer to Rear Toe Adjustment. |
