For 1990-2009 cars only
Special Tools
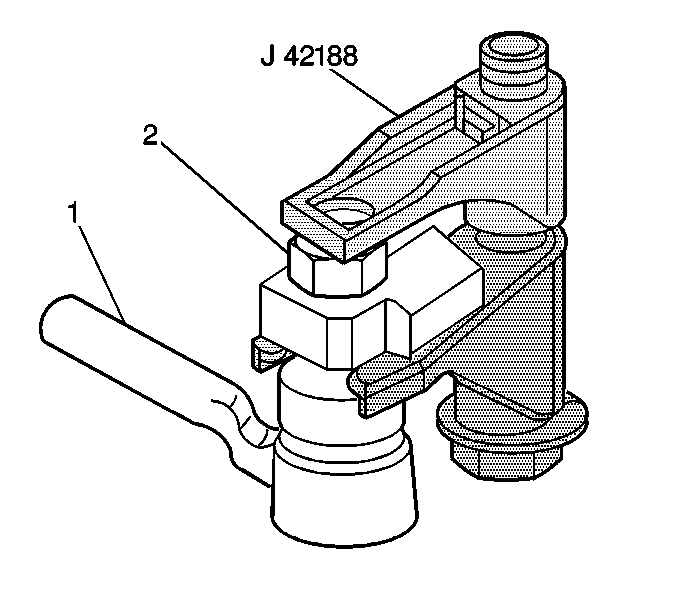
J 42188 Ball Joint Separator
Removal Procedure
- Raise and suitably support the vehicle. Refer to Lifting and Jacking the Vehicle.
- Remove the tire and wheel assemblies. Refer to Tire and Wheel Removal and Installation.
- Loosen, do not remove, the outer tie rod end stud nut (2) from the outer tie rod end ball stud.
- Install J 42188 between the steering knuckle and the outer tie rod end stud.
- Tighten the nut on J 42188 until the steering knuckle and the outer tie rod end stud separate.
- Remove J 42188 and the outer tie rod end stud nut.
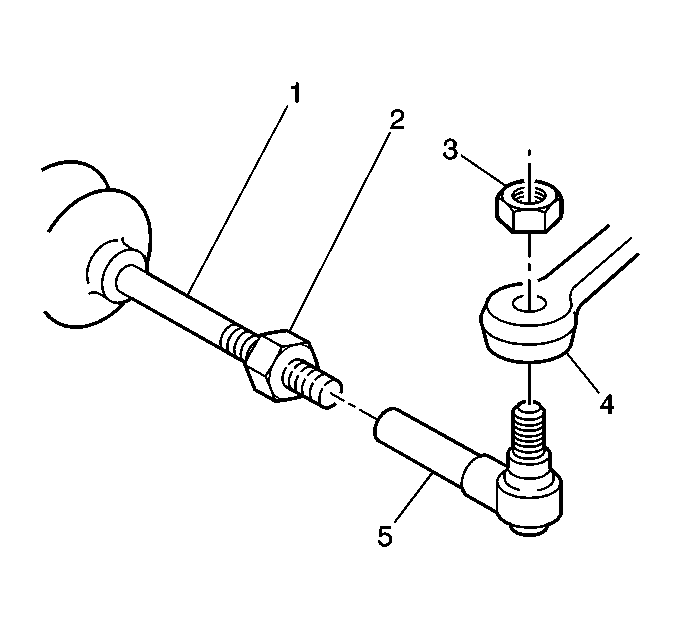
- Remove the outer tie rod end stud (5) from the steering knuckle (4).
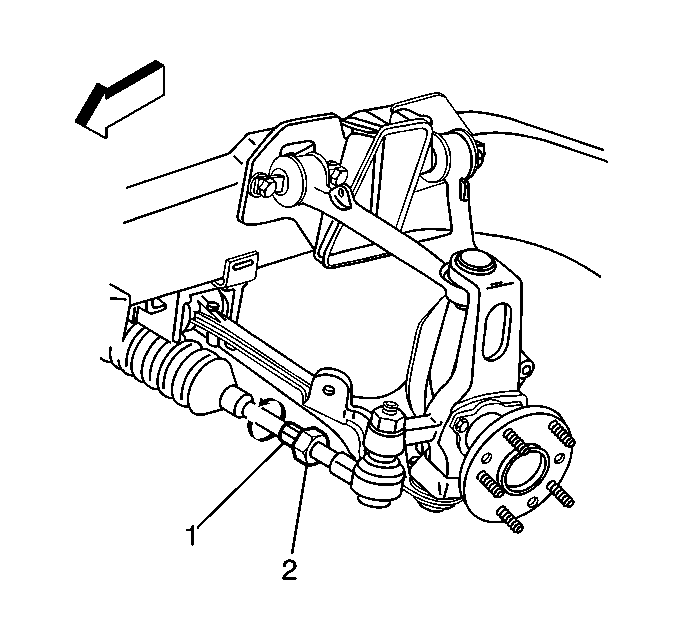
- Loosen the jam nut (2) on the inner tie rod assembly.
- Remove the outer tie rod end (5) from the inner tie rod assembly (1).


Installation Procedure
- Install the outer tie rod end (5) to the inner tie rod assembly (1). Do not tighten the jam nut.
- Install the outer tie rod end stud (5) to the steering knuckle (4).
- Install the outer tie rod end stud nut (3) to the outer tie rod end stud (5).
- Tighten the outer tie rod end stud nut to 30 N·m (22 lb ft) to seat the stud.
- Turn the nut an additional 120 degrees.
- Install the tire and wheel assemblies. Refer to Tire and Wheel Removal and Installation.
- Lower the vehicle.
- Adjust the wheel toe. Refer to Wheel Alignment - Steering Wheel Angle and/or Front Toe Adjustment.

Caution: Refer to Fastener Caution in the Preface section.
Tighten

Note: Do not twist the rack and pinion boot during toe adjustment.
