Special Tools
| • | DT 48827 Skip Shift Socket
|
| • | J 3289-20 Holding Fixture
|
| • | J 36850 Transjel® Lubricant
|
| • | J 39441 5th/6th Driven Gear Installer
|
| • | J 39441-10 5th Gear Installer Adapter
|
| • | j 41099 Skip Shift Sensor Remover/Installer
|
| • | J 44395-A Transmission Holding Fixture
|
Shift Shaft Assemblies and Gear Clusters Installation
- Lubricate all components as assembly progresses, using
J 36850 transjel® lubricant
.
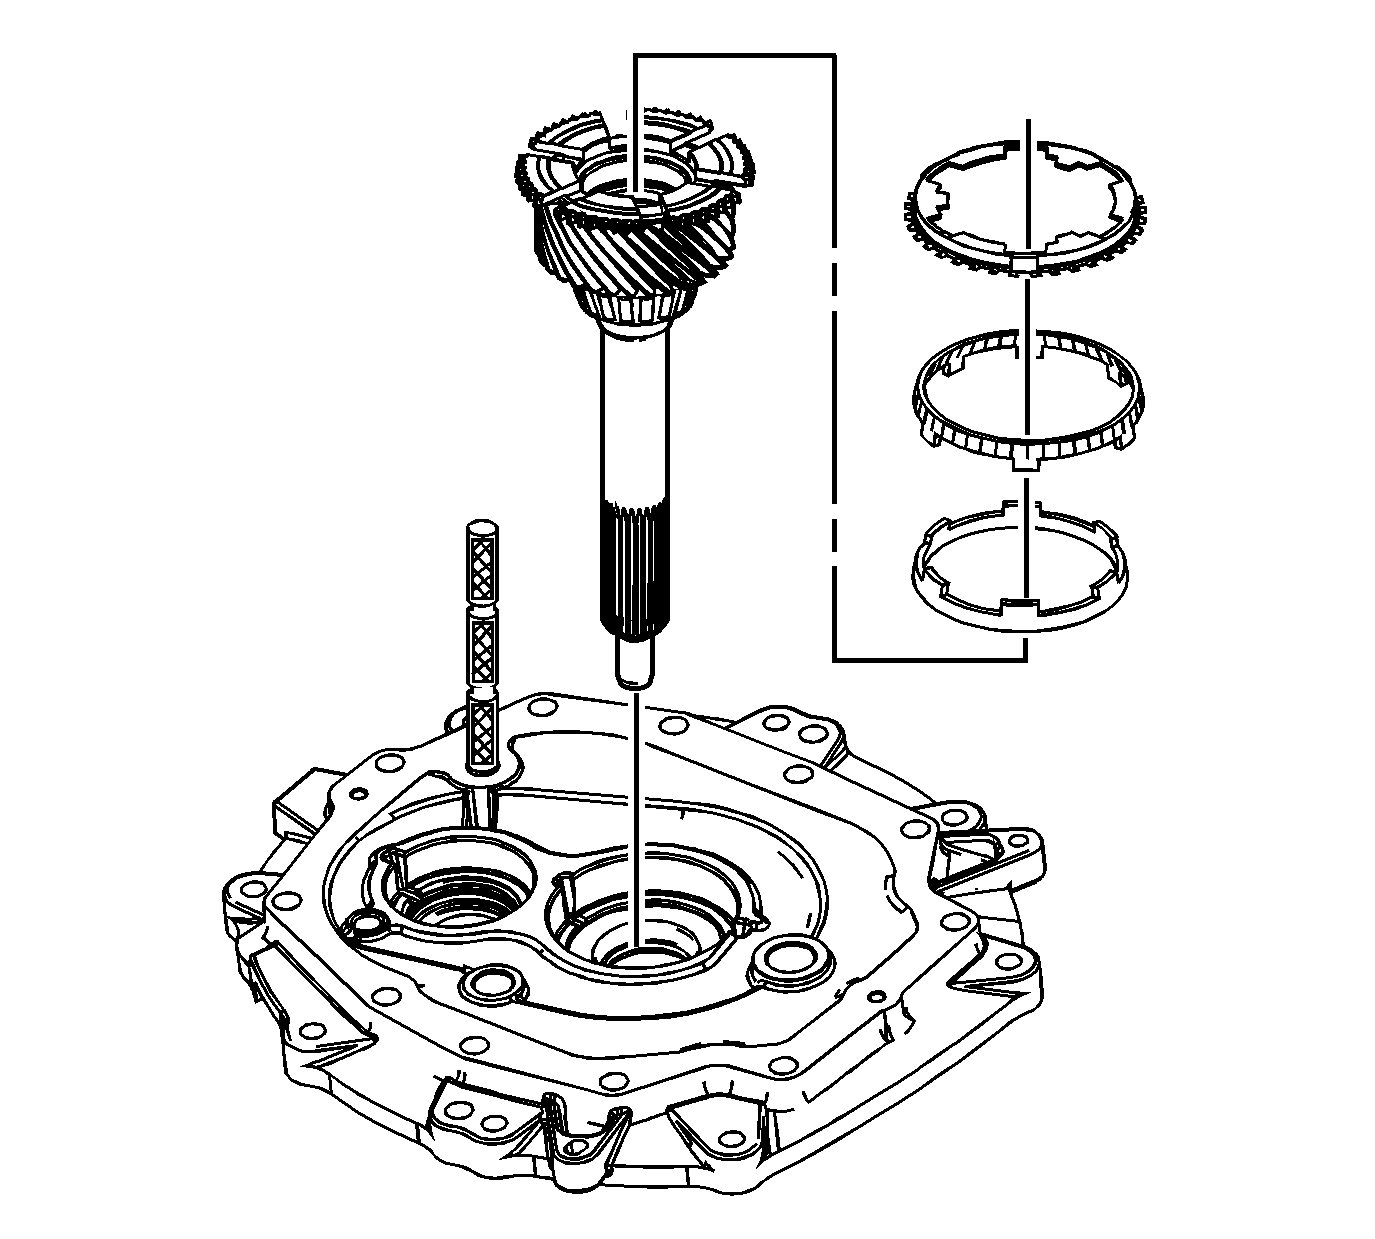
- Install the input shaft in the adapter plate.
- Install the 4th gear blocking ring, 4th gear friction cone, and 4th gear inner cone.
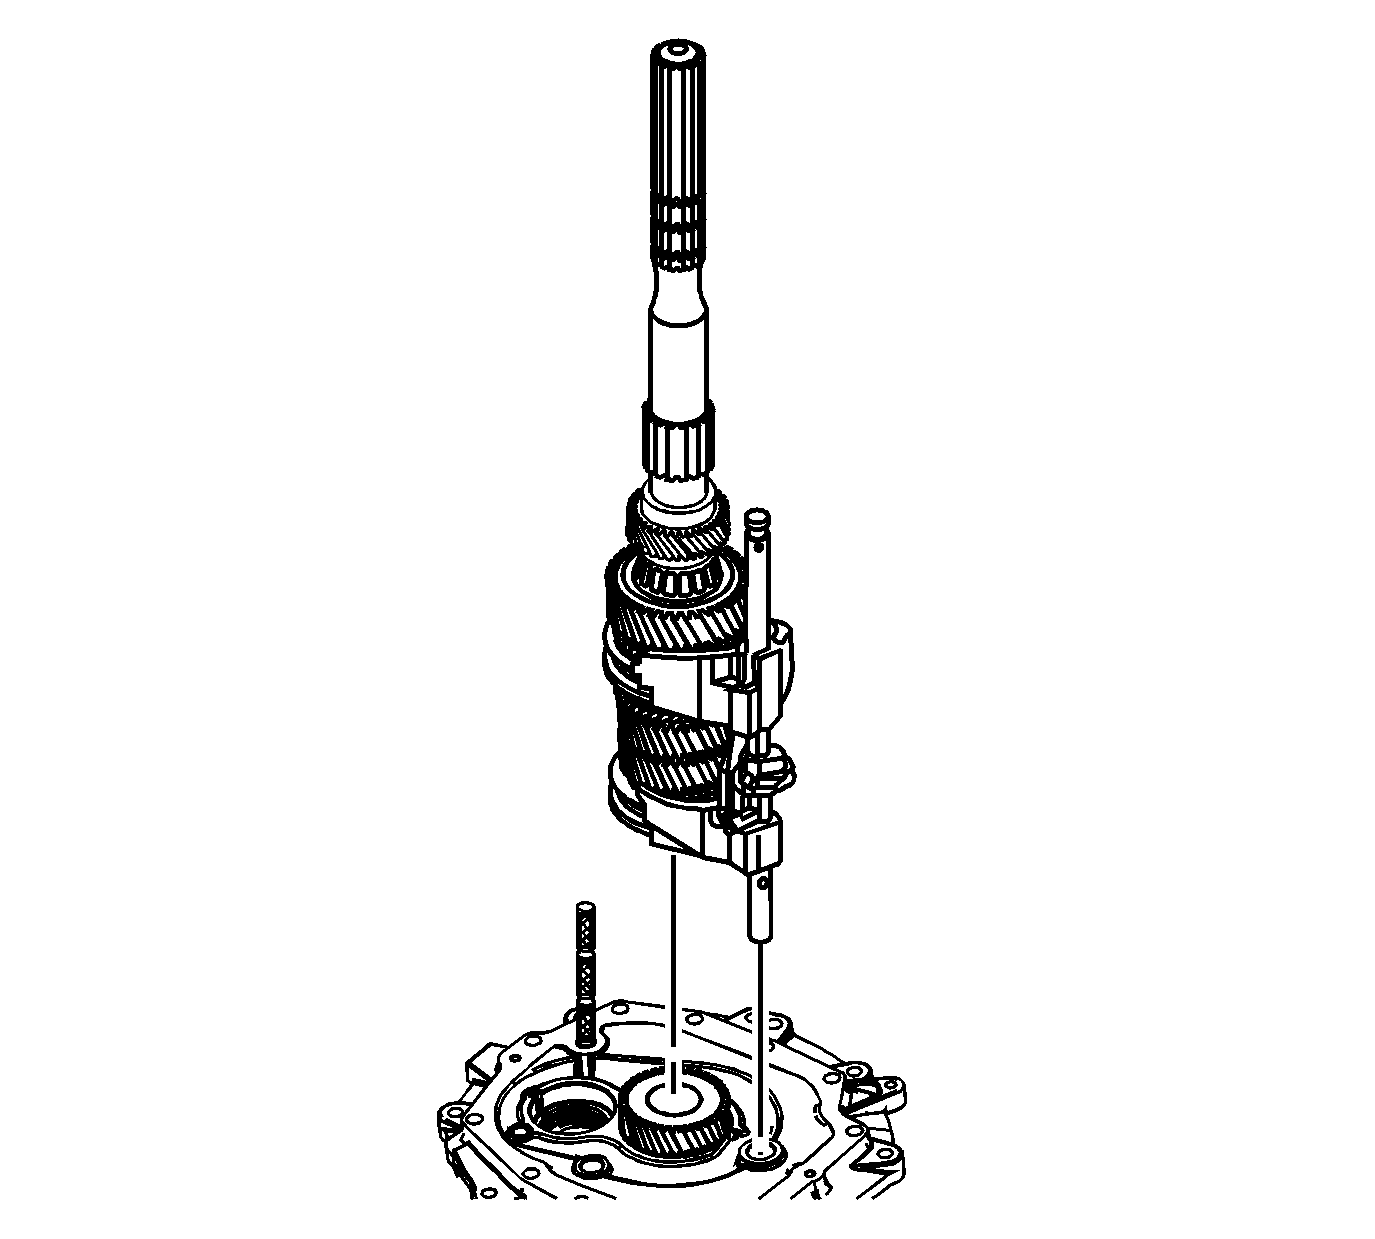
- Assemble the shift shaft to the mainshaft.
- Install the neutral return roll pin to the shift shaft.
- Install the mainshaft and the shift shaft assembly into the adapter plate.
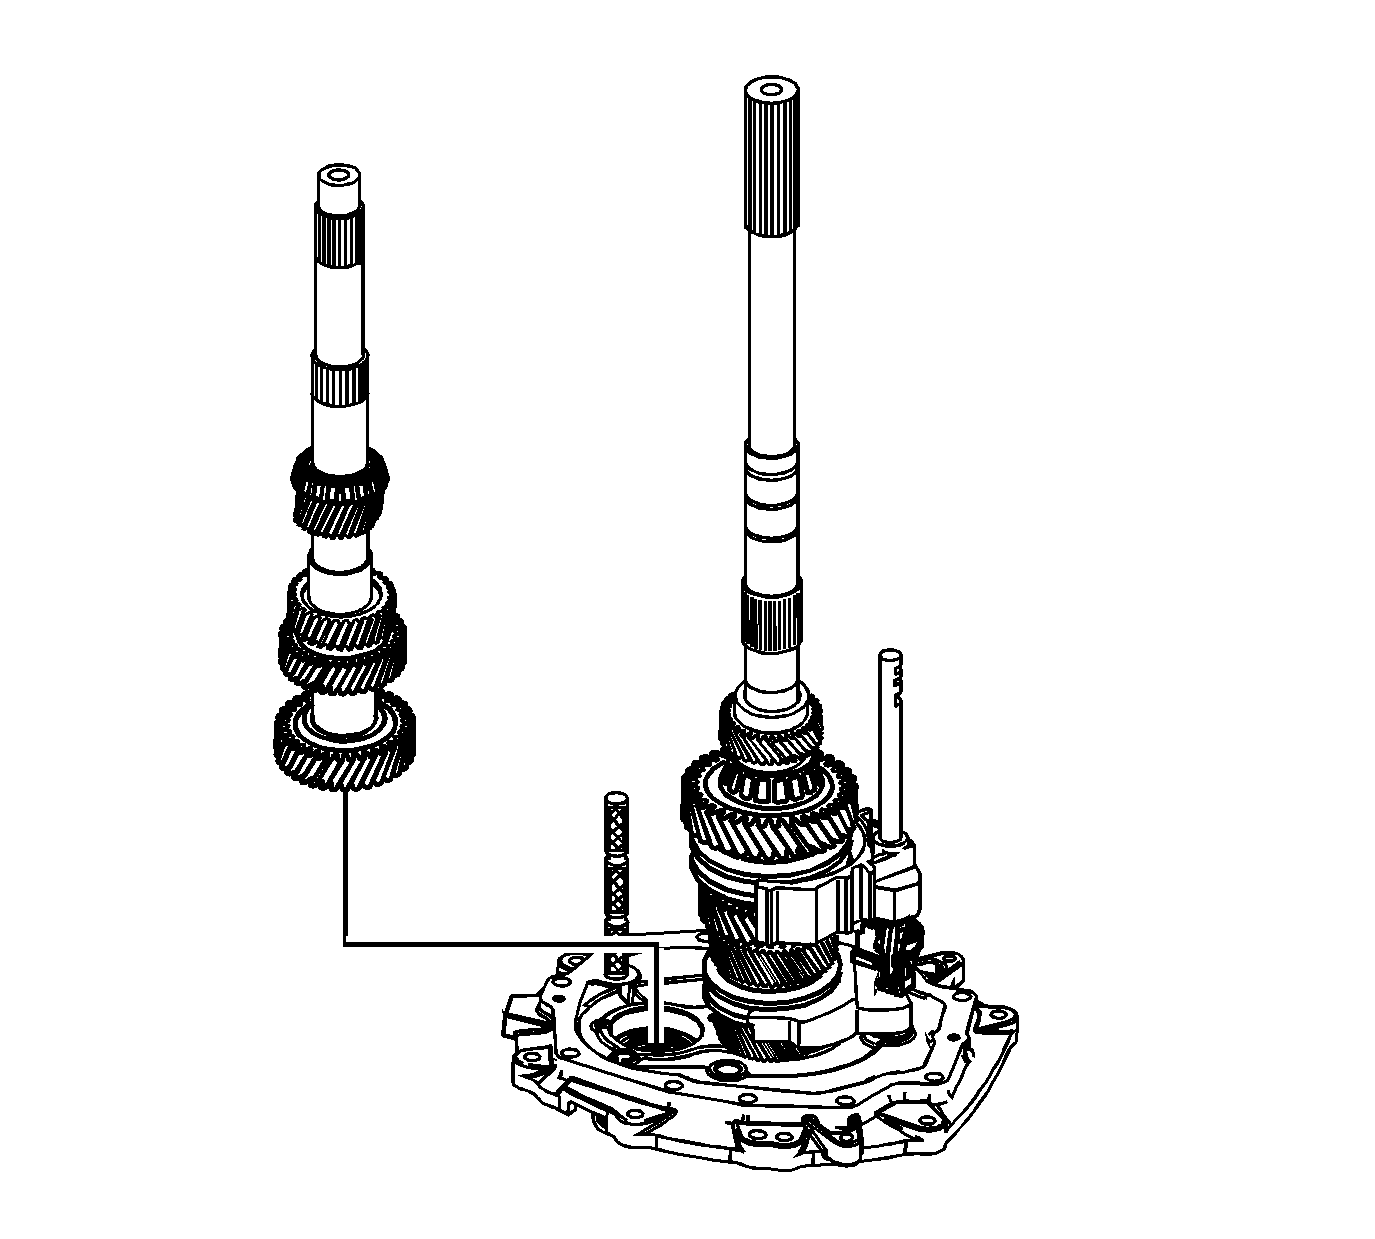
- Install the countershaft assembly using the following sequence:
| 7.1. | Lift up the mainshaft assembly enough in order to install the countershaft assembly. |
| 7.2. | Install the countershaft assembly. |
| 7.3. | Lift the mainshaft assembly enough in order to rotate the input shaft to engage the synchronizer keys with 4th gear blocking ring. |
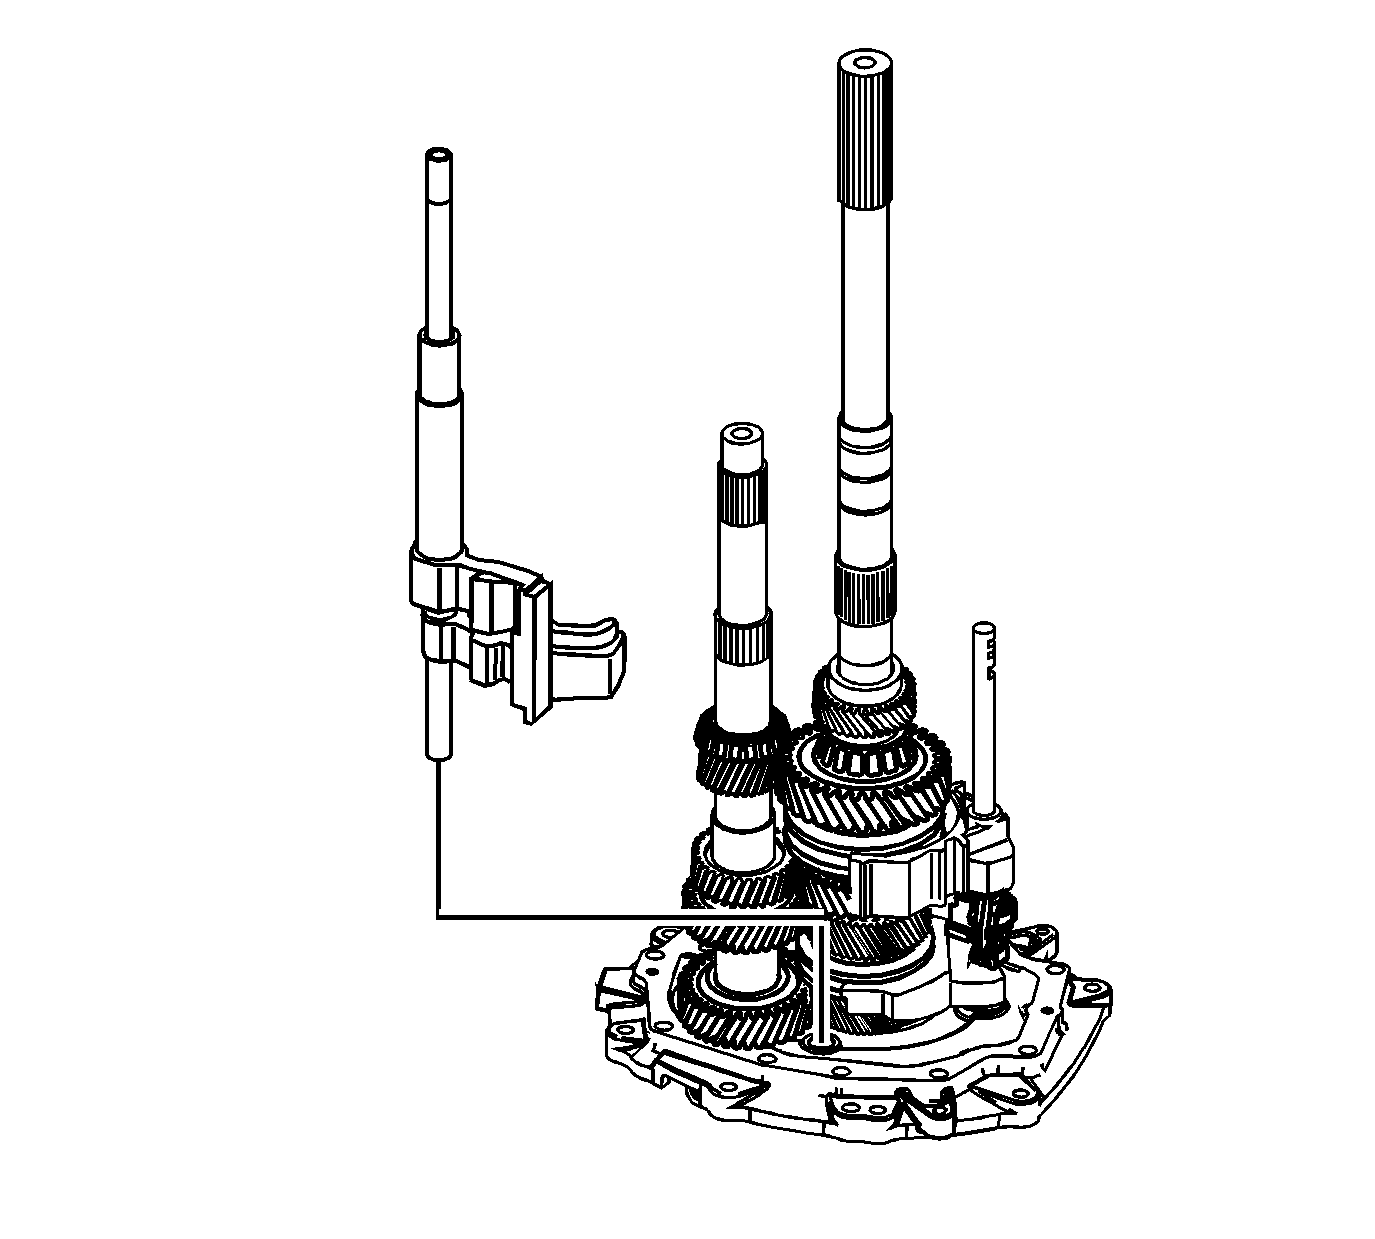
- Install the 5th/6th and the reverse shift shaft.
Align the slots of the shift shaft levers with the interlock plate.
Reverse Lockout Assembly Assemble
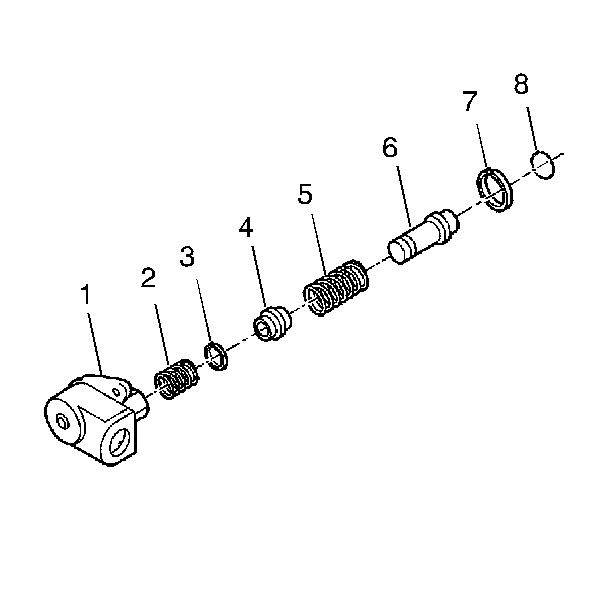
Warning: The reverse lockout assembly is under spring pressure. Exercise caution when removing the retainer ring, as bodily injury may result.
- Install the reverse lockout plunger (6).
- Install the reverse lockout outer spring (5).
- Install the reverse lockout collar (4).
- Compress the reverse lockout plunger and the collar (4) in a vise and Install the retainer ring (3).
- Install the reverse lockout inner spring (2).
- Install the reverse lockout components in the body (1).
- Install the retainer ring (7).
- Install the O-ring to body (8).
Transmission Case Installation
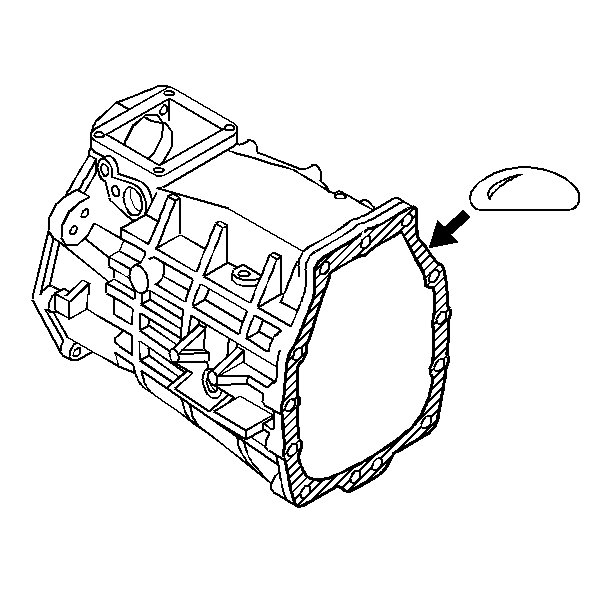
Note: Lubricate all components as the assembly progresses. Use
J 36850 transjel® lubricant
or the equivalent.
- Apply sealant GM P/N 12345739 (Canadian P/N 10953472) or equivalent to the transmission case to adapter plate mating surface.
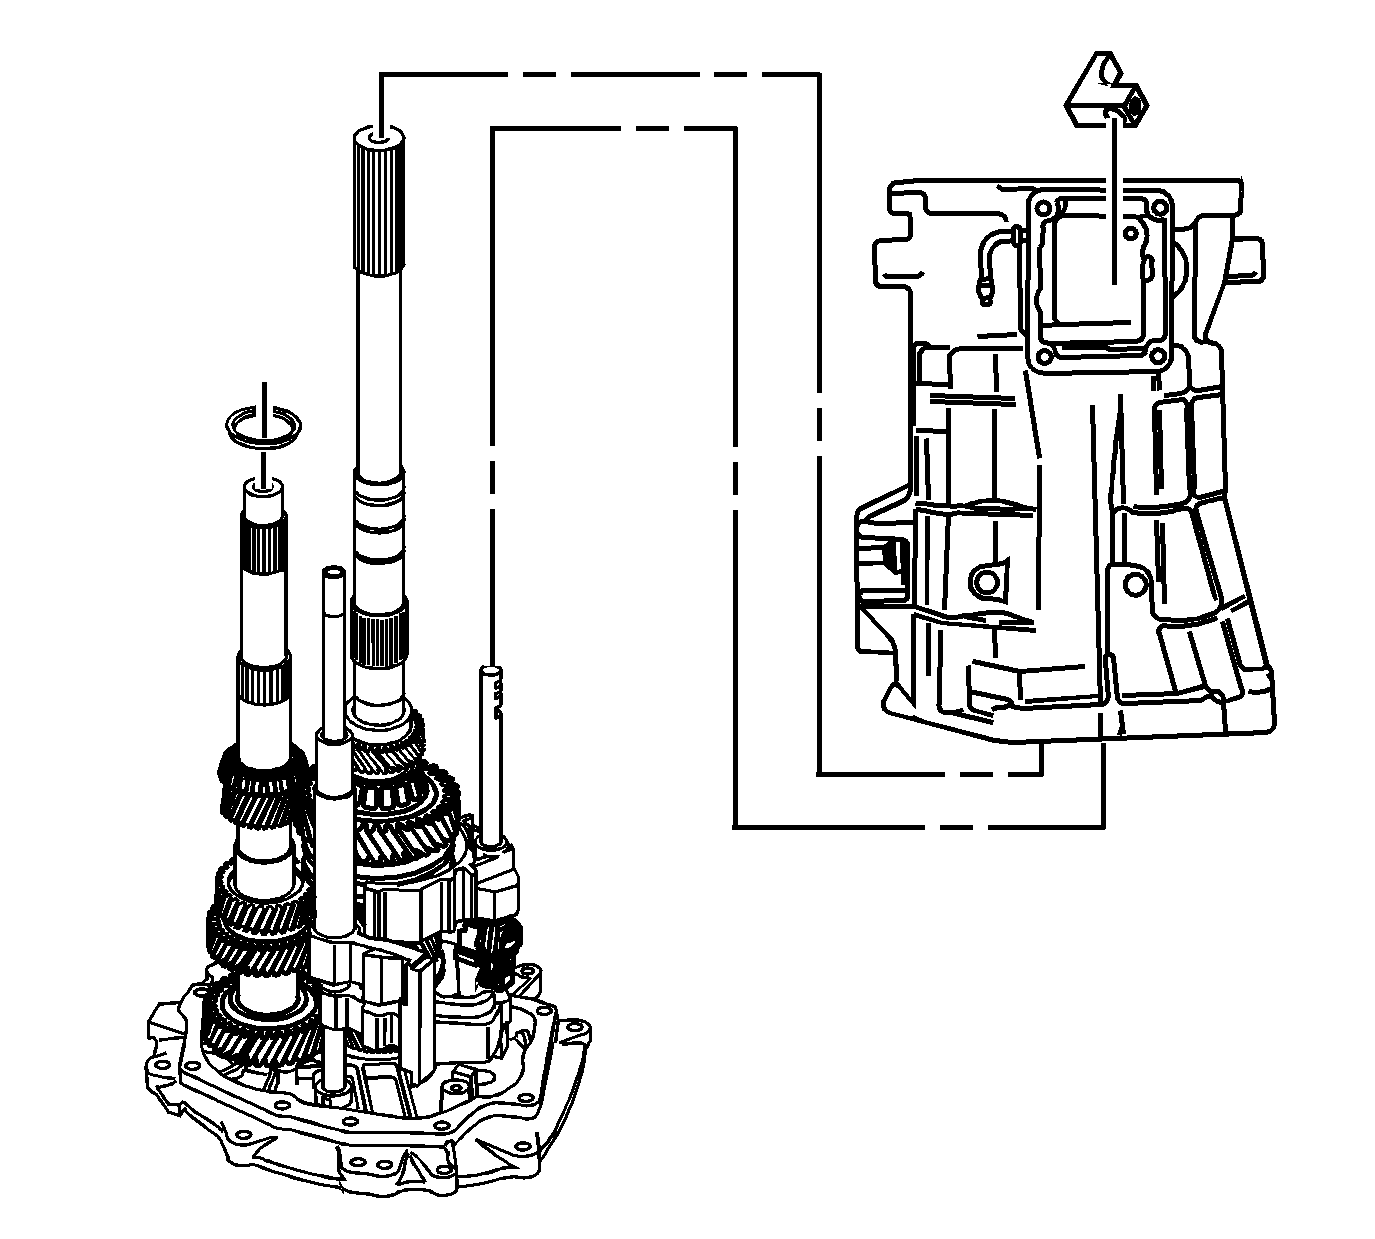
- Do the following in order to install the transmission case and the offset lever:
| 2.1. | Shift the transmission into NEUTRAL in order to keep the 3rd/4th shift shaft from engaging. |
| 2.2. | Install the offset lever. |
| 2.3. | Slide the transmission case onto the gear clusters and the shift rail components. |
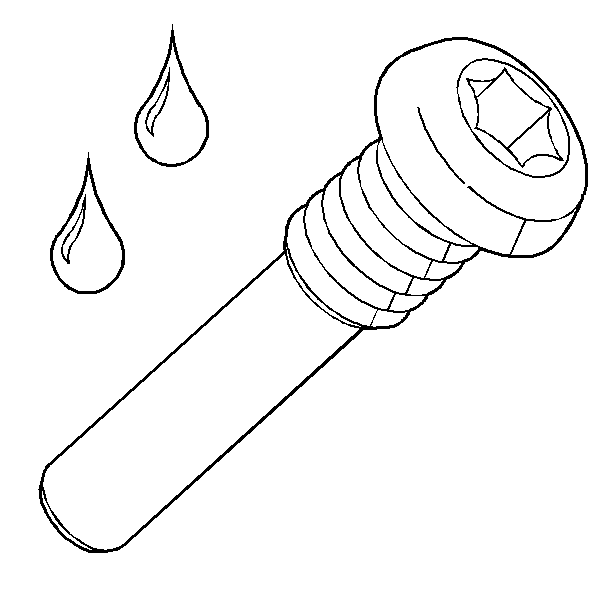
- Apply threadlock GM P/N 12346004 (Canadian P/N 10953480) or equivalent to the threads of the shift lever guide bolts.
Caution: Refer to Fastener Caution in the Preface section.
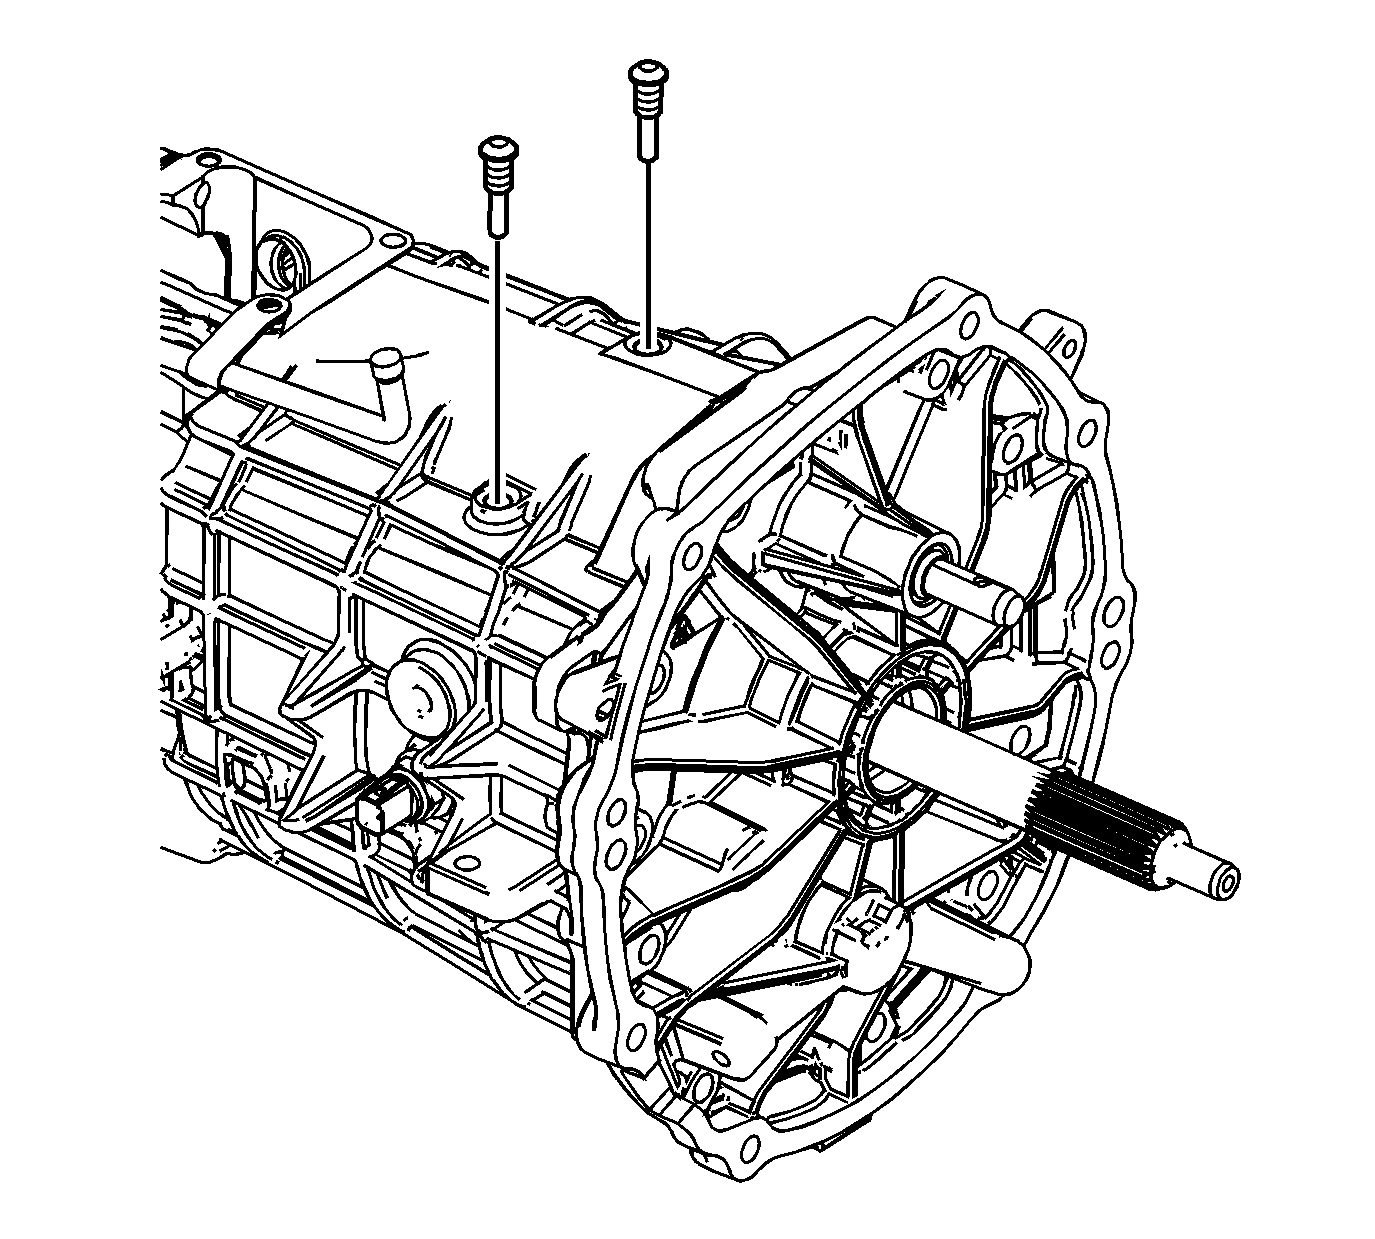
- Install the shift lever guide bolts and pull up on 5th/6th and reverse shift rail assembly. This will help align the slot of the shift interlock plate with the guide bolt hole and tighten the bolts to
27 N·m (20 Ib ft).
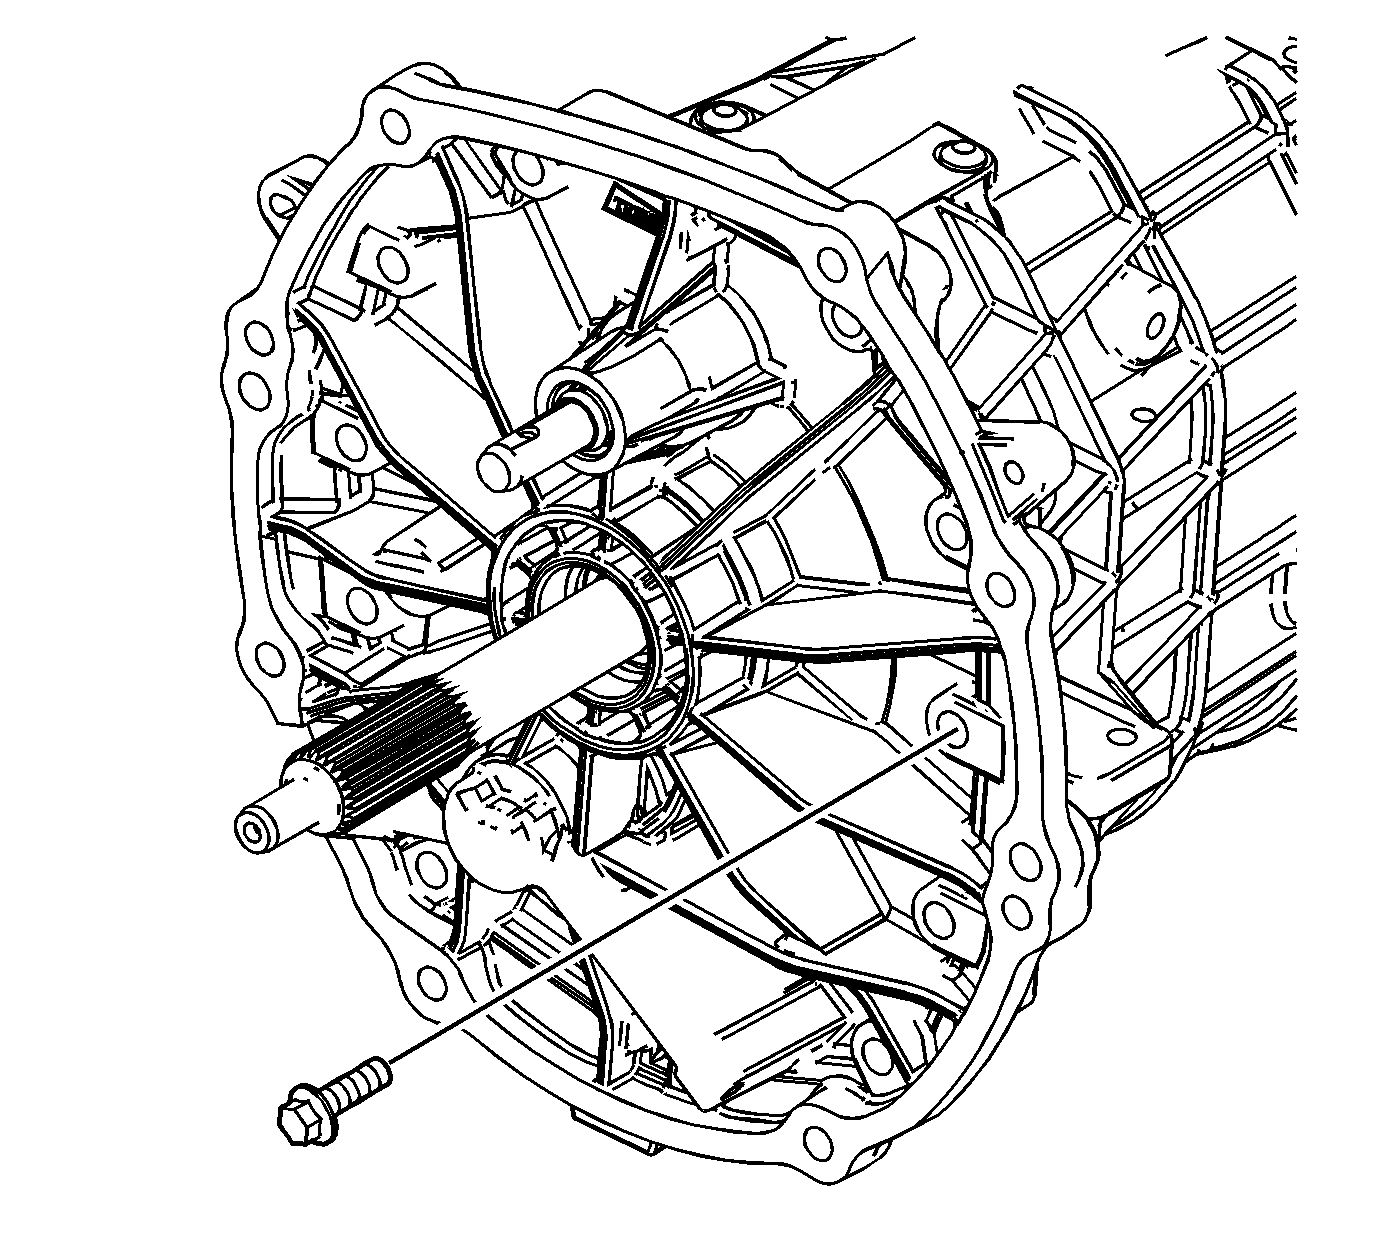
- Install the adapter plate to transmission case bolts and tighten to
48 N·m (36 Ib ft).
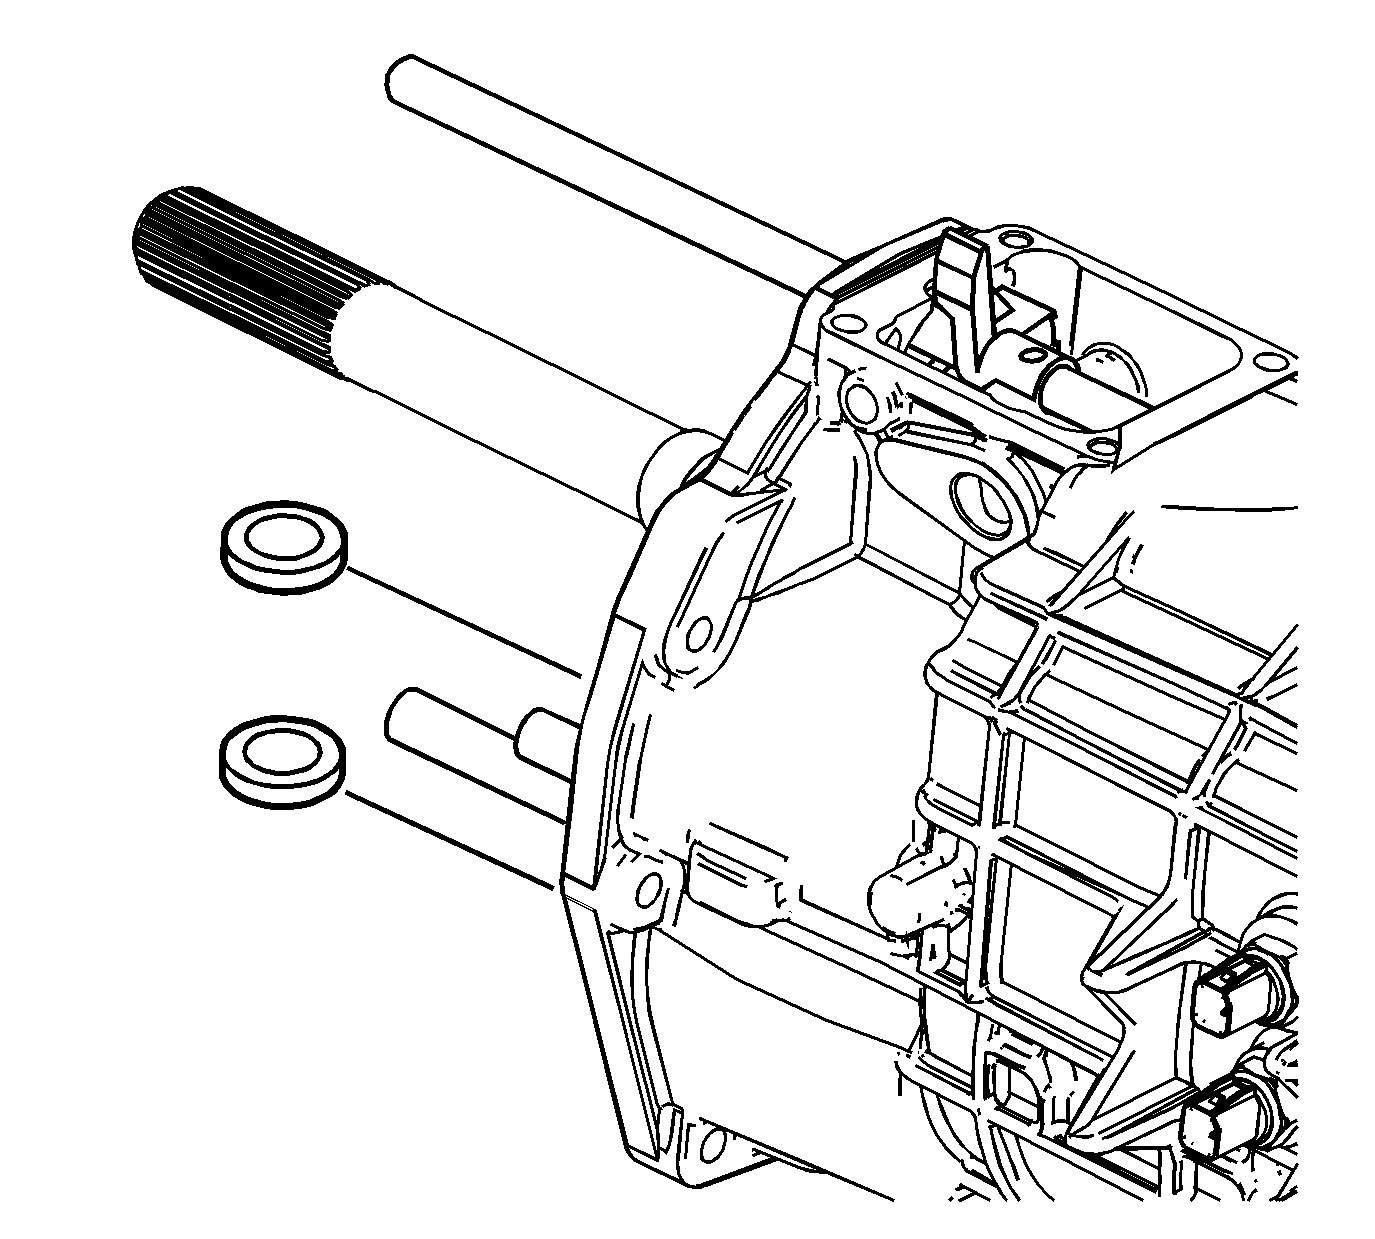
- Install the magnets into the transmission case.
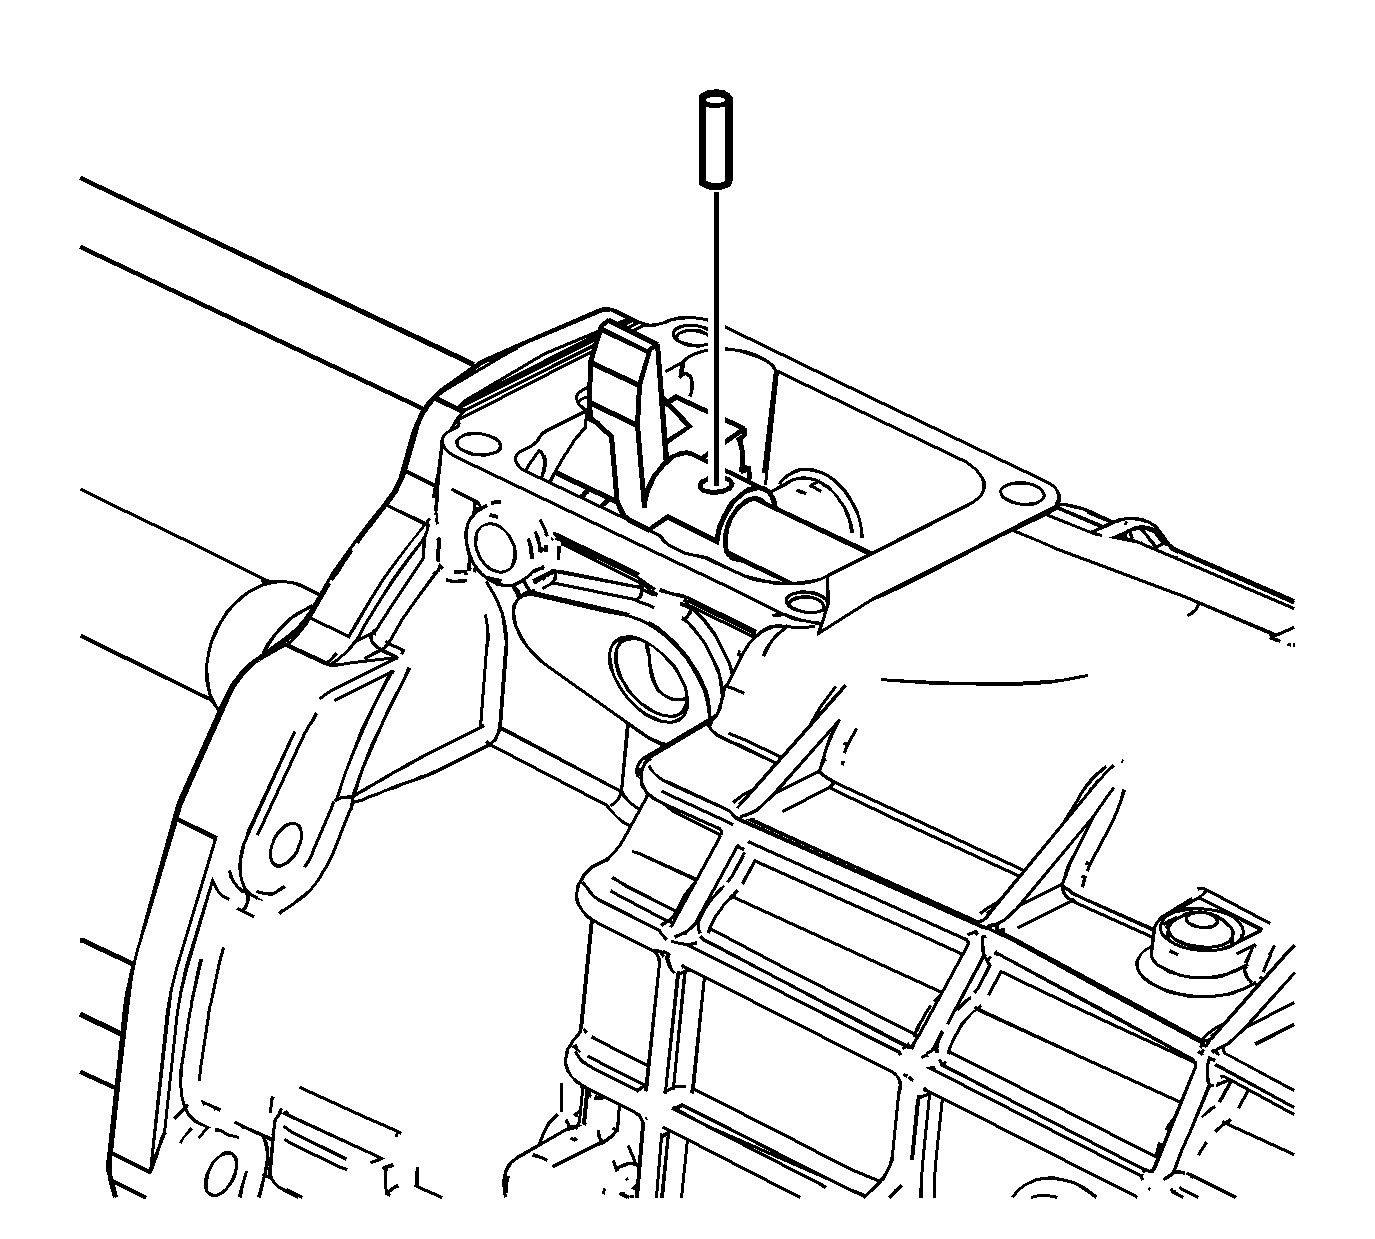
- Install the offset lever roll pin.
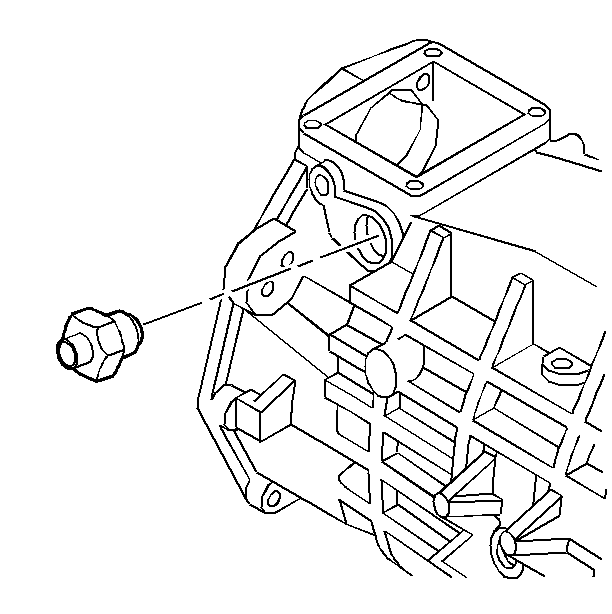
- Install the shift detent assembly and tighten to
40 N·m (30 Ib ft).
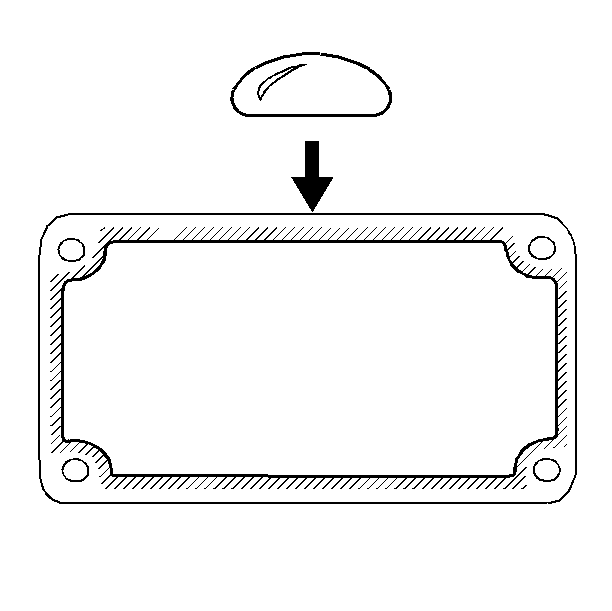
- Apply sealant GM P/N 12345739 (Canadian P/N 10953472) or the equivalent to the mating surface of the cover plate.
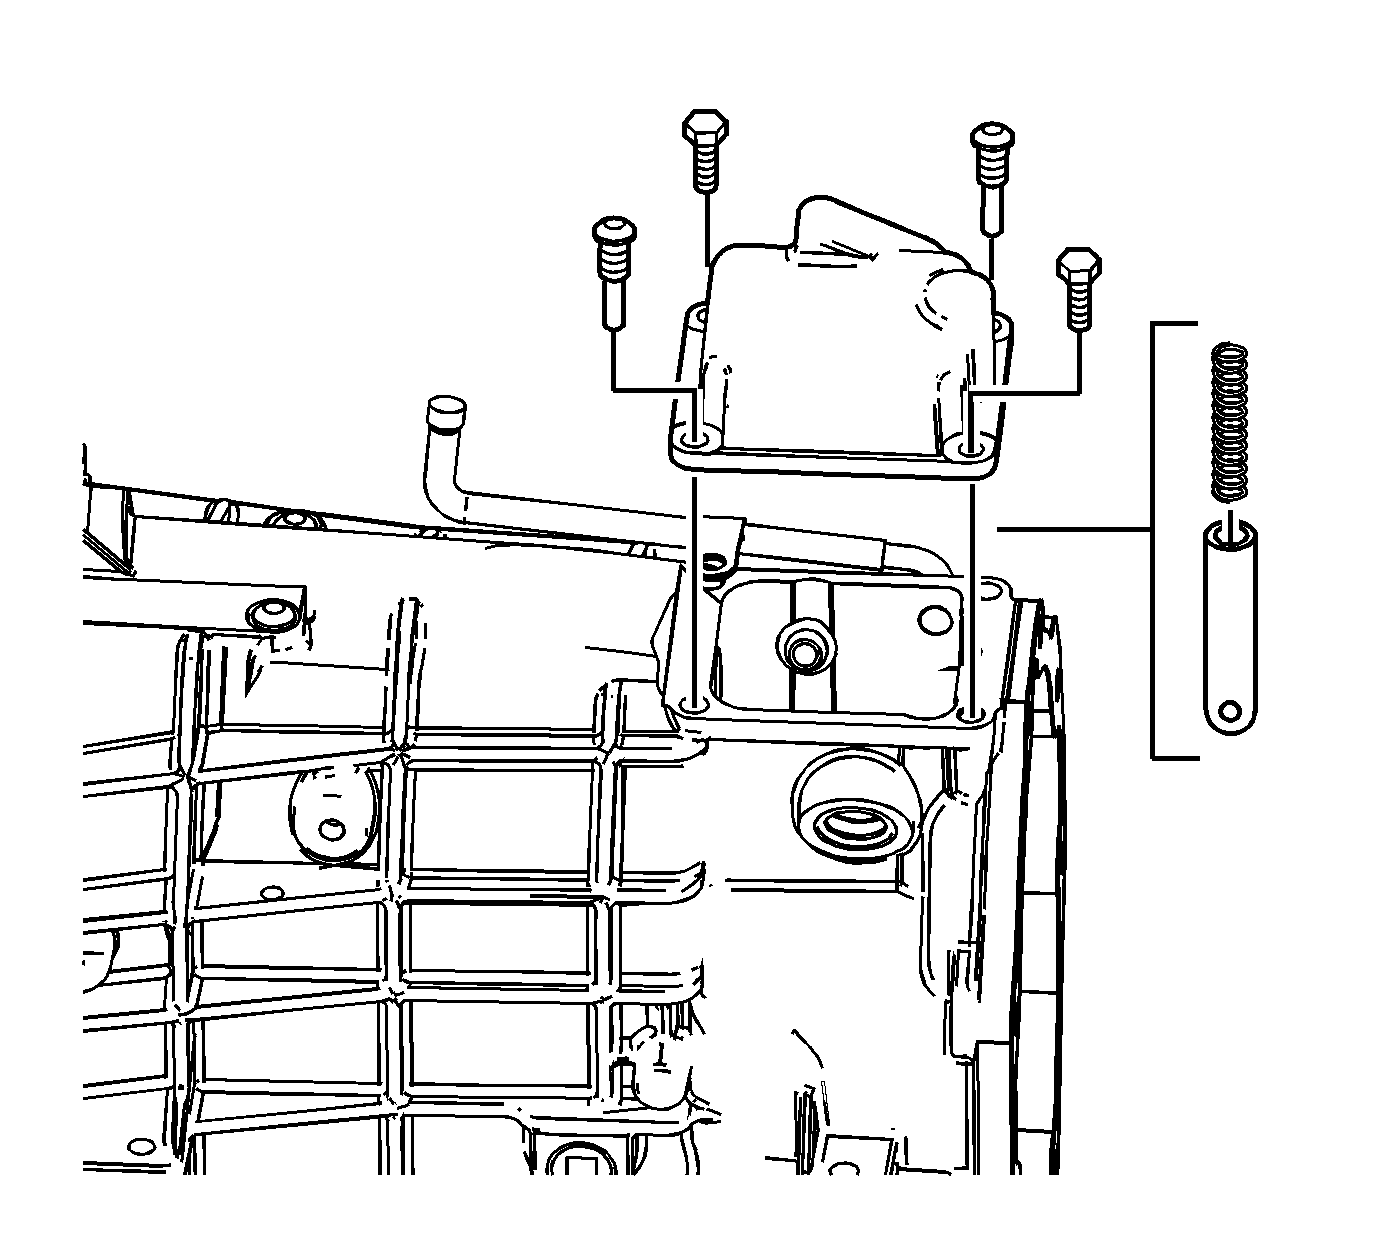
- Install the spring and roller detent.
- Install the transmission case cover and the case cover bolts and tighten to
20 N·m (15 Ib ft).
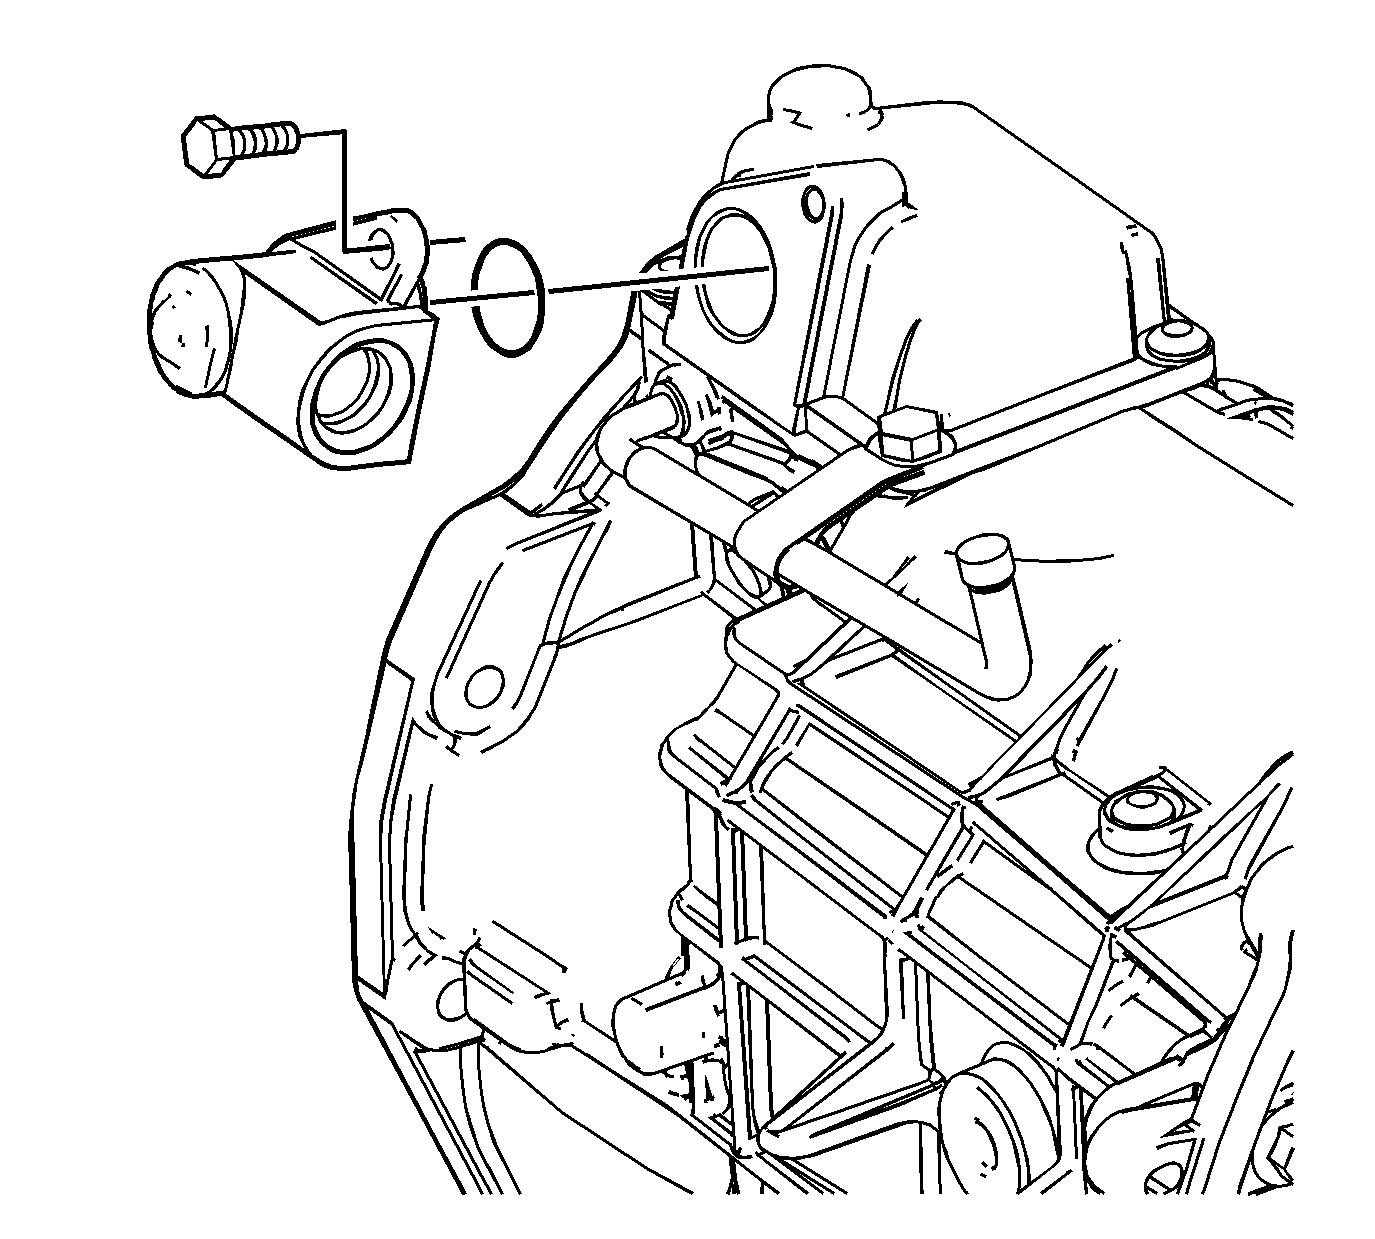
- Install a new O-ring seal on the reverse lockout body.
- Install the reverse lockout body and bolt in the cover plate and tighten the bolts to
18 N·m (13 Ib ft).
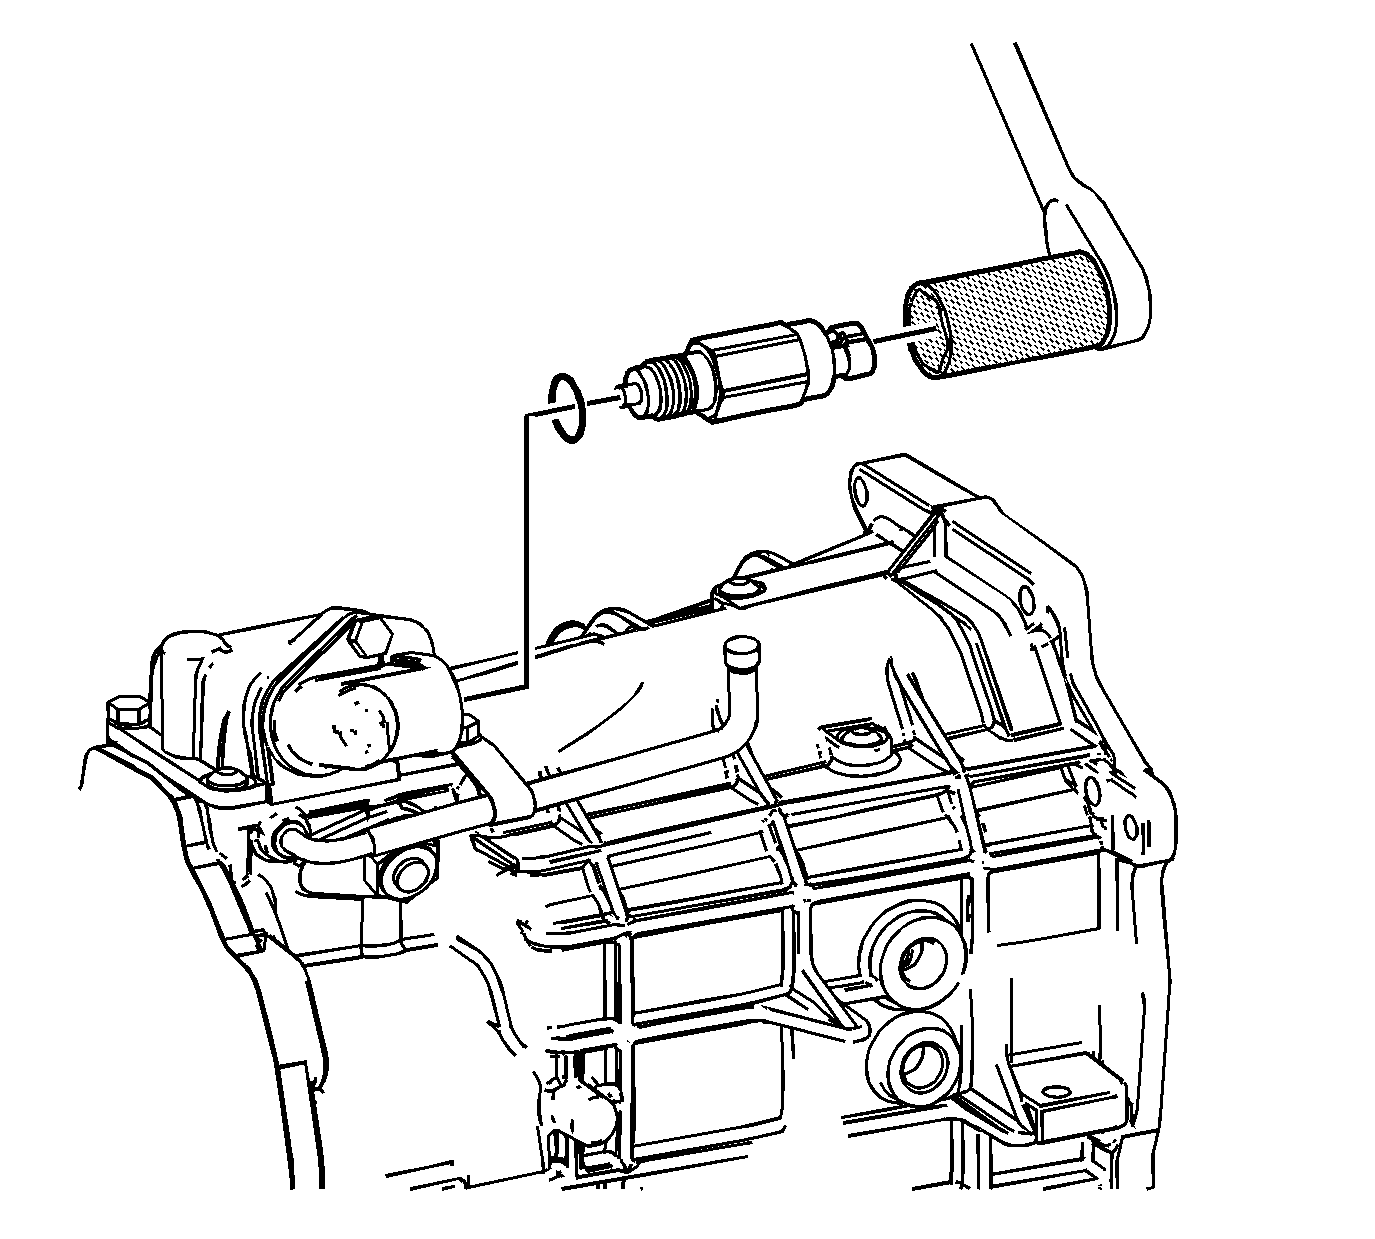
- Install a new O-ring seal on the reverse lockout solenoid.
- Install the reverse lockout solenoid to reverse lockout body assembly, using
DT 48827 shift socket
and tighten the solenoid to
40 N·m (30 Ib ft).
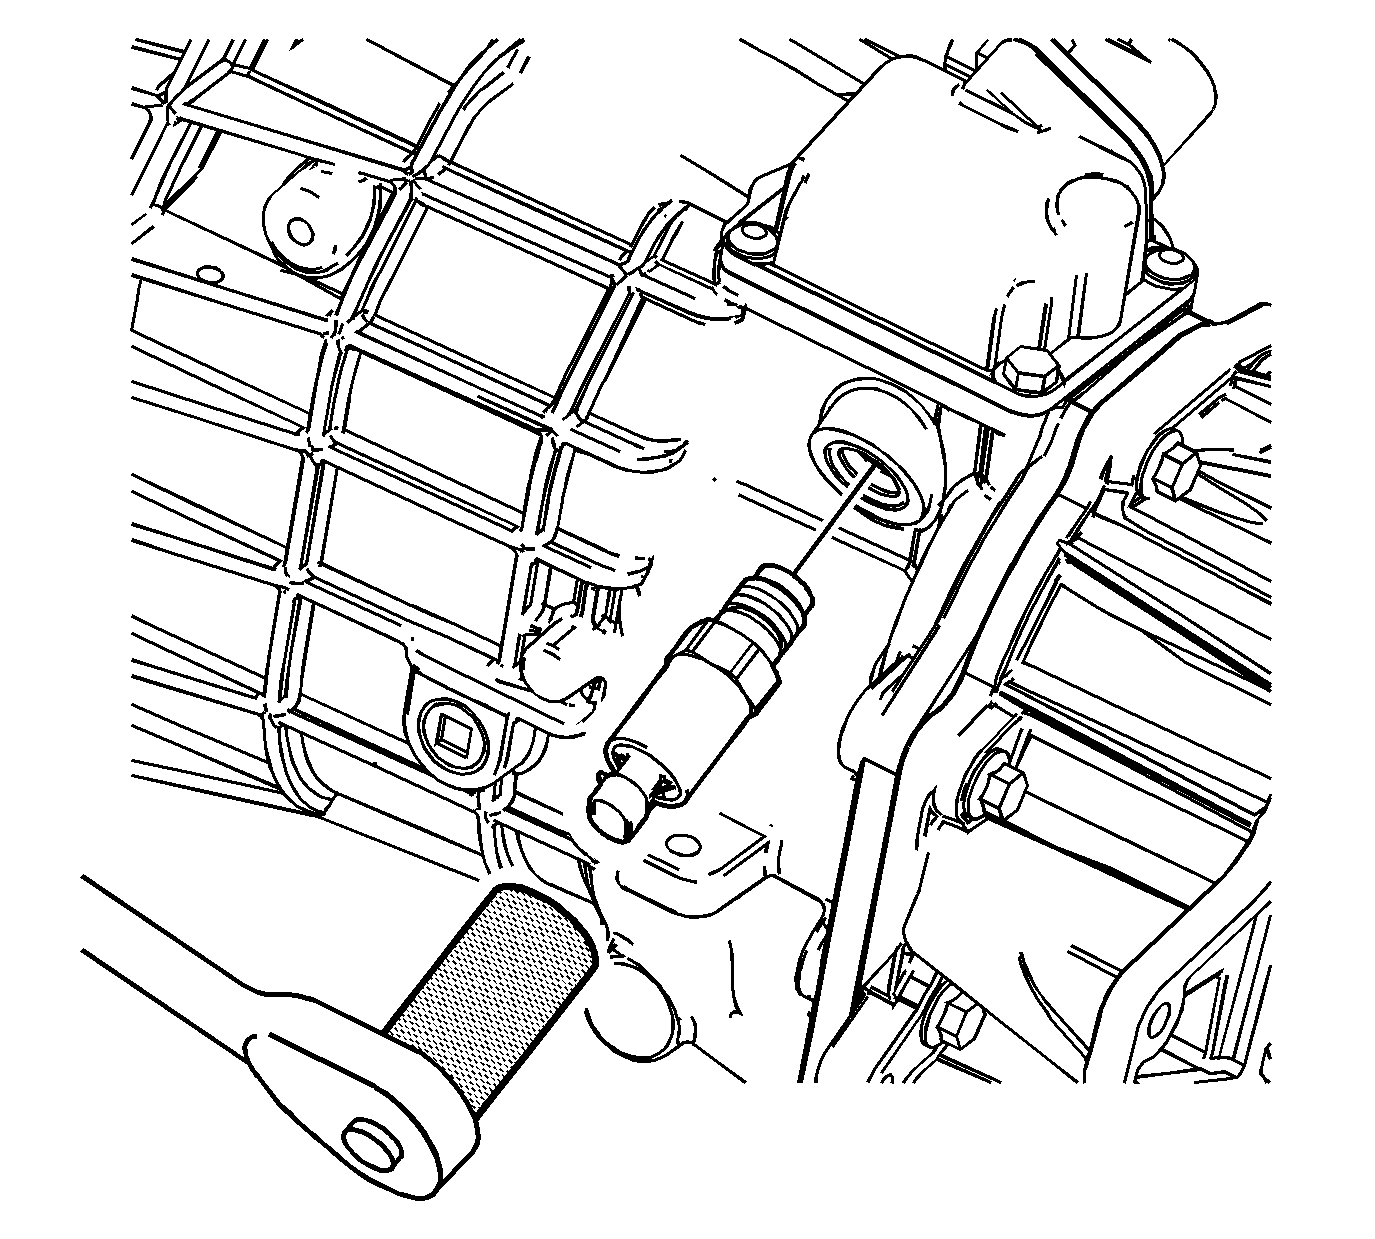
- Install the computer aided gear select solenoid, using
DT 48827 shift socket
and tighten the solenoid to
40 N·m (30 Ib ft).
Countershaft Gear Installation
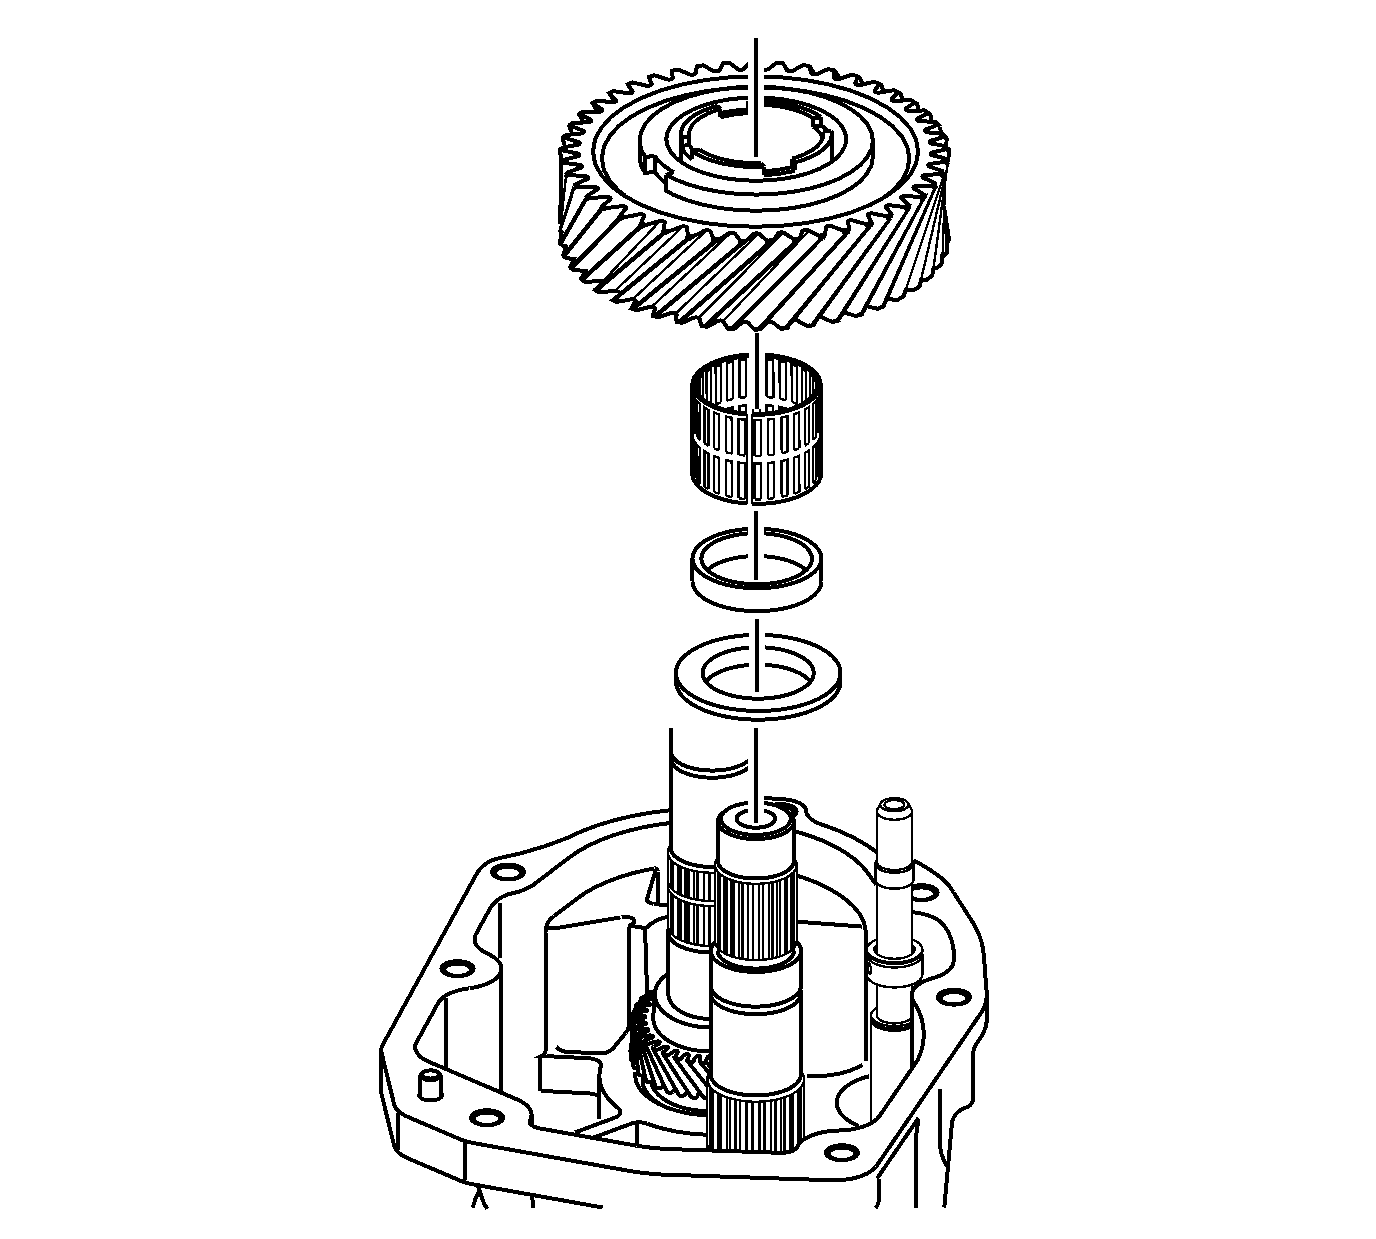
- Install the spacer, caged needle bearing, and the 6th driven gear.
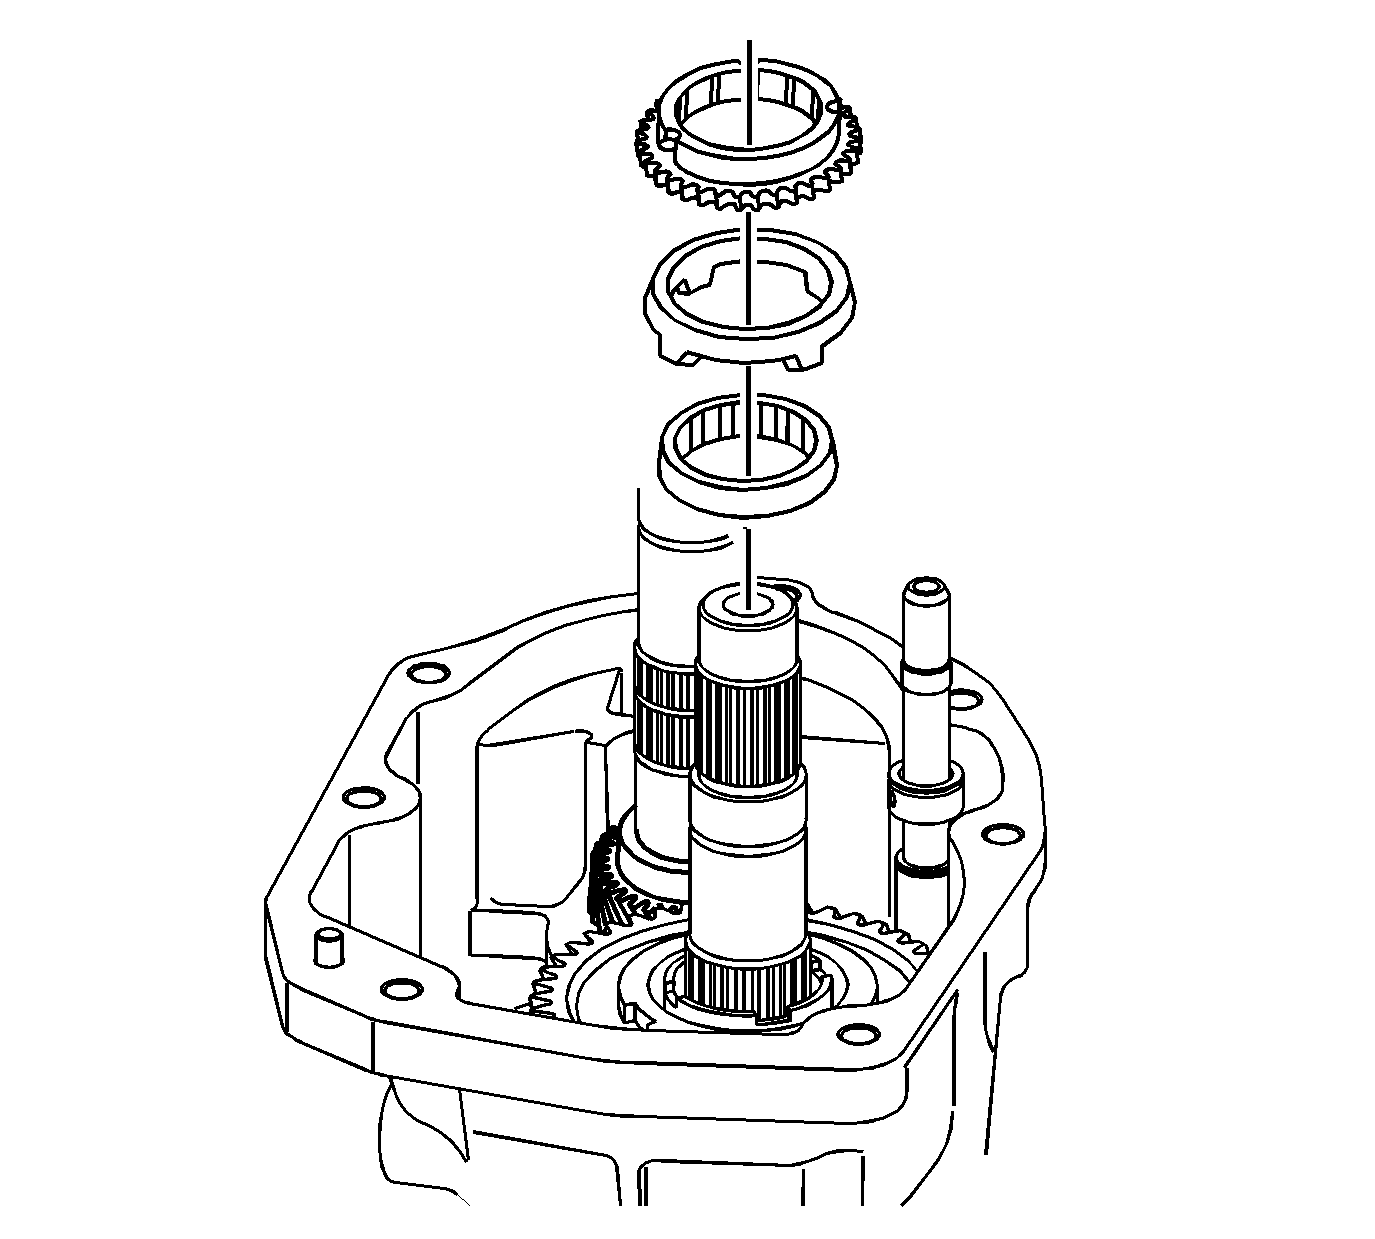
- Install the speed drive gear synchronizer blocking ring, the speed drive gear friction cone, and the speed drive gear inner cone.
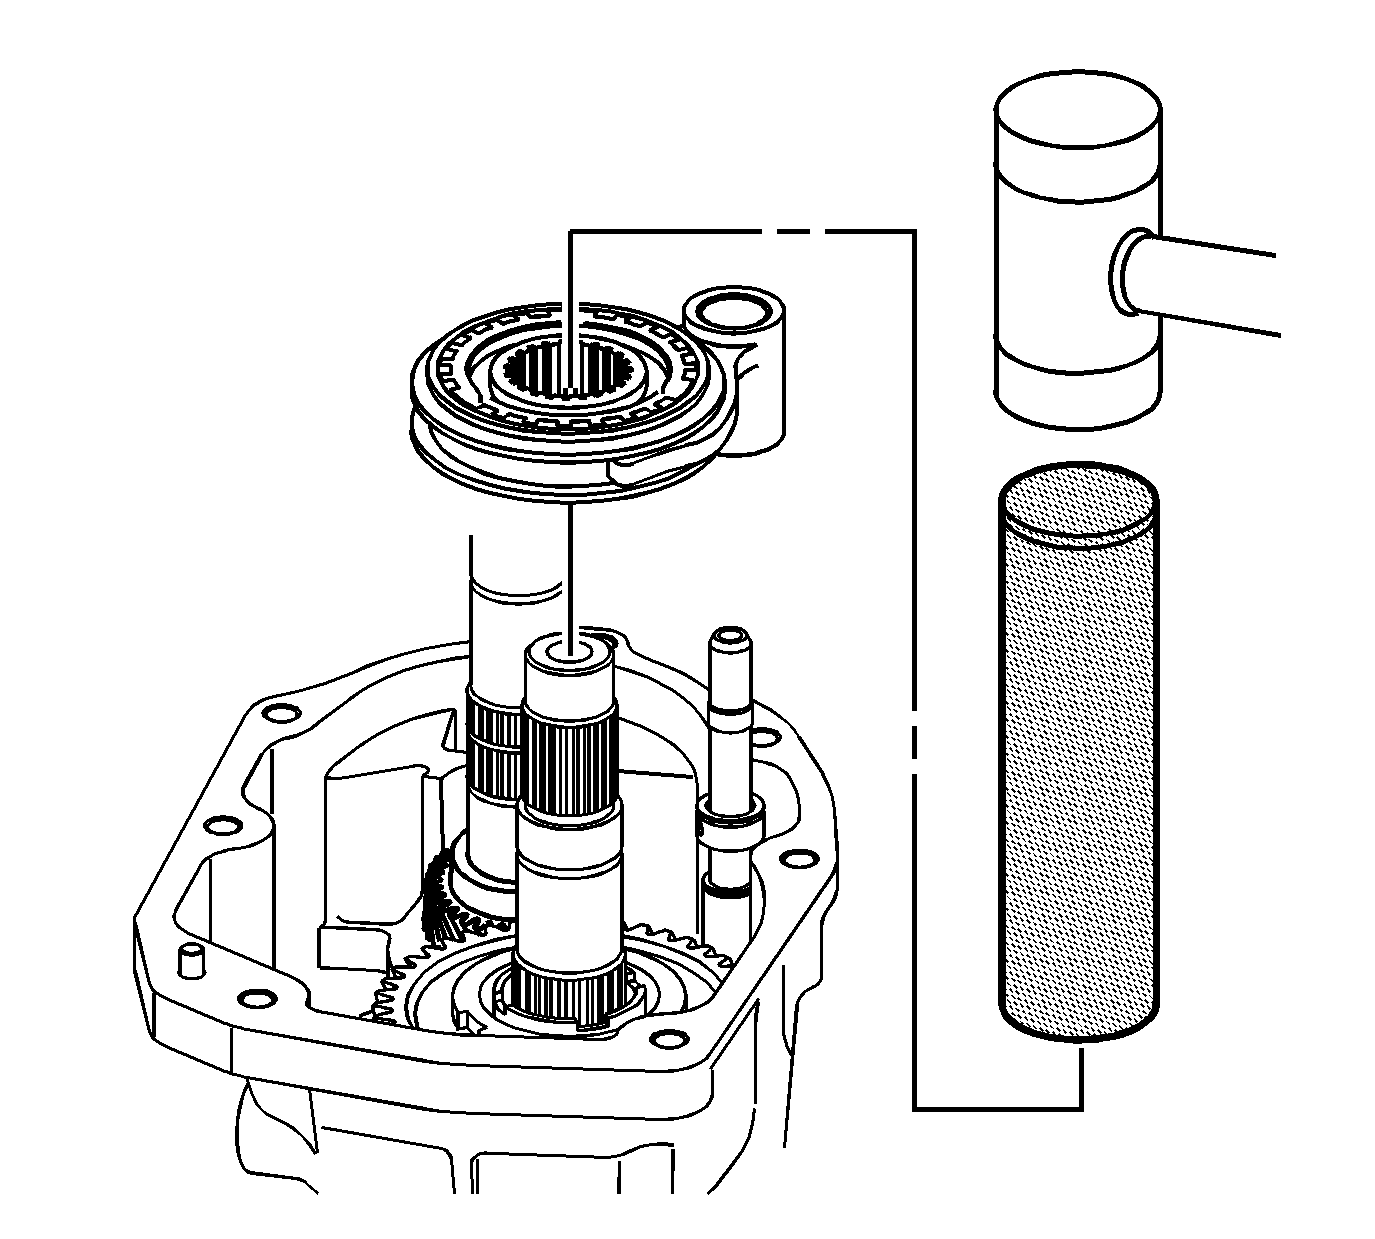
- Install the 5th/6th shift fork, synchronizer sleeve and synchronizer hub assembly using
J 5590 press tube
and a mallet.
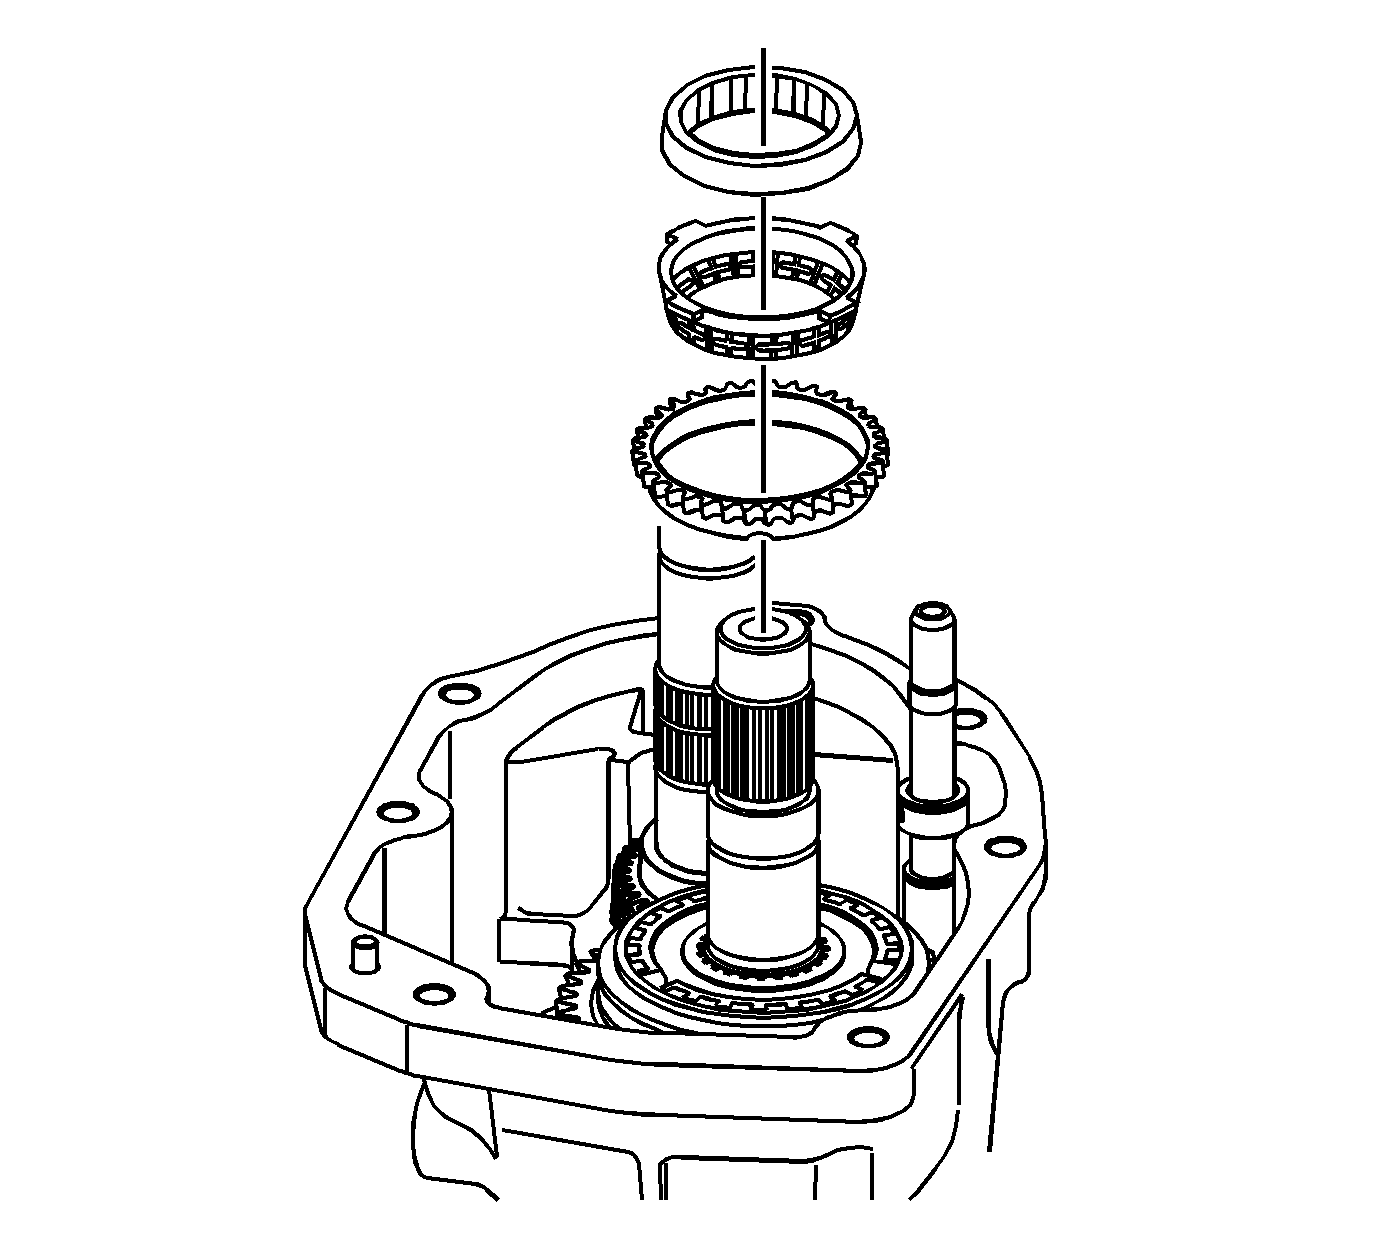
- Install the speed drive gear synchronizer blocking ring, the speed drive gear friction cone, and the speed drive gear inner cone.
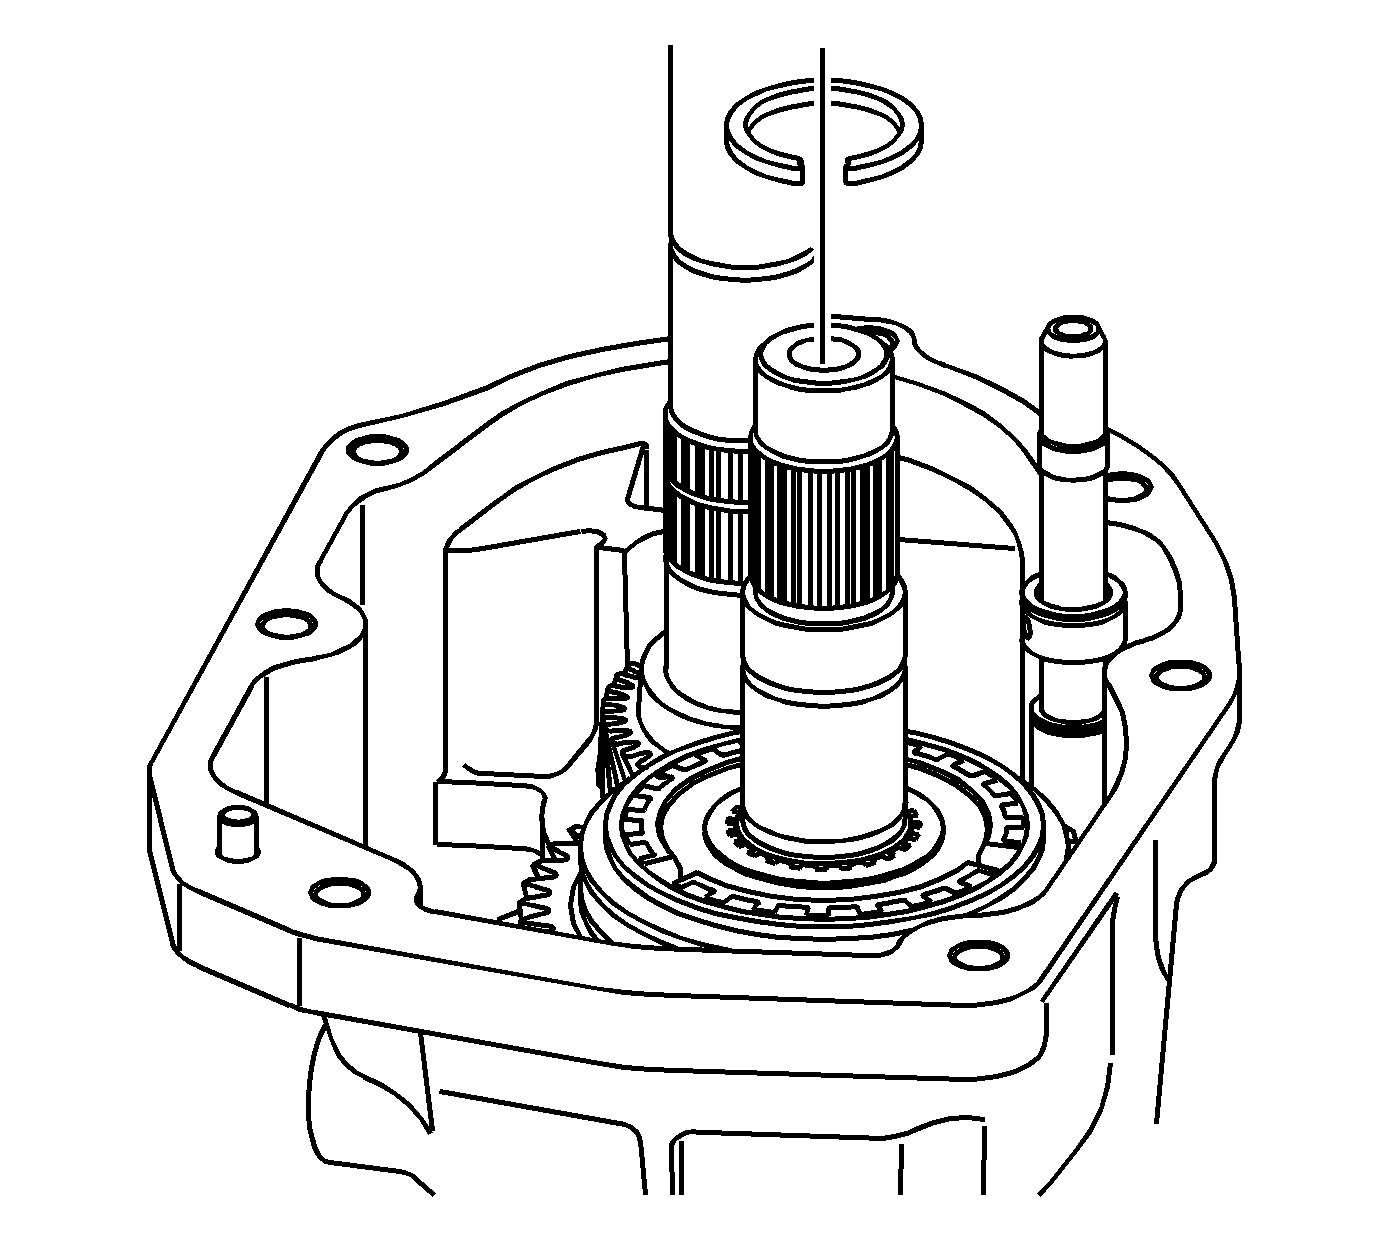
- Install the retainer clip from the countershaft.
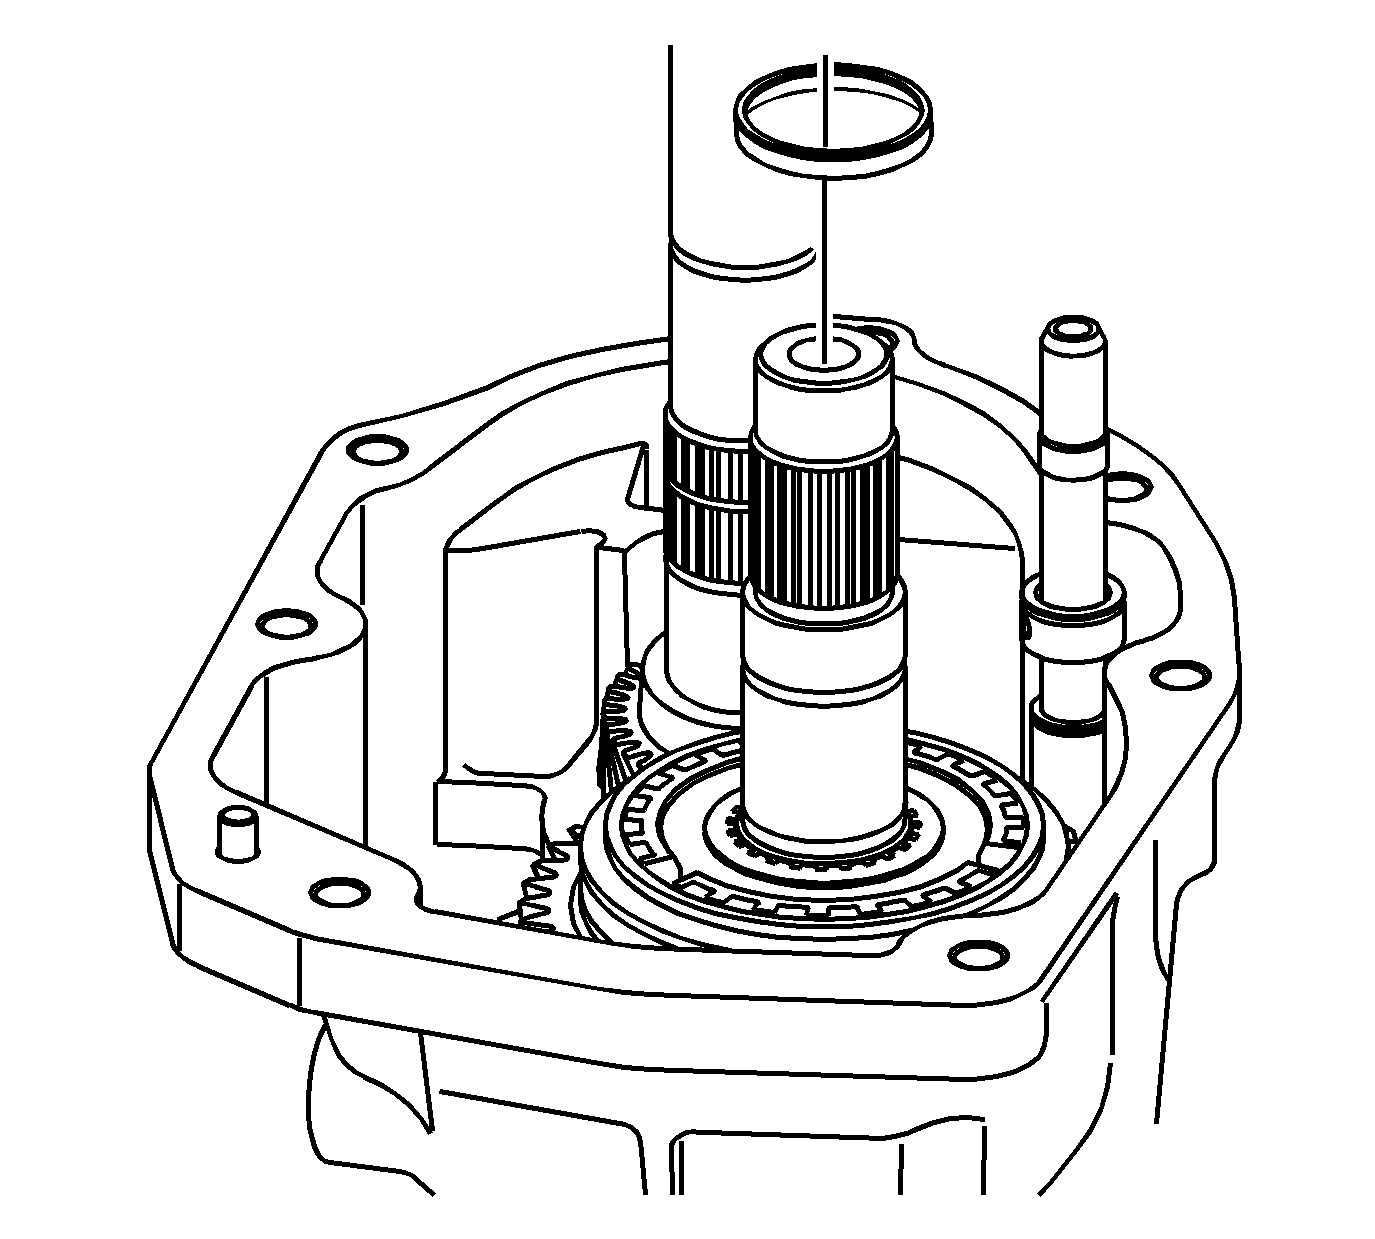
- Remove the spacer from the countershaft.
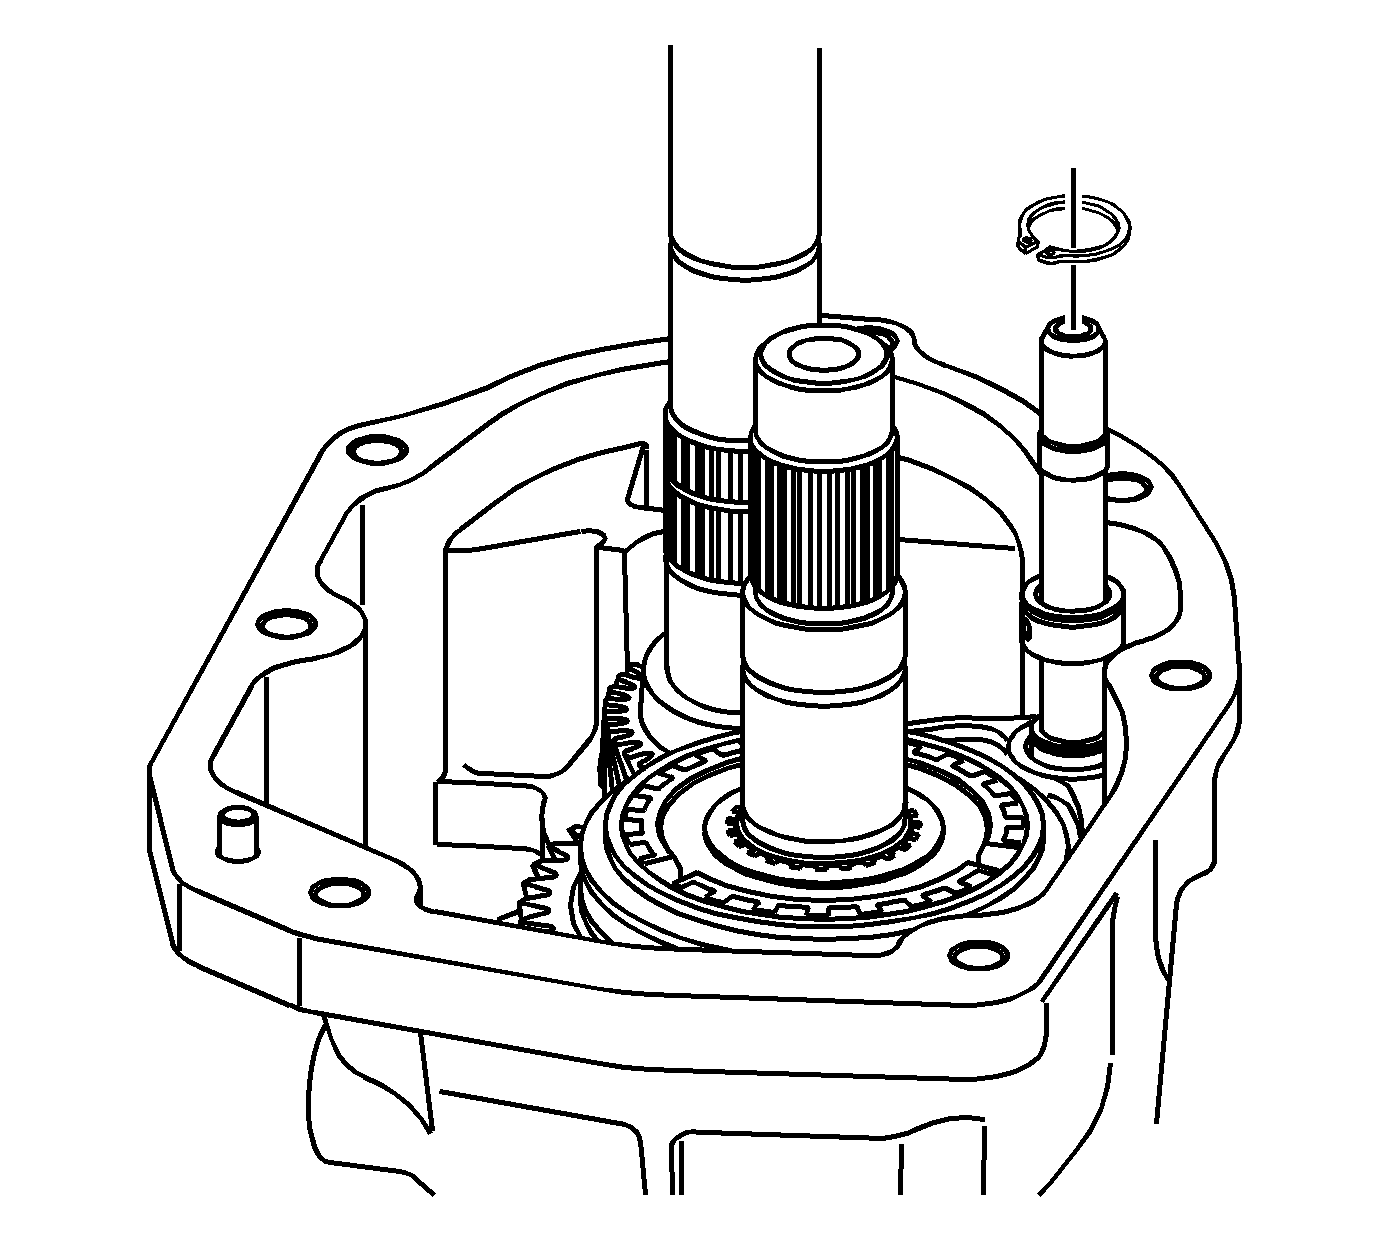
- Install the 5th/6th speed shift fork retainer ring.
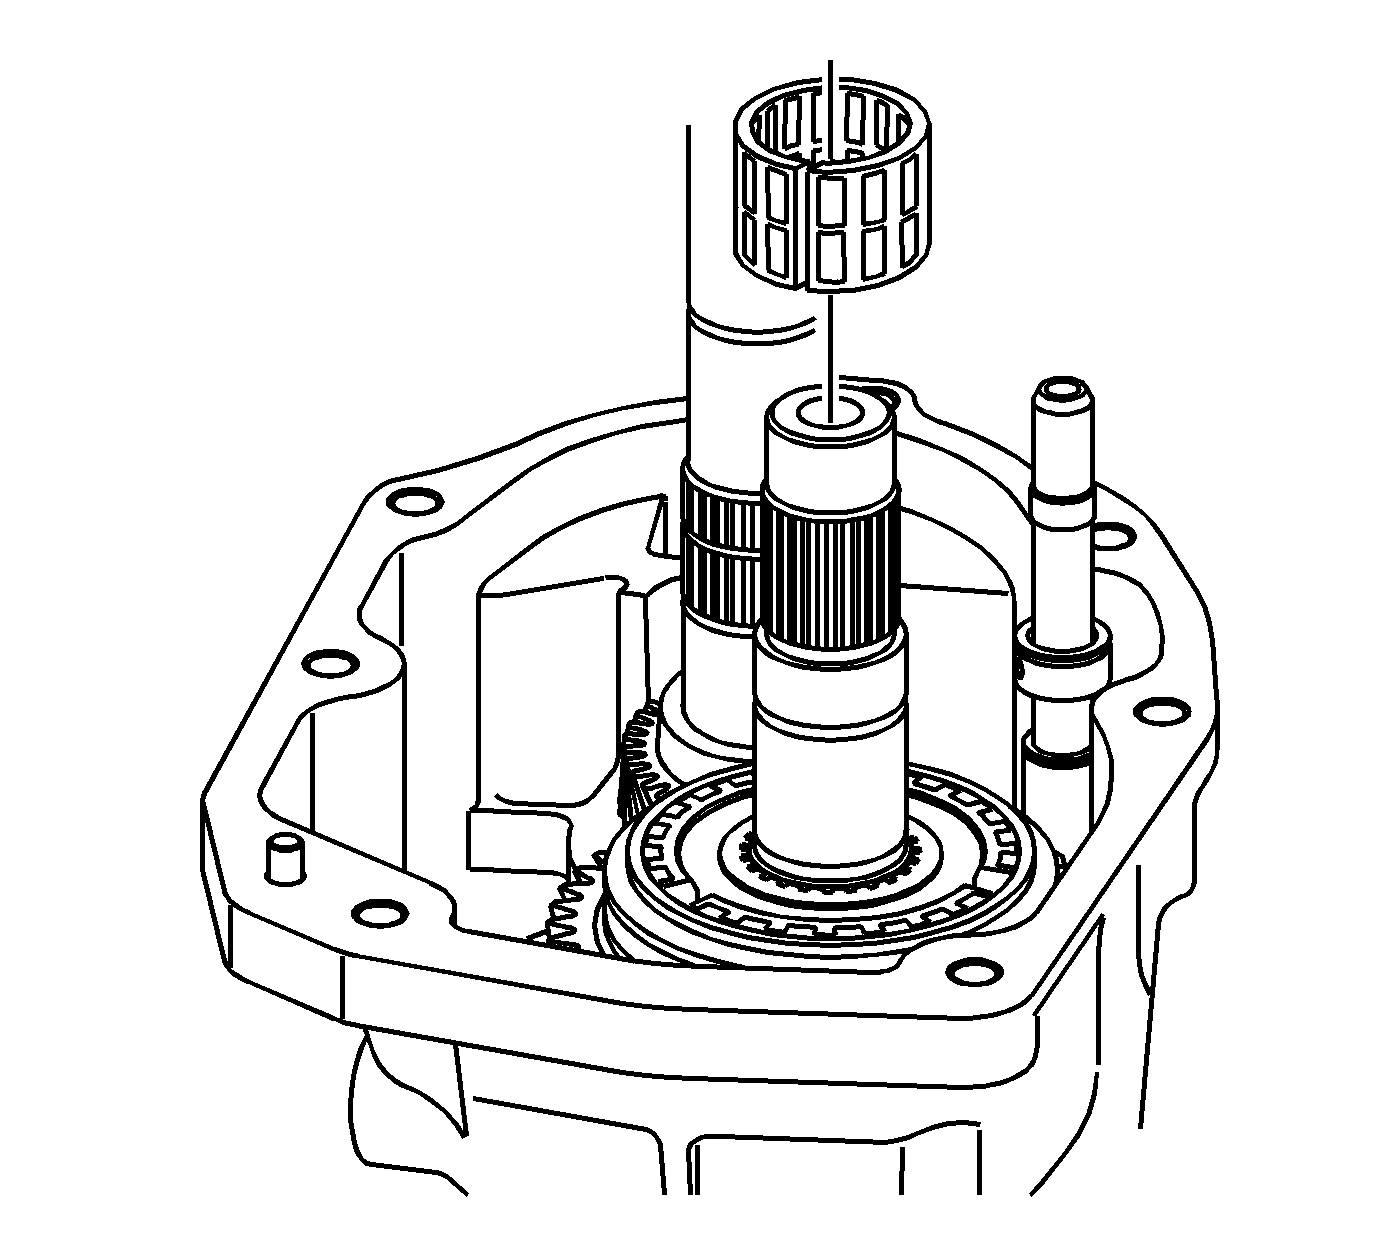
- Install the needle bearing from the countershaft.
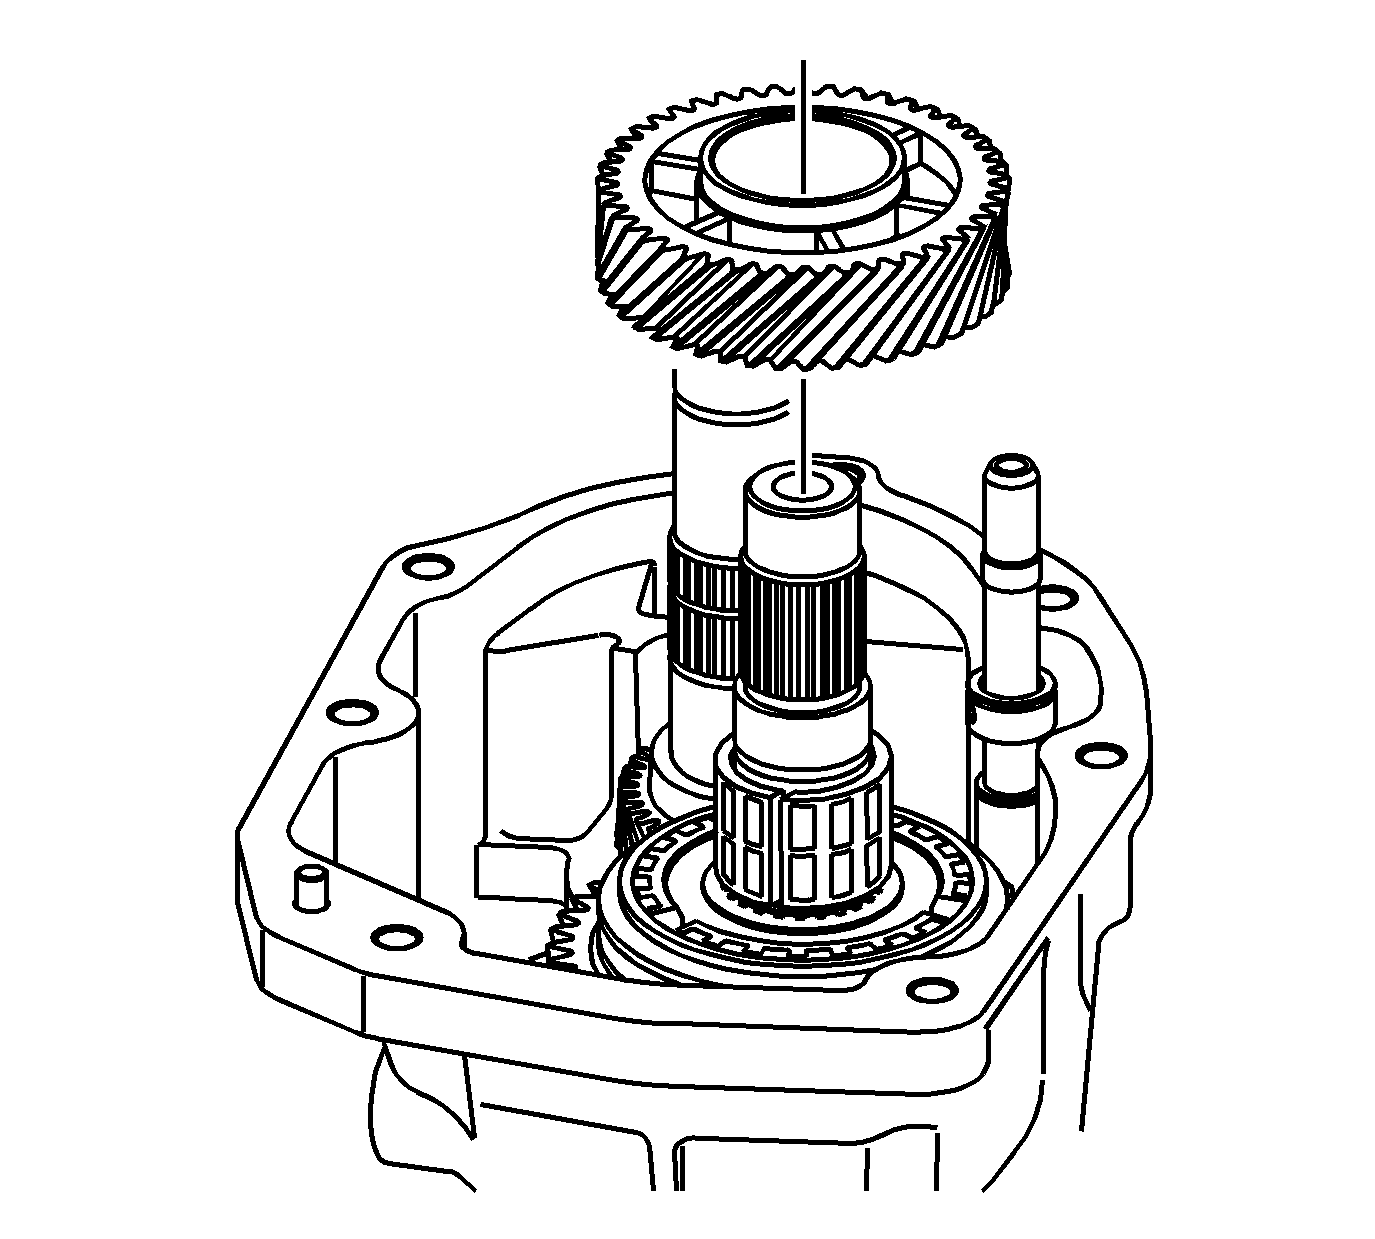
- Install the gear from the countershaft.
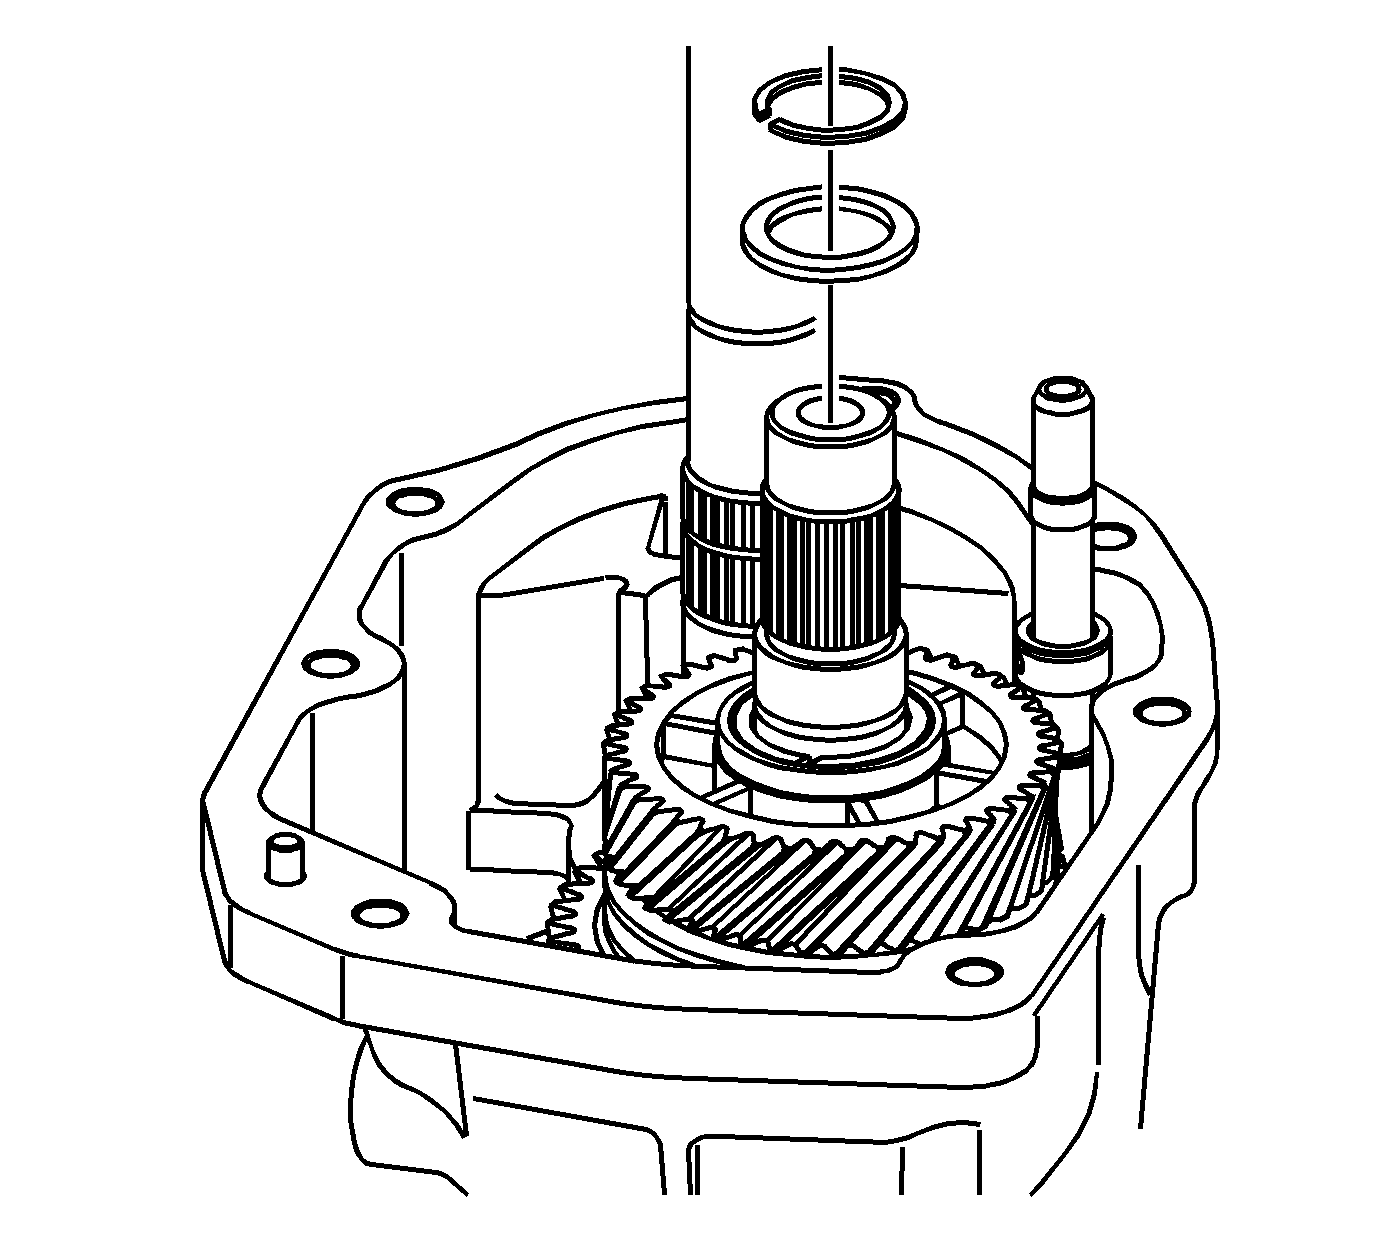
- Install the spacer and the countershaft retainer.
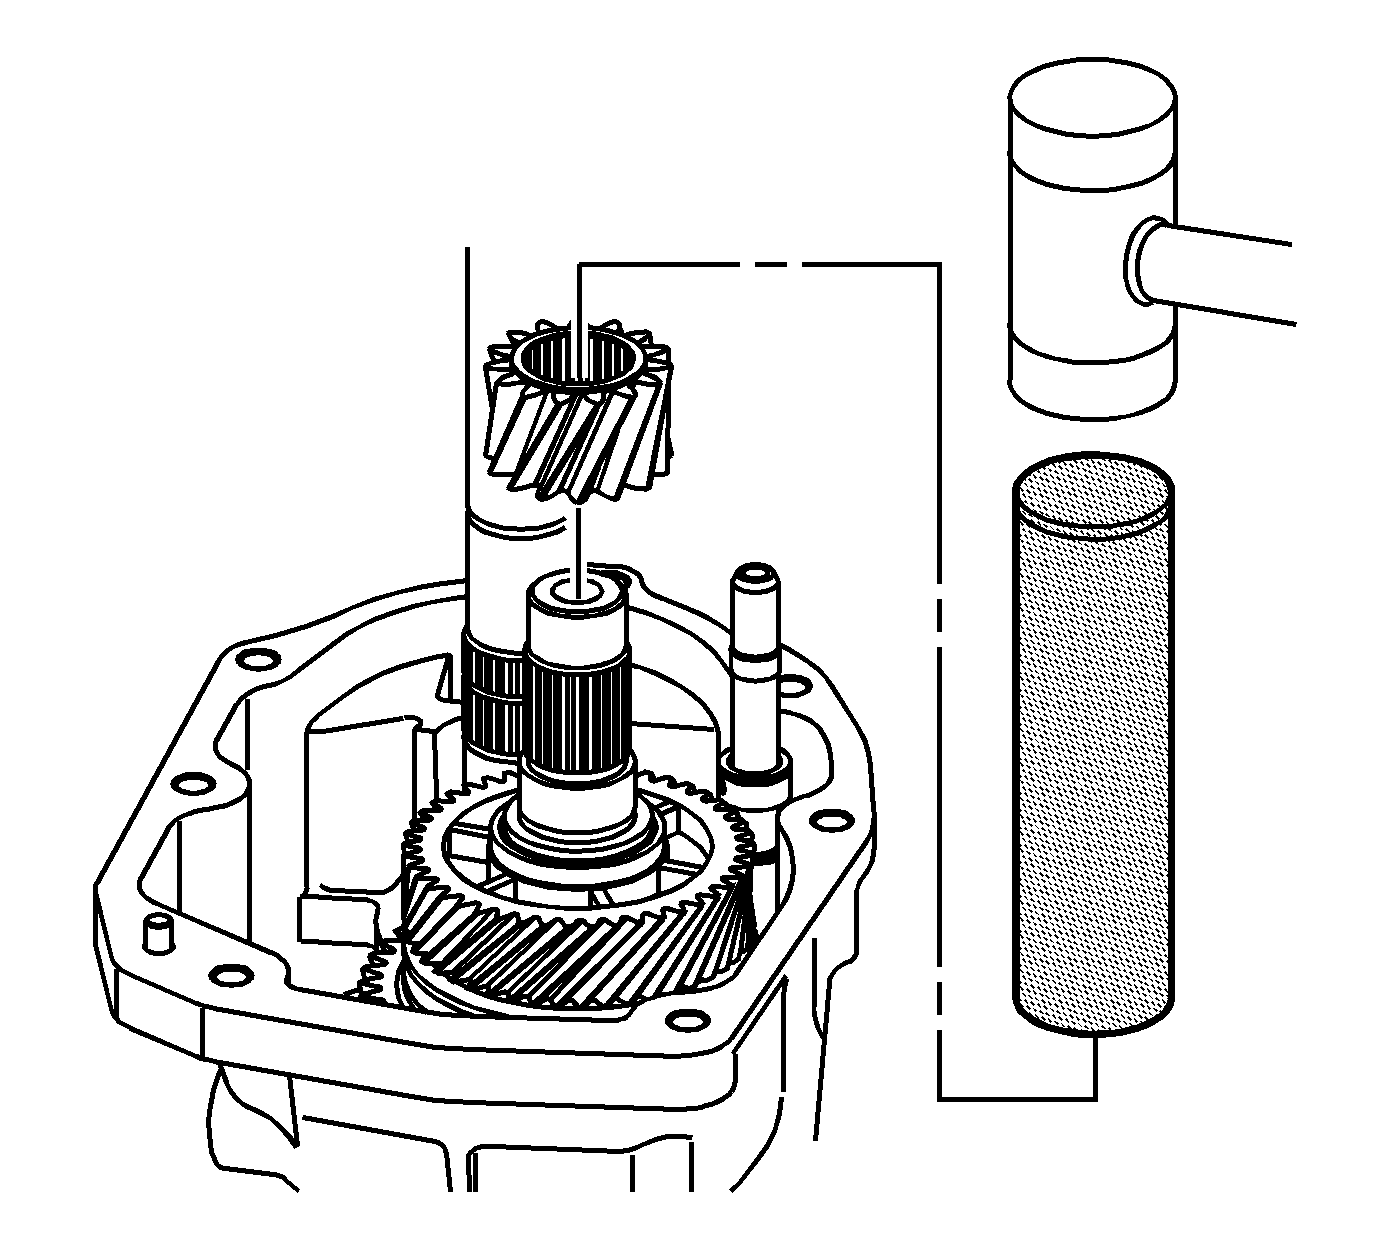
- Install the countershaft gear using
J 5590 press tube
and a mallet.
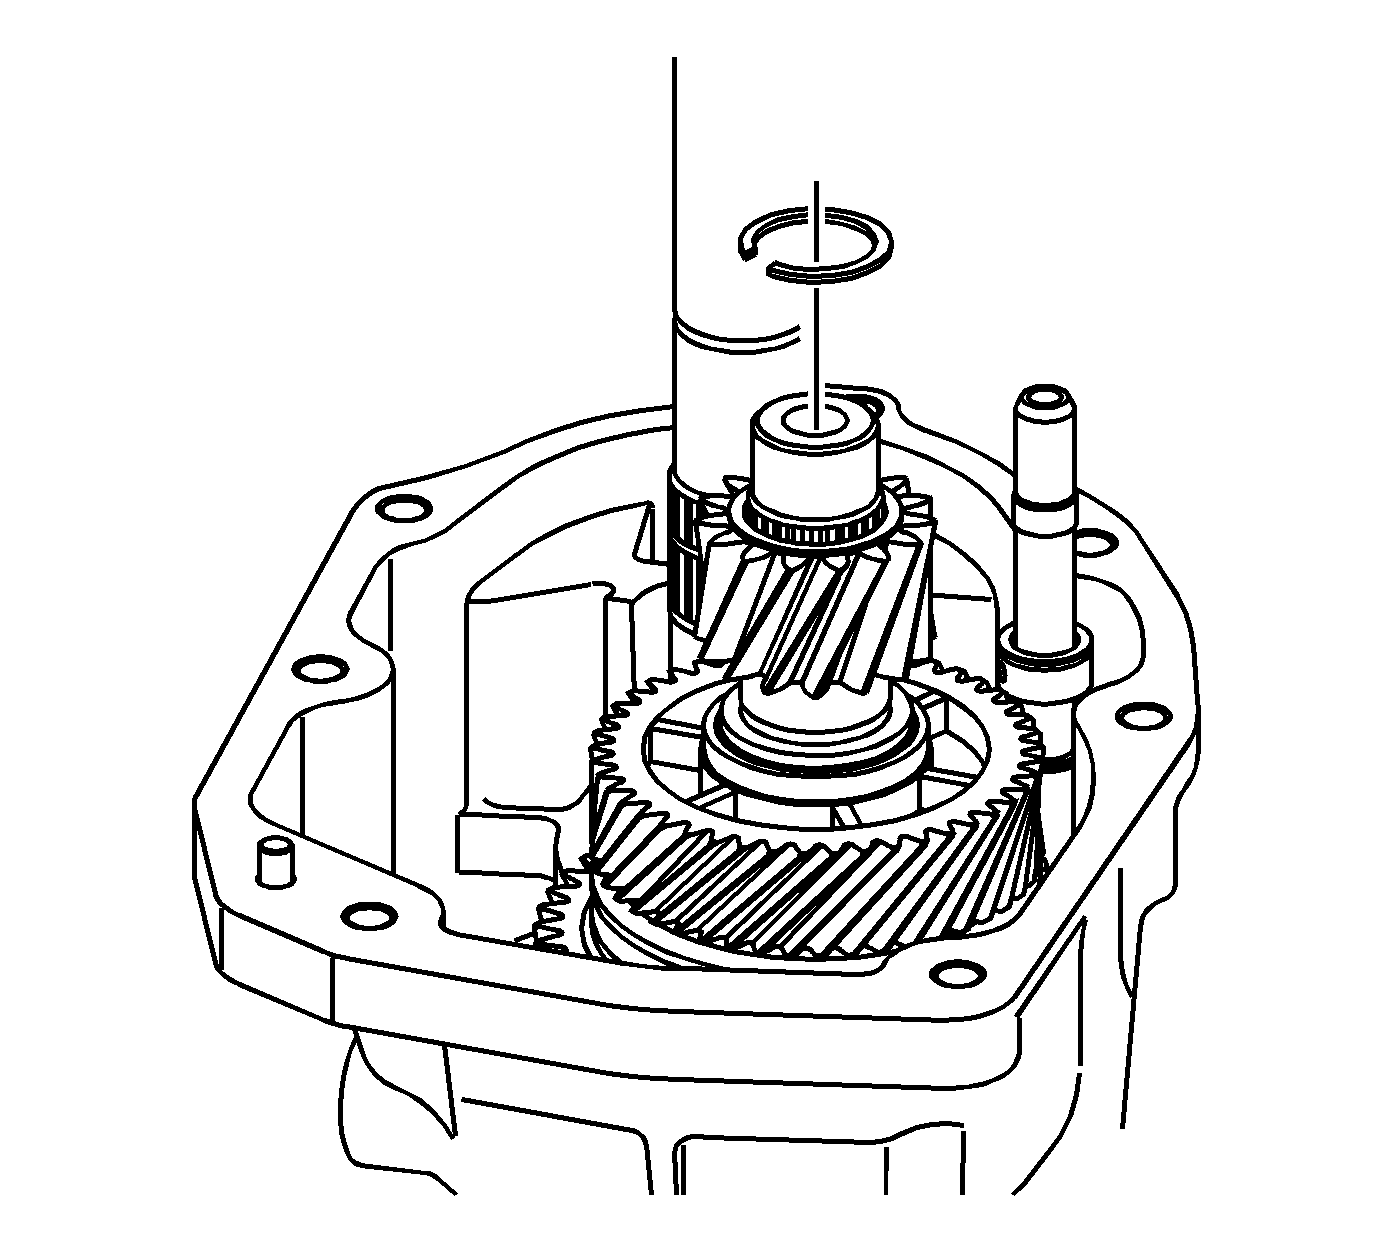
- Install the countershaft retainer clip.
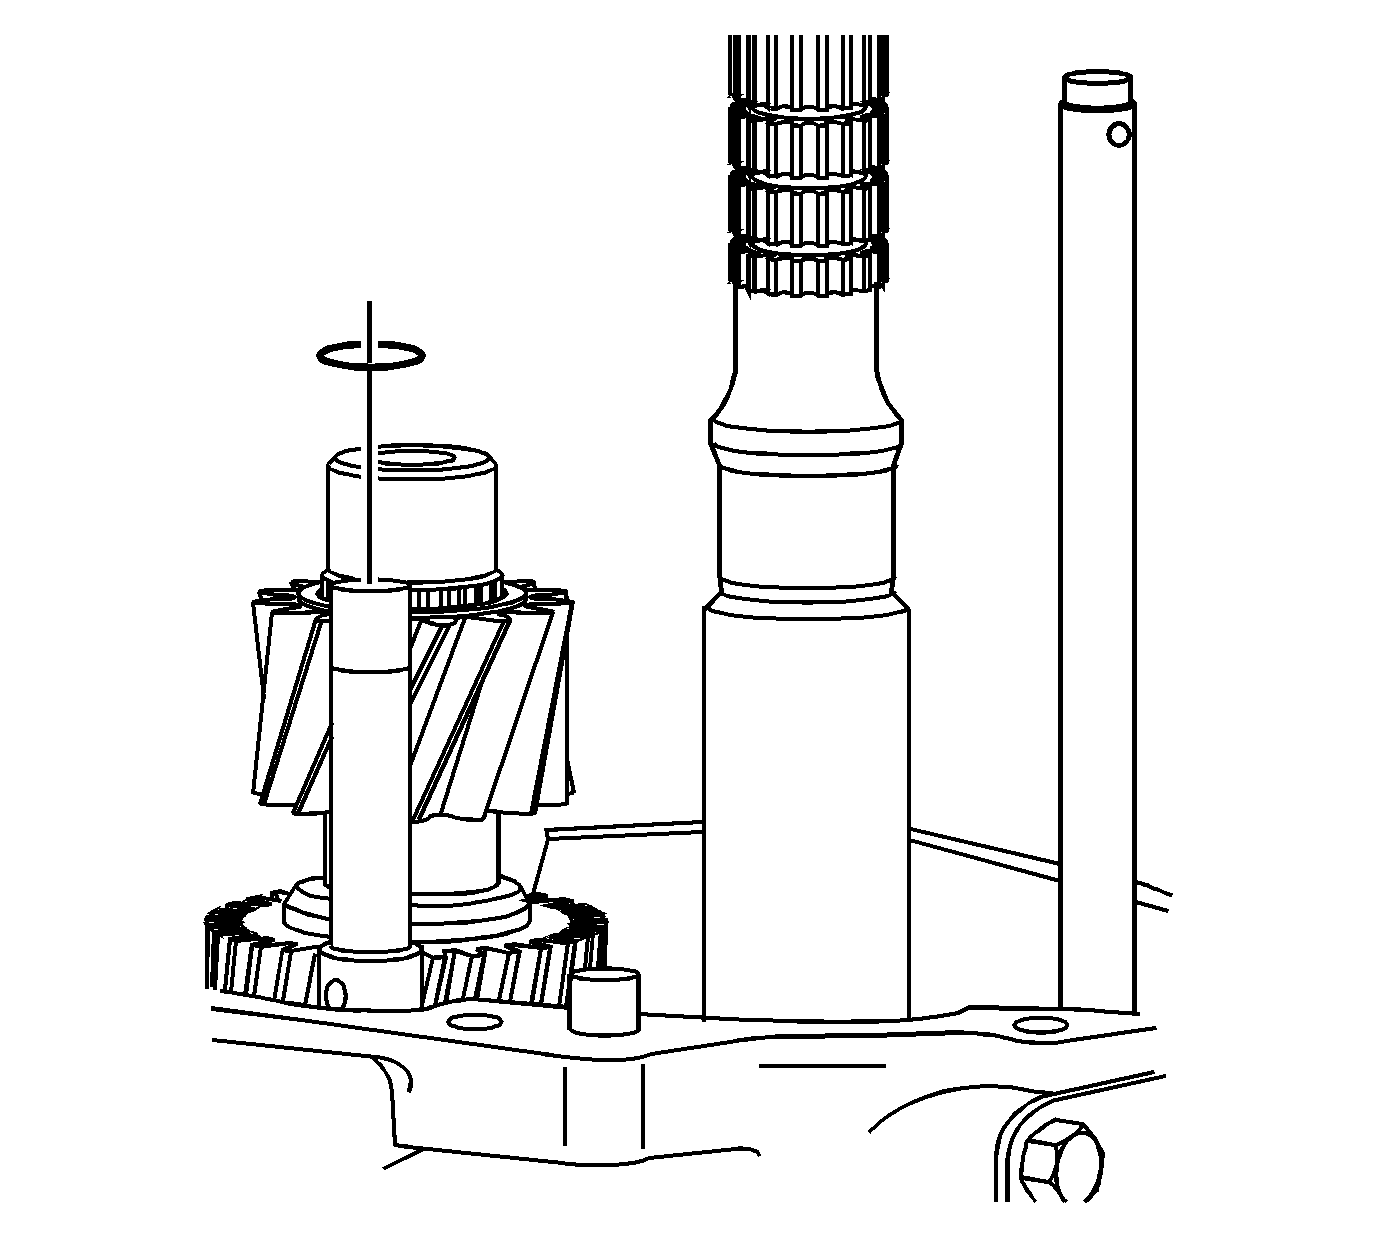
- Install the 5th/6th shift fork retainer ring.
5th/6th Speed Driven Gear Installation
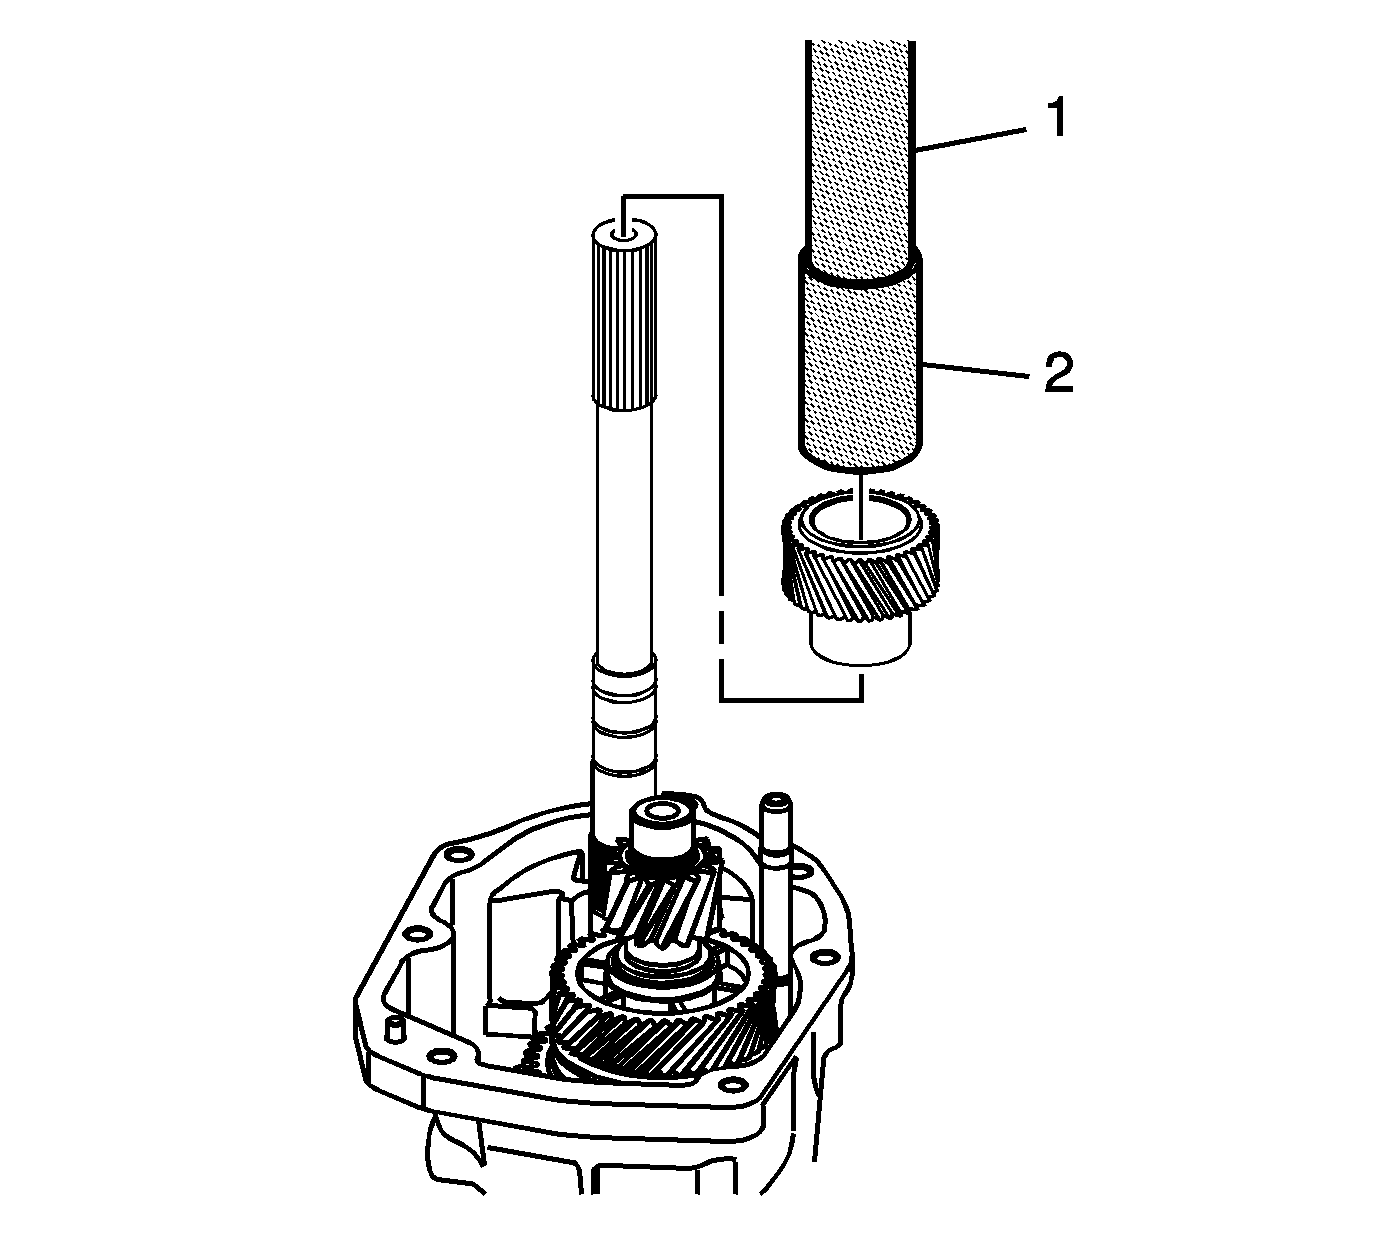
- Install the 5th speed driven gear using the
J 39441 gear installer
(1) and
J 39441-10 adapter
(2). The smaller outside diameter (OD) of the gear faces down.
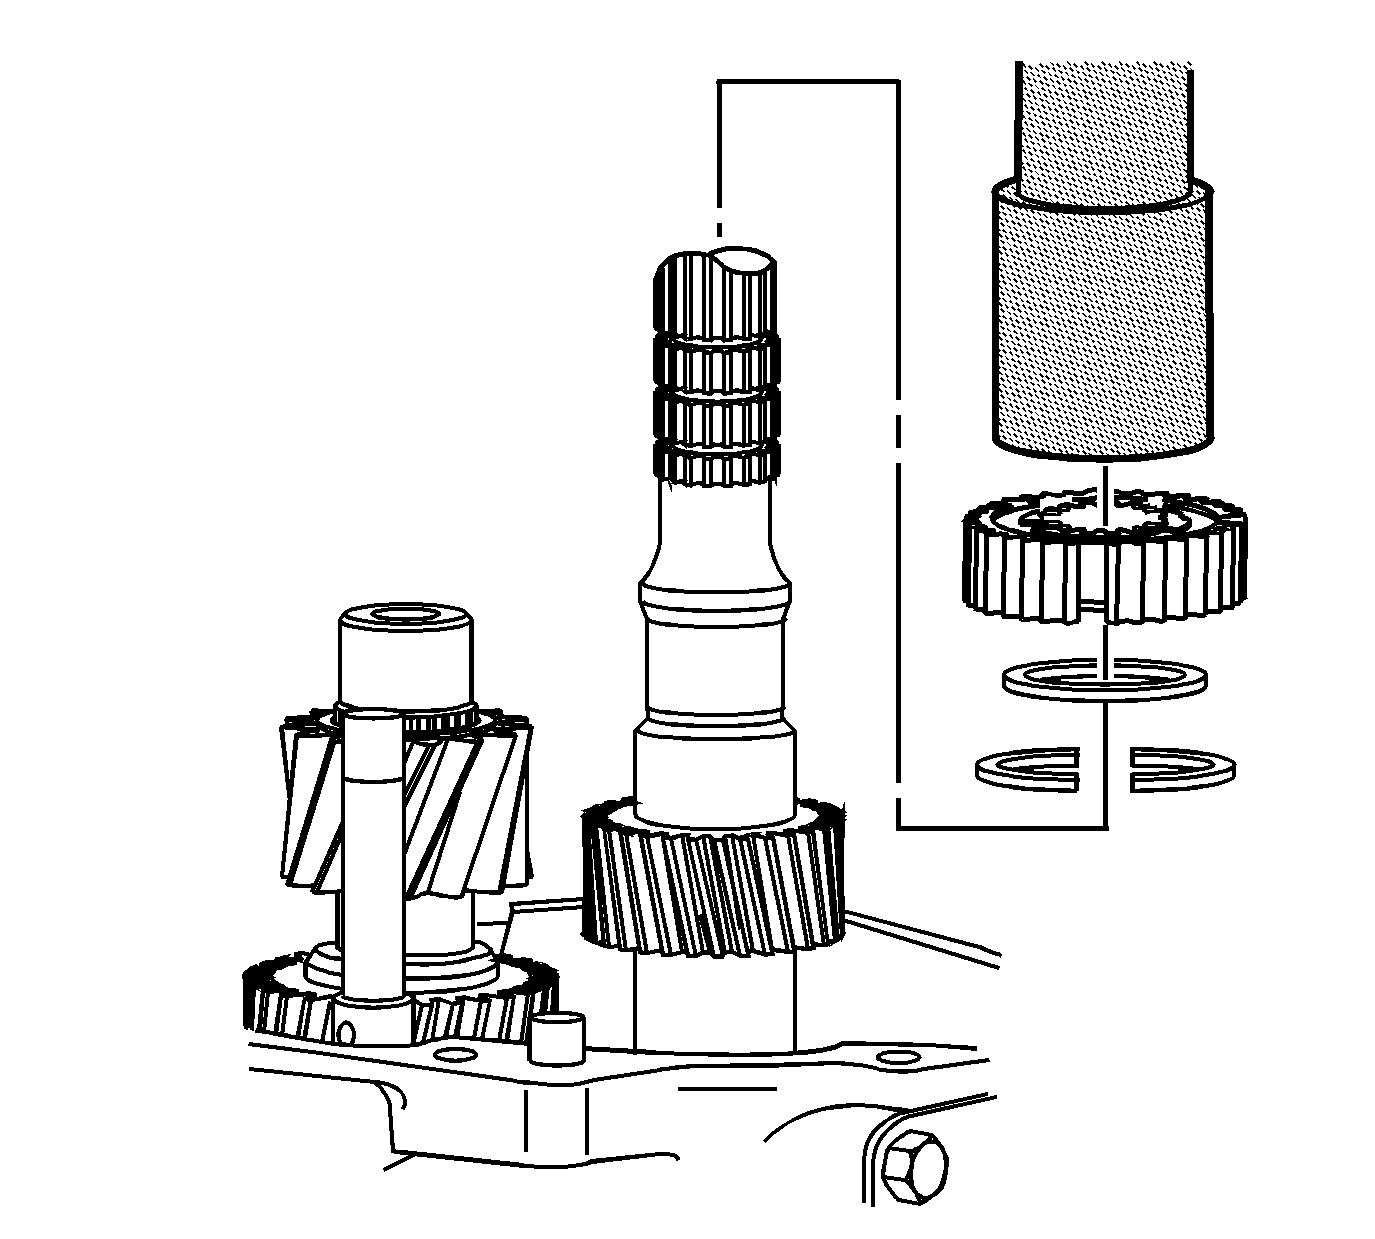
- Install the 2 piece thrust washer and locking ring.
- Install the synchronizer hub using
J 39441 gear installer
and
J 39441-10 adapter
.
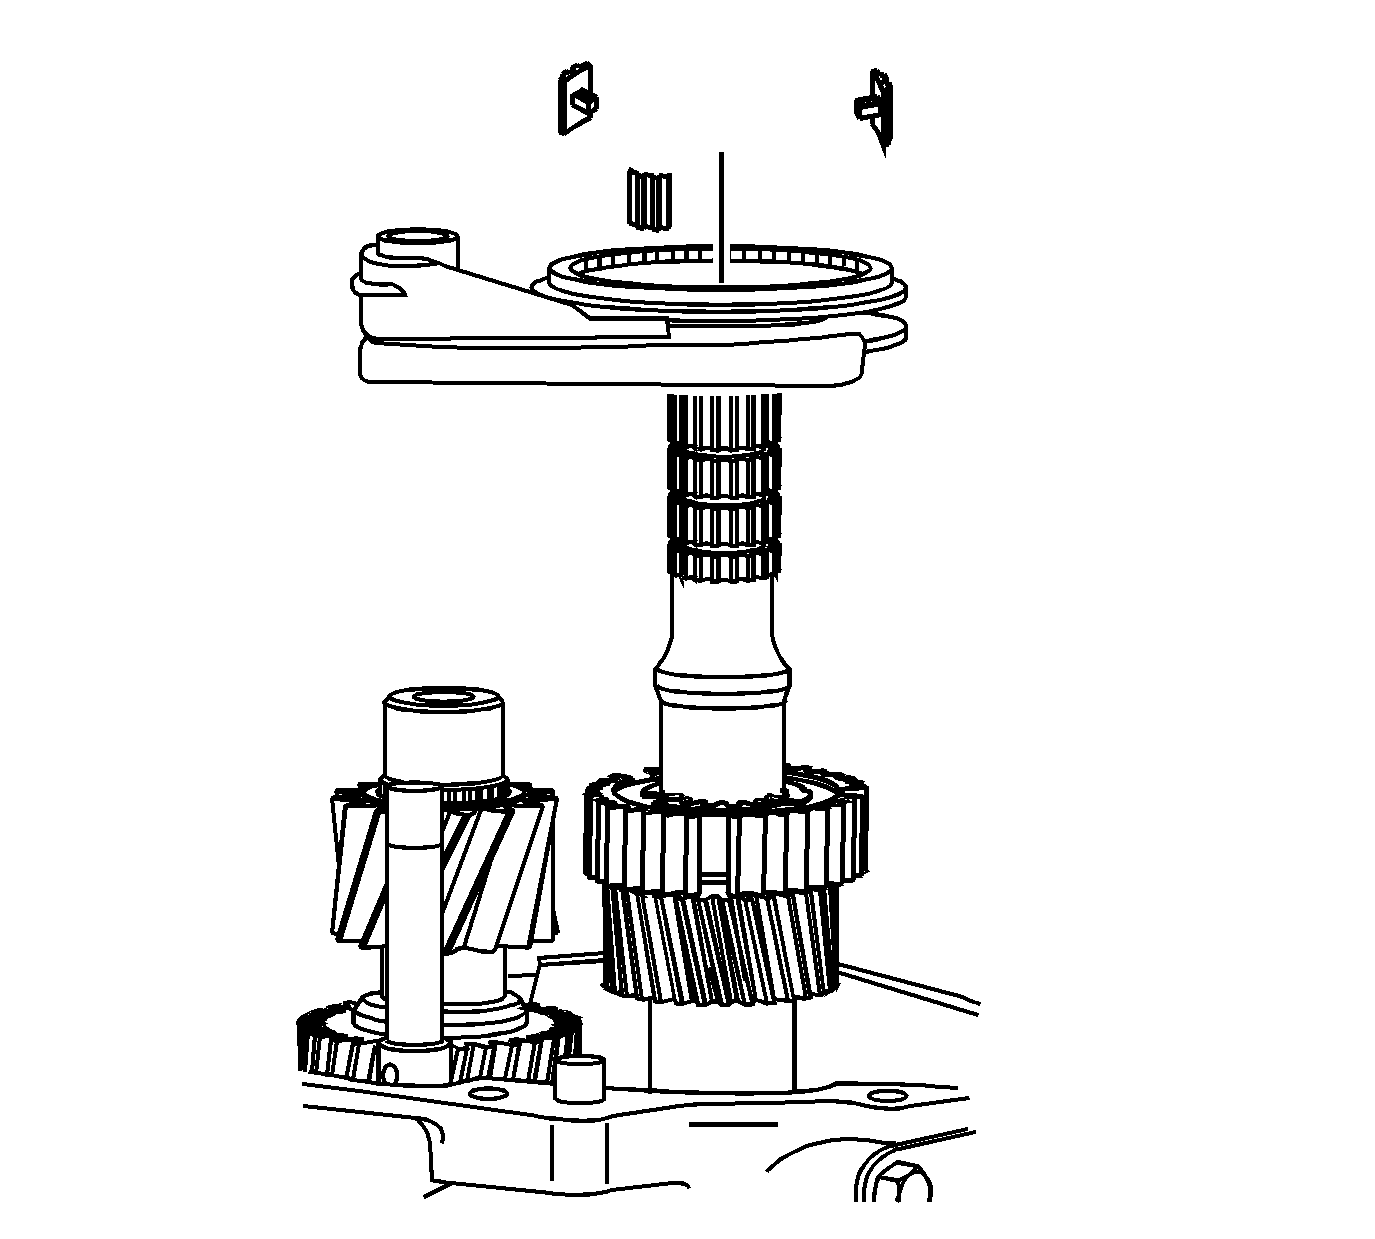
Note: Align synchronizer inserts with synchronizer sleeve notches.
- Install the reverse shift fork, the synchronizer sleeve, and the synchronizer inserts.
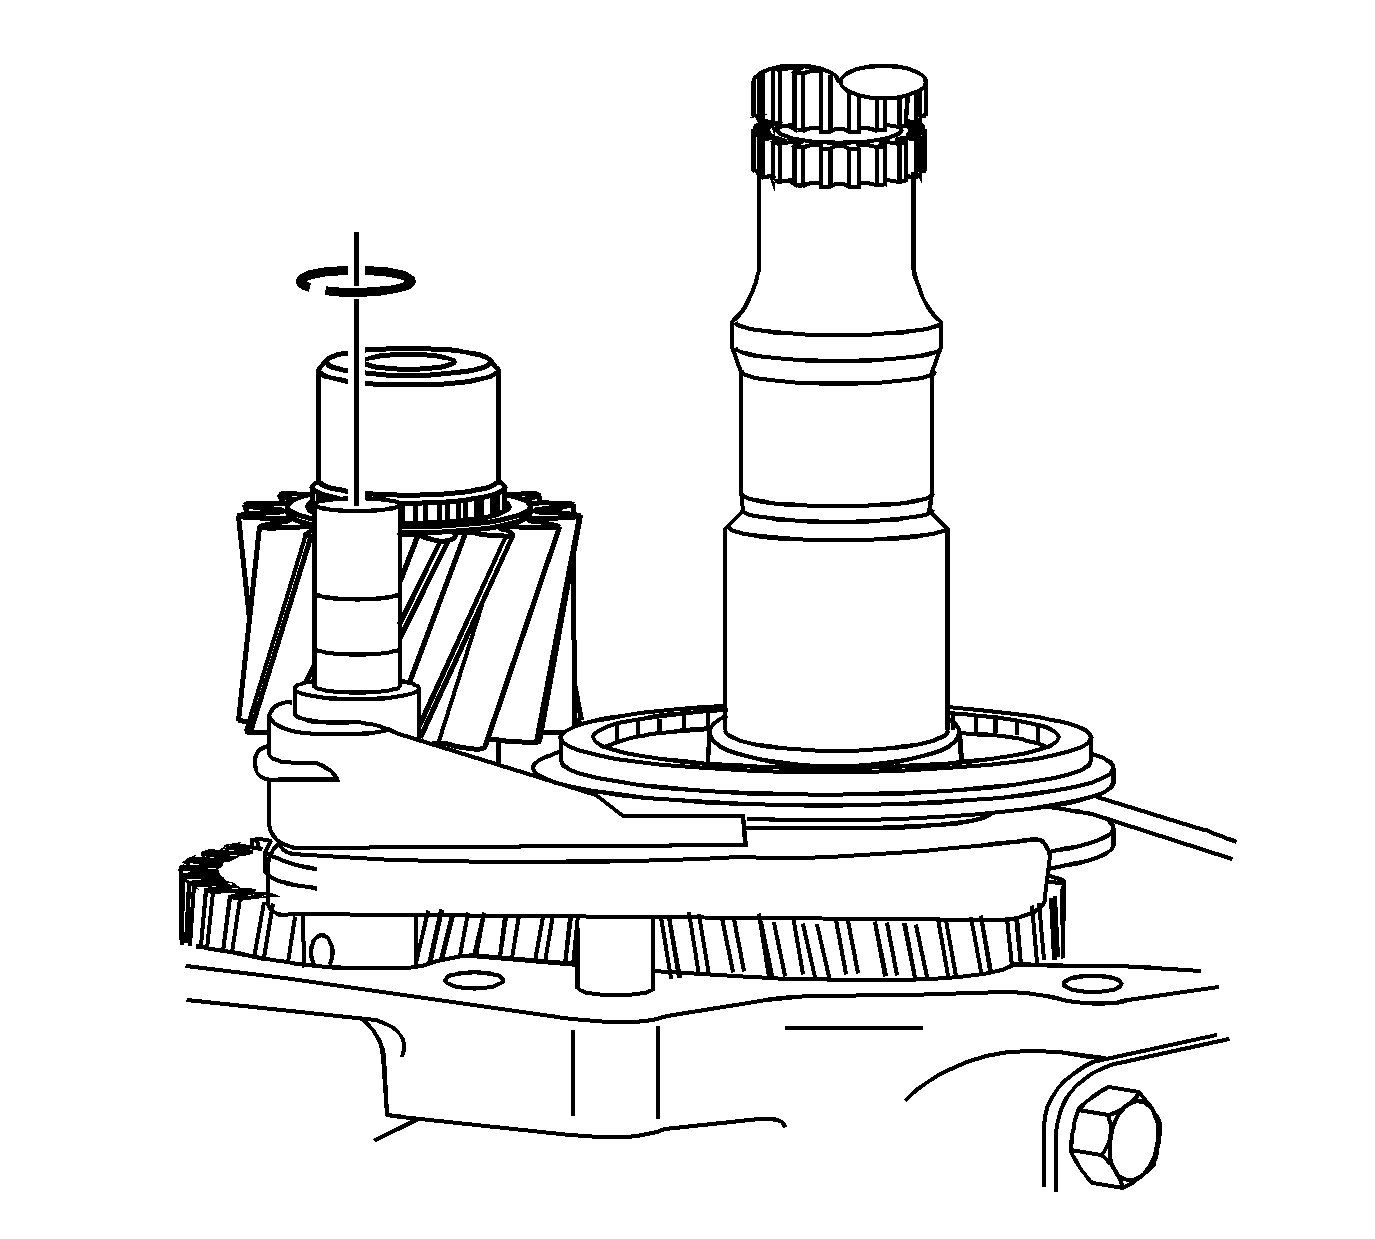
- Install a NEW shift fork retainer ring.
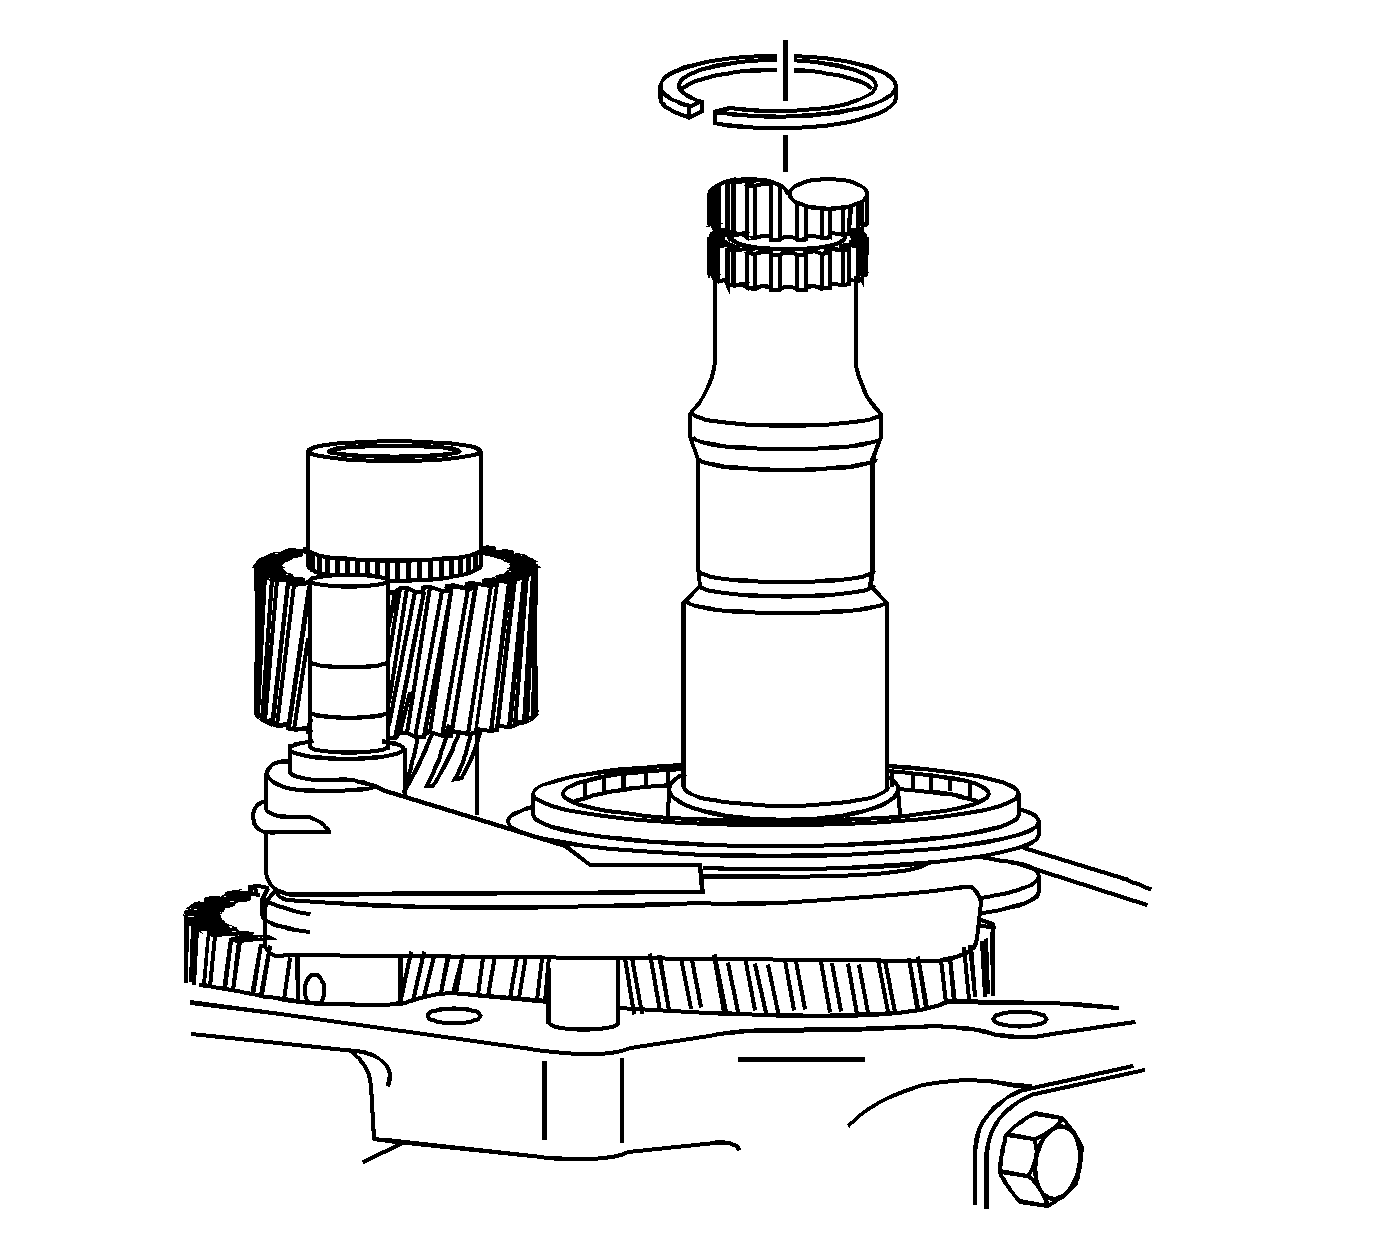
- Install the reverse synchronizer retainer ring.
Reverse Speed Gear Installation
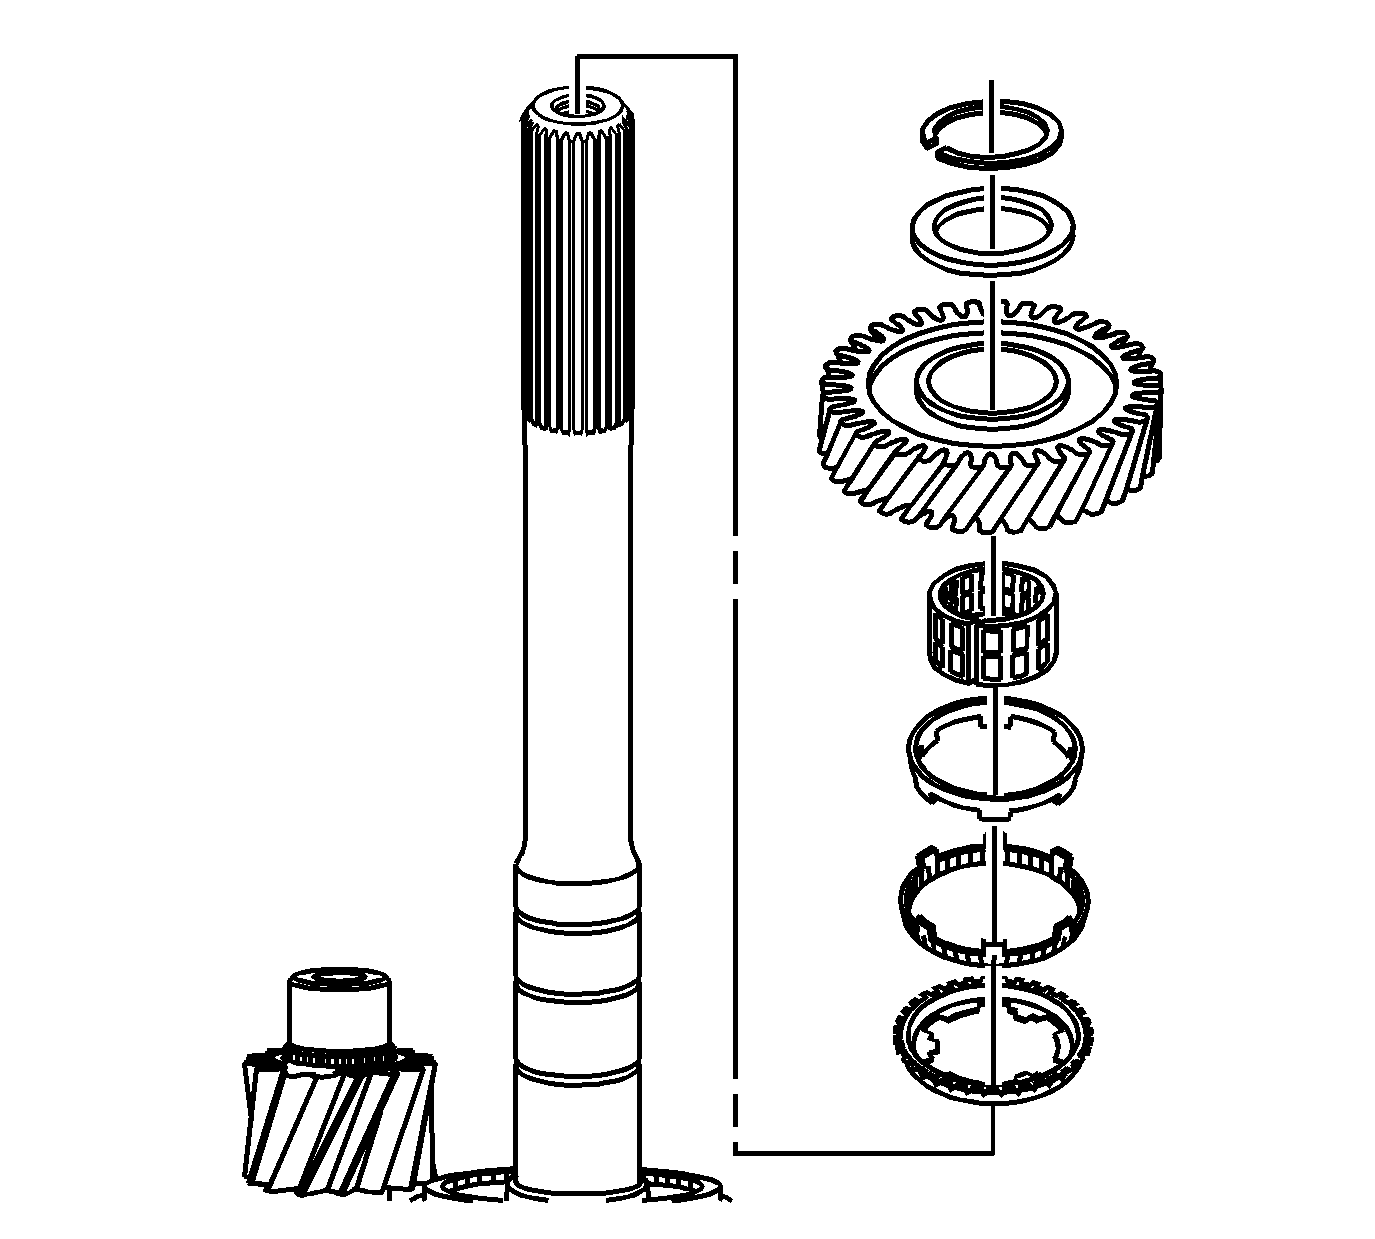
- Install the following parts in order:
| 1.1. | The reverse gear synchronizer blocking ring |
| 1.2. | The reverse drive gear intermediate cone |
| 1.3. | The reverse drive gear inner cone |
| 1.4. | The reverse gear caged needle bearing |
| 1.6. | The reverse gear thrust washer |
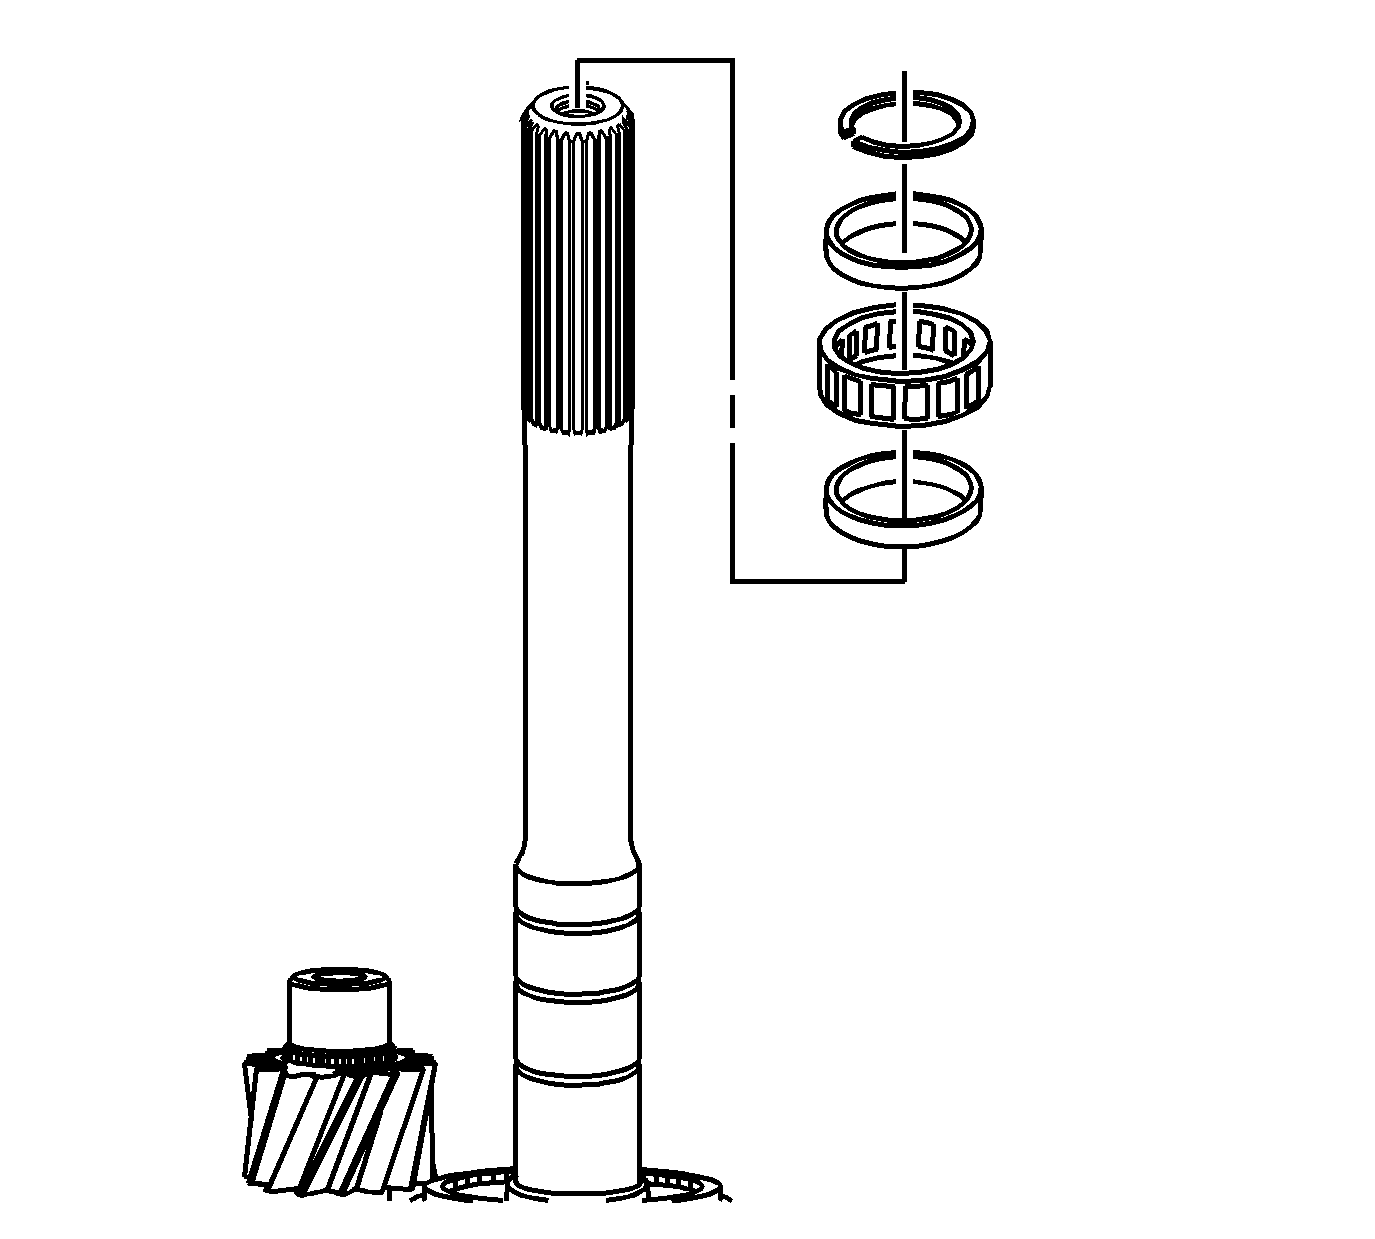
- Install the following parts in order:
| 2.4. | The roller bearing retainer ring |
Extension Housing Assembly Installation
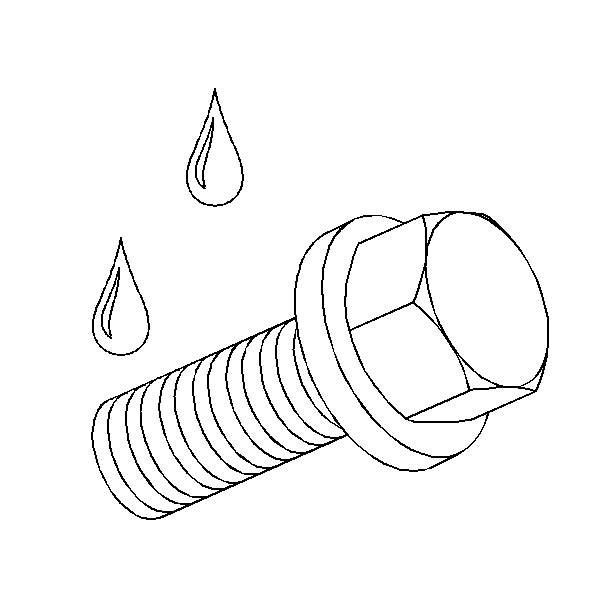
- Apply GM P/N 12345382 (Canadian P/N 10953489) or the equivalent to the reverse idler shaft brackets bolt threads.
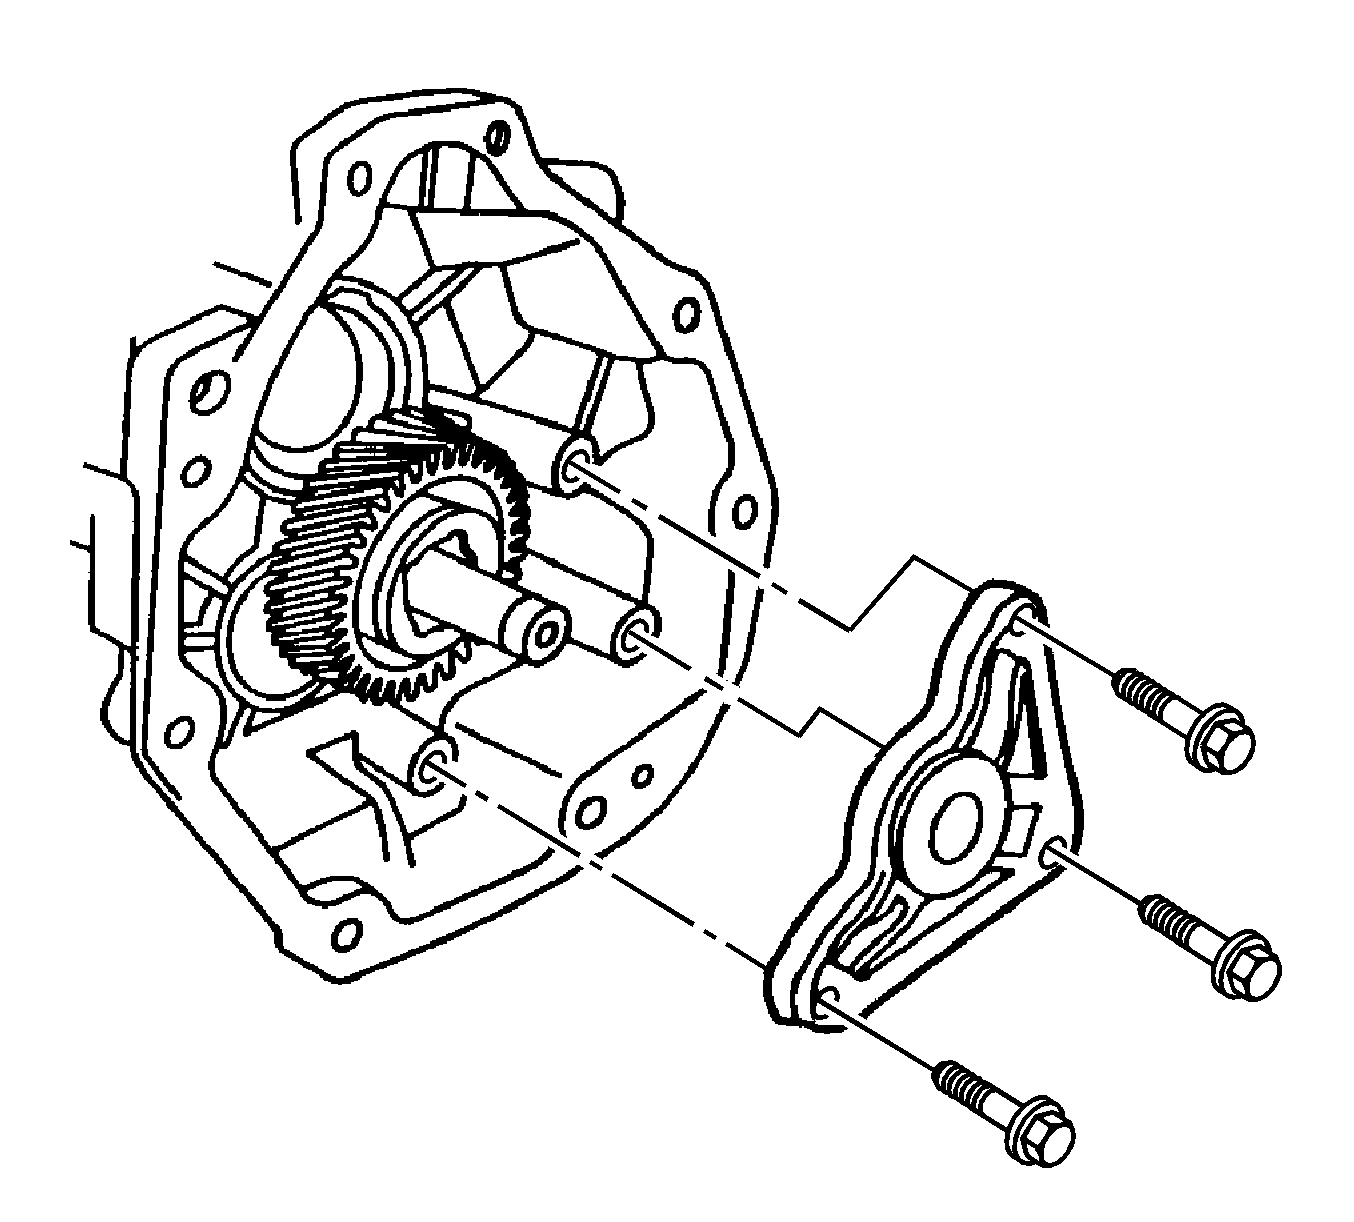
- Install the following parts in order:
| 2.1. | The reverse idler shaft bracket |
| 2.2. | The reverse idler shaft bracket bolts and tighten to
25 N·m (18 Ib ft). |
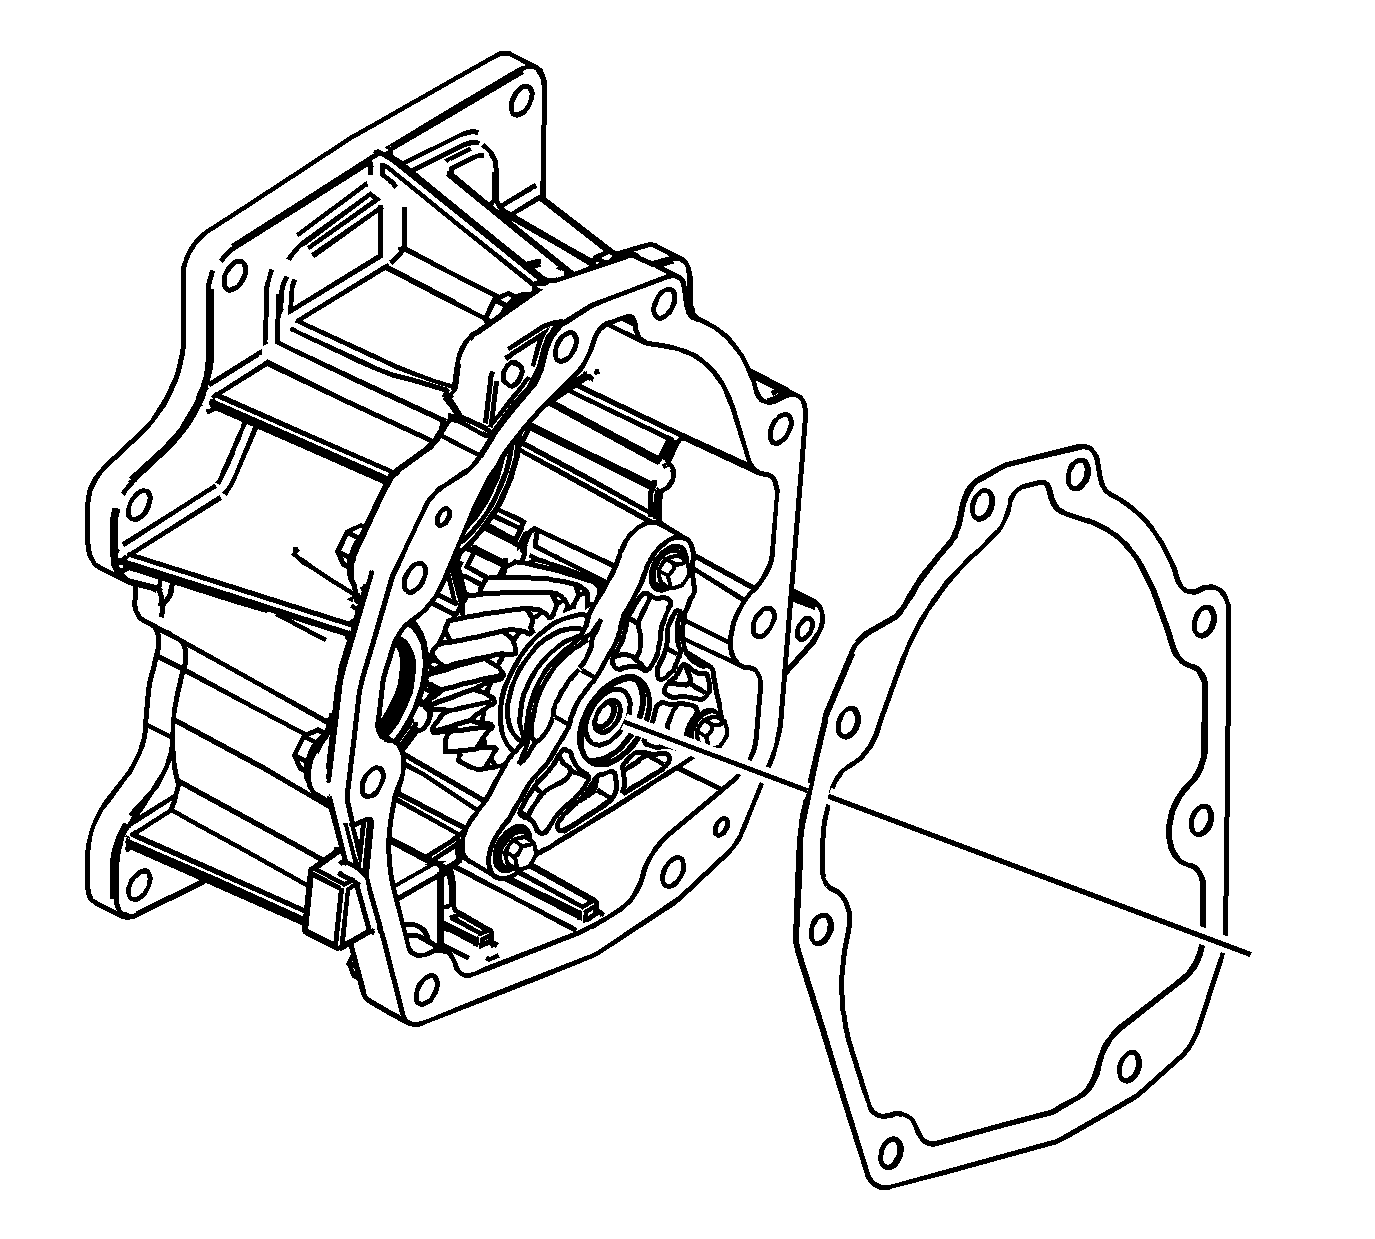
- Install a new gasket GM P/N 89059570 on the extension housing to the transmission case mating surface.

- Apply thread sealer GM P/N 12346004 (Canadian P/N 10953480) or equivalent to the top 2 extension housing bolts.
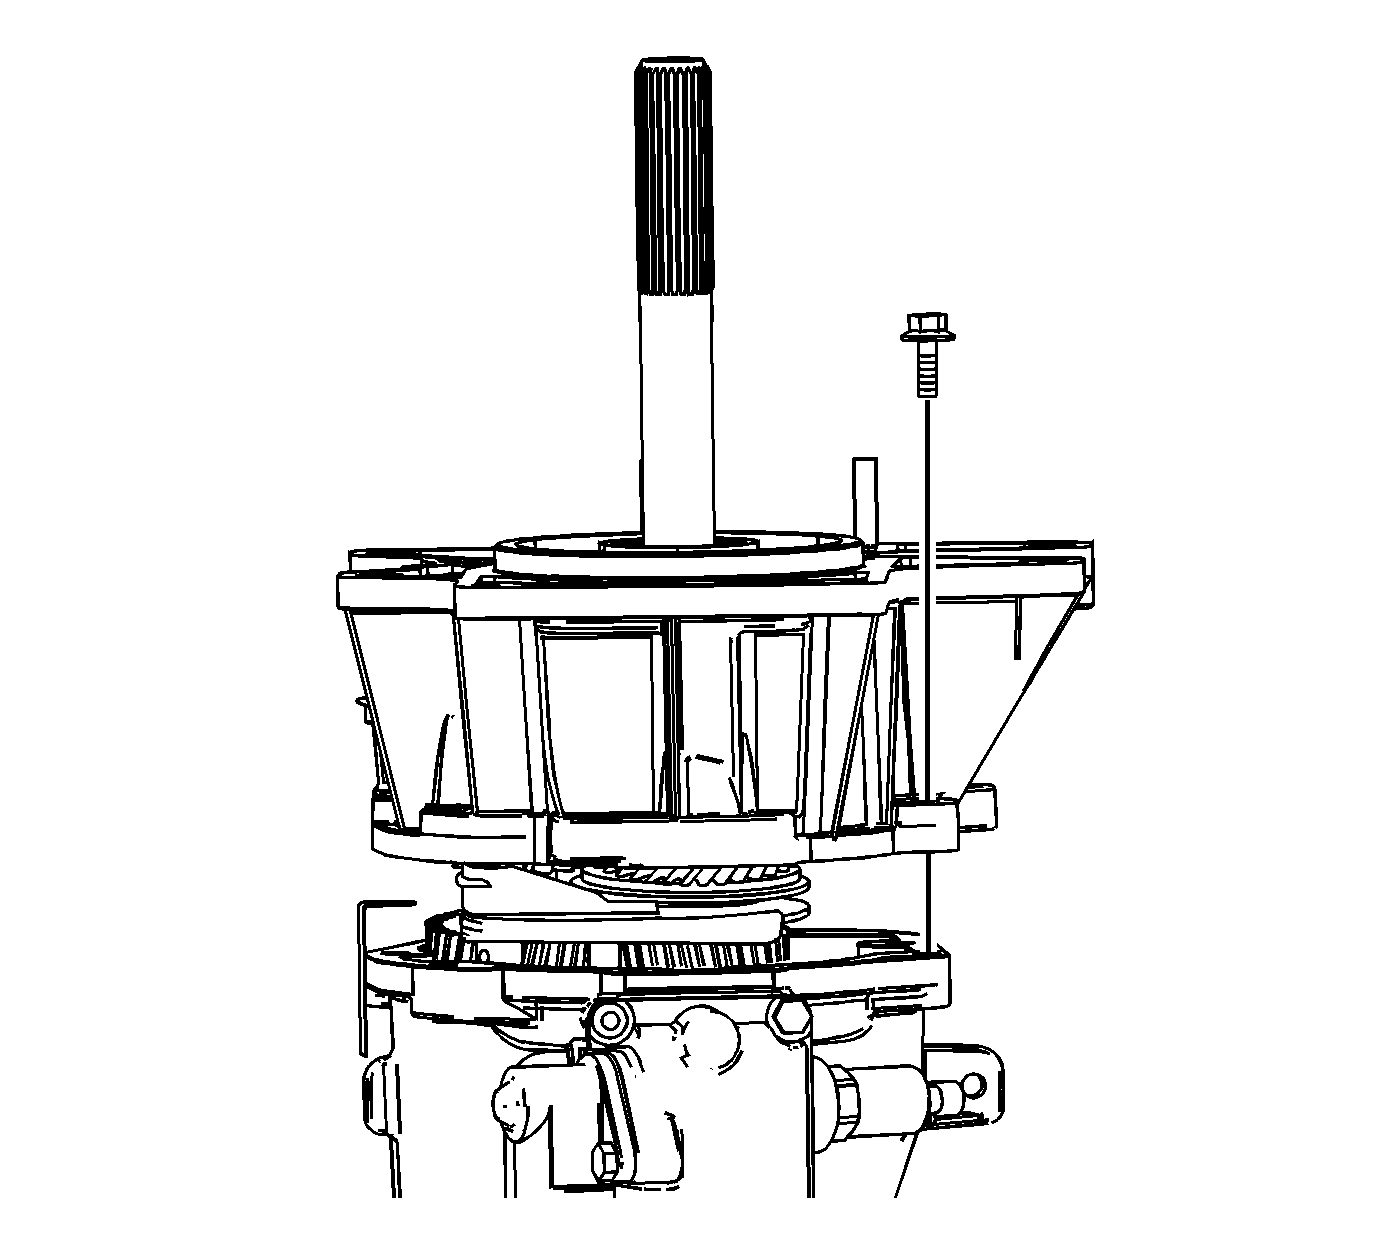
Note: Align the 5th/6th shift shaft to the extension housing bore in order to install the extension housing.
- Install the extension housing.
- Install the extension housing bolts and tighten to
48 N·m (36 lb ft).
- Install the vent tube.
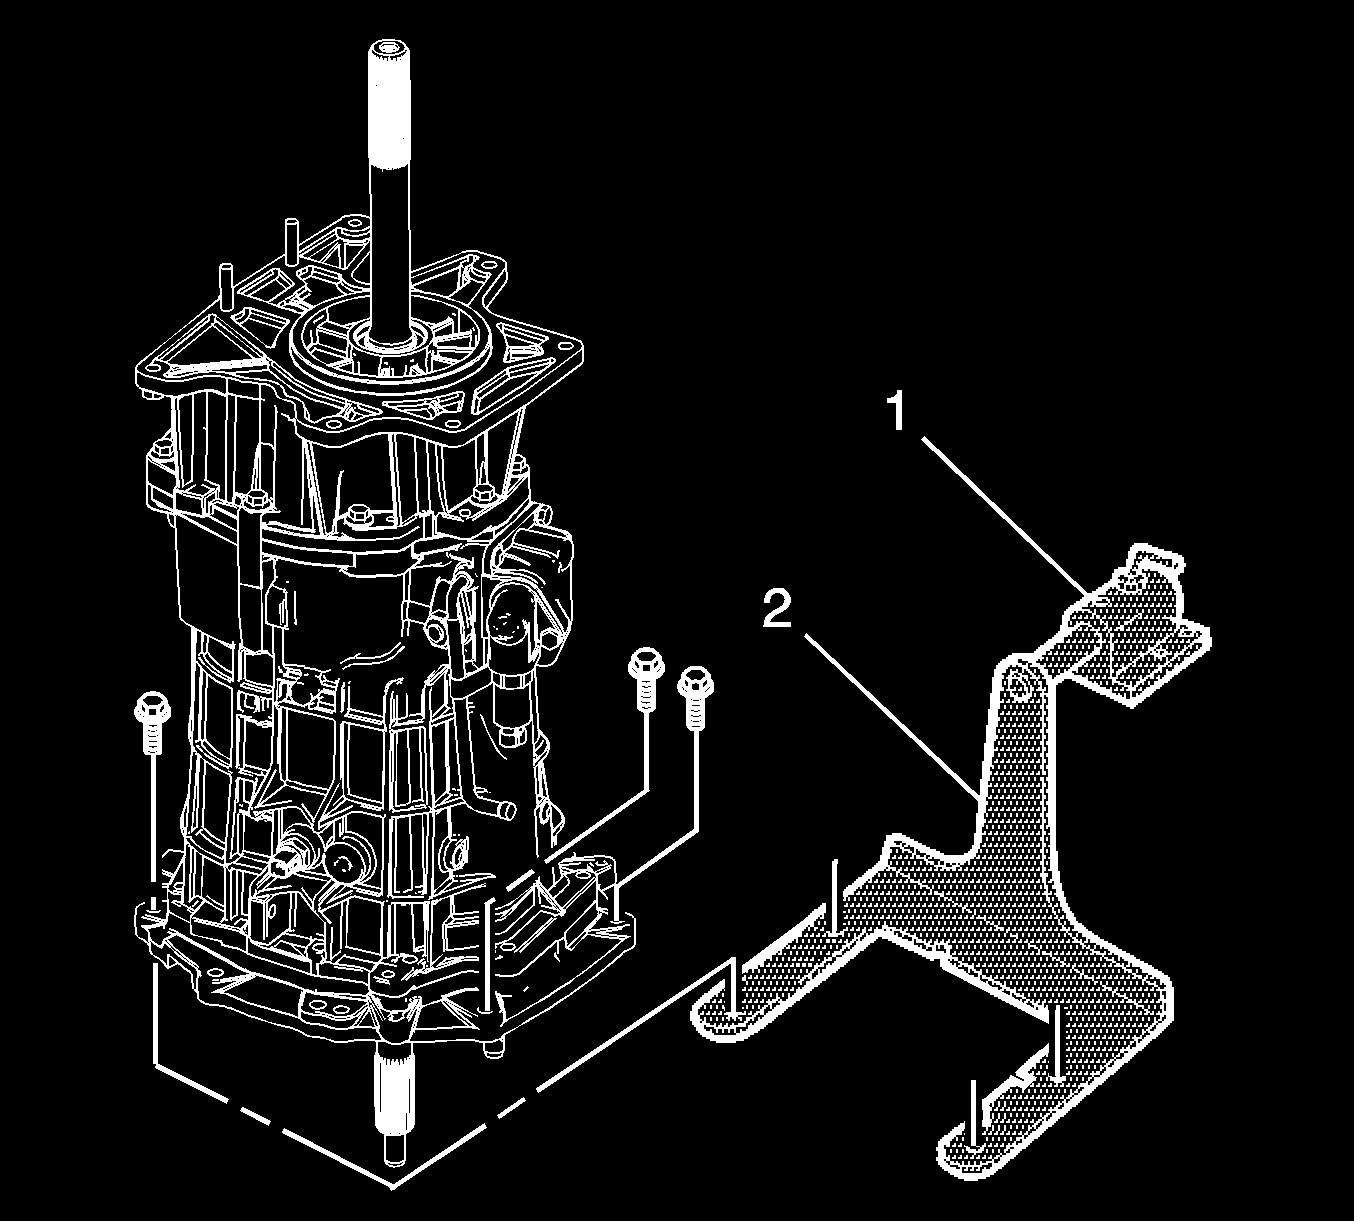
- Remove the
J 44395-A transmission holding fixture
(2) and
J 3289-20 holding fixture
(1) from the transmission.
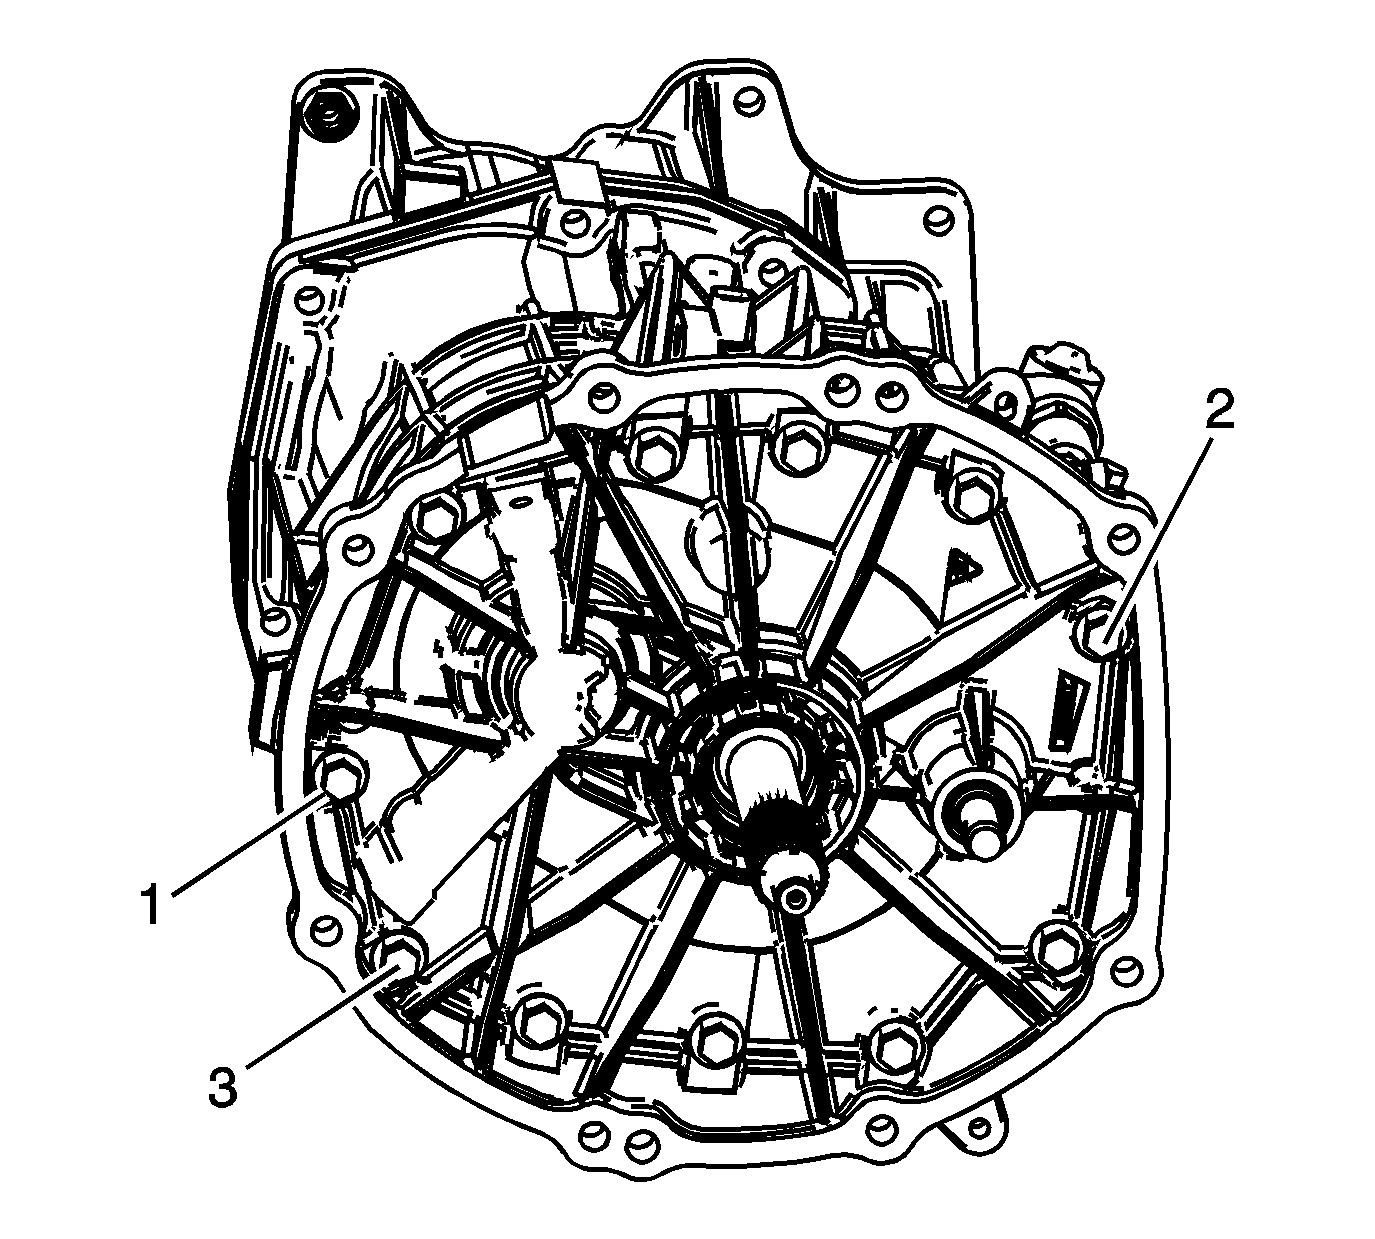
- Install all remaining adapter plate bolts (1, 2, 3) and tighten to
48 N·m (36 lb ft).
- Fill the transmission with manual transmission fluid, until even with the bottom of the fill plug hole. For fluid recommendations, refer to
Adhesives, Fluids, Lubricants, and Sealers.
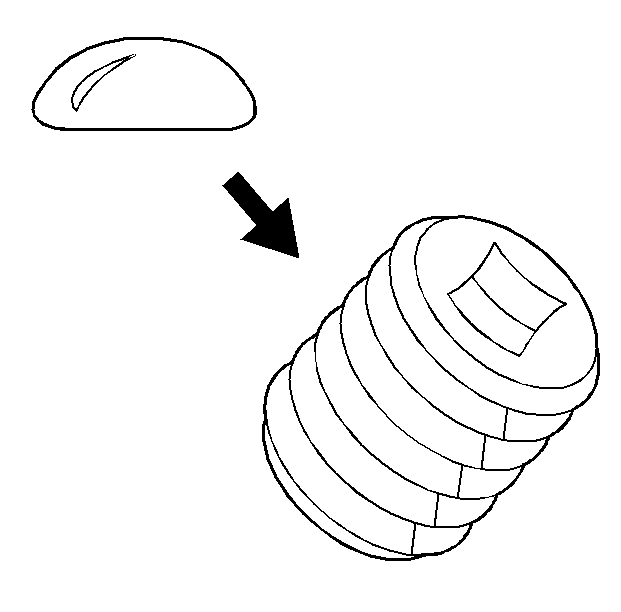
- Apply sealant GM P/N 12346004 (Canadian P/N 10953480) or equivalent to the threads of the transmission case fill plug.
- Install the transmission fluid fill plug and tighten to
27 N·m (20 lb ft).


