For 1990-2009 cars only
Folding Top Replacement Manual Top
Removal Procedure
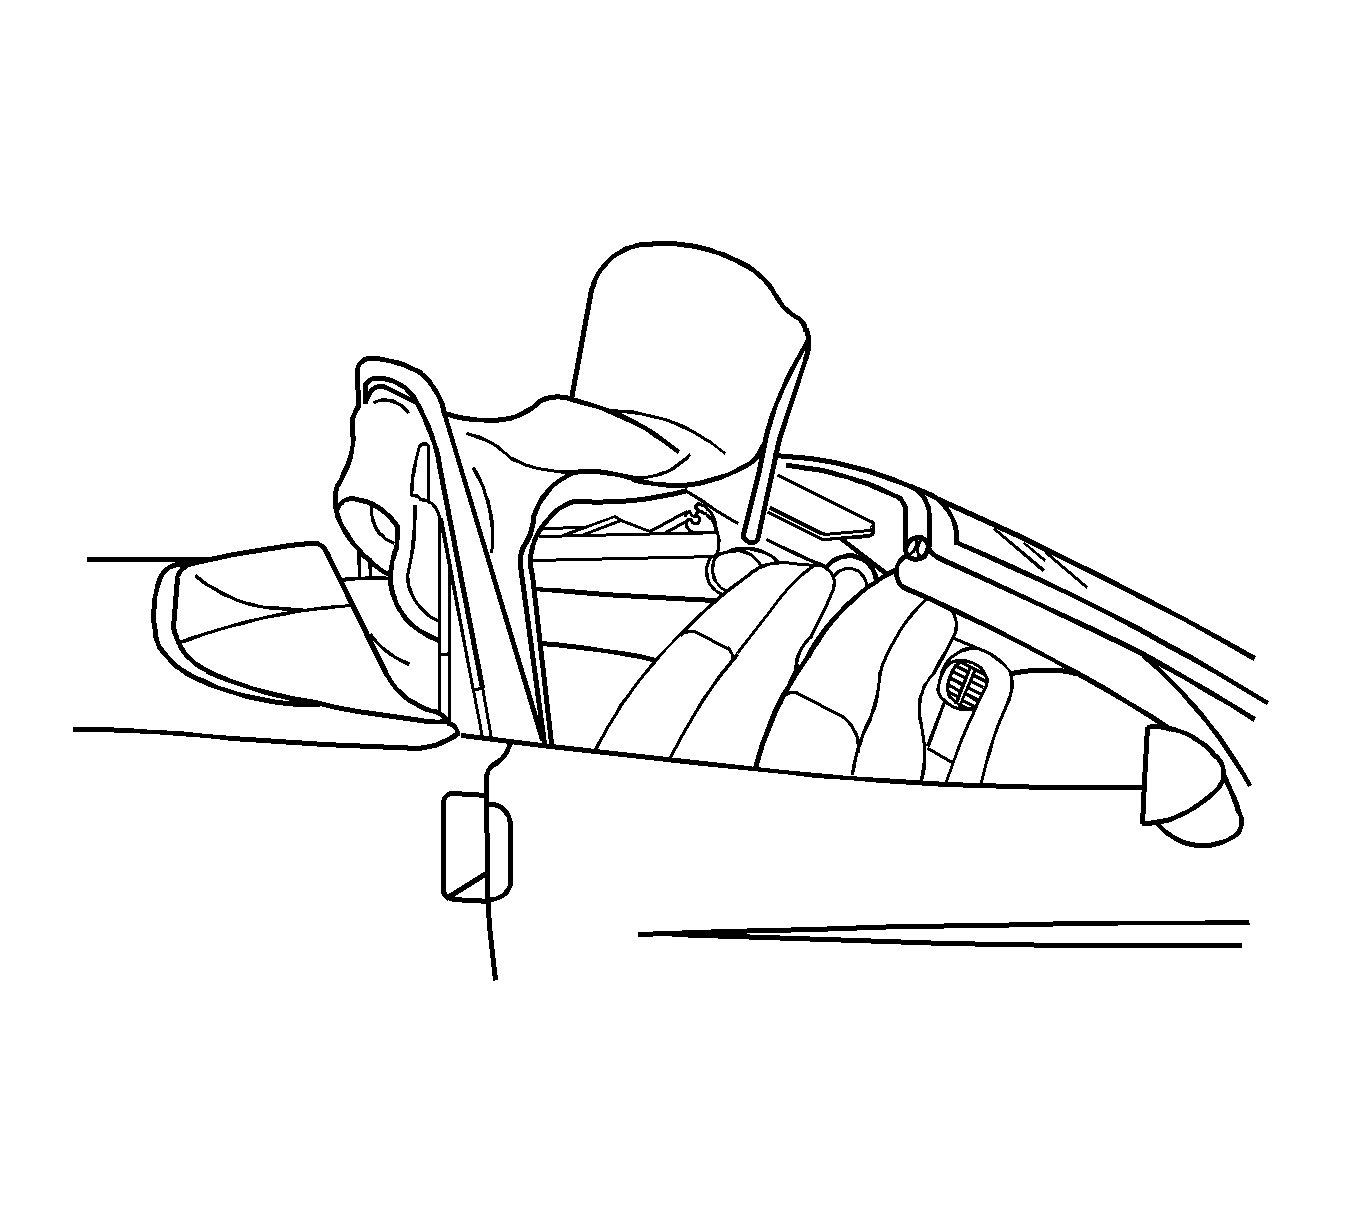
- Position the number 1 bow and the number 5 bow in an up position.
- Open top stowage compartment lid.
- Remove the lock pillar upper trim panel. Refer to Body Lock Pillar Trim Panel Replacement
- Disconnect the rear defogger electrical connections at the seat belt tower.
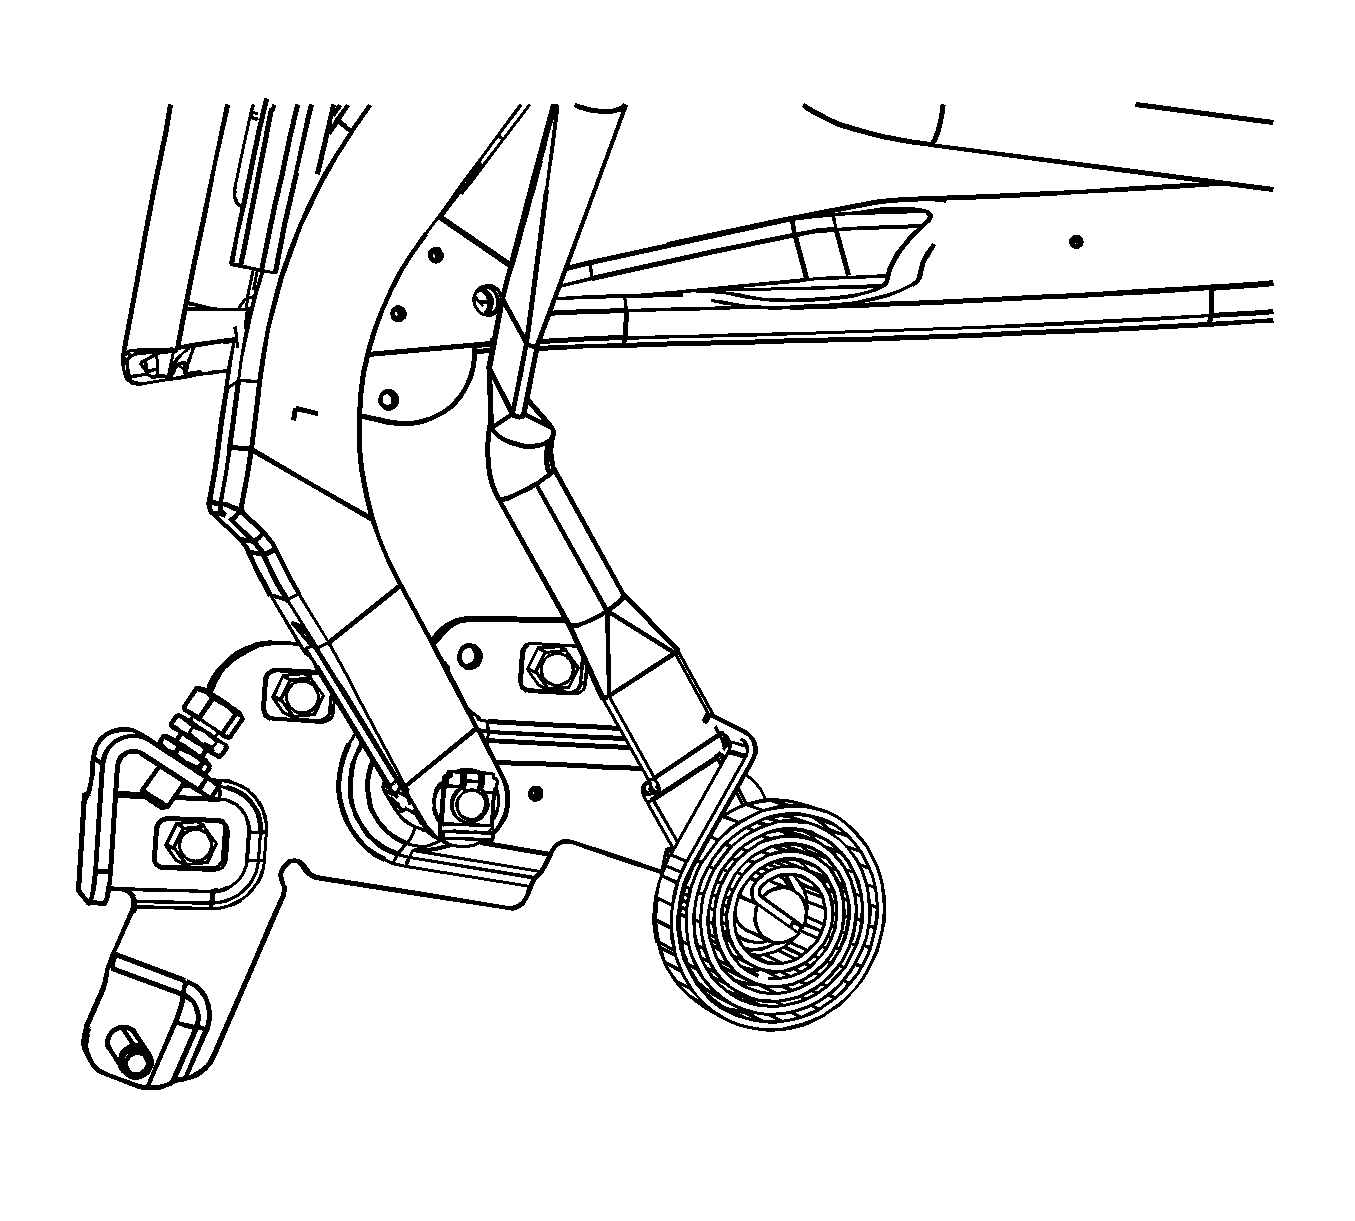
- Remove pivot bracket brace.
- Remove the folding top pivot bracket bolts with an assistant.
- With an assistant, slide the top slightly up and then rearward and out of the pillar bracket pin.
Installation Procedure
- With an assistant, position the folded top to the vehicle with the top pivot bracket resting on the pillar bracket pin.
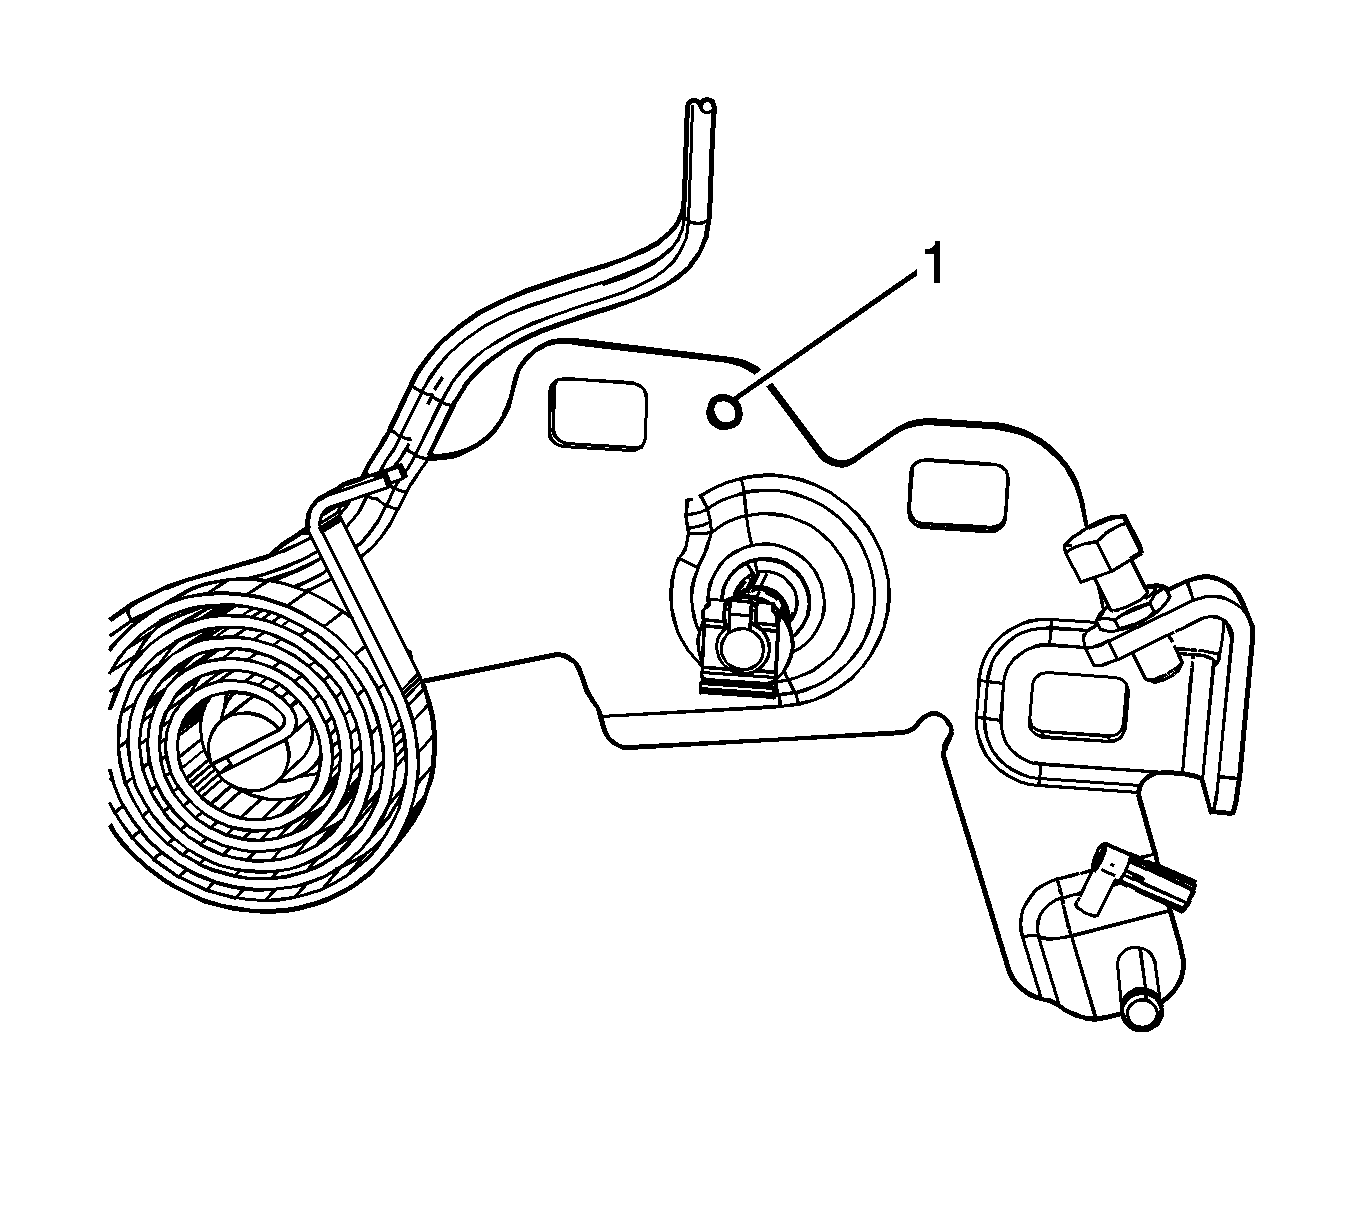
- Ailing bolt holes by inserting a drift pin in the alignment hole (1).
- Install pivot bracket brace.
- Install the pivot bracket bolts.
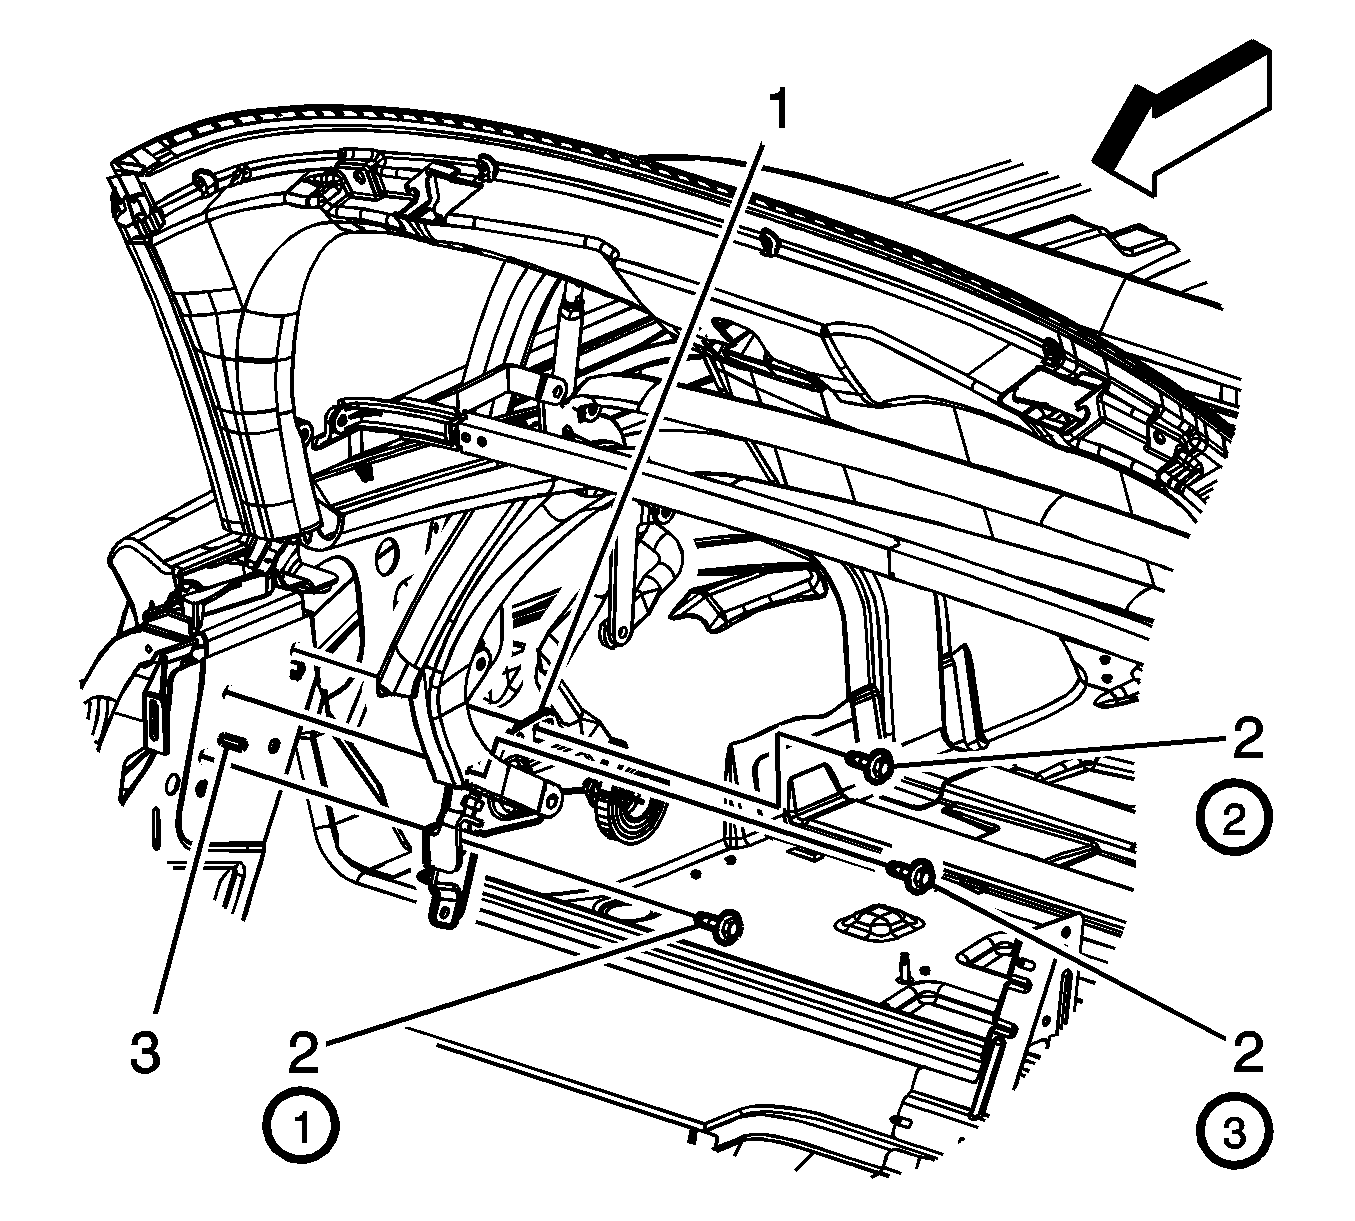
- Install the folding top bolts to the body in the mandatory sequence 1, 2, 3.
- Connect the rear defogger electrical connections.
- Close and latch the top.
- Install the lock pillar trim panel. Refer to Body Lock Pillar Trim Panel Replacement.
- Check top for proper operation.
- Water test the folding top.

Caution: Refer to Fastener Caution in the Preface section.
Tighten
Tighten the bolts to 25 N·m (18 lb ft).
Folding Top Replacement Power Top
Removal Procedure
Note: The power folding top is serviced as a complete assembly. Folding top cover, frame, hydraulic pump and folding top control module are all included in the service part assembly.
- Position the #1 bow and the #5 bow in an up position.
- Open the folding top stowage lid.
- Disconnect the battery. Refer to Battery Negative Cable Disconnection and Connection.
- Remove the stowage compartment carpet. Refer to Rear Compartment Rear Center Trim Panel Carpet Replacement.
- Disconnect the rear defogger electrical connections at the seat belt tower.
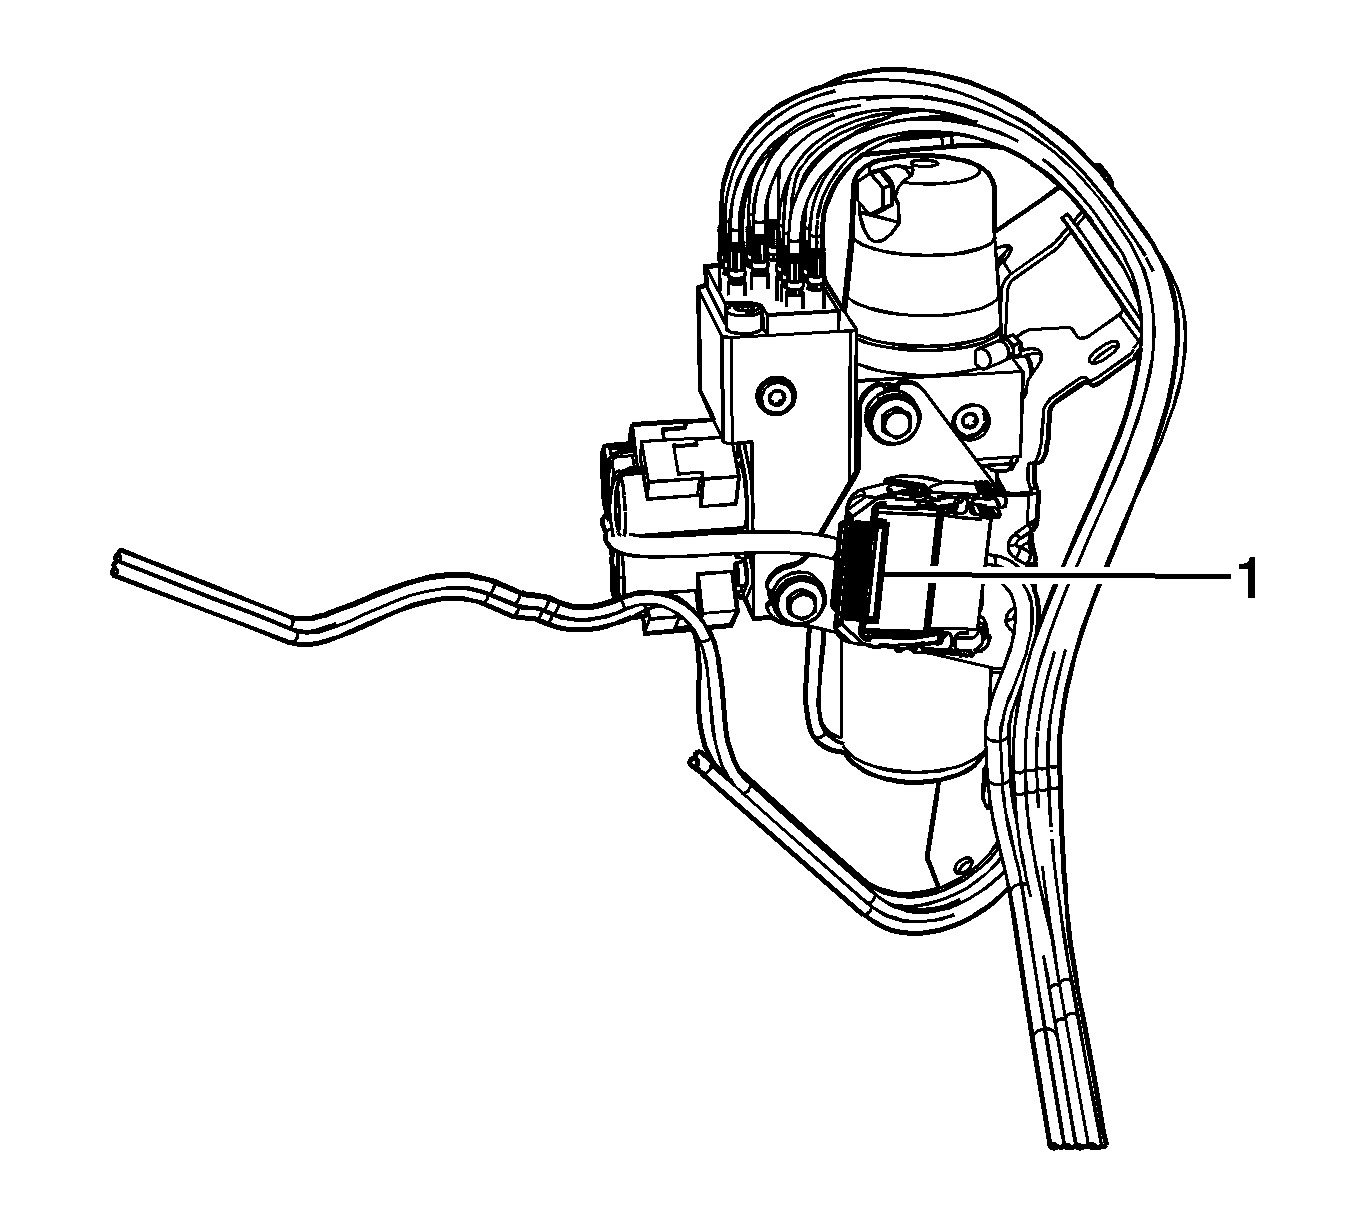
- Disconnect the electrical connector from the hydraulic pump bracket.
- Disconnect the stowage lid hydraulic cylinders from the hinge. Refer to Folding Top Cylinder Replacement.
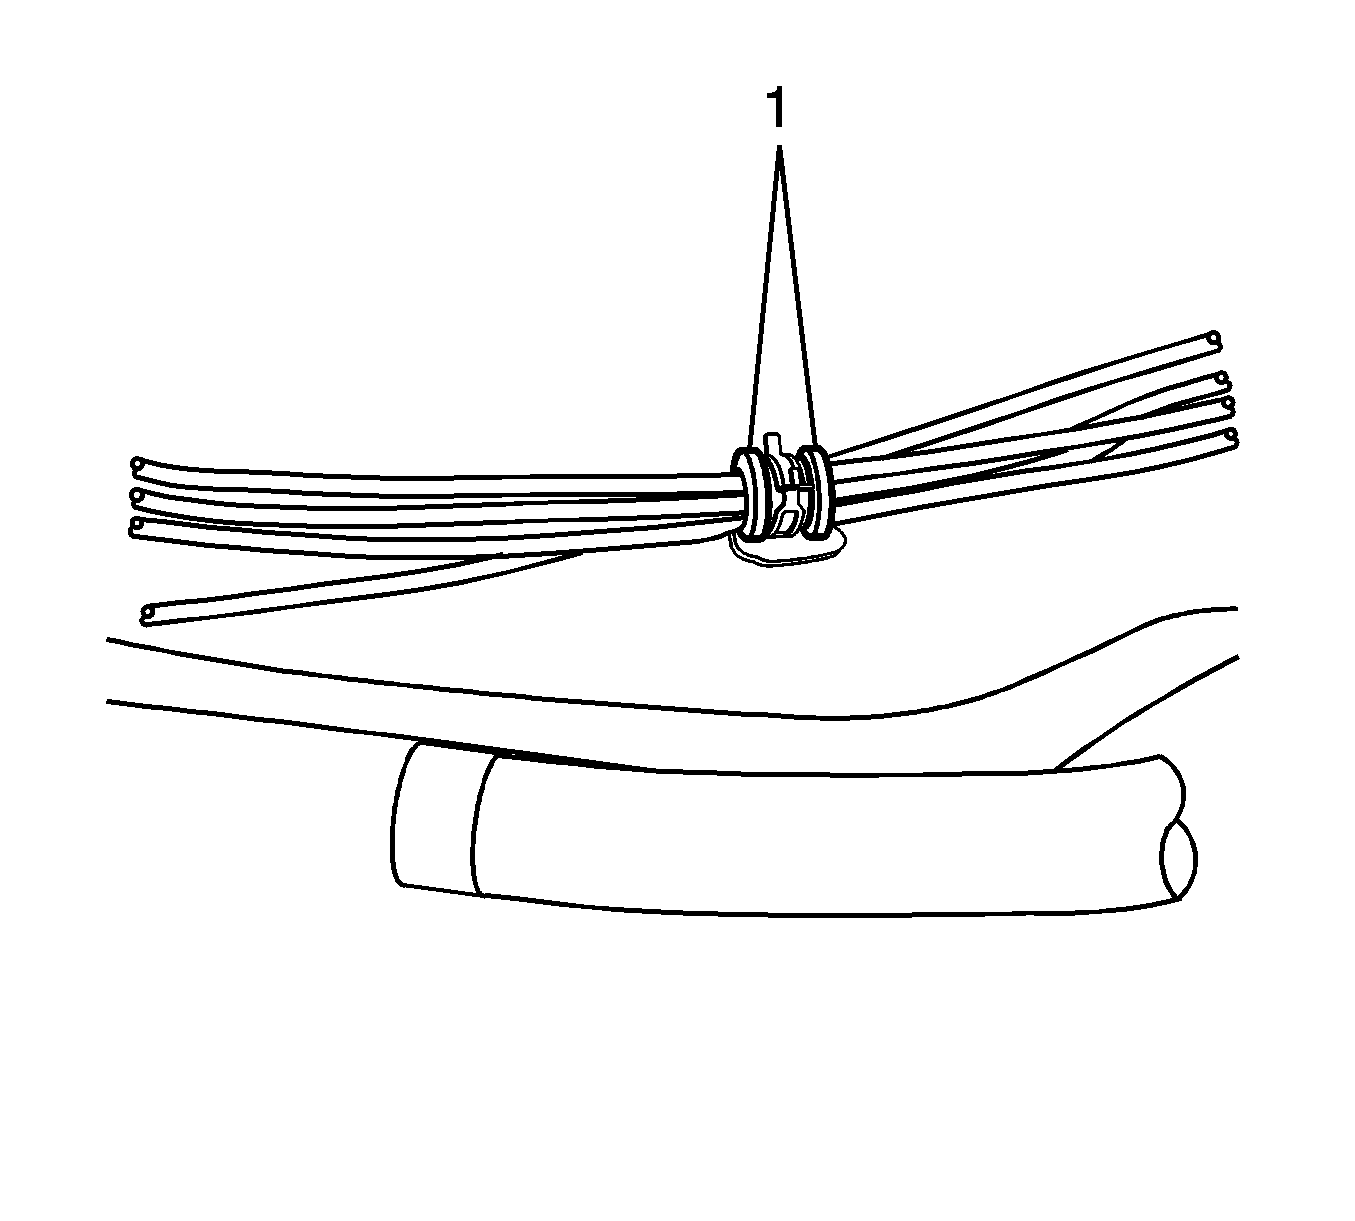
- Open the fold-over clips (1) that retain the electrical harness and hydraulic hoses to the floor.
- Remove folding top control module. Refer to Folding Top Control Module Replacement.
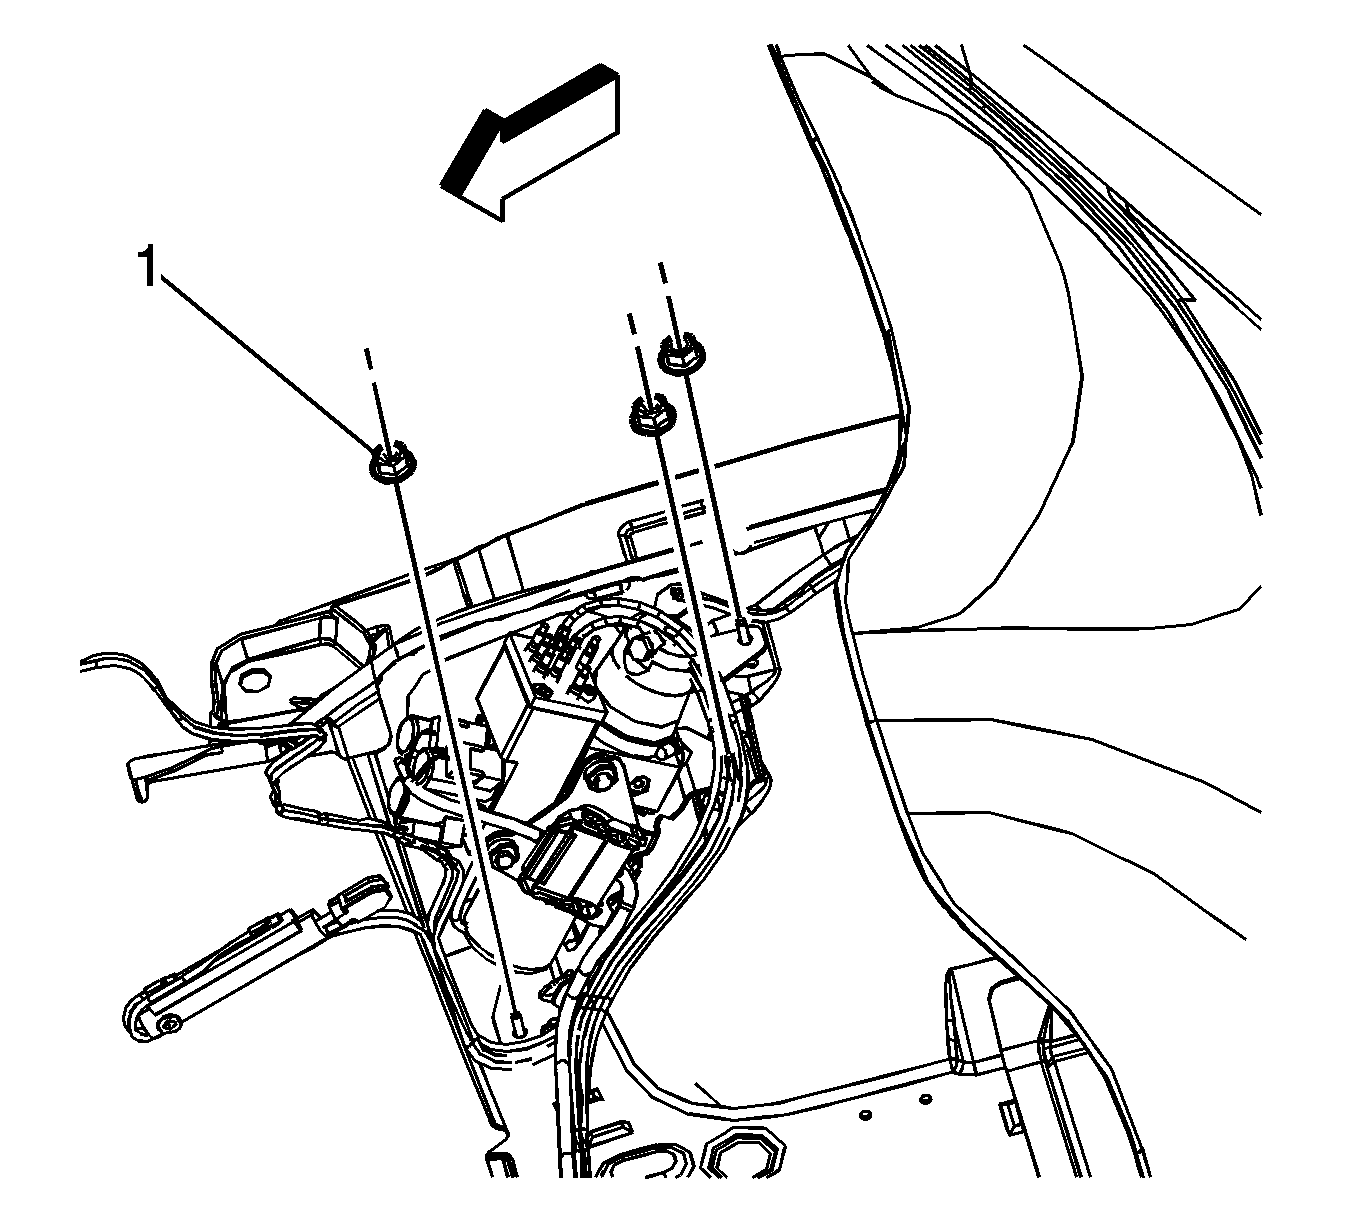
- Remove the hydraulic pump nuts (1).
- Remove the folding top pillar bracket bolts with an assistant.
- With an assistant, slide the top slightly up and then rearward and out of the pivot bracket.
- Remove the folding top assembly.


Installation Procedure
- With an assistant, position the folded top to the vehicle with the top resting on the pivot bracket pin.
- Insert a drift pin into the alignment hole (1) to align bolt holes.
- Remove the drift pin.
- Install the folding top bolts to the body in the mandatory sequence 1,2,3.
- Install the hydraulic pump nuts (1).
- Install the folding top control module. Refer to Folding Top Control Module Replacement.
- Install the folding top stowage lid hydraulic cylinders. Refer to Folding Top Cylinder Replacement.
- Install the electrical harness and hydraulic hose fold-over clips (1) to the floor. Fold the clips over to retain the electrical harness and hydraulic hoses.
- Connect the electrical connector to the hydraulic pump.
- Connect the rear defogger electrical connections.
- Install the rear compartment carpet. Refer to Rear Compartment Rear Center Trim Panel Carpet Replacement.
- Connect the battery. Refer to Battery Negative Cable Disconnection and Connection.
- Close and latch the top.
- Inspect the top for proper operation. Refer to Power Folding Top Description and Operation.
- Water test the folding top.


Caution: Refer to Fastener Caution in the Preface section.

Tighten
Tighten the bolts to 25 N·m (18 lb ft).

Tighten
Tighten the nuts to 10 N·m (89 lb in).

