For 1990-2009 cars only
Special Tools
J 37872 Universal Spanner Wrench
Removal Procedure
- Remove the air conditioning drive belt. Refer to Air Conditioning Compressor Belt Replacement.
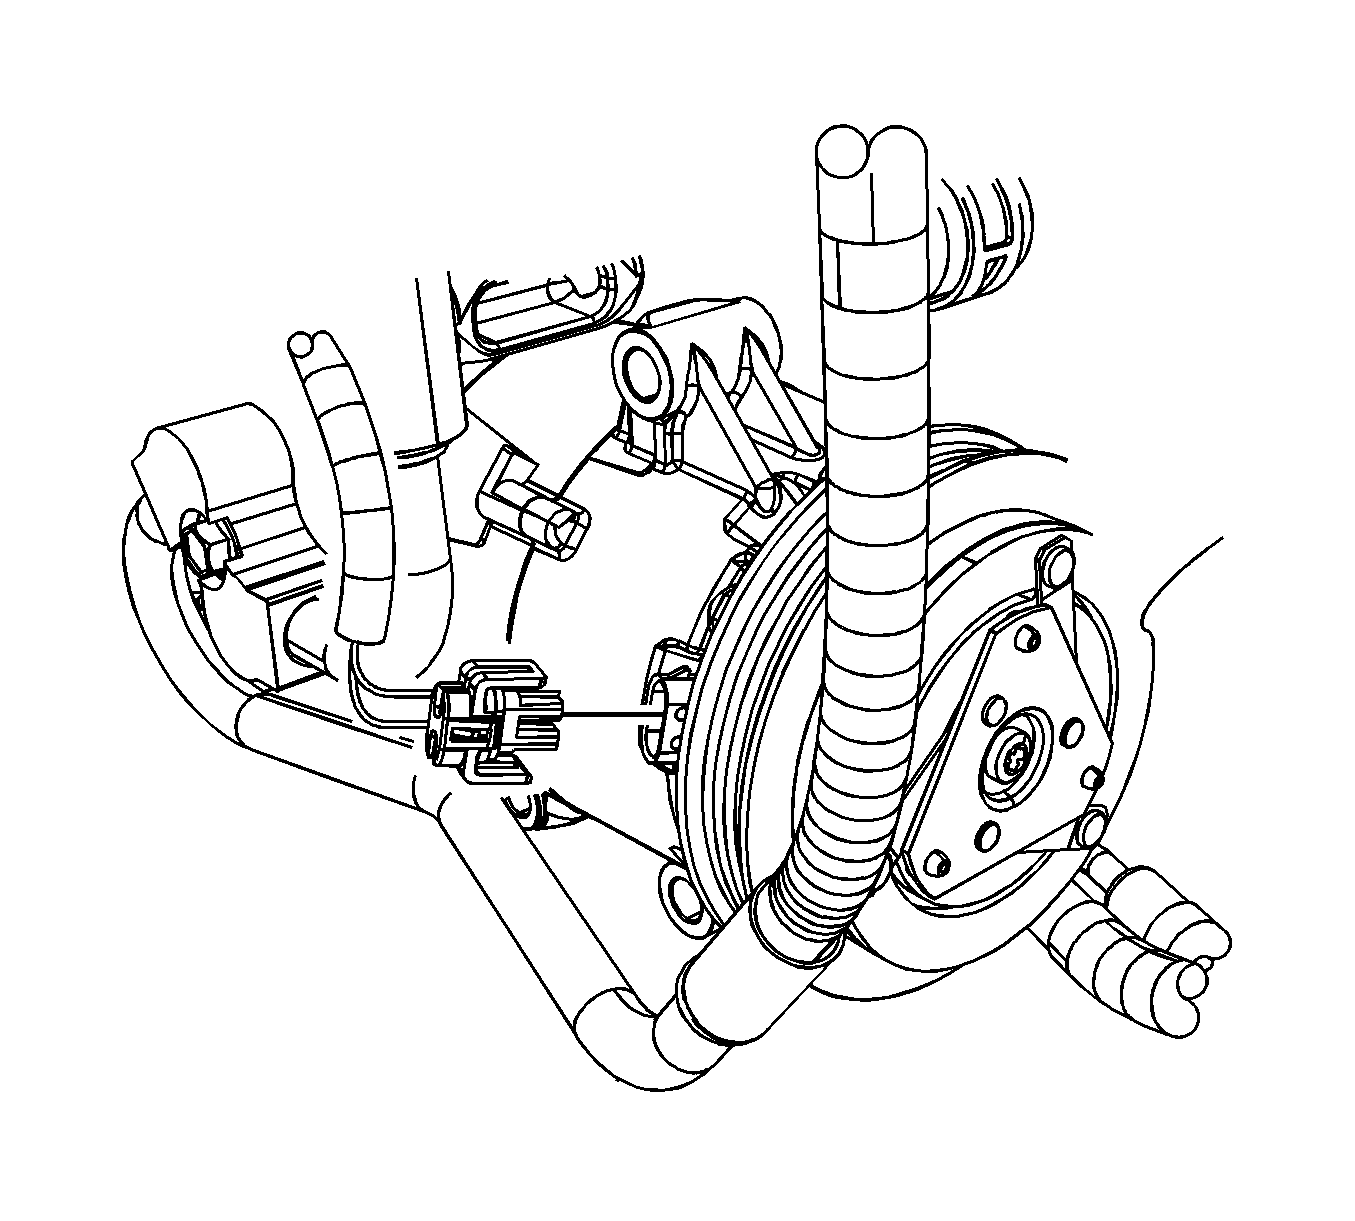
- Remove the electrical connector from the A/C compressor coil assembly.
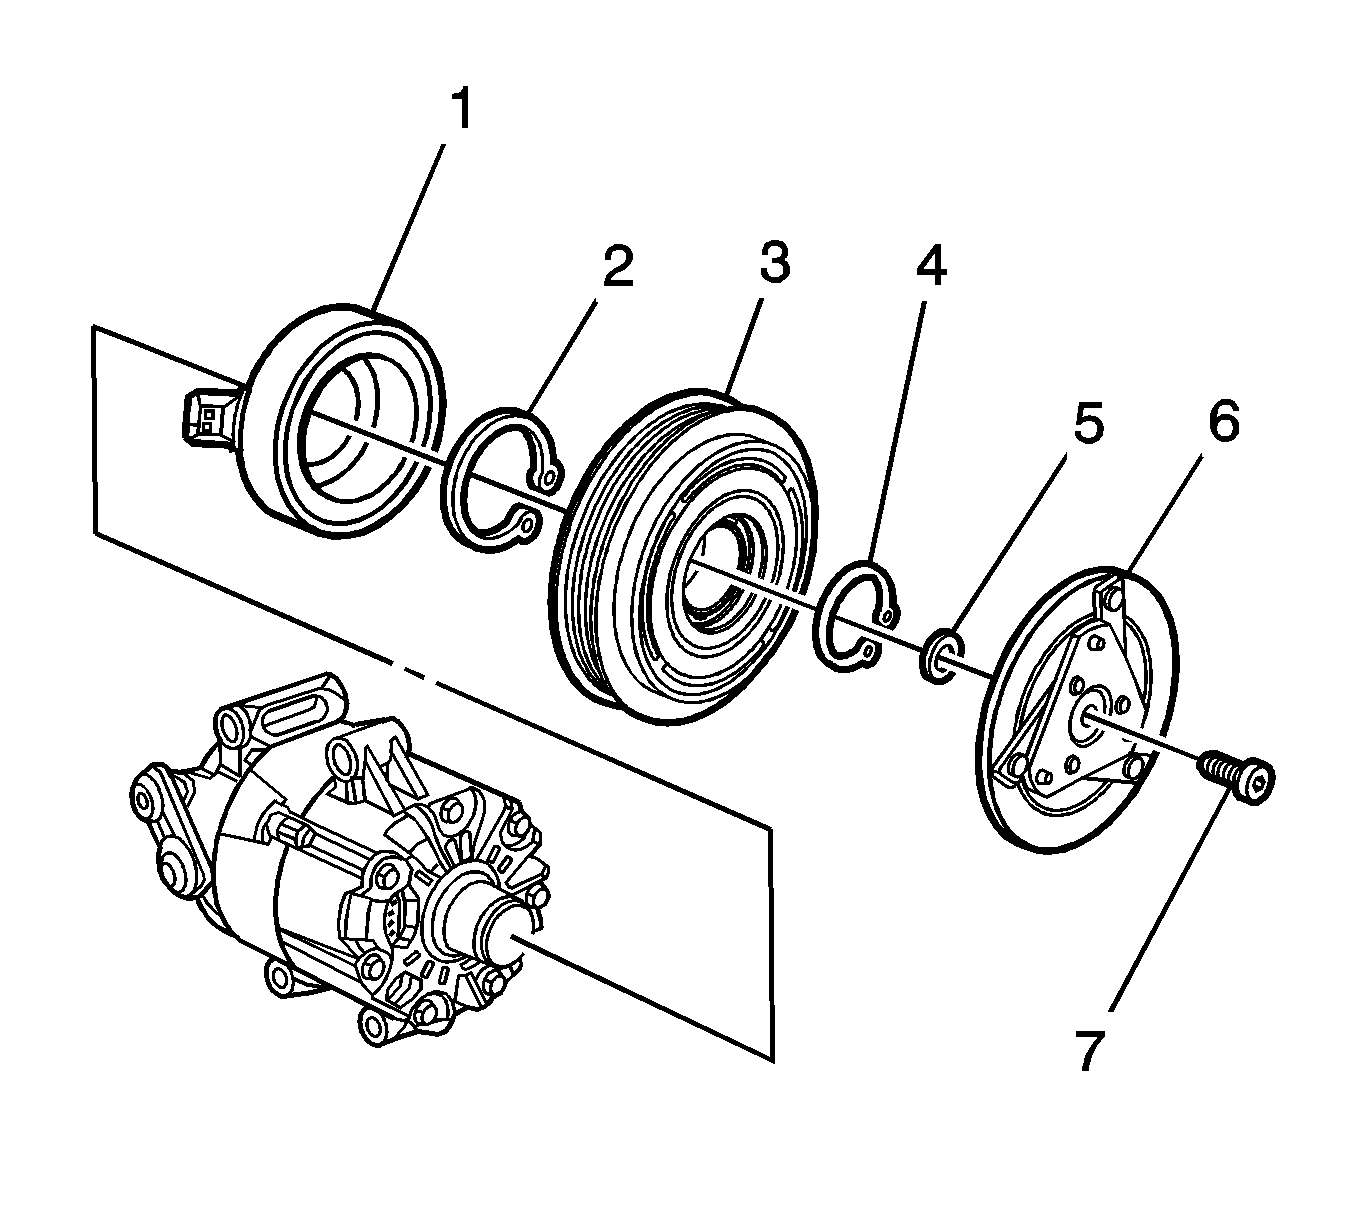
- Using J 37872 , remove and discard the air conditioning clutch screw (7).
- Remove the clutch driver (6) from the splined shaft.
- Remove and discard the pulley and bearing assembly retainer (4).
- Remove the pulley and bearing assembly (3) from the A/C compressor.
- Remove and discard the coil assembly retainer (2).
- Remove the coil assembly (1) from the A/C compressor.
- Carefully clean the splined shaft and the retainer grooves of any foreign debris.
- Carefully clean the shaft threads of adhesive using a M6 x 1.0 tap.


Note: There are air gap shims (5) between the clutch driver and the splined shaft.
Carefully blow out debris with compressed air.
Installation Procedure
- Install the coil assembly (1) to the A/C compressor.
- Install a new coil assembly retainer (2).
- Install the pulley and bearing assembly (3) to the A/C compressor.
- Install a new pulley and bearing assembly retainer (4).
- Install the clutch driver (6) to the splined shaft.
- Measure the air gap between the clutch driver (6) and pulley (3). The air gap should be between 0.3-0.6 mm (0.011-0.024 in).
- Ensure that the clutch driver (6) does not drag against the pulley (3) when the pulley is rotated.
- Using J 37872 , install a new air conditioning clutch screw (7).
- Connect the electrical connector to the A/C compressor coil assembly.
- Install the air conditioning drive belt. Refer to Air Conditioning Compressor Belt Replacement.

Note: Ensure that retainers are fully seated within their groove.
Note: Using shims (5), ensure a 0.3-0.6 mm (0.011-0.024 in) air gap is between the clutch driver and pulley.
Use a light coat of clean PAG oil to hold the shims in place.Caution: Refer to Fastener Caution in the Preface section.
Tighten
Tighten the screw to 10 N·m (89 lb in).

