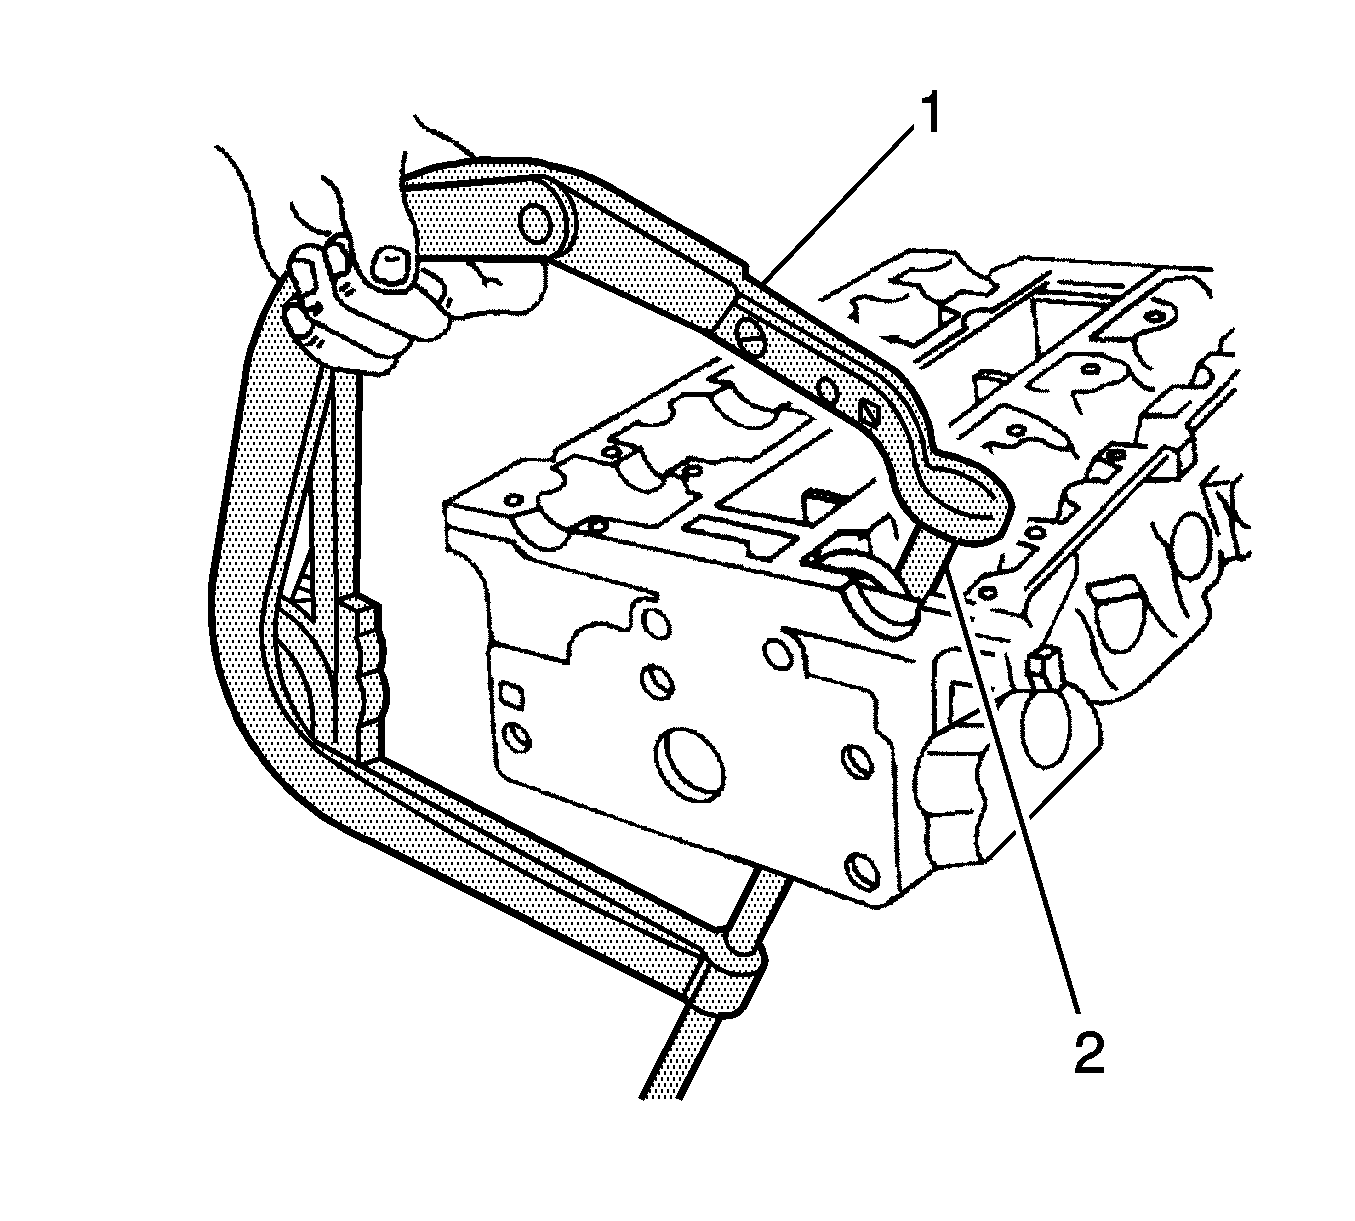
| • | J 8062 Valve Spring Compressor - Head OFF |
| • | KM-653-A Adapter |
Assembly Procedure
- Coat the valve stems with engine oil.
- Insert the valves in the cylinder head in their original positions.
- Insert the valve spring seats.
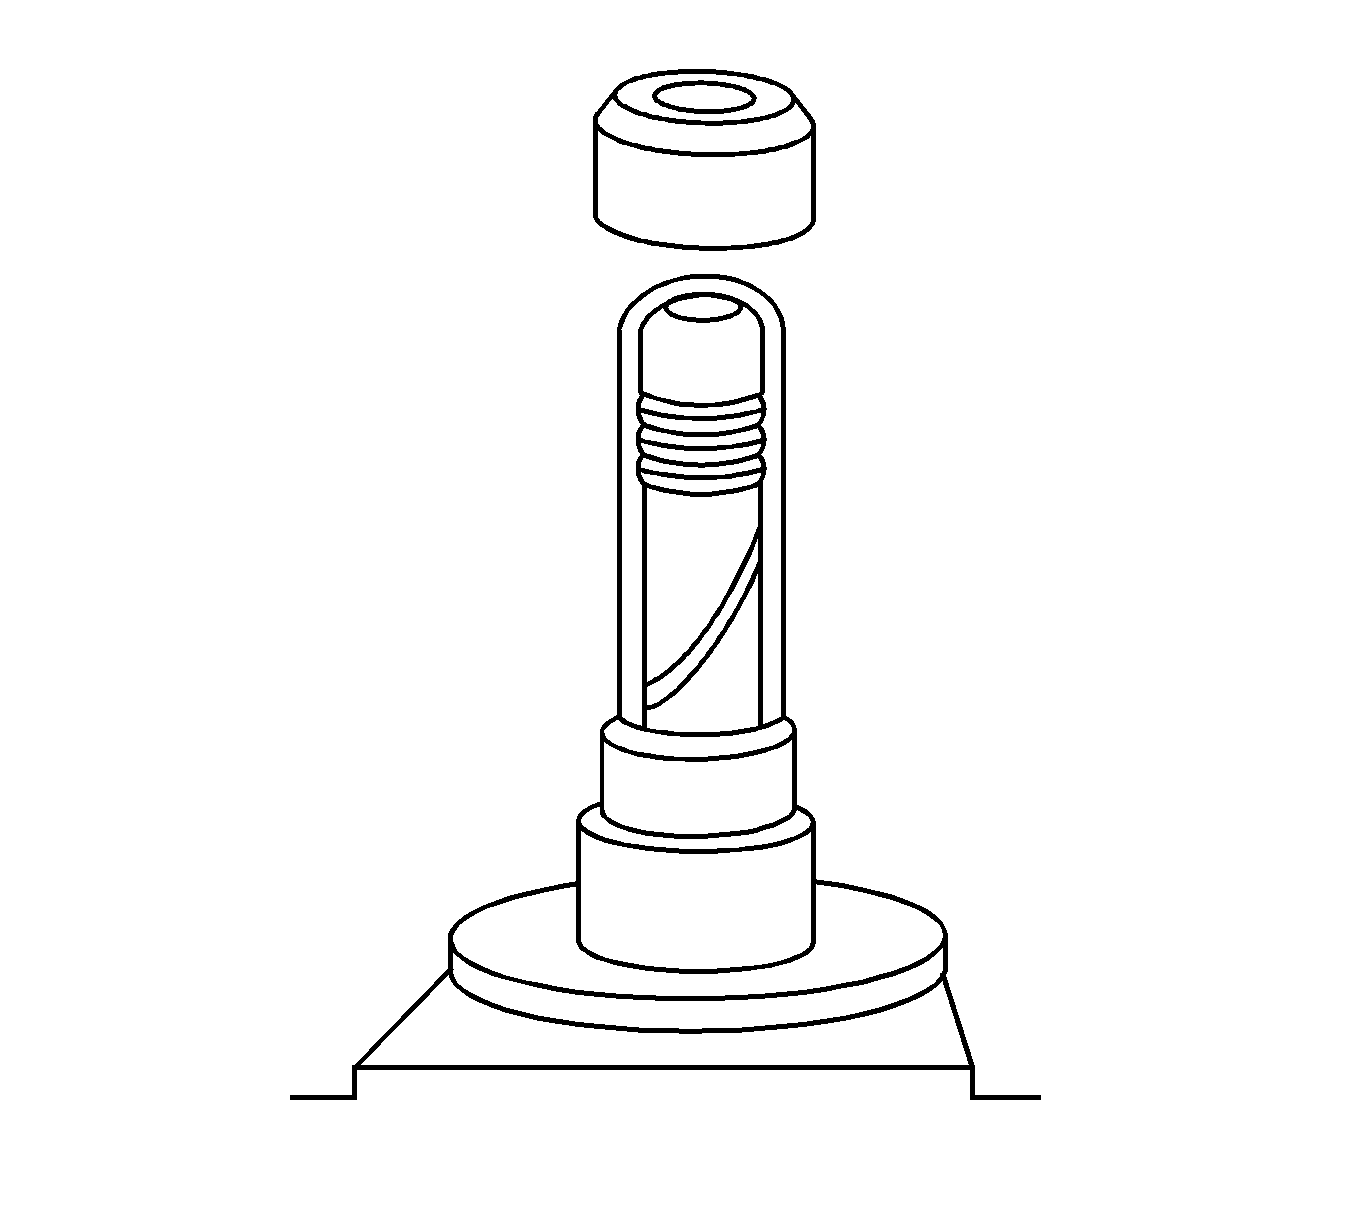
- Push the accompanying assembly sleeve onto the valve stem.
- Insert the new valve stem seat.
- Carefully drive the valve stem seal onto the stop with light taps.
- Install the valve springs in their original positions.
- Install the valve springs caps.
- Compress the valve springs with the J 8062 (1) and KM-653-A (2).
- Install the valve retainers.
- Remove the J 8062 (1) and KM-653-A (2).
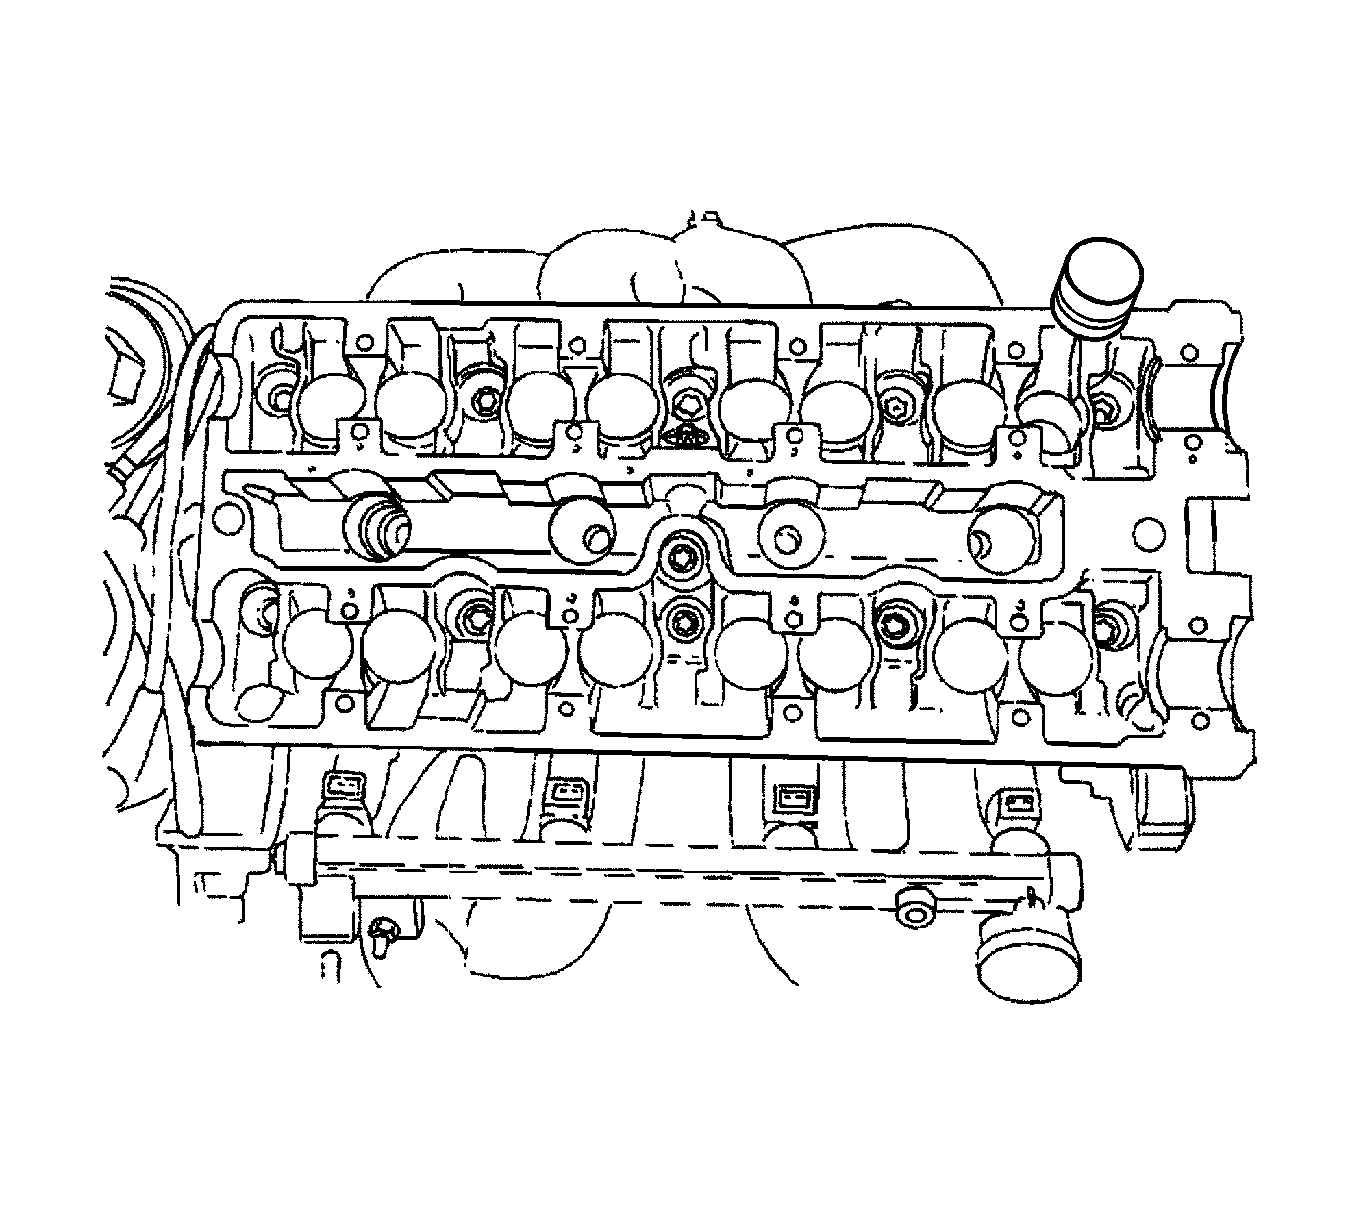
- Lubricate the valve lash adjusters with engine oil.
- Install the valve lash adjusters.
- Install the intake camshaft.
- Install the intake camshaft bearing caps in their original positions.
- Install the exhaust camshaft.
- Install the exhaust camshaft bearing caps in their original positions.
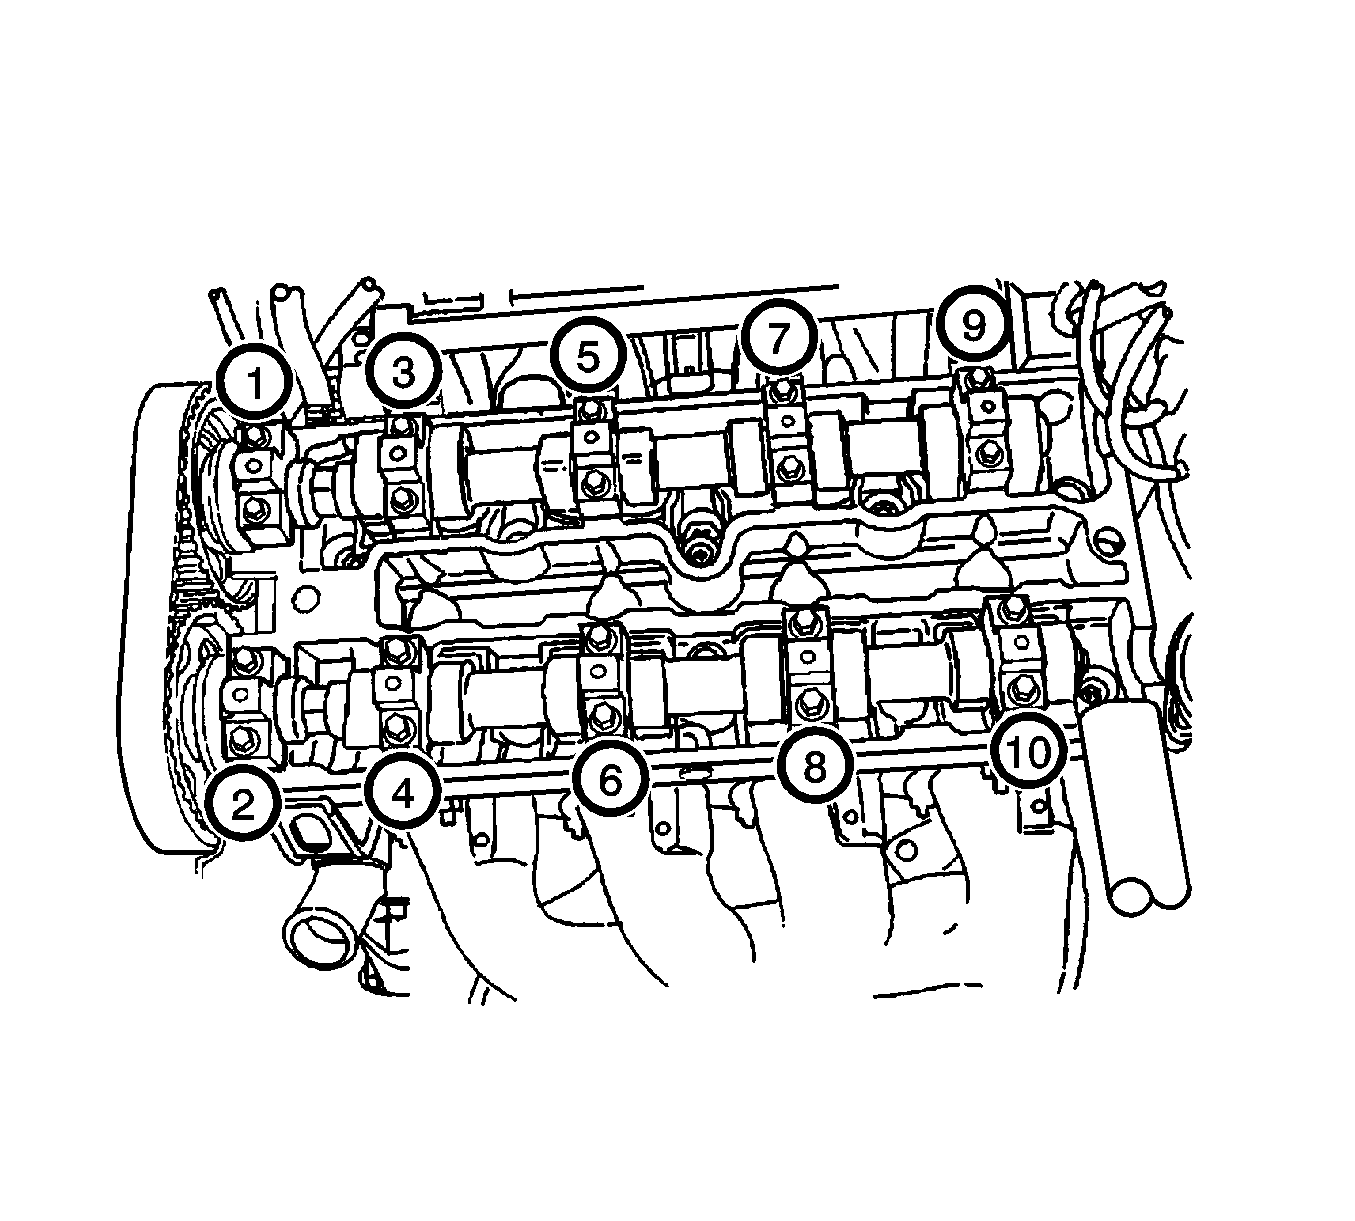
- Install the camshaft bearing cap bolts.
- Tighten the camshaft bearing cap bolts gradually and in the sequence shown for each camshaft cap.
- Install the spark plugs.
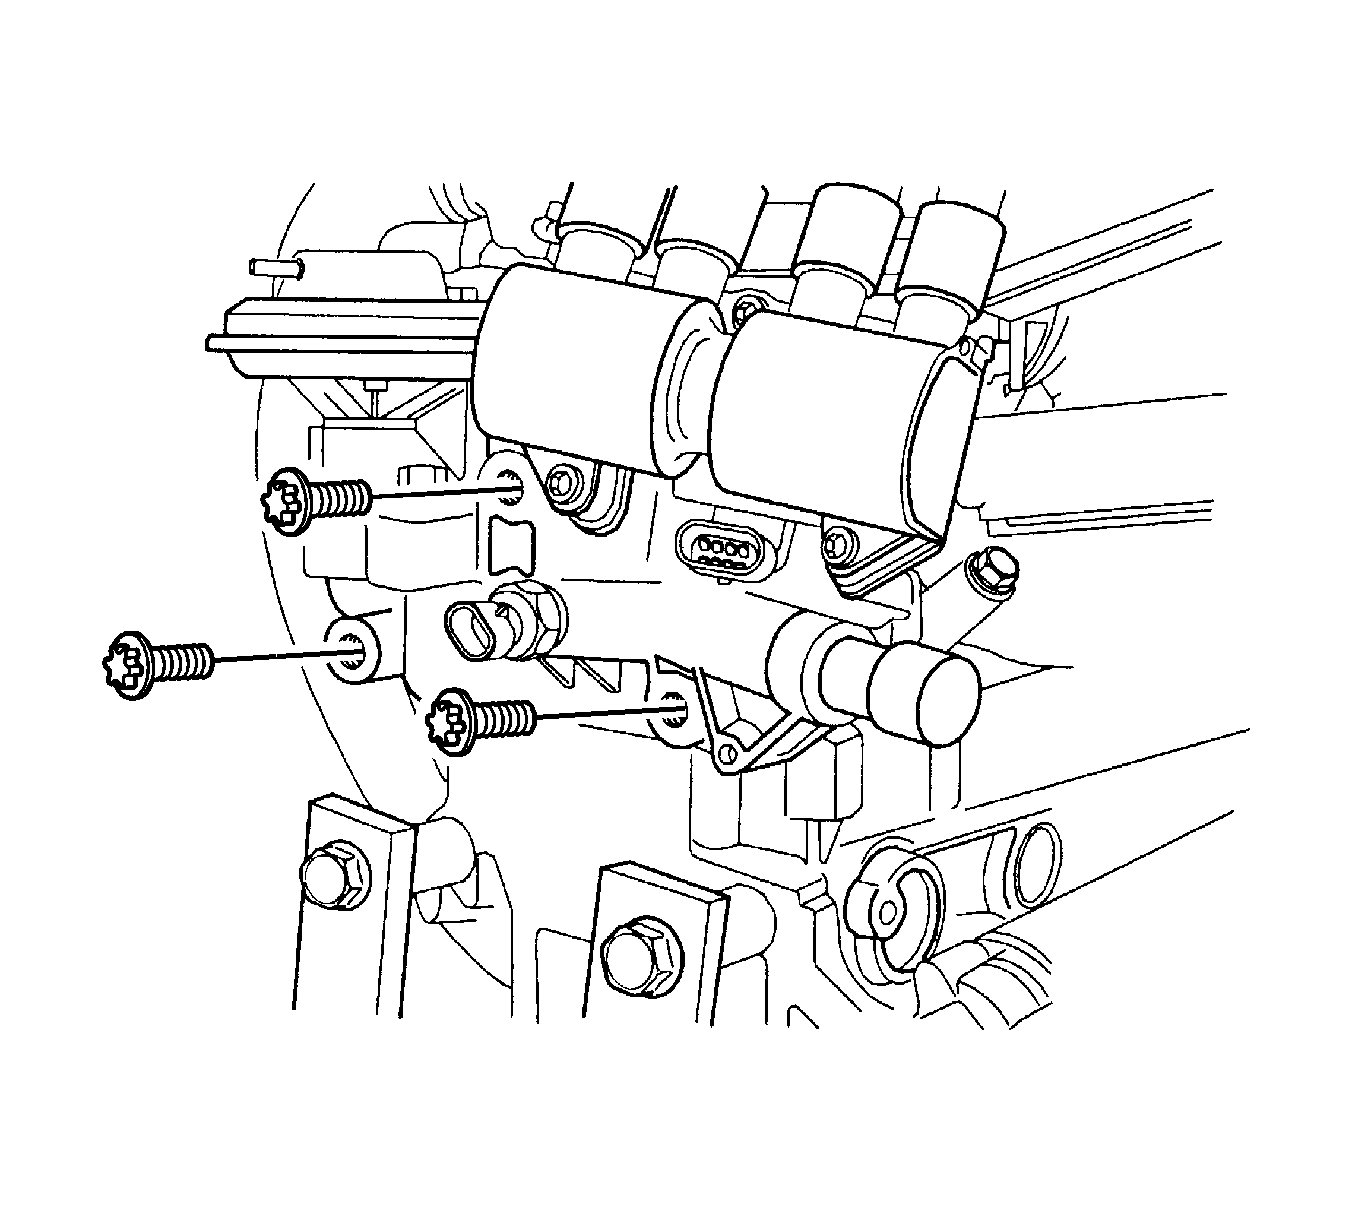
- Install the ignition coil and exhaust gas recirculation (EGR) mounting bracket and bolt.
- Install the ignition coil and EGR.
- Install the intake manifold studs.
- Install the intake manifold gasket.
- Install the intake manifold.
- Install the intake manifold retaining nuts and retaining bolts in the sequence shown.
- Install the fuel rail assembly. Refer to Fuel Injection Fuel Rail Assembly Replacement in Engine Controls - 2.0L.
- Install the thermostat housing assembly.
- Install the thermostat housing mounting bolts.
- Install the coolant bypass housing bolts.
- Install the exhaust manifold studs.
- Install the exhaust manifold gasket.
- Install the exhaust manifold.
- Install the exhaust manifold retaining nuts in the sequence shown.
- Install the exhaust manifold heat shield.
- Install the exhaust manifold heat shield bolts.
- Install the cylinder head with the intake manifold and the exhaust manifold attached. Refer to Cylinder Head Replacement .
Caution: Refer to Safety Glasses Caution in the Preface section.
Caution: Refer to Compressed Valve Spring Caution in the Preface section.
Notice: Refer to Fastener Notice in the Preface section.
Tighten
Tighten the camshaft bearing cap bolts to 8 N·m
(71 lb in).
Tighten
Tighten the spark plugs to 20 N·m (15 lb ft).
Tighten
Tighten the ignition coil and EGR mounting bracket
bolts to 25 N·m (18 lb ft).
Tighten
Tighten the ignition coil and EGR to 10 N·m
(89 lb ft).
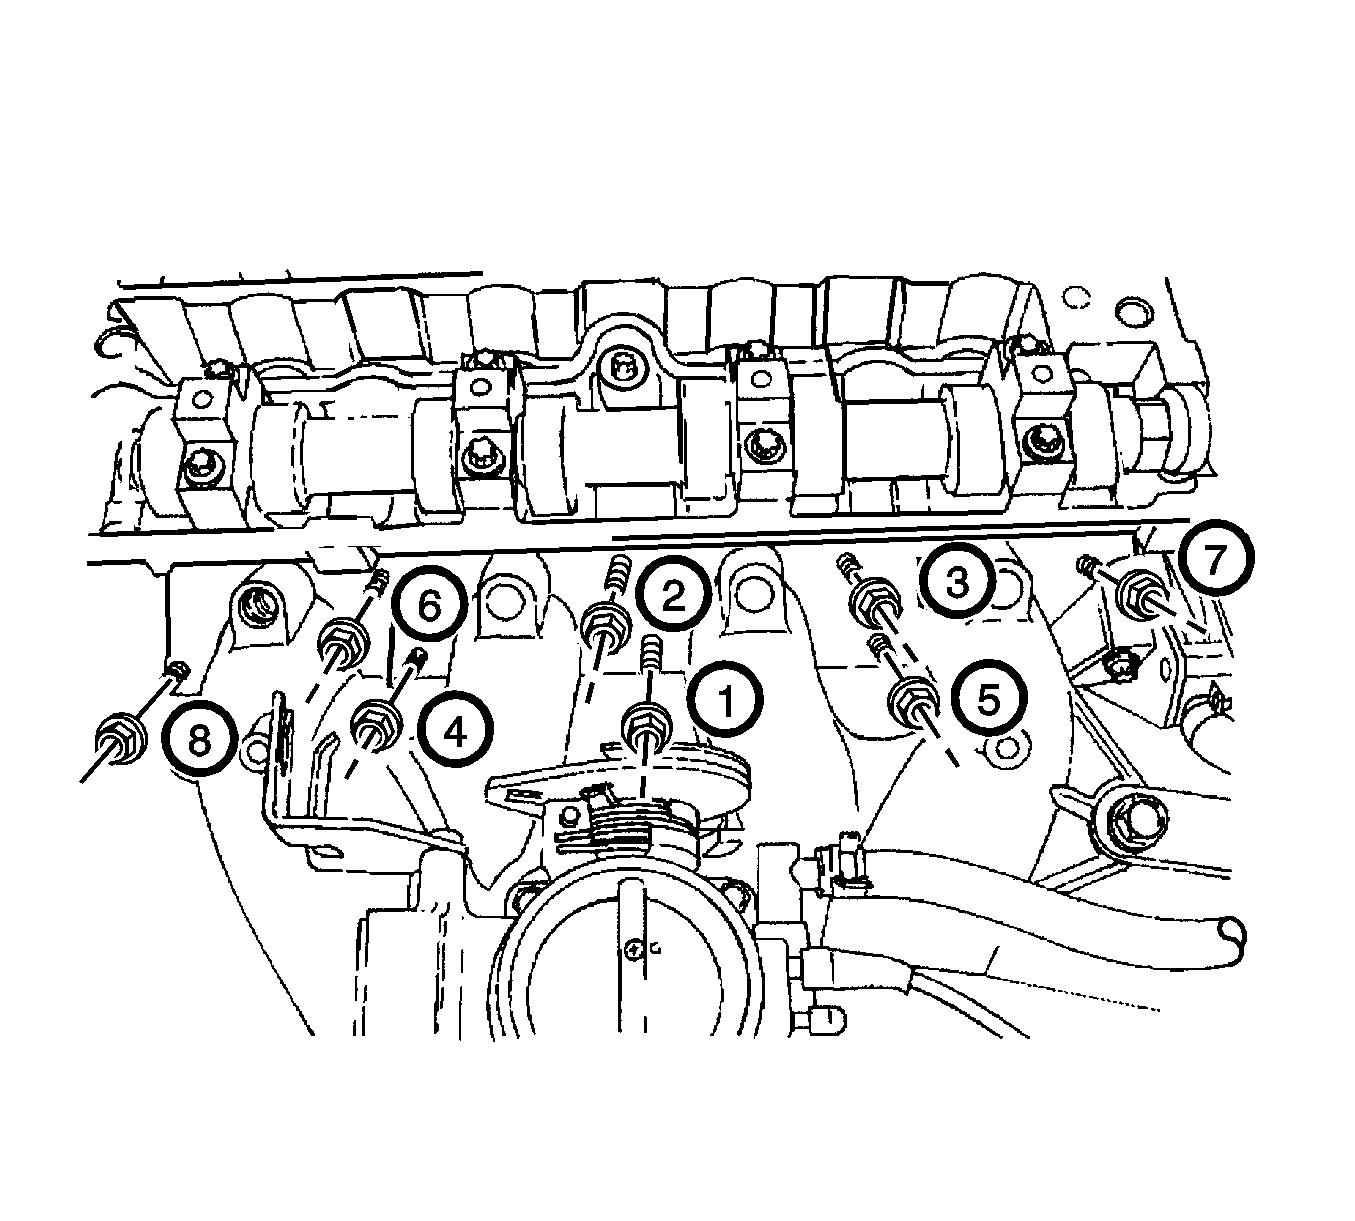
Tighten
Tighten the intake manifold retaining nuts and retaining
bolts to 22 N·m (16 lb ft).
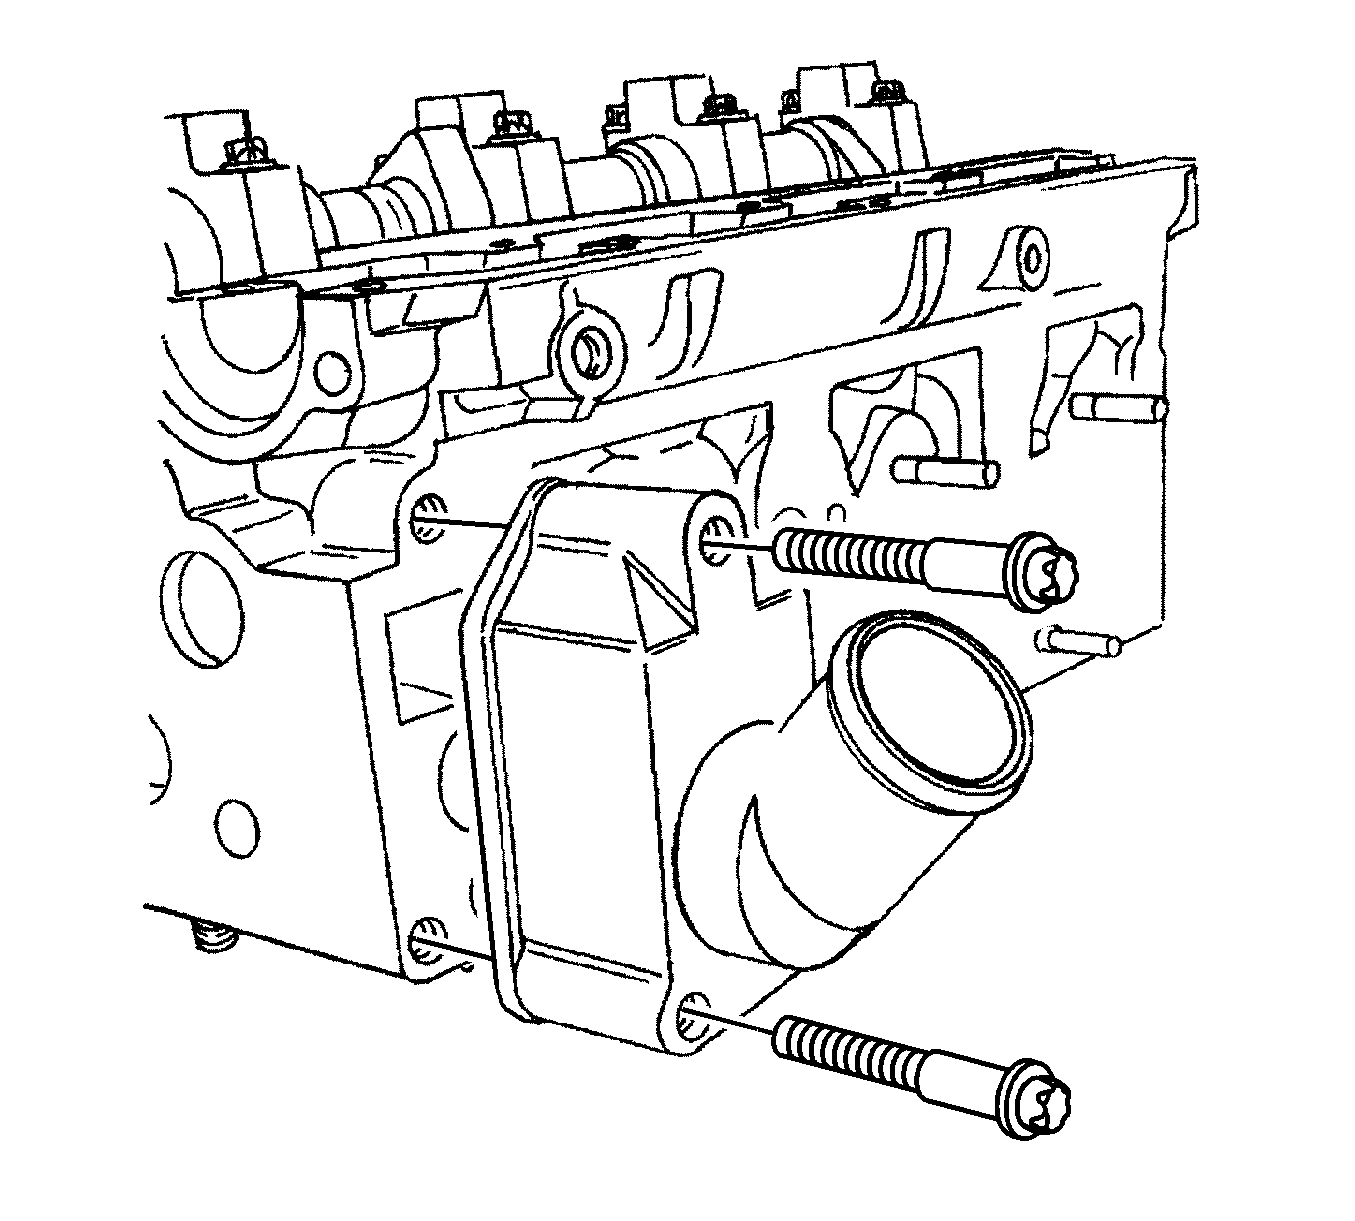
Tighten
Tighten the thermostat housing mounting bolts to
15 N·m (11 lb ft).
Tighten
Tighten the coolant bypass housing bolts to 15 N·m
(11 lb ft).
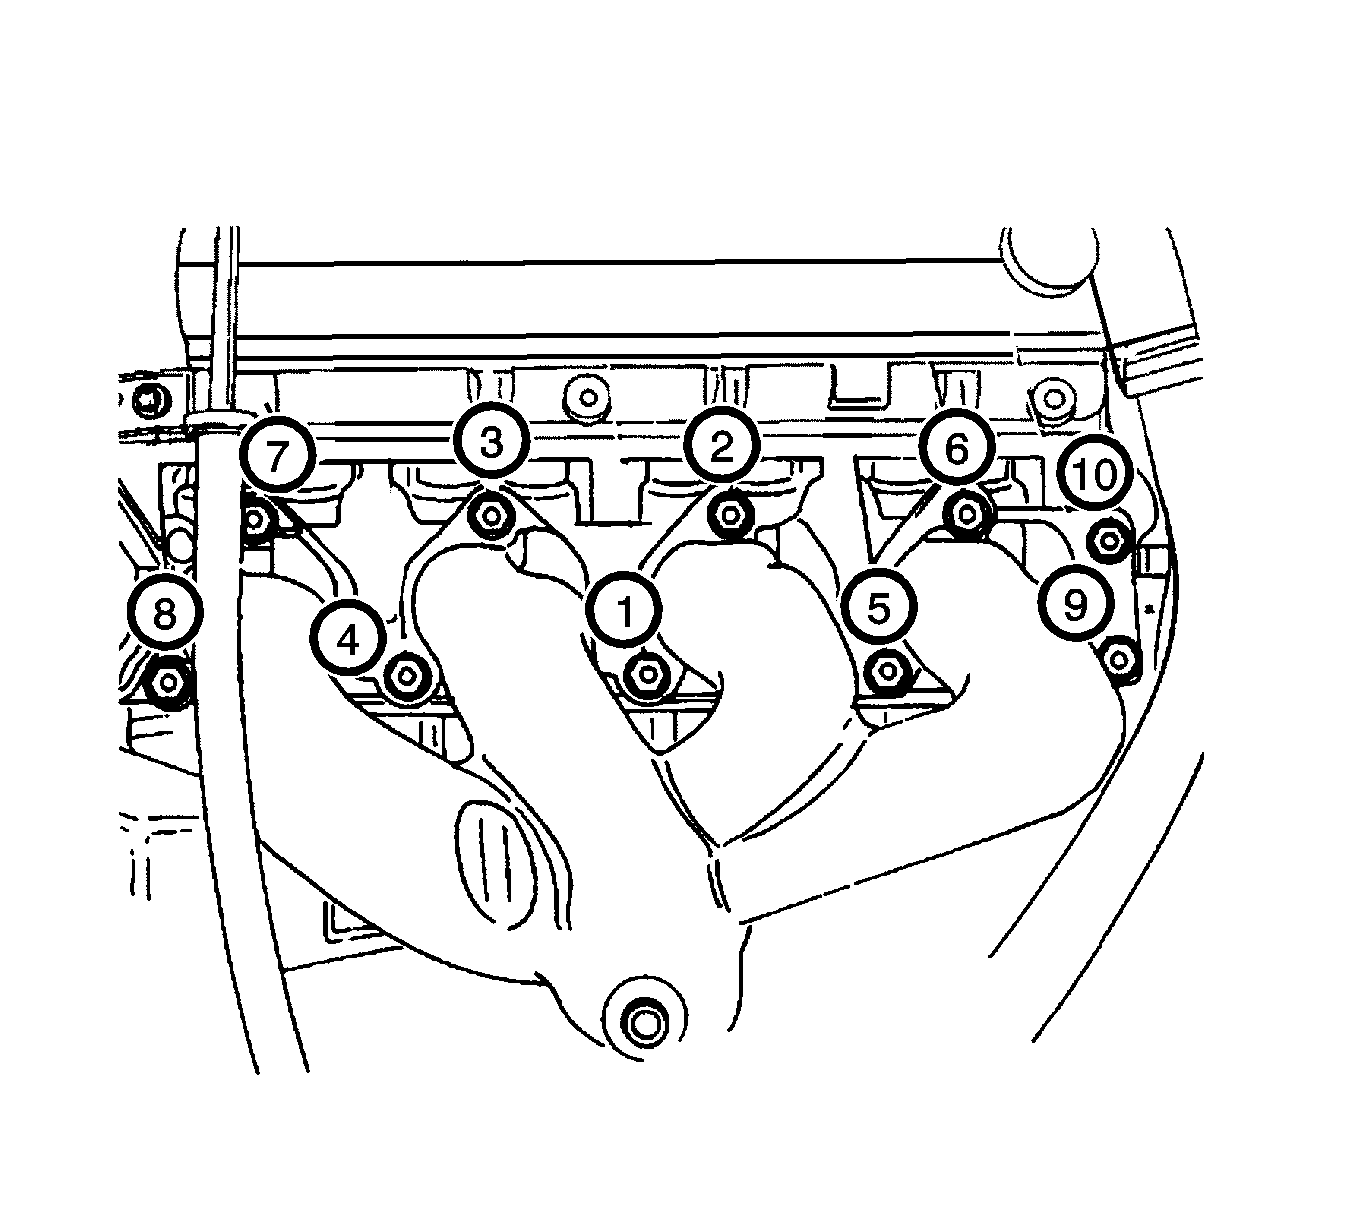
Tighten
Tighten the exhaust manifold retaining nuts to 22 N·m
(16 lb ft).
Tighten
Tighten the exhaust manifold heat shield bolts to
8 N·m (71 lb in).
