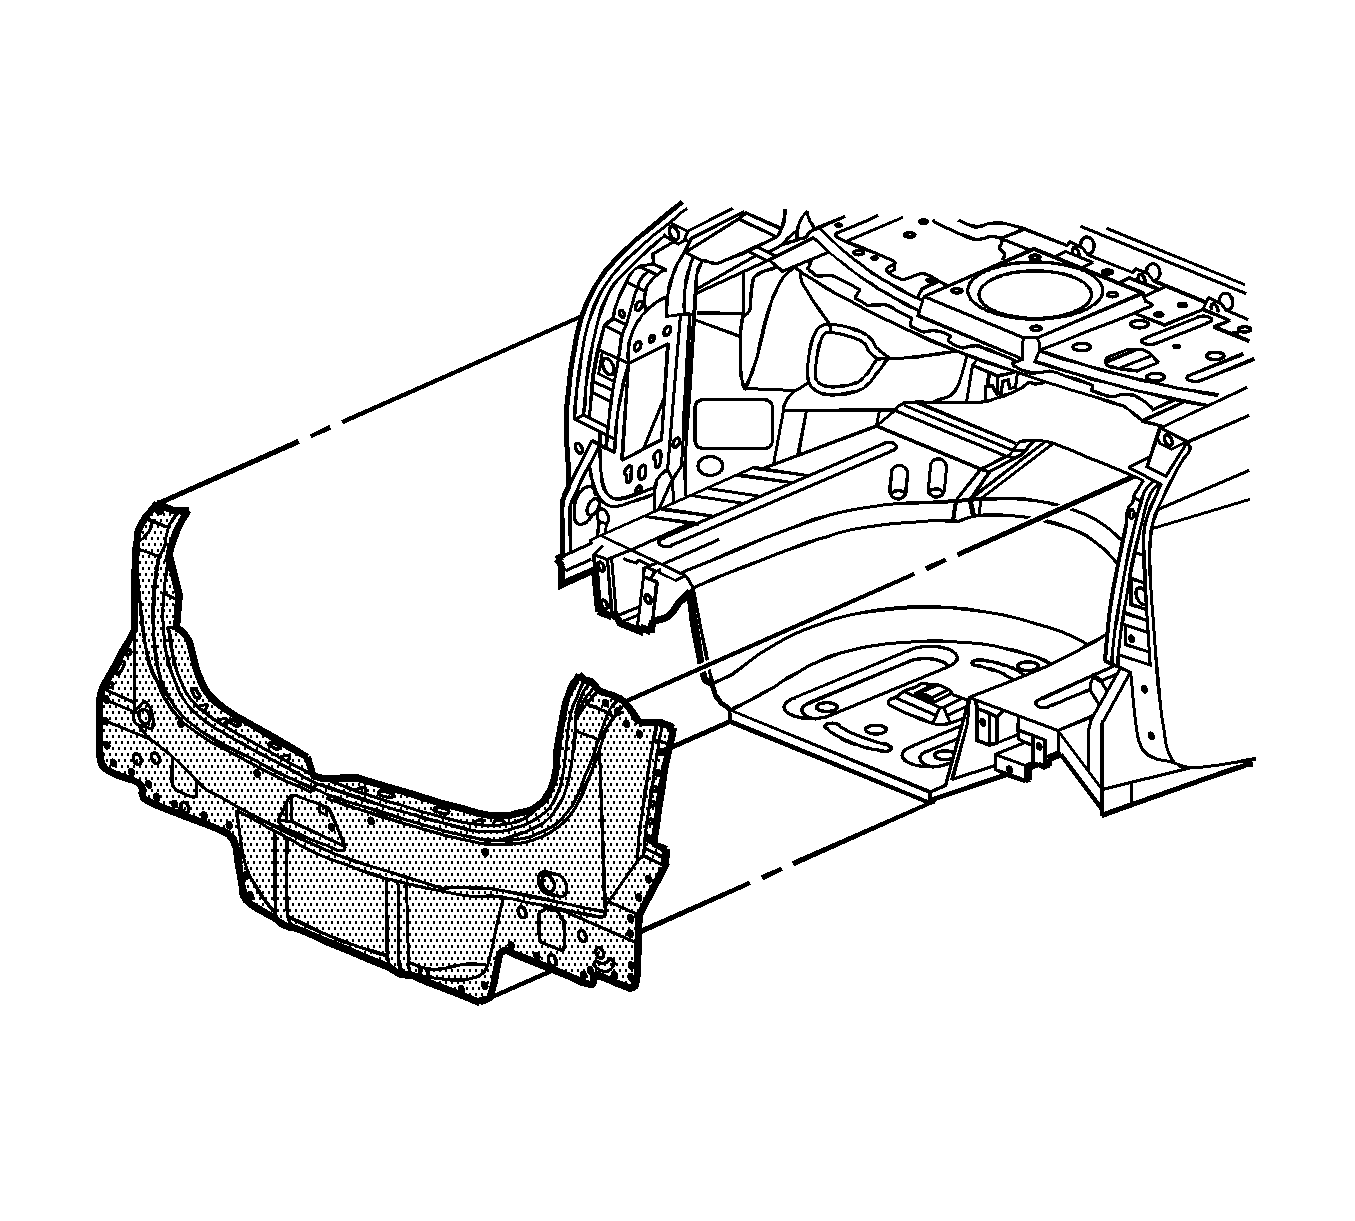
Important: The body rear end panel is joined to the quarter panel outer, rear floor side member and rear floor panel. It forms the base for the rear combination lamps and other parts and maintains the rigidity of the rear body. Pay particular attention to twists and parallelism and inspect mounting of related parts when welding.
This repair procedure gives you the option of using an installation procedure for either metal-inert gas (MIG) welding or adhesive bonding.
Removal Procedure
- Disable the SIR system. Refer to Disabling the SIR System in SIR.
- Disconnect the negative battery cable.
- Remove all related panels and components.
- Repair as much of the damage as possible. Refer to Dimensions - Body .
- Remove the sealers and anti-corrosion materials from the repair area, as necessary. Refer to Anti-Corrosion Treatment and Repair in Paint/Coatings.
- Locate and drill out all the necessary factory welds.
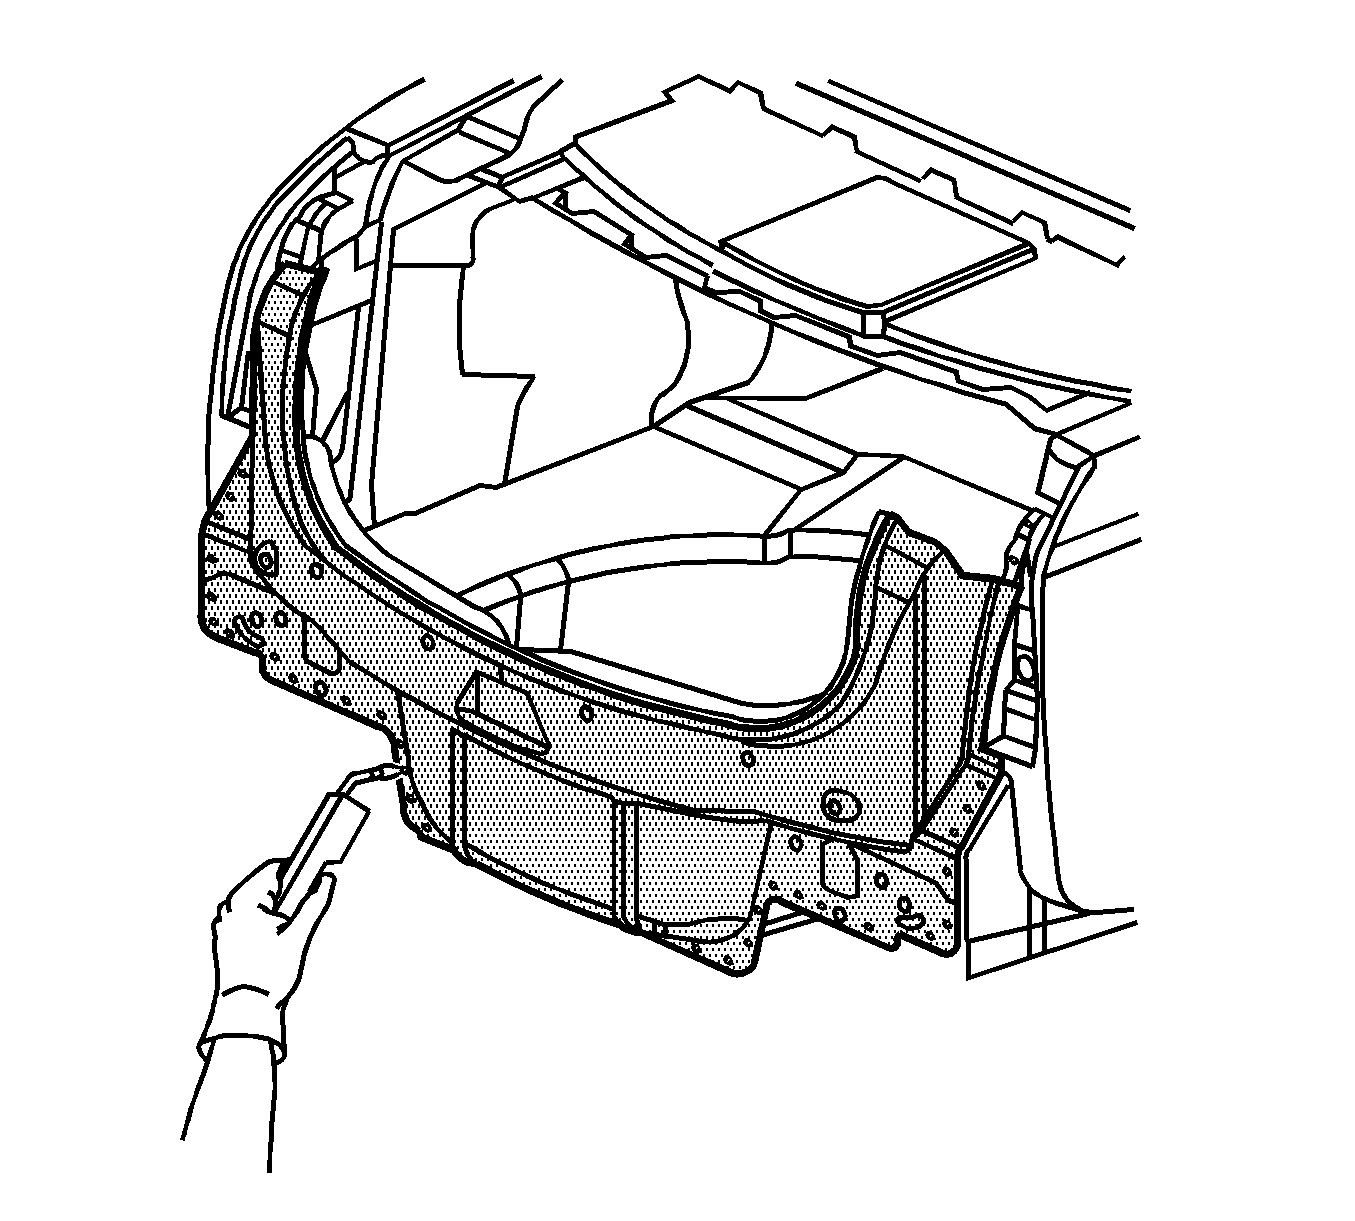
- Remove the rear end panel.
Caution: Refer to Approved Equipment for Collision Repair Caution in the Preface section.
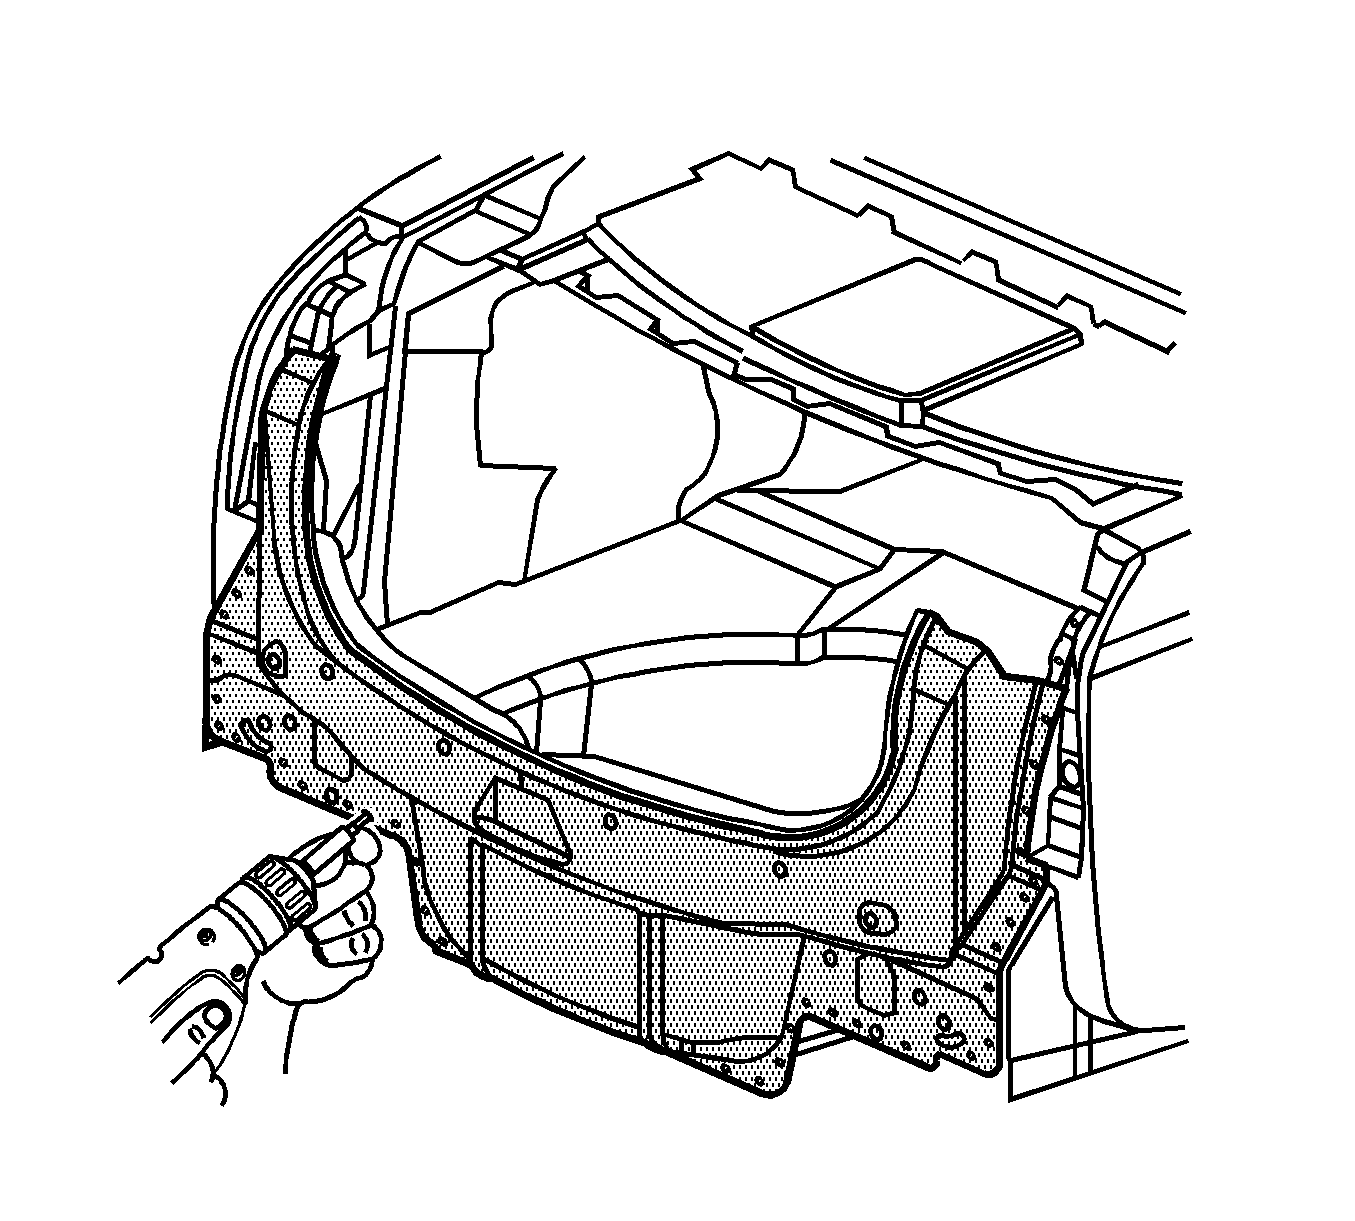
Important: Note the number and location of the factory welds for installation of the rear end panel.
Installation Procedure (Metal-Inert Gas (MIG) Welding)
- Drill 8 mm (5/16 in) plug weld holes in the service part as necessary in the locations noted from the original panel.
- Prepare all mating surfaces as necessary.
- Apply 3M® Weld-Thru coating P/N 05916 or equivalent to all mating surfaces.
- Position the rear end panel on the vehicle. Use 3-dimensional measuring equipment to inspect the panel.
- Clamp the panel in place.
- Plug weld accordingly.
- Clean and prepare all of the welded surfaces.
- Install all of the related panels and components.
- Apply the sealers and anti-corrosion materials to the repair area, as necessary. Refer to Anti-Corrosion Treatment and Repair in Paint/Coatings.
- Paint the repaired area. Refer to Basecoat/Clearcoat Paint Systems in Paint/Coatings.
- Connect the negative battery cable.
- Enable the SIR system. Refer to Enabling the SIR System in SIR.
Important: If the location of the original plug weld holes can not be determined, space the plug weld holes every 40 mm (1½ in) apart.
Installation Procedure (Adhesive Bonding)
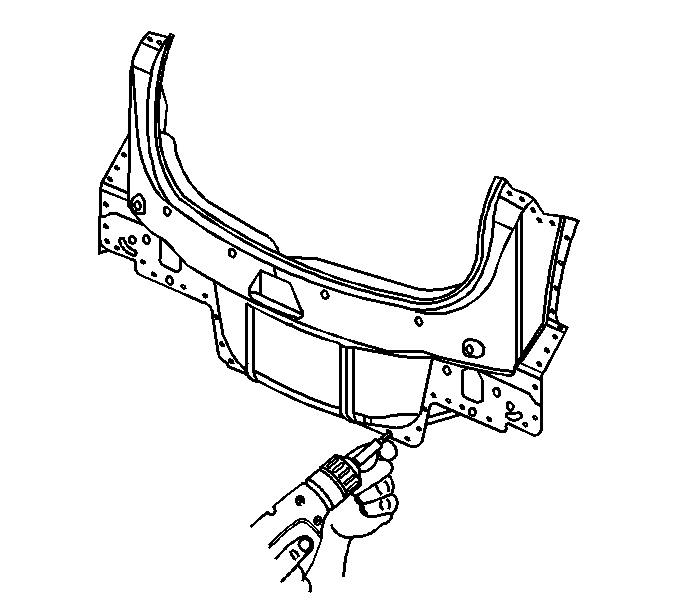
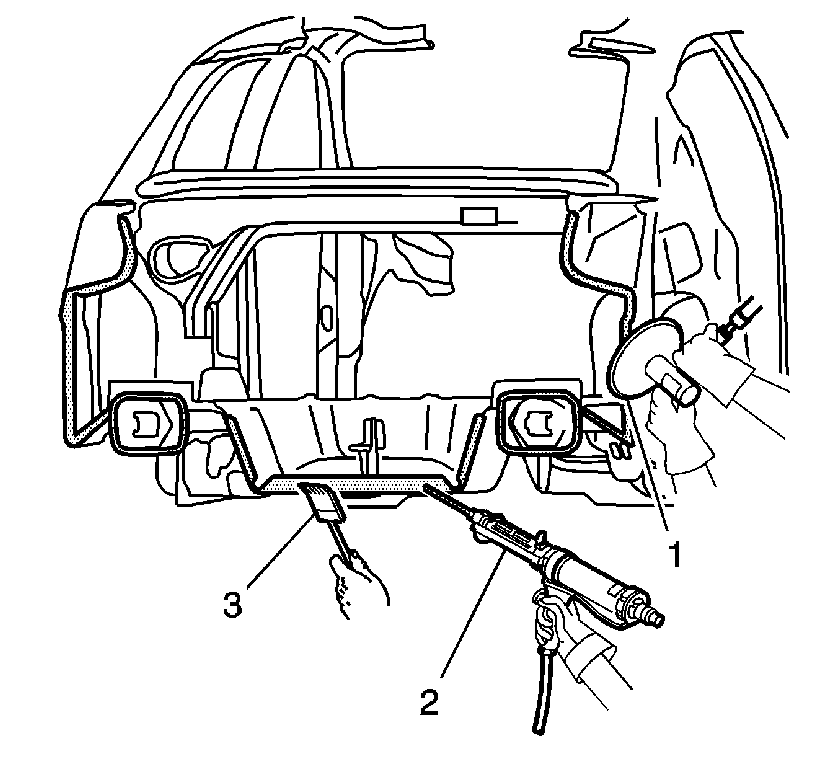
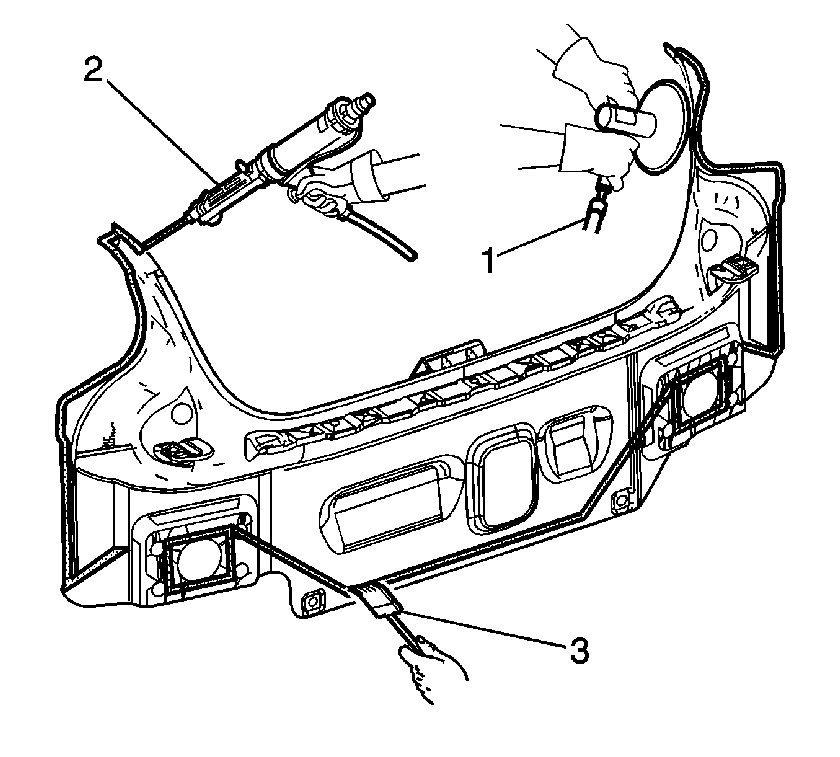
- Grind the surface of the body mating flanges (1) to bare steel.
- Grind the body rear end panel mating flanges (1) to remove the E-coating.
- Clean the mating surfaces.
- Apply a bead of metal panel bonding adhesive (2) GM P/N 12378566/7 (Canadian P/N 88901674/5) or equivalent to a thickness of 3-6 mm (1/8 to 1/4 in), to both of the mating surfaces.
- Using a small acid brush (3), spread a coat of adhesive to cover all the bare metal surfaces to ensure corrosion protection.
- Install the body rear end panel to the vehicle.
- Clamp the body rear end panel into position as required.
- Using lacquer thinner remove the excess adhesive from the panel area.
- Apply the sealers and anti-corrosion materials to the repair area, as necessary. Refer to Anti-Corrosion Treatment and Repair in Paint/Coatings.
- Paint the repair area. Refer to Basecoat/Clearcoat Paint Systems in Paint/Coatings.
- Install all related panels and components.
- Connect the negative battery cable.
- Enable the SIR system. Refer to Enabling the SIR System in SIR.
Important: Take care not to damage the corners or thin the metal during the grinding operation.
Important: The adhesive has a working time of 40-50 minutes. Do not allow the adhesive to totally cure off the vehicle, as proper alignment of the panel to the body will be difficult.
Important: Do Not pull the panels apart after joined together. Slide the panels against each other to realign the panels.
